If you want to grow mushrooms at home, there are a few decisions you have to make. One of these is what type of container to use.
Single-use mushroom growing bags are a popular choice and very easy to use, but they aren’t the most environmentally friendly option.
You could grow mushrooms in reusable containers like tubs or buckets, but these only work when using less nutritious substrates that don’t need sterilization.
Luckily, there is another option, reusable polypropylene mushroom bottles. These are easy to use and can withstand high sterilization temperatures.
Read on to learn the pros and cons of growing mushrooms in bottles, which mushrooms you can grow in bottles and how to grow mushrooms in bottles step-by-step.
Why Grow Mushrooms in a Bottle?
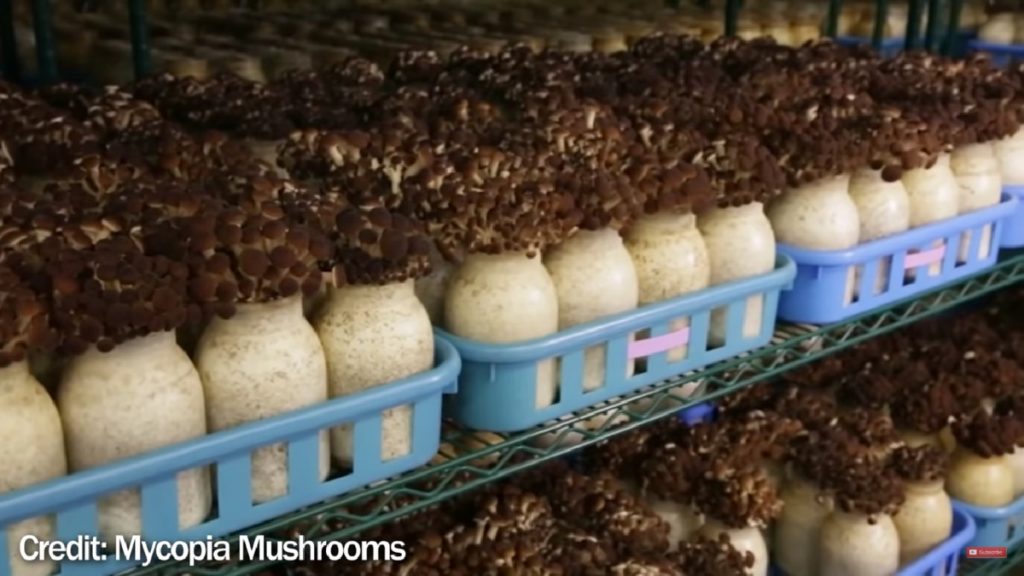
The main reason why large-scale commercial farms grow mushrooms in bottles is because it enables a high degree of mechanization, automation and consistency.
And small scale growers often use bottles or jars because they’re more eco-friendly, as growing mushrooms in bottles reduces the single-use plastic waste created when using bags.
What is The Best Container to Grow Mushrooms in?
When choosing mushroom-growing containers, growers have several options, and it can sometimes be confusing.
The ideal container will vary depending on the type of mushroom, chosen substrate, growing method and quantity of mushrooms you hope to cultivate.
And, if you’re wondering, can I grow mushrooms in a plastic container? The answer is yes.
Monotubs made from plastic totes, plastic bags, small plastic containers and buckets are all popular choices.
However, except for specialized polypropylene mushroom grow bags and bottles, most plastic containers cannot withstand the high temperatures required for sterilization.
So they’re best used to grow mushrooms that thrive on less nutritious substrates, like straw, cardboard, coffee grounds and sugarcane bagasse, as these substrates don’t need sterilization.
Specialized autoclavable plastic bottles are most often used on an industrial scale in China, Korea, Japan and the US to produce large quantities of gourmet mushrooms.
But home growers can also grow top fruiting varieties of mushrooms in plastic mushroom bottles or modified glass jars.
Pros and Cons of Growing Mushrooms in Bottles
Before you decide to grow mushrooms in bottles, consider these pros and cons:
Pros
- Reduces plastic waste – Reusable bottles are much better for the environment than single-use plastic bags.
Especially when considering the amount of plastic waste large commercial operations would generate if they used plastic grow bags.
- Facilitates automation – This is a significant advantage for commercial mushroom farmers.
Growing mushrooms in standardized bottles allows farmers to automate much of the growing process, increasing efficiency.
Machines can mix the substrate, fill the bottles, inoculate the sterilized bottles, and, after harvesting, machines empty and clean the bottles.
Small-scale growers, who cannot afford to automate, don’t get this benefit when growing mushrooms in bottles. - Provides consistency – Growing mushrooms in bottles using the same substrate recipe and inoculation rate generally results in similar yields and uniformly sized mushrooms.
Consistent harvests and uniform mushrooms make planning, harvesting, packing and budgeting easier.
Cons
- Limited species – You can only grow certain mushroom species in bottles as some mushrooms, like shiitake, prefer to grow out the sides of a substrate block.
- High start-up costs – To start an automated mushroom farm using bottles as containers, you’ll need a lot of up-front capital.
We recommend starting small and using grow bags or buckets until you know there’s enough demand before investing in expensive machinery and autoclavable bottles. - Slower colonization – When using bags and buckets to grow mushrooms, You can mix mushroom spawn into the substrate until it’s evenly distributed, speeding up colonization.
But, with bottles, you insert mushroom culture or spawn into a hole in the center of the substrate, and it needs to spread outwards from there, increasing colonization time.
- Single flush – Growers generally only get one good crop of mushrooms from a bottle.
Bottles only hold around 2.2 lbs (1 kg) of substrate, and there usually aren’t enough nutrients for a decent second flush.
Mushroom grow bags typically hold 5.5 to 10 lbs (2.4 to 4.5 kg) and often produce 2 or 3 flushes of mushrooms. - Time-consuming to clean jars – This is the biggest disadvantage of bottles for small-scale home growers.
If you don’t have a machine to remove the substrate from the bottles and clean them, this process can be labor-intensive and time-consuming.
What Mushrooms Grow Best in Bottles?
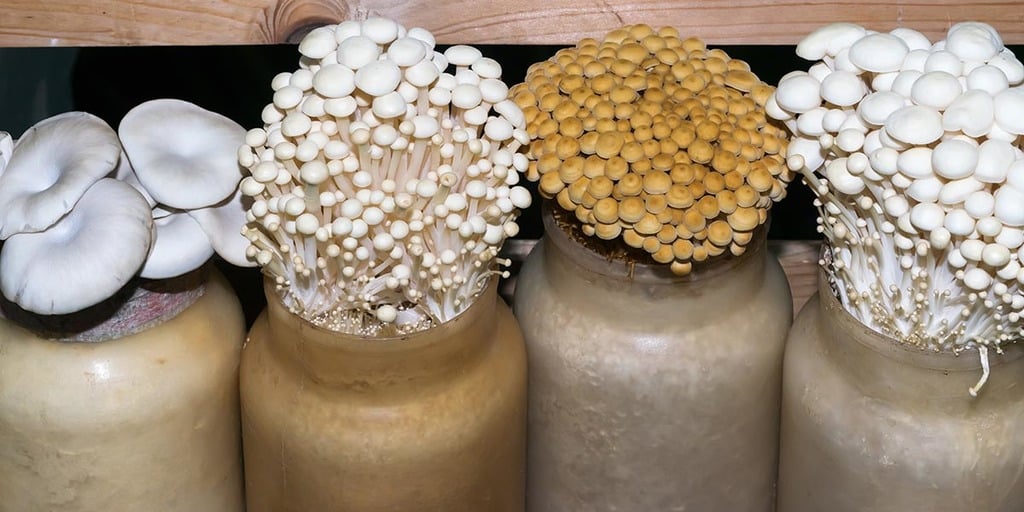
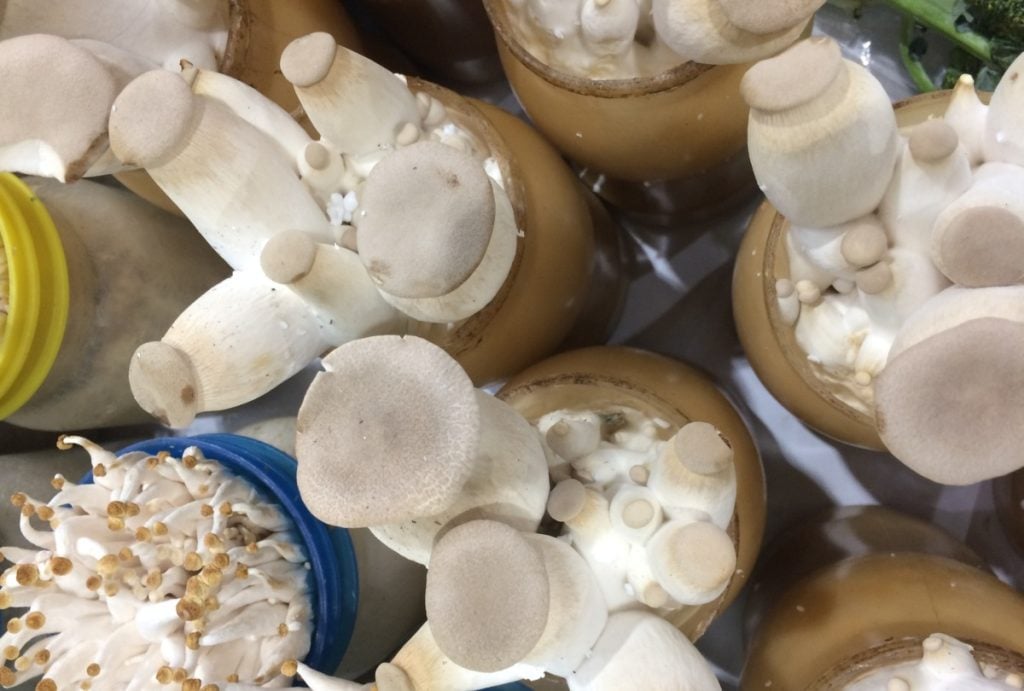
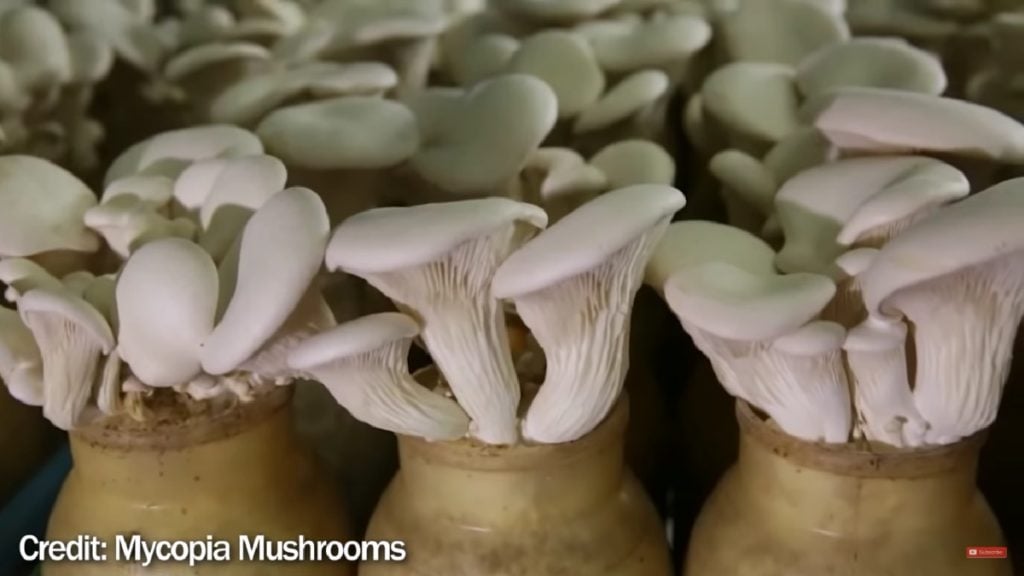
Top-fruiting mushroom species like king oyster, shimeji and enoki are the best mushrooms to grow in bottles.
Although you can grow several other gourmet mushrooms, including oyster, nameko and maitake mushrooms in bottles, you’ll get much better yields from a sawdust fruiting block.
Here are the mushroom species we recommend growing in bottles:
King Oyster Mushrooms
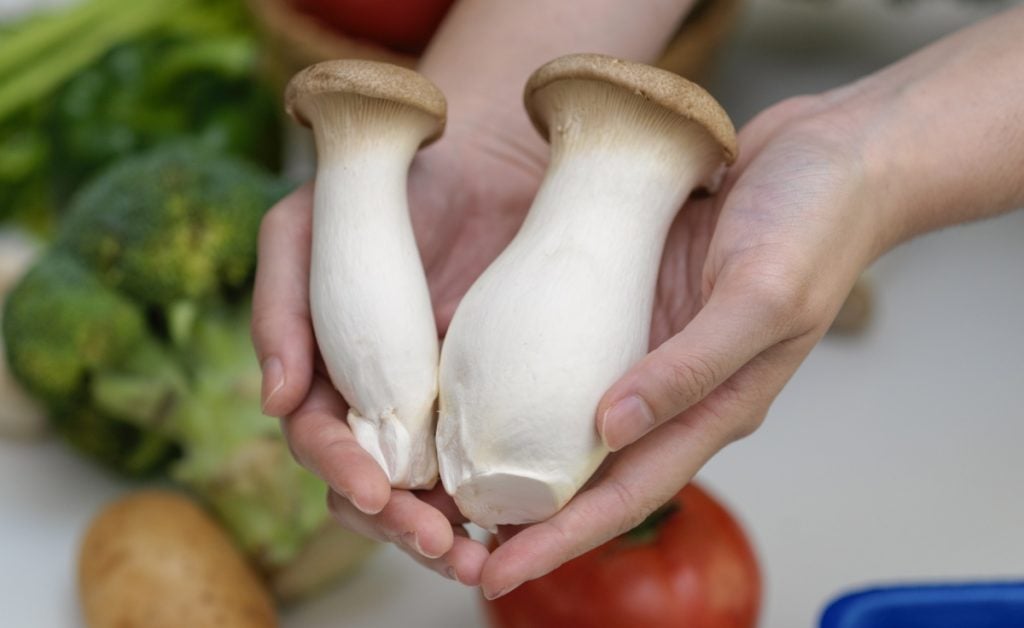
King oyster mushrooms are the largest species of oyster mushroom and are often considered superior because of their thick stems, unique texture and delicious flavor.
Cultivated king oysters have tall, thick stems and tiny caps and are sought after by chefs who often use them to make mushroom scallops and steaks.
King oysters are fussier than other oyster mushrooms and take longer to grow, but they’re still one of the easiest mushrooms to cultivate and very popular with small-scale mushroom farmers.
You can grow these top fruiting mushrooms indoors in bags or bottles or outdoors in mushroom beds.
Shimeji Mushrooms
These popular edible mushrooms come in brown and white varieties and are often referred to as beech mushrooms because beech trees are their preferred substrate.
Shimeji are versatile culinary mushrooms with a firm texture and subtle buttery, nutty flavor. They’re popular in Asian cuisine and often used in stir-fries or added to soups and stews.
Shimeji mushrooms grow best on supplemented sawdust and are commonly cultivated in bottles in Japan.
They’re relatively easy to grow at home, and you can grow them indoors all year round.
Enoki Mushrooms
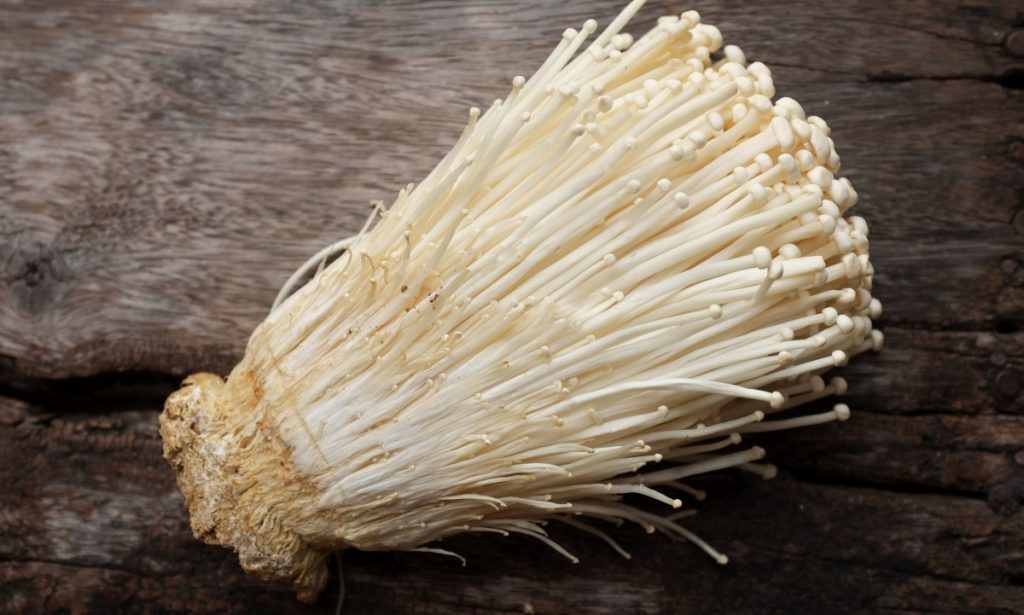
Enoki mushrooms are one of the most cultivated mushrooms in the world and are extremely popular in Asian countries.
Cultivated Enoki mushrooms look very different from their wild counterparts, as they’re grown in low light, CO2-rich environments that change their appearance.
Commonly grown in bottles, cultivated enoki mushrooms are pale with long thin stems and tiny caps.
To encourage the long stems, growers place a sleeve around the mouth of the bottle after pinning.
The sleeve reduces airflow, creating higher CO2 levels that cause the mushrooms to grow tall, skinny stems in search of fresh air.
Step-by-Step Guide to Growing Mushrooms in Bottles
Growing mushrooms in bottles is an eco-friendly, easy way to cultivate small amounts of top-fruiting mushroom species at home.
You can buy autoclavable plastic mushroom bottles with filter lids or make your own bottles using glass jars with lids.
Decide which species of mushroom you would like to grow and follow the steps below to grow them in bottles:
Step 1: Gather Supplies
The first step is to gather all the required equipment and supplies. Fortunately, this is easier than you may think, and you probably already have some items at home.
To grow mushrooms in bottles, you’ll need the following:
Plastic Mushroom Bottles or Mason Jars with Lids – Mason jars are ideal for new mushroom growers who want to try growing species that need more nutritious substrates but don’t want to use bags.
Once you have experience growing mushrooms in bottles, you may want to buy autoclavable mushroom-growing bottles.
But until then, you can create filter lids for your mason jars using poly stuffing, felt or synthetic filter discs.
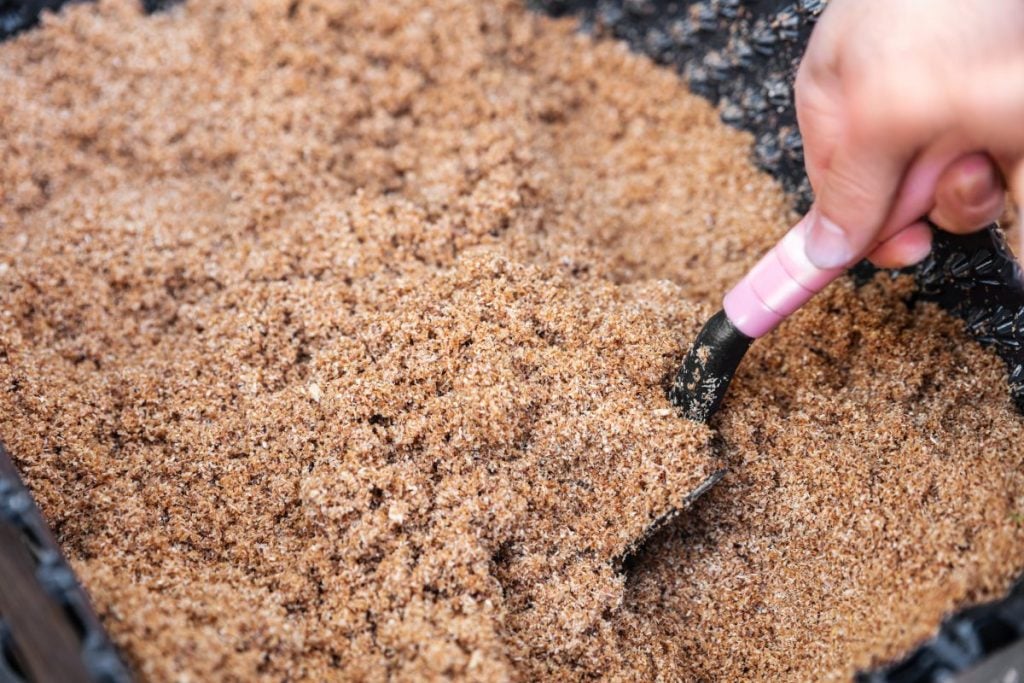
Substrate – The best substrate to use will depend on the species of mushroom you want to grow, as different species feed on different organic matter.
But most gourmet mushrooms thrive on dead and decaying hardwood trees, including all the best species to grow in jars.
The best mushroom substrates for bottles are those with small particles like sawdust or coffee grounds that are easy to pour into the bottles.
And as bottles only hold small amounts of substrate, you don’t need to worry about compaction or lack of airflow in the center of the substrate.
Growers commonly use supplemented hardwood sawdust or Master’s mix when growing mushrooms in bottles.
If you don’t live near a good source of fresh sawdust, hardwood pellets are a good option and readily available in most places.
A Pressure Cooker – Supplemented substrates and substrate mixes need sterilization to kill as many competing organisms as possible and give the mushrooms a head start.
To sterilize a substrate, you need temperatures higher than 250°F (121°C) for at least 90 minutes.
The best way to reach these temperatures and sterilize small quantities of substrate is in a pressure cooker at 15PSI.
Mushroom Spawn – We recommend ordering grain spawn from a reputable supplier, preferably someone in your area.
When ordering your mushroom spawn, try to have all the other items ready before it arrives, as it’s best to use grain spawn as soon as possible.
Old or low-quality mushroom spawn may take longer to colonize the substrate or fail to grow all together.
Step 2: Modify Jar Lids
Plastic mushroom-growing bottles come with filter lids, but if you are using mason jars to grow mushrooms, you’ll need to modify the lids so the mycelium can breathe during colonization.
This process involves making a ¼ inch (6.5mm) hole in the lid and filling it with poly stuffing or covering it with micropore or a filter disc.
Do mushrooms need airflow to grow? Yes, they do. Although mycelium can survive higher levels of CO2 during colonization, fresh air exchange is still necessary.
Like humans, mushrooms breathe in oxygen and exhale CO2 and need some fresh air exchange during colonization.
Airflow is also very important for the fruiting stage of mushroom growth.
Light and fresh air signal to the mycelium that it has reached the surface of the substrate and can begin pinning, and good airflow ensures proper growth.
The reason for using poly stuffing or filter discs on the hole during colonization is to allow fresh air exchange but not so much that the substrate dries out.
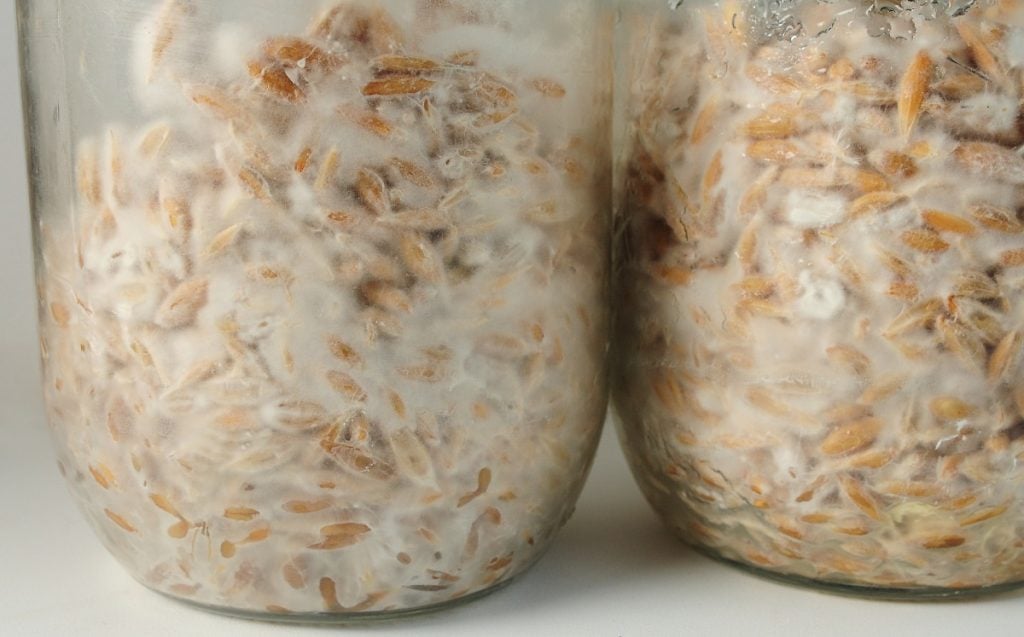
Step 3: Prepare Substrate and Fill The Bottles
Before putting your substrate into the bottles, you’ll need to mix in supplements and hydrate the substrate.
Most mushroom species thrive on substrates that have a 60% moisture content.
The amount of water you need to achieve a 60% moisture content will vary depending on the type of substrate.
For supplemented hardwood sawdust substrates, try adding water at a rate of around 1.5 to 1.7 times the weight of the dry substrate.
Before adding your prepared substrate to your bottles, squeeze a handful of the substrate. If more than a drop or two of water comes out, it’s too wet.
And, if no water comes out and the substrate isn’t staying together in your hand, it’s too dry.
Adding too much or too little water is a common mistake, but with practice, you’ll learn what 60% moisture content looks and feels like. And how much water it takes to achieve this using different substrate materials.
If you’re happy with the moisture content of your substrate, fill your bottles to around 0.5 inches (12mm) from the top. Then tap them on your worktop or a table to slightly compact the substrate.
Using the handle of a wooden spoon or similar utensil, make a hole around ¾ inch (20mm) in diameter in the center of the substrate. This is where you’ll insert the mushroom spawn after sterilization.
Ensure the hole goes all the way to the bottom of the bottle to help encourage even colonization.
Step 4: Sterilization
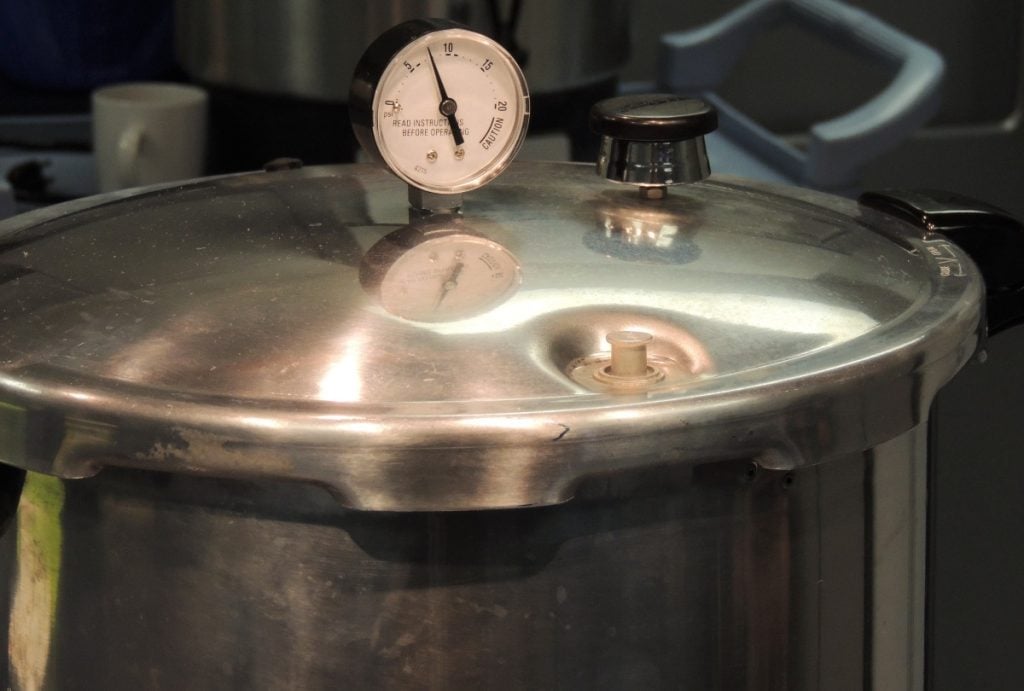
Once you have made the hole in the center of the substrate, it’s time to sterilize your substrate.
Be careful when moving the bottles, as you do not want the hole to collapse and close, making it tricky to add the grain spawn.
Place the lids on your bottles, stand them upright in your pressure cooker and sterilize them at 15 PSI for 90 minutes.
Bottles don’t take as long to sterilize as bags because they don’t hold as much substrate.
Leave the bottles to cool to room temperature inside the pressure cooker. When cool, they’re ready for the next step, inoculation.
Step 5: Inoculation
Inoculation is the name given to the process of adding mushroom spawn to your sterilized substrate.
It’s best to inoculate your bottles on a clean work surface in front of a laminar flow hood to prevent contamination.
And before you begin, wipe the outside of the bottle and spawn bag with alcohol and ensure your hands are clean.
Then take the lid off the bottle and pour grain spawn into the hole in the center of the substrate.
When you have completely filled the hole with spawn, replace the lid.
Step 6: Incubation
Place your inoculated bottles on a shelf or in a cupboard at room temperature, away from direct sunlight, and leave them to incubate.
During this time, the mushroom mycelium grows off the grain and spreads throughout the substrate.
Bottles take longer to colonize than bags, as the grain spawn is not evenly distributed through the substrate.
Depending on which mushroom species you’re growing, your bottles should be fully colonized in 3 to 4 weeks.
When white mycelium has spread throughout the substrate, your bottles are ready for fruiting.
Step 7: Initiate Fruiting
You have reached the exciting phase of mushroom growing, where you finally see your mushrooms grow. It’s time to take off the lid of your colonized bottle and place it in fruiting conditions.
When you open the bottle, you’ll often see small mushroom pins already forming on the top of the substrate.
Growers recommend scraping off the top layer of mycelium and any small pins using a fork. This re-invigorates the mycelium and helps to encourage even pinning across the surface.
The scraped mycelium should recover and form new pins in 3 to 4 days. During this time, high humidity levels are essential.
To help maintain humidity levels during pinning, you can place a damp breathable cloth over the top of the open jar.
Once all the pins have formed, remove the cloth and watch as your mushrooms grow out the top of the bottle.
Step 8: Harvest
The ideal time to harvest varies from species to species, but generally, it’s best to harvest mushrooms before the caps flatten and the mushrooms release their spores.
You can harvest your mushrooms by twisting them off at the base or cutting across the top of the bottle.
After you have harvested the mushrooms, use a fork or something similar to remove the spent substrate from the bottles and clean them thoroughly so they’re ready for the next batch of mushrooms.
How Do You Grow Mushrooms in Coffee Grounds in a Bottle?
Growing oyster mushrooms in coffee grounds is a fun way for beginners to get started. You don’t need to sterilize coffee grounds as they’re pasteurized during the brewing process.
This means you can inoculate freshly brewed coffee grounds as soon as they have cooled enough to not kill the mushroom mycelium.
Used coffee grounds are full of nutrients that oyster mushrooms love, making them one of the best mushroom species to grow on this substrate.
First, sterilize your bottle and filter lid by submerging them in boiling water for 10 minutes and remember to clean your hands and wipe down your work surface with alcohol to help prevent contamination.
Allow the sterilized bottle to cool to room temperature. Then put your freshly brewed, cooled coffee grounds into the bottle, add oyster mushroom grain spawn and shake or stir to mix.
Some people also like to use the layering method and add a layer of coffee grounds followed by a layer of grain spawn and repeat this until the jar is full.
When the coffee grounds and spawn are well mixed or the jar is full of layers, place the filter lid on the bottle and leave it to incubate at room temperature away from direct sunlight.
When white mycelium has completely colonized the coffee grounds, open the top of the bottle and place it in fruiting conditions.
Keep an eye on your oyster mushrooms and mist them with water twice a day. They grow fast, doubling in size daily, and could be ready for harvest in less than 2 weeks.
Final Thoughts
Growing mushrooms in bottles in an automated system is a good option for commercial mushroom growers as it increases efficiency and production.
But this method is out of reach for most small-scale mushroom farmers, as apart from the bottles and lids, it also needs lots of machines, meaning the start-up costs are extremely high.
Home growers can grow top fruiting mushrooms in reusable bottles or jars, but emptying and cleaning the bottles becomes very time-consuming as you increase production.
To learn more about growing mushrooms at home using simple methods and minimal equipment visit our Mushroom Growing Hub.


