Growing mushrooms with ready-made grain spawn is one of the most beginner-friendly ways for new mushroom growers to advance beyond mushroom grow kits.
Purchasing ready-to-use grain spawn also benefits small-scale mushroom farmers, as it saves time and resources. But new growers, who want to learn more, often ask, “can you make your own mushroom grain spawn?”
The answer is yes, and it’s not as complicated as you may think.
Read on to learn what grain spawn is, the best grains to use, what supplies you’ll need and how to make grain spawn step-by-step.
What is Grain Spawn?
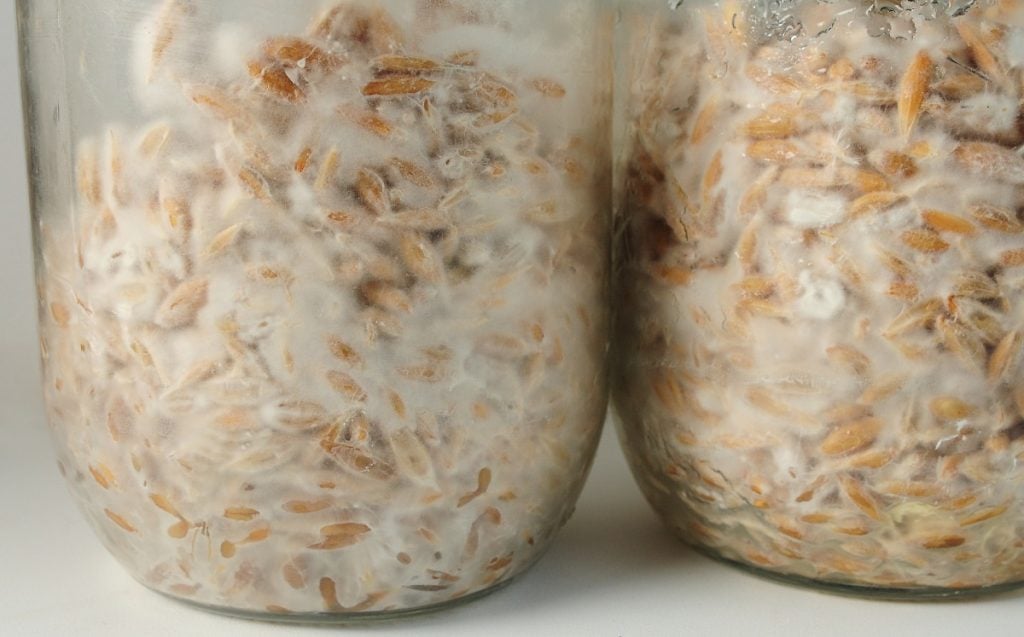
Grain spawn consists of mushroom mycelium growing on a substrate of sterilized grain. Mushroom cultivators use grain spawn to multiply mycelium and inoculate bulk mushroom substrates.
The grains provide nutrients for the mycelium to feed on and grow, and when fully colonized it’s easy to break the grain spawn into small pieces.
These small pieces of mycelium-coated grain are easy to distribute evenly throughout a bulk substrate, creating multiple inoculation points and speeding up colonization.
Grain spawn is most often used for growing mushrooms indoors as, in outdoor beds, birds and small mammals may eat the grain and your mycelium at the same time.
How is Grain Spawn Made?
Grain spawn is made by inoculating a container of hydrated and sterilized grain with mushroom mycelium using either liquid or agar culture.
The inoculated grain is then left to incubate while the mycelium grows and spreads throughout the grain, feeding on the nutrients it provides.
When your grain is fully colonized, you have ready-to-use grain spawn.
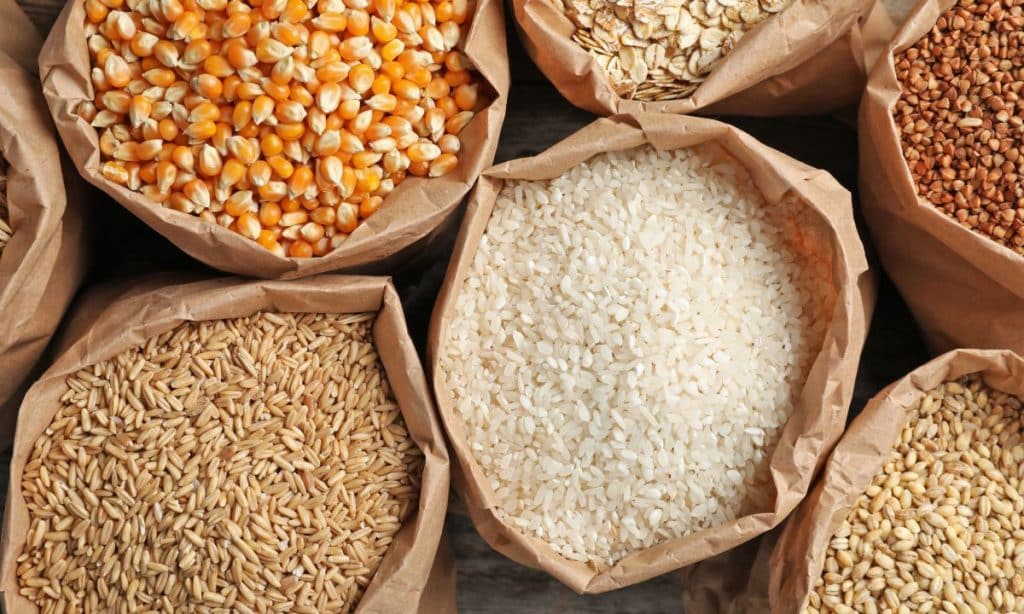
Best Types of Grain for Mushroom Grain Spawn
You can use almost any grain to make grain spawn, and they all have pros and cons. Factors to consider when deciding which grain to use are grain size, quality and price.
And remember, if you plan on selling your mushrooms and want them to be organically certified, you’ll need to use organically certified grain to make your grain spawn.
We recommend using locally sourced grain as this reduces the transport costs and helps to support local businesses.
Here are some of the grains you can use to make grain spawn:
Rye
If you can get rye, it’s ideal. It holds more water than most other grains, contains lots of nutrition for the mushroom mycelium, and the grains are relatively small.
But rye is often challenging to find, only available in large quantities or expensive if you have to buy it online, so it may not be best for small home growers.
Wheat
Also called wheat berries or wheat seeds, wheat is the most commonly used grain in the UK. It’s similar in size and nutritional value to rye but does not hold as much water and can dry out if not well-soaked.
Millet
Some growers prefer millet to rye as the individual grains are smaller, providing more inoculation points when you add it to a bulk substrate.
It’s perfect for making grain spawn but not always easy to work with because of its size and can become mushy if you soak it for too long.
Wild Bird Seed (WBS)
Wild bird seed is inexpensive and readily available at garden centers or pet shops, making it popular with people growing mushrooms as a hobby.
However, it does not hold water as well as other grains, does not hydrate evenly and is not suitable for all mushroom species.
Popcorn
Growers recommend popcorn for beginner mushroom growers as it’s easy to hydrate correctly, readily available and relatively contaminant resistant.
But popcorn kernels are much bigger than other grains, meaning you get fewer inoculation points, and it takes the mycelium longer to colonize popcorn.
Brown Rice
Although rice is cheap and easy to find, it tends to become mushy or sticky and is more prone to contamination than other grains.
For this reason, it’s not commonly used by commercial growers, but depending on your location, it may be a good option for small-scale home growers.
Barley
Some people use barley to make grain spawn, and while it has enough nutrients for the mycelium, it can get very mushy.
Sorghum
This small round grain is slightly larger than millet and commonly used by commercial growers.
It has the benefit of providing more inoculation points because of its size. And, like millet, it’s less prone to contamination than rye or wheat.
Why Do You Need to Sterilize The Grain?
Hydrated grains are nutrient-rich and make an ideal substrate for mushroom mycelium. But they’re also perfect for mold and bacteria that often grow faster than mushroom mycelium.
To ensure your mycelium gets a head start, with no competition from mold and bacteria, you’ll need to sterilize the grain to kill all living organisms and spores.
The best way for small-scale home growers to achieve the temperatures required for sterilization is by using a pressure cooker at 15 PSI for around 2 hours.
Our article,” How to Sterilize Mushroom Substrate: A Step-by-Step Guide,” has more information for you.
What You’ll Need to Make Grain Spawn
Before you begin, you’ll need to gather supplies and ensure you have the equipment required, including containers to hold the grain spawn.
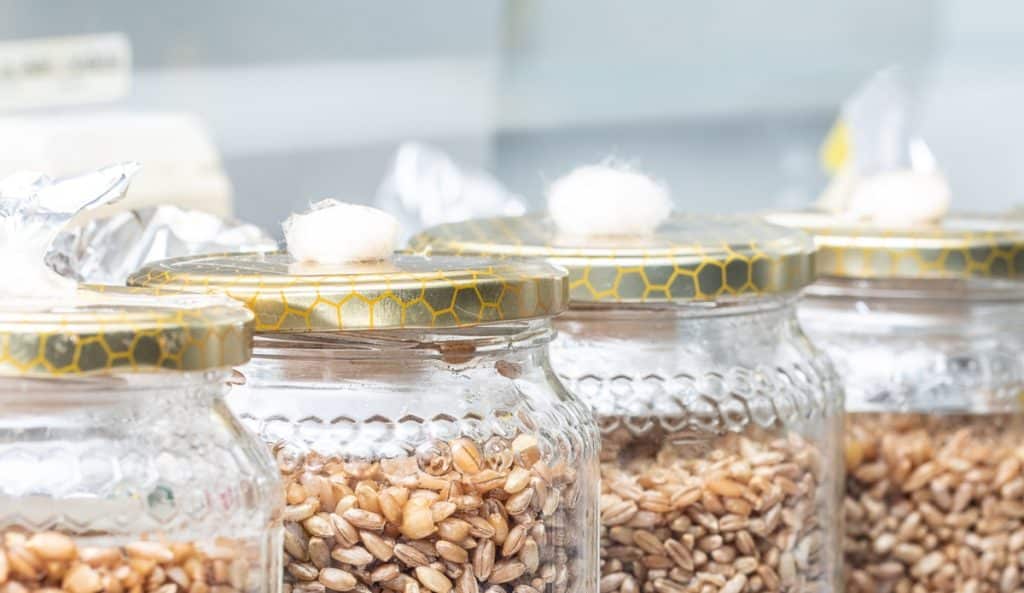
You can use mushroom growing bags to make grain spawn, but growers commonly use mason jars as you can clean and reuse your jars, causing less plastic waste than single-use bags.
Your mason jars need modified lids to allow fresh air exchange. You can buy these online or modify standard mason jar lids.
To make grain spawn, you’ll need:
- Cereal grain
- Mason jars with modified lids
- Bucket or large bowl
- Large pot
- Aluminium Foil
- Pressure cooker
- Agar culture, liquid culture or previous grain spawn.
- 70% Isopropyl alcohol
- Gloves
How to Make Grain Spawn Step-by-Step
Follow the steps below to make mushroom grain spawn using mason jars:
1. Hydrate The Grain
The first step in hydrating your cereal grain is to soak the grain in water. You can do this in a large bowl or bucket, depending on how many jars you plan on filling.
Remember, as the grain absorbs water, it will expand and, depending on the type of grain, will increase 2 to 3 times in volume.
As a general rule, mushroom cultivators suggest using around ⅓ of the final volume required in dry grain.
How long should you soak grain for spawn?
It’s best to soak your grain for 12 to 24 hours, but not longer than this, as if you leave the grain for too long, it will sprout.
Next, simmer your grain in a large pot for 10 to 20 minutes to further hydrate and soften the grains, making it easier for the mycelium to access the nutrients they provide.
Take care not to simmer the grains too long, as you don’t want them to crack open and become mushy.
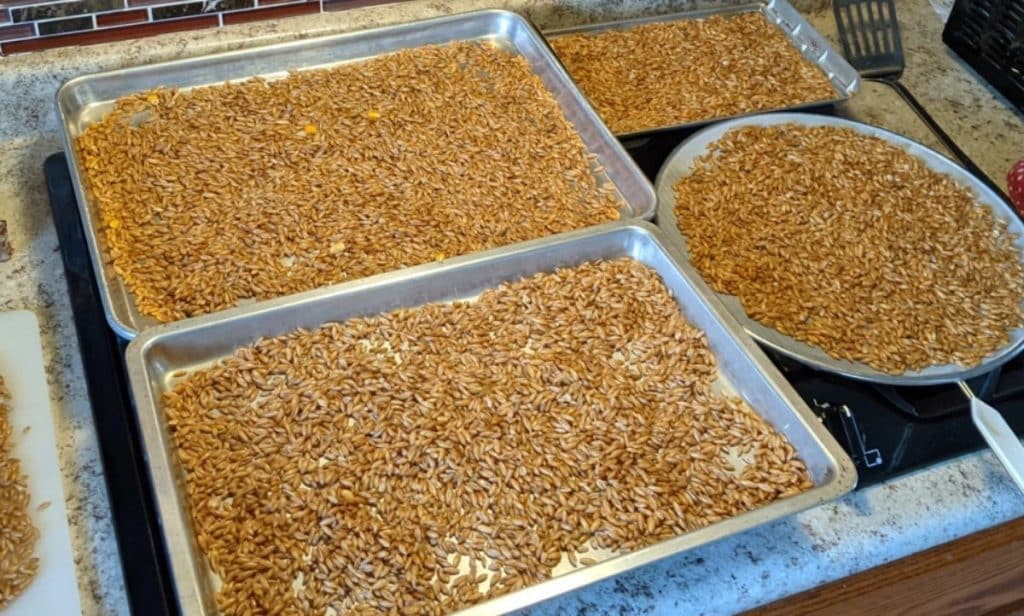
2. Drain The Grain
Once you have finished simmering the grain, drain off the cooking water and leave it to cool for an hour or two on a large, flat surface like a baking tray.
This allows the moisture on the outside of the grains to evaporate, leaving you with grain kernels that are full of water on the inside but dry on the outside.
3. Fill Your Jars
Place the cooled grain into your jars, leaving 1 to 2 inches ( 2.5 to 5 cm) of space at the top.
This space allows you to shake the jars during colonization to help speed up the process and break the colonized grain apart before use.
Then close your jars with your AirPort or modified lids with a self-healing injection port and a filter that allows fresh air exchange.
How to Modify a Mason Jar Lid to Make Grain Spawn
If you plan on making your own modified lids for use with liquid culture, you’re going to need the following:
- A drill
- An ¼ inch ( 0.6 cm) drill bit and an ⅛ inch (0.3 cm) drill bit or similar
- High-temperature silicon
- Polyfill pillow stuffing
First, make two holes in the lid of your jar using the drill. One around ¼ inch (0.6 cm) in the center and the other around ⅛ inch (0.3 cm) in size, closer to the edge.
The smaller hole will be your self-healing injection port, so once it’s drilled, cover it with a small blob of high-temperature silicon and leave it to dry overnight.
Finally, pull a wad of polyfill through the hole in the center to create a filter that allows the mycelium to breathe during colonization.
If you plan on using agar culture or grain spawn to inoculate your grain, you will only need the hole on the center of the jar with the polyfill, as you do not need an injection port.
4. Sterilize The Grain
Cover the top of your modified lids with tin foil to prevent water from getting in through the filter hole during sterilization, and place the jars of grain in your pressure cooker.
Use a wire rack or something similar to prevent the jars from coming into contact with the pressure cooker’s base, and ensure they’re not touching each other or the sides of the pressure cooker.
Add water to your pressure cooker, and following the manufacturer’s instructions, sterilize your grain for 90 minutes at 15PSI.
After the time is up, turn off the pressure cooker and leave the jars inside the pressure cooker to cool down for 8 hours or overnight.
5. Inoculate The Grain
When your jars of sterilized grain have cooled to room temperature, they are ready for the mushroom mycelium.
The process of adding mushroom mycelium to your grain is called inoculation. Sterile conditions are crucial during this process so you don’t introduce contaminants.
You can use liquid culture, agar culture or other grain spawn to inoculate your grain.
Liquid Culture
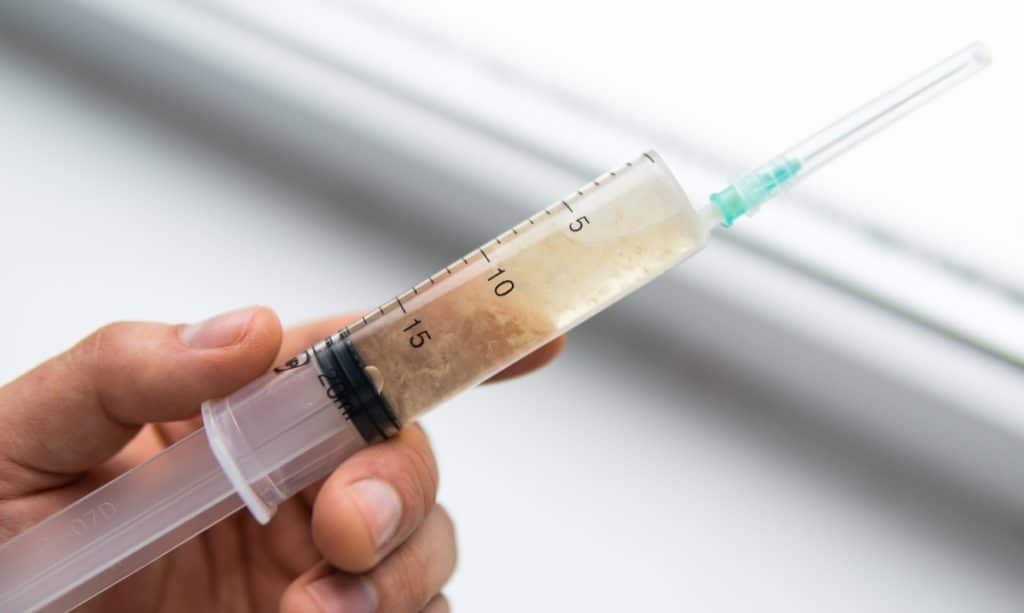
If you’re using liquid culture and have a self-healing injection port, it’s much easier to maintain sterile conditions.
This is because the liquid culture, syringe and needle are sterilized when you get them, and you transfer sterile liquid culture through a sterile needle directly into your sterilized grain.
This allows you to work in a clean space away from drafts without a laminar flow hood or still air box.
First, remove the foil covering your lid and wipe down the top of the lid with alcohol.
Then, shake your culture syringe to distribute the mycelium, insert the needle into the jar through your injection port, and inject 1-2 CC (1-2 ml) of culture into the grain.
Repeat the process for each jar, and although some growers don’t think it’s necessary, you can flame sterilize the needle between each jar to help prevent contamination.
Agar Culture
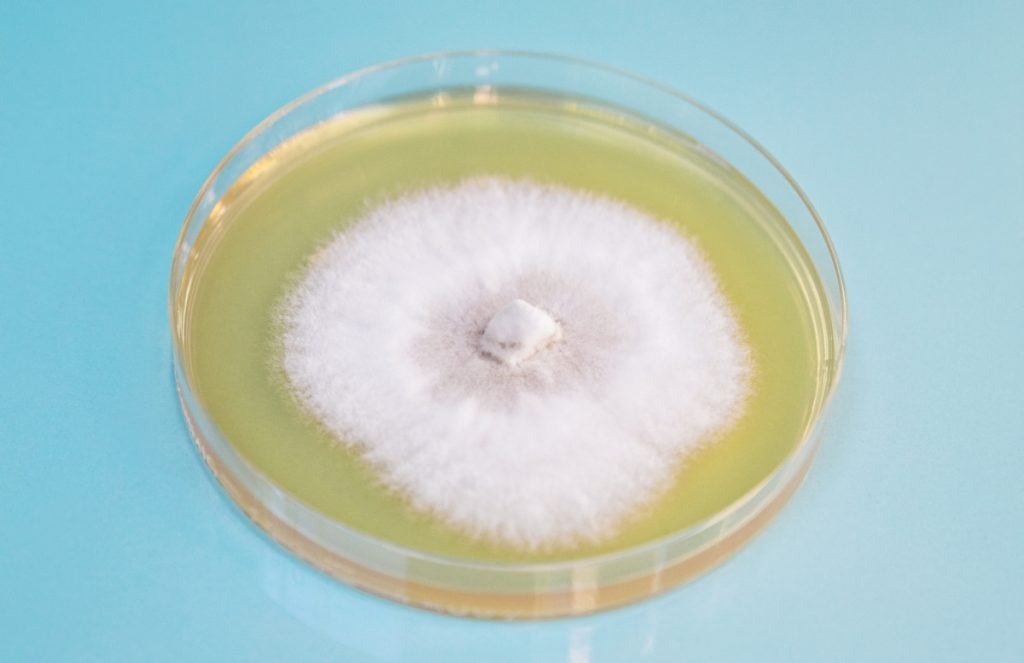
If you’re using agar culture to inoculate your grain, you’ll need to open the jar, increasing the chances of contamination.
Thus, growers usually work on a clean workstation with a laminar flow hood or inside a still air box.
You are going to need the following:
- Jar of sterilized grain
- Agar culture
- Scalpel
- A flame of some sort to sterilize the scalpel
- Gloves and a face mask
First, wipe down all your tools and the top and sides of the jar with alcohol and place them in front of the flow hood or in the still air box.
Open your jar and petri dish of agar culture, cut a small piece of agar culture using a flame-sterilized scalpel and place it in the jar of grain. Then, quickly close the petri dish and put the lid back on the inoculated grain.
6. Incubate The Grain Spawn
When inoculation is complete, the mycelium you introduced needs time to grow and spread throughout the grain.
This phase of the mushroom growing process is called incubation.
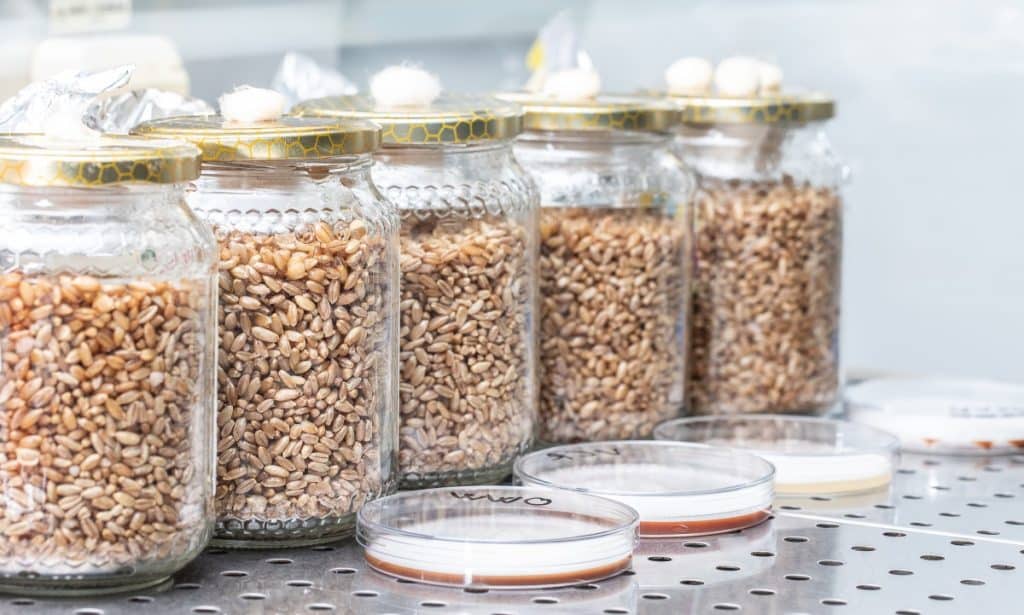
During incubation, store your jars in a room temperature location away from direct sunlight and check them every few days to monitor mycelium growth and check for any contamination.
How long does it take mycelium to colonize grains?
It can take the mushroom mycelium anywhere from 2 to 3 weeks to fully colonize the grain, depending on the mushroom species, choice of grain and growing conditions.
Some growers like to shake their jars when they are a third of the way colonized. This breaks up the mycelium and spreads it throughout the grain, speeding up colonization.
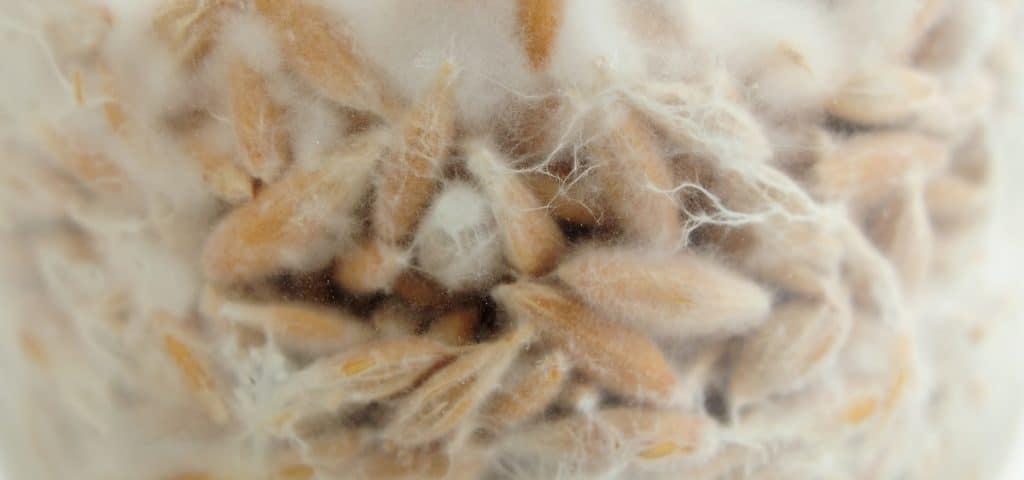
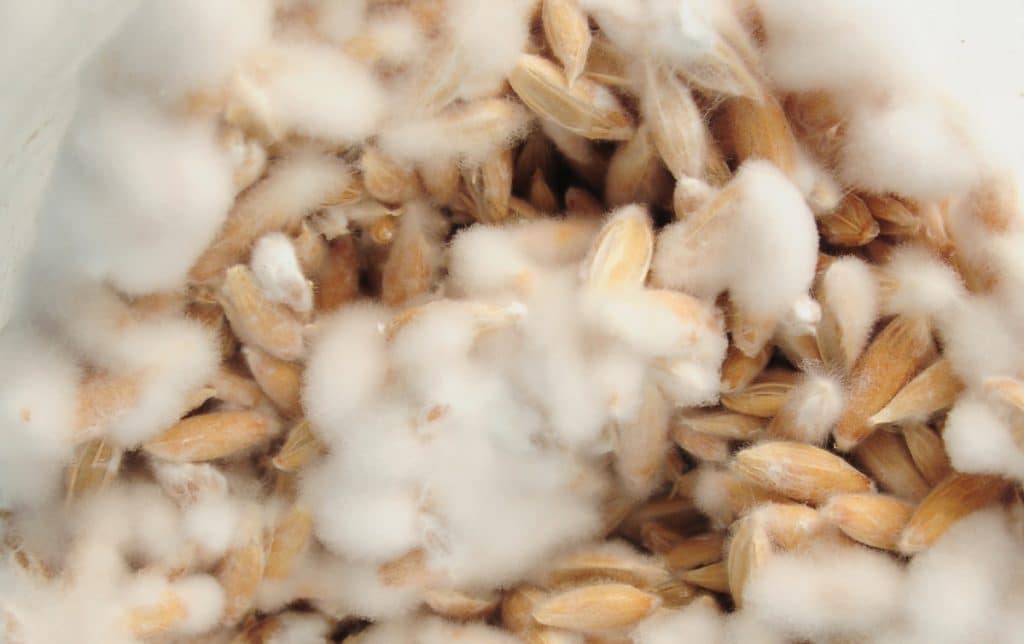
When the grain is completely covered with mycelium and uniformly white, your jar is fully colonized, and your grain spawn is ready to use.
How to Use Grain Spawn to Grow Mushrooms
Grain spawn is very versatile, and mushroom growers use it to inoculate various bulk substrates to grow mushrooms both indoors and outdoors.
It’s ideal for indoor applications, and you can use it to inoculate bulk substrate and grow mushrooms in bags, buckets, bottles or monotubs.
You can also use your grain spawn to create plug spawn or sawdust spawn for growing mushrooms outdoors on logs or in garden beds or to make more grain spawn.
Before use, shake your jars to break the grains apart, then mix them into your bulk substrate. The ideal spawn rate will vary depending on the cultivation method and substrate.
Growers generally recommend using a spawn rate of 1 to 3% for fully sterile substrates and 5 to 20% for non-sterile substrates.
Our article on mushroom inoculation has more information on inoculating different substrates.
Grain Spawn Alternatives
Grain spawn is not your only option for inoculating bulk substrates, although it’s definitely the most popular as it helps to reduce colonization times and increase yields.
What can I use instead of grain spawn?
Sawdust spawn is a popular alternative to grain spawn and is not as prone to contamination, making it ideal for outdoor use.
It’s also less appealing to bugs, birds and rodents than grain spawn but has less nutrition, increasing colonization time and possibly decreasing final yields.
You can also use the stem butt method to grow mushroom mycelium on cardboard or paper, creating cardboard spawn.
Like sawdust, cardboard is a low-nutrient substrate, so this method is only suitable for robust, fast-growing mushroom species and provides lower yields.
Our article, “How To Grow Your Own DIY Mushroom Spawn,” will take you through creating oyster mushroom spawn using damp cardboard step-by-step.
Common Issues and How to Troubleshoot Them
The most common problem encountered by people making grain spawn is mushroom contamination. Several different types of contaminants may appear on your grain, including:
- Green mold (Trichoderma is the most common)
- Bacteria (slimy, wet spot)
- Black mold
- Red or orange mold
Contamination is almost always caused by one of the following common mistakes:
- Improper sterilization – Ensure you have a pressure cooker that can provide the required pressure and only start timing your 90 minutes once the pressure cooker has reached 15PSI.
- Over-hydrated grain – Take care, especially when using softer grains like rice or barley that quickly turn mushy. Over-hydrated grain can mean too much moisture in your jars, which slows colonization and increases chances of contamination.
Do a ‘squish’ test using a single kernel to check that your grain is correctly hydrated. You should be able to crush the grain with some pressure, but it shouldn’t be mushy.
If you can’t crush it, it may need more soaking, but if it’s soft and mushy, it’s over-hydrated, and you’ll need to start again.
- Lack of sterile technique when inoculating – Always work in a clean, closed space, use gloves and a mask and wipe your workstation and any tools with isopropyl alcohol.
It’s best to inoculate your grain in front of a laminar flow hood or in a still air box, and don’t rush or cut corners.
Final Thoughts
Knowing how to make grain spawn allows you to multiply mushroom mycelium. You can use a 1-liter jar of grain spawn to create over 1000 jars in a short space of time.
But, although making grain spawn at home isn’t complicated, it can be time-consuming.
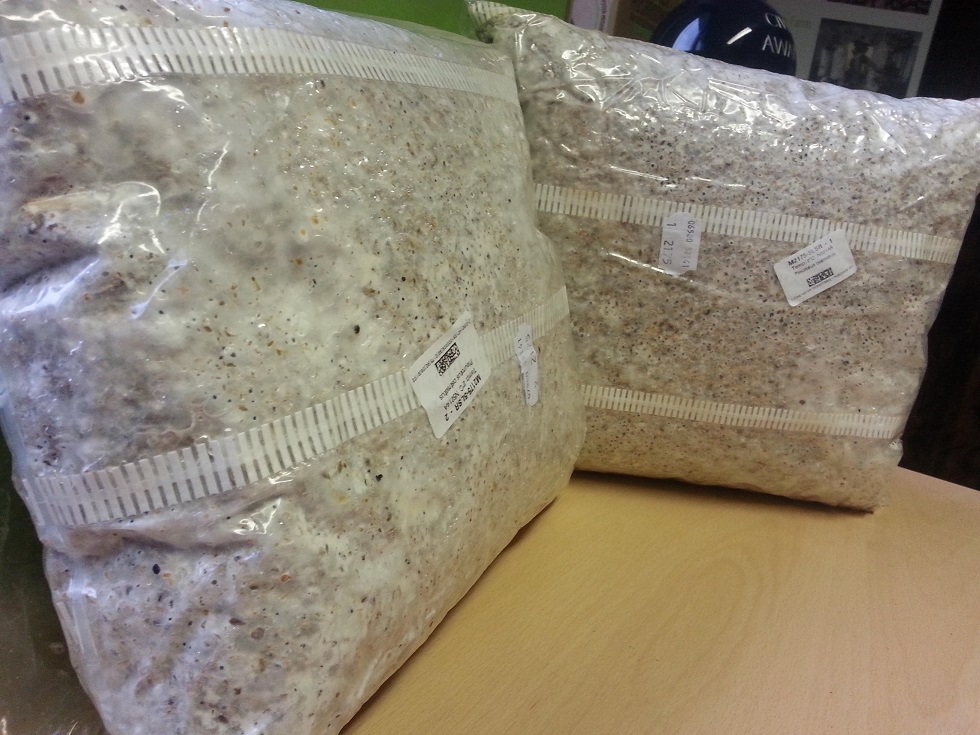
We recommend small-scale mushroom farmers purchase high-quality grain spawn or even ready-to-use substrate blocks as it saves time and resources.
To learn more about growing mushrooms at home the low-tech way, visit our Mushroom Growing Hub or try one of our mushroom cultivation courses.


