Picking the right substrate for growing your mushrooms can be the difference between success and failure.
Straw is one versatile substrate that can be used by both home-based mushroom growers and commercial mushroom farms.
In this article, you’ll learn how to grow mushrooms on straw.
We’ll explain how to prepare straw for growing mushrooms, what kinds of mushrooms grow in straw and everything else you’ll need to get started.
With a few basic supplies, you can be growing tasty gourmet mushrooms on straw in just a few weeks.
How To Grow Mushrooms on Straw
If you’re familiar with other methods of growing mushrooms, then we think you’ll find growing on straw to be fairly straightforward.
The biggest difference is how you’ll need to prepare the straw. We’ll talk about that below, but first let’s go over the supplies required to grow mushrooms on straw.
What You’ll Need
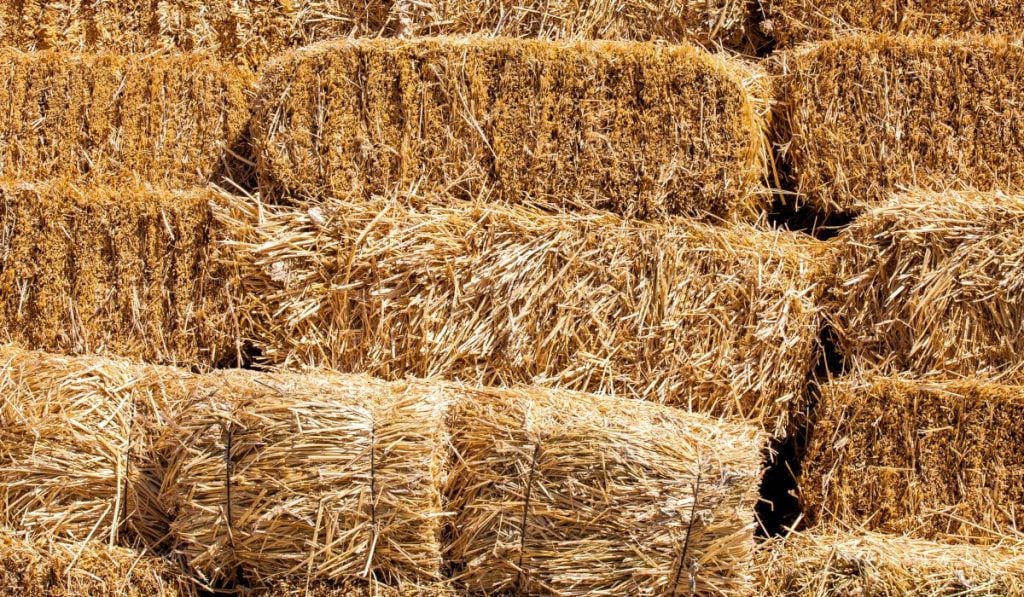
Straw – Wheat straw, oat straw and rice straw can all be used.
If you live in a subtropical area where sugarcane is grown, you can use sugarcane bagasse as an alternative to straw.
Bagasse is the dry pulpy material left behind after juices have been extracted from sugarcane.
Make sure your straw or bagasse is in good condition, with no signs of mold or rotting.
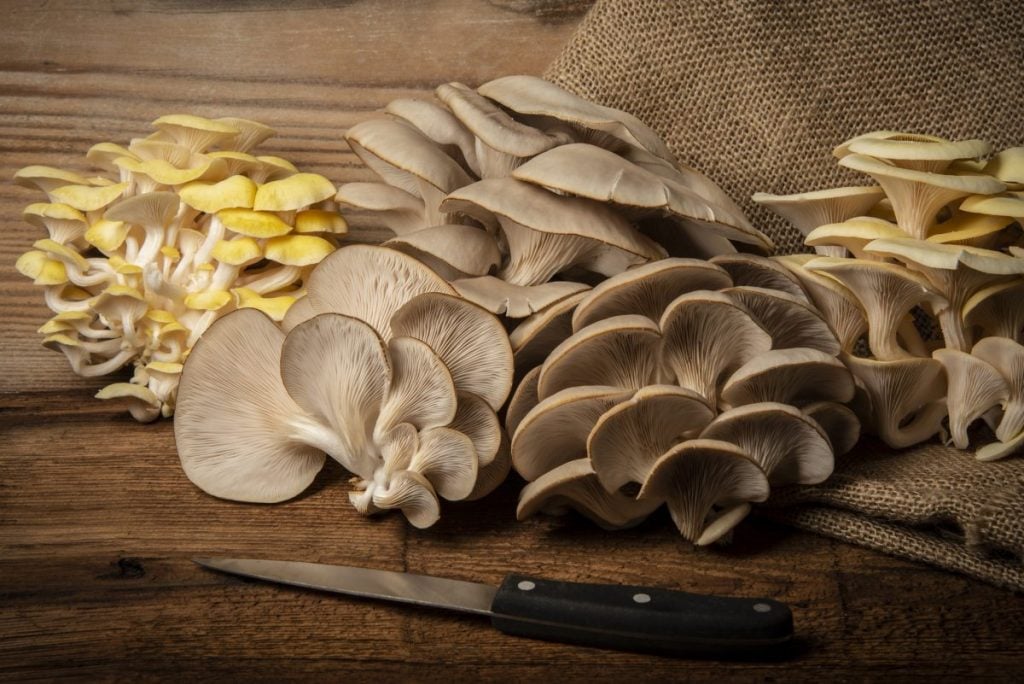
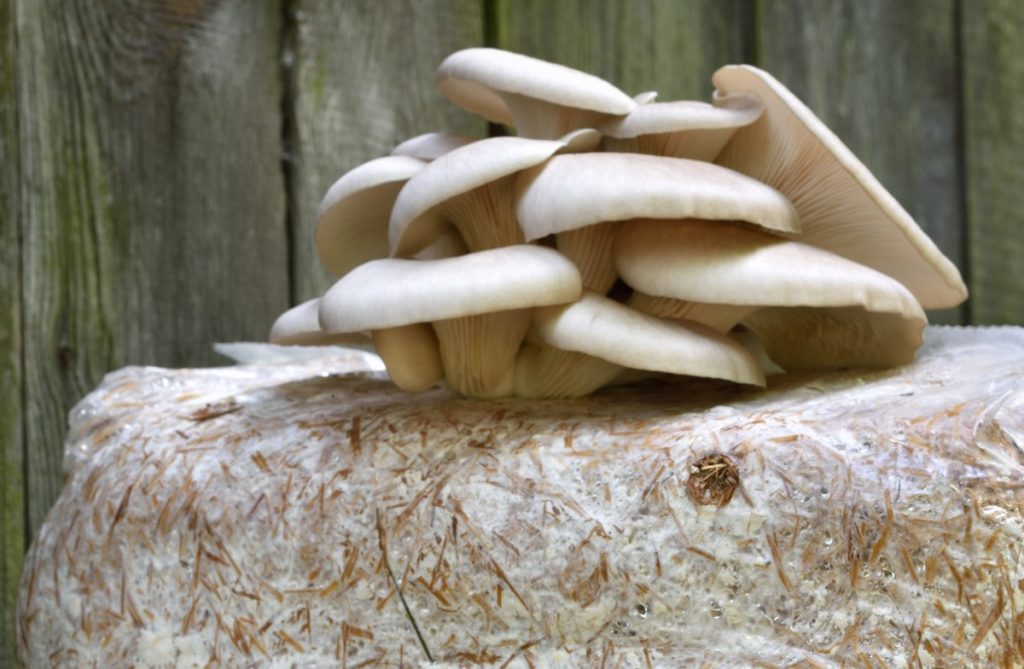
Mushroom spawn – Be sure to choose a species that’s known to grow well on straw. Oyster mushrooms are a great choice.
Something to pasteurize in – For larger batches, we recommend a large drum and a propane burner to heat the water.
A fruiting chamber – This will depend on the size of your mushroom growing operation and and could be a monotub or shotgun fruiting chamber, Martha grow tent, larger grow tent, greenhouse or grow room.
See our article How to Build a Mushroom Fruiting Chamber: 7 Steps to pick the right setup for you.
How To Chop Straw for Mushroom Substrate
Depending on how you buy your straw, it might need to be chopped into smaller pieces before you’re able to grow mushrooms on it.
If you can, try to buy ready-chopped bales. These are often sold for use as animal bedding.
You can buy a large bale of straw for about $10 (£7.63) from feed stores or some local garden centers.
If you’re buying your straw directly from a farmer, see if you can pay them to chop the straw for you with their machines.
Some farmers will even be nice enough to do this free of charge, especially if you’re regularly buying large amounts of straw from them.
If you need to cut your straw at home without any specialized equipment, there are a few different techniques you could try.
You can lay your straw out in your garden and then run it up with a mower to chop it into small pieces.
You could also put your straw into a trash can and shred it with a weed whacker or strimmer.
Some leaf blowers also come with a shredder attachment. Or you could use a small wood chipper if you happen to own one.
Whatever method you use, be sure to use a mask when working with straw to avoid breathing in small dust particles.
Why Would You Want To Grow Mushrooms in Straw?
Straw is an inexpensive material that’s readily available in most areas.
It makes a good substrate for growing mushrooms because it’s easy to break down and full of nutrition. Straw supports nice mushroom fruiting.
It’s simple and easy to cut up and pasteurize your straw. Straw is also quite lightweight and easy to mix in small batches, compared to sawdust.
You can grow many different types of mushrooms on straw, so it’s quite versatile as well.
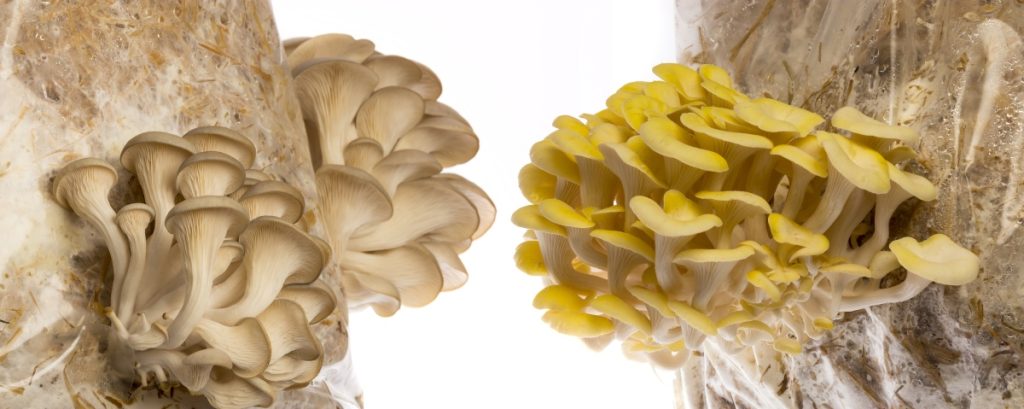
What Kind of Mushrooms Grow Best in Straw?
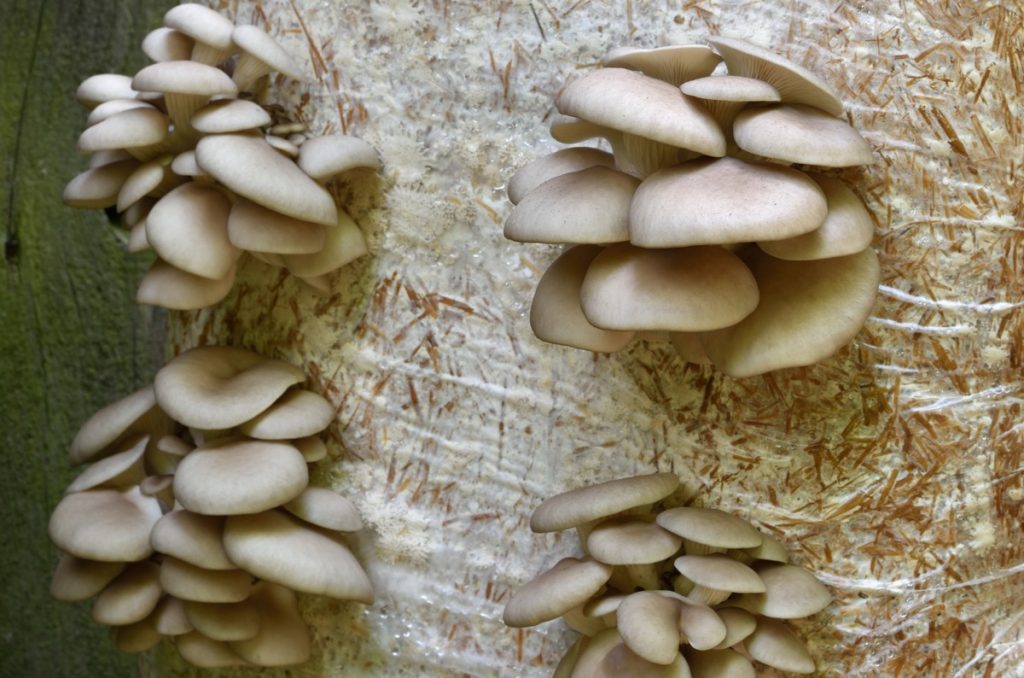
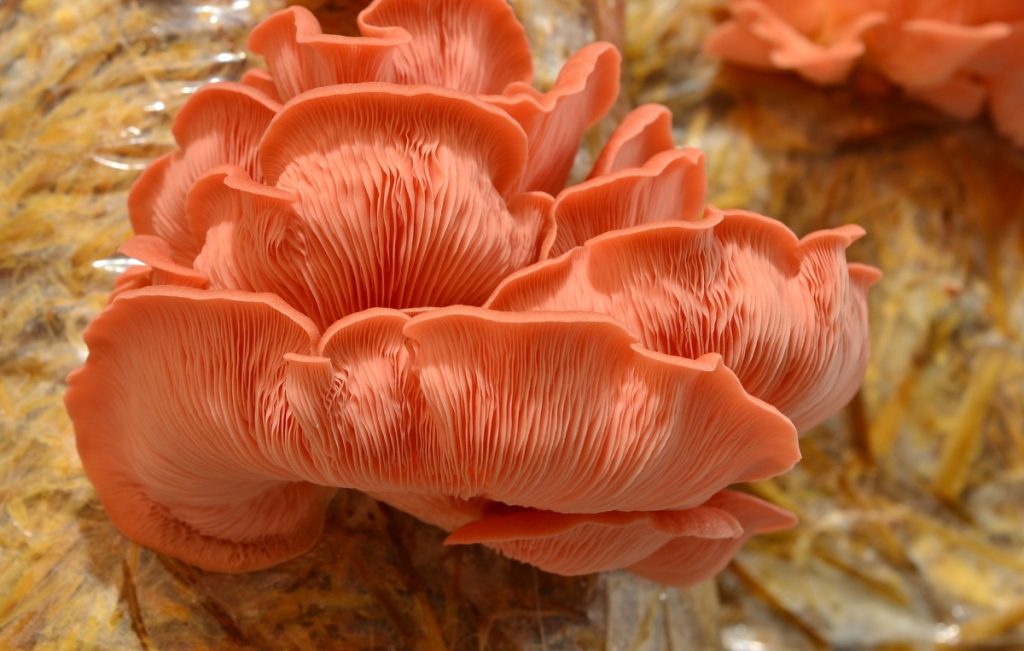
Oyster mushrooms are one of the easiest mushrooms to grow on straw for beginners. That’s what we’d recommend if you’re just getting started.
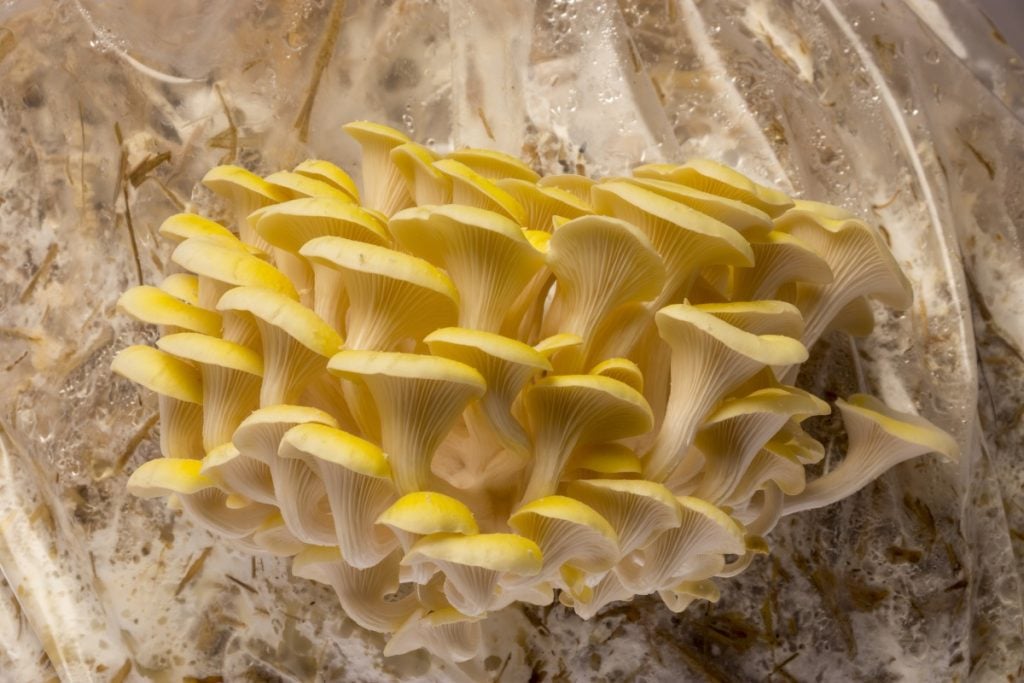
All oyster mushroom strains will grow on straw. That includes blue, golden, pink, pearl, phoenix and king oyster varieties.
Elm oyster mushrooms, although not true oysters, also grow well on straw and often produce very high yields as they’re larger than other oysters.
See Oyster Mushrooms 101: A Complete Guide To Oyster Mushrooms to learn the differences between each type and figure out which will work best in your situation.
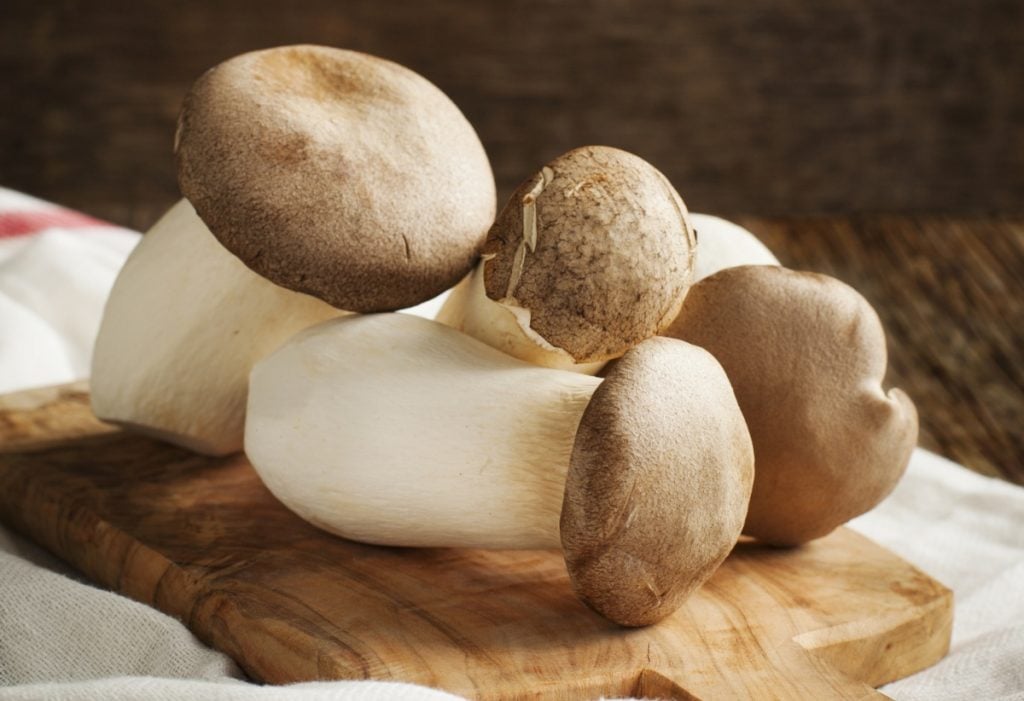
How To Grow King Oyster Mushrooms on Straw
King oyster mushrooms grow a bit differently than other oyster varieties. They take a bit longer to fruit than other oyster strains as well.
You still prepare poly bags with straw similar to other varieties. But instead of cutting holes in the sides of the bag, king oyster mushrooms usually fruit at the top of the bag.
This is because instead of growing in clusters, king oysters produce large individual mushrooms.
Something else that’s unique to king oysters is the use of a casing layer. This layer helps provide more humidity and allows the king oyster mushrooms to grow better.
A casing layer is added just before the grow bags are placed into the fruiting chamber. It usually consists of 50% vermiculite, 50% coconut coir and 1% hydrated lime.
Apply a casing layer at least 1 to 2 inches (2.5 to 5 cm) thick when growing king oysters to help keep in moisture and allow them to grow as large as possible.
Other Mushroom Varieties That Grow Well on Straw
Aside from oyster and king oyster mushrooms, you can grow the following on straw:
- Pioppino mushroom
- Paddy straw mushroom
- King stropharia (also known as wine caps)
Note that wine cap mushrooms are typically grown outdoors.
Step by Step Guide To Growing Mushrooms in Straw
Here’s the full process necessary to grow mushrooms on straw.
Step 1: Prepare Your Straw
Before you can get started, you need to chop up the straw.
Your mushroom spawn will be most easily able to colonize straw if it’s cut into small pieces. Aim for around 1 to 3 inch (2.54 to 7.62 cm) pieces.
For smaller amounts of straw, you can use a pair of garden shears to cut your straw.
For larger amounts, use the methods we mentioned above for chopping straw to use as mushroom substrate.
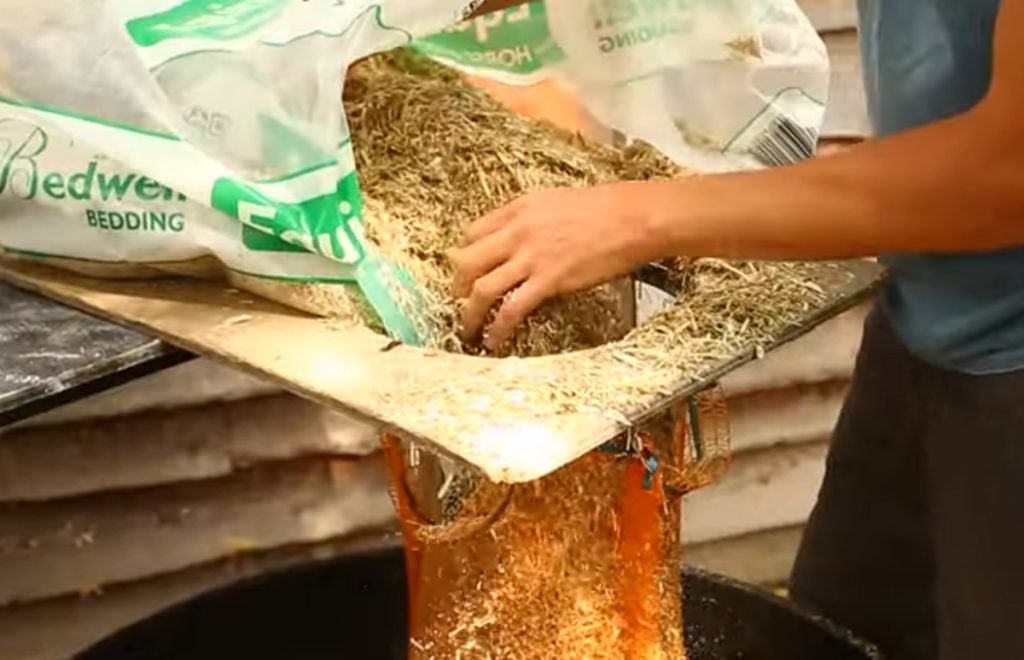
Step 2: Wash and Soak Your Straw (Optional)
This step is not absolutely necessary and can be skipped if desired.
However, you might find that it helps to wash your straw off in a large tote with a small amount of dish soap before moving on to the next step.
Washing your straw will help rinse off some of the dust and debris.
The dish soap will act as a mild disinfectant to reduce the amount of bacteria on your straw. This will help reduce the chances of contamination.
If you do wash your straw using soap, be sure to completely rinse off all of the soap before moving to the next step.
Step 3: Hydrate and Pasteurize
There are two methods that we recommend for hydrating and pasteurizing straw on a Low Tech Mushroom Farm.
You need to use at least one of these methods to give your mushroom spawn an advantage over natural molds and bacteria in the environment.
Pasteurization allows your mycelium a chance to colonize the straw before other contaminants can take hold.
The first method is to soak your straw in water for 12 hours and then pasteurize it for 90 minutes in hot water (60 – 75 C or 140 – 167 F).
Alternatively, you can soak your straw for 12 to 18 hours in a high pH cold water lime bath.
To prepare this bath, mix 0.2% hydrated lime into your water. This works out to about 6 grams (0.2 ounces) of hydrated lime per gallon (3.79 liters) of water used.
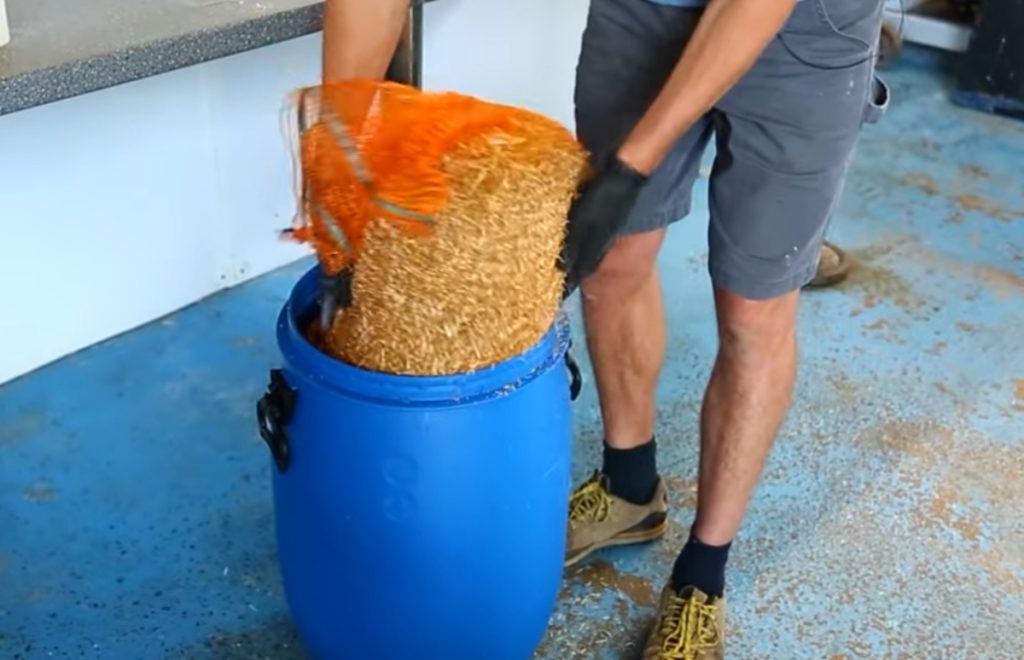
For smaller operations, you can perform the pasteurization process in a large tote.
For medium to large sized mushroom farms, we recommend completing either of these methods in a 55 gallon (208 liter) drum.
Make sure that it’s a food grade container, not one that’s been used to store anything toxic in the past.
If you are using the heat method, you’ll also need a propane burner or some other way to provide consistent heat for your water. You’ll also need a thermometer to check the temperature.
We find it’s also convenient to put your straw into either a laundry bag or a large mesh basket. That way it’s all kept together and it’s easier to weigh everything down to keep it submerged.
When working with chemicals and hot mixtures, make sure to wear personal protective equipment:
- A mask or respirator
- Eye goggles
- Gloves
- Apron
Step 4: Drain and Cool
If you add your mushroom spawn to your pasteurized straw before it’s had time to cool, there’s a good chance you’ll kill it.
First you need to drain your straw and allow it to fully cool to room temperature.
You can speed up the cooling process by spreading your pasteurized straw out on a clean table.
From this point onward, pay special attention to cleanliness. You want to avoid re-introducing contaminants back into the straw as much as possible.
Wash down any surfaces that the straw will come into contact with. Disinfect your hands with an alcohol-based hand sanitizer regularly.
Step 4: Inoculate
Before you begin the inoculation process, be sure to check that there aren’t any pockets of hot straw that still need to cool down.
And just to reiterate, make sure you’re wearing latex or nitrile gloves, or that you’ve disinfected your hands.
If you had spread your straw out on a table to cool, you can leave it there for this step.
For smaller batches, you can mix everything together in a large tote.
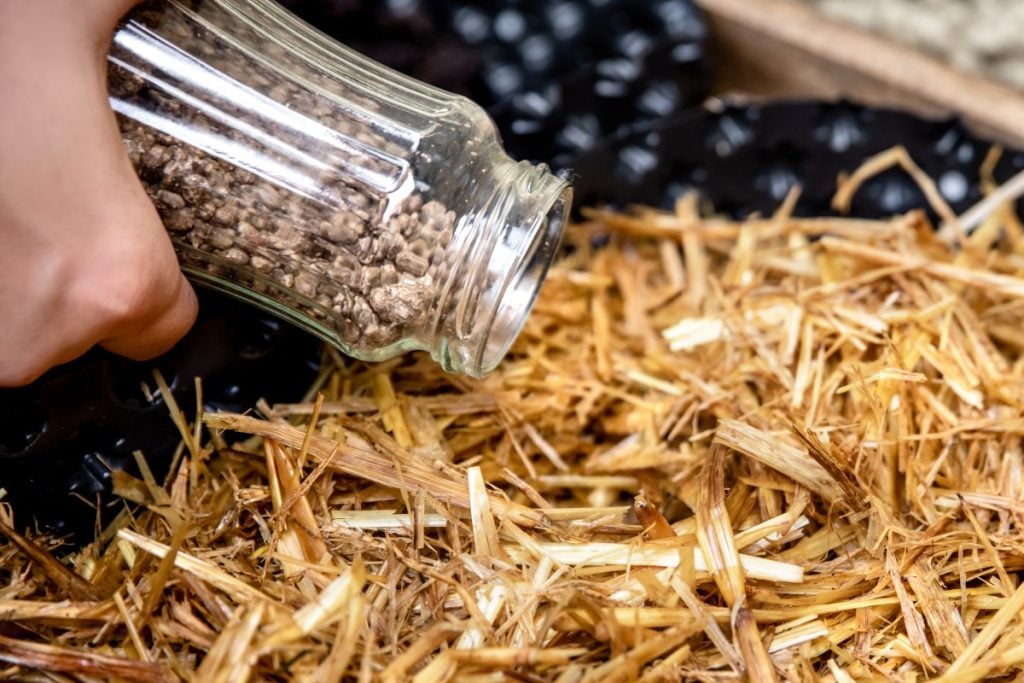
Add mushroom spawn to your straw. We recommend using a ratio of at least 10% spawn to straw, otherwise the risk of contamination is greatly increased.
The higher the spawn ratio that you use, the quicker your straw will get fully colonized.
We recommend a ratio of around 15%, or about 1.5 lbs (0.68 kg) of spawn for each 10 lbs (4.53 kg) of wet straw.
You’ll want to mix your spawn and straw thoroughly to get an even distribution.
Step 5: Fill Your Bags or Containers With Inoculated Straw
Now it’s time to put your inoculated straw into some kind of container where the colonization phase can take place.
You can use 5 gallon (22 liter) buckets or plastic bags. For growing outdoors, we’ve even seen people use laundry baskets to contain the straw.
For indoor growing, poly tubing is the most standardized and versatile material to use.
Since it’s clear, it’s much easier to spot potential contamination early, as opposed to growing in opaque buckets.
The shape of the bags also allows more surface area for fruiting. Plus you can customize it and cut the holes wherever you want later on.
Try not to use poly tubing with a lay flat diameter larger than 16 inches (40 cm). This will give you a bag that’s about 10.5 inches (26.7 cm) thick once filled.
If you go much larger than this size, you can end up with an anaerobic core that can lead to contamination.
As you go, periodically press the straw to pack it down as tight as you can. Otherwise you can end up with air pockets and premature mushrooms pinning within the bag.
Once your bag is filled, give one final squeeze to remove any excess air and then twist off the top of the bag. Secure it in place with a zip tie or wire.
If your mushroom growing bags came with filter patches, then you’re all set. If not, you’ll need to punch some holes into the bag to allow for airflow so the mycelium can breathe.
A bag with no air exchange will almost always become contaminated.
If you need to create your own holes, cut small X’s approximately every 5 inches (12.7 cm) around the whole bag.
If you’ll be hanging your bag, you may also want to poke a couple of holes in the bottom to allow excess remaining water to drip out.
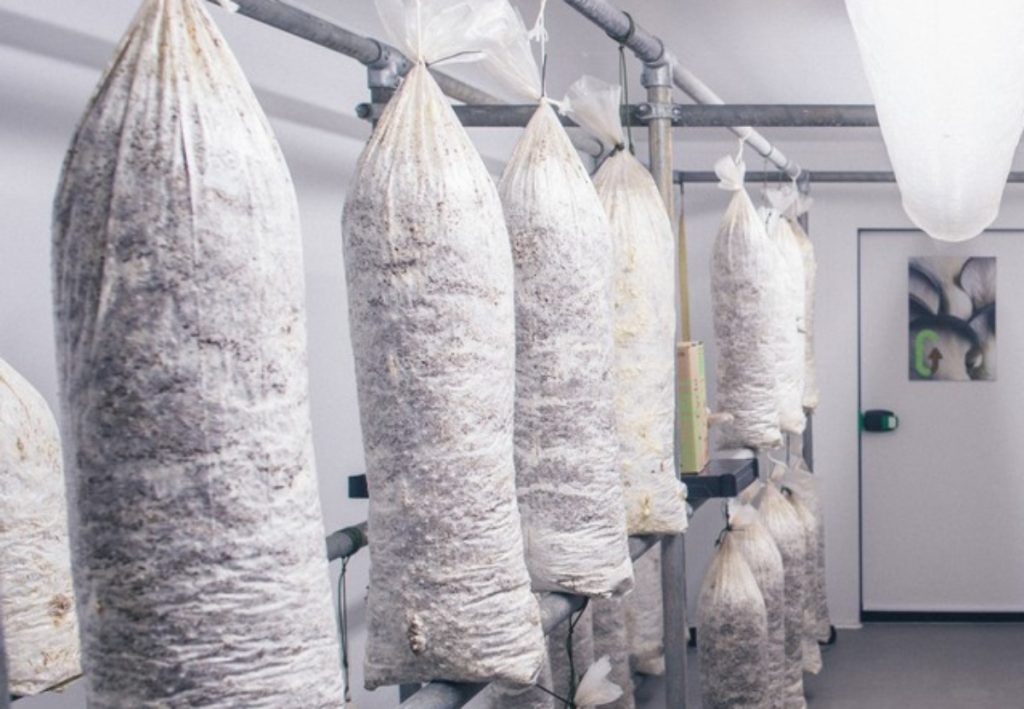
Step 6: Colonization
Store your filled bags somewhere at a stable room temperature and away from sunlight.
For oyster mushrooms, it will take around 1 to 2 weeks for the bags to become fully colonized.
If you’ve prepared multiple bags, leave space between them.
The growing mycelium will create heat during the colonization process. Your mushroom culture can get too warm and die if there isn’t enough airflow around the bags.
Check on your bags every few days to make sure there’s no contamination and they’re developing well. Compost or throw away any bags with strange colors or bad odors.
Once all of the straw is covered in a nice white growth of mycelium, it’s time to fruit.
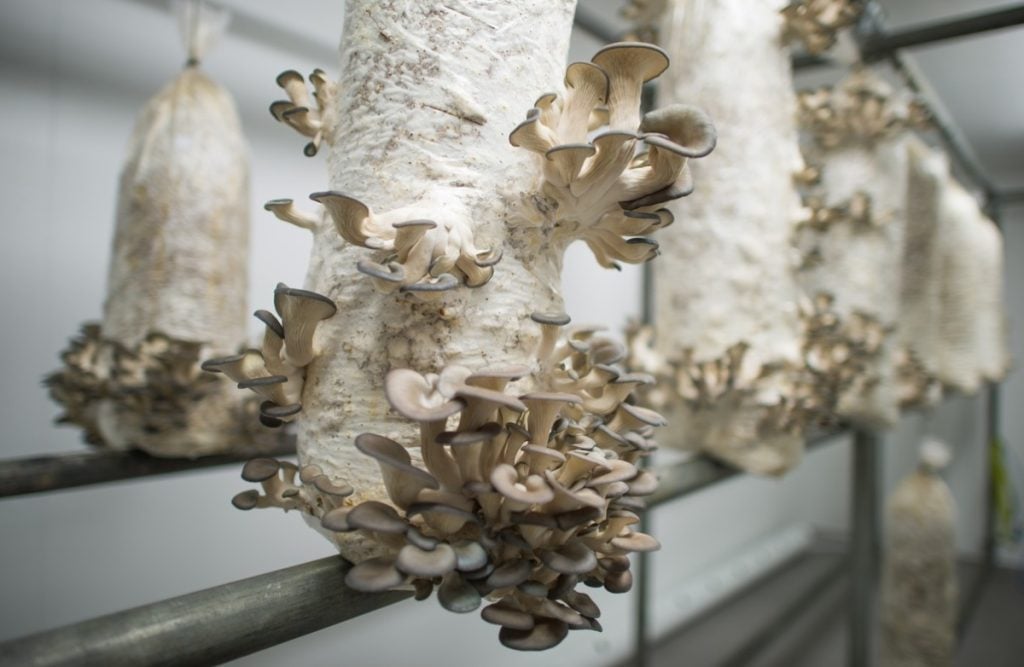
Step 7: Fruiting
The fruiting process for mushrooms grown on straw is the same as if you were growing on sawdust, coffee grounds or cardboard.
Basically, you just need to create the right conditions for fruiting and the mushrooms will do the rest. This includes elevating the humidity, dropping the temperature slightly and adding light.
At first you’ll see pins forming around the holes that you cut in the plastic. Quickly they will grow into full-sized mushrooms.
At this point, the most important thing is to not let your mushrooms dry out as they grow. Be sure to mist them with water at least a couple of times per day.
If you are growing on straw outdoors, a fruiting chamber is usually not needed. Just place your colonized straw in a shady and cool location and allow nature to take over.
Step 6: Harvest
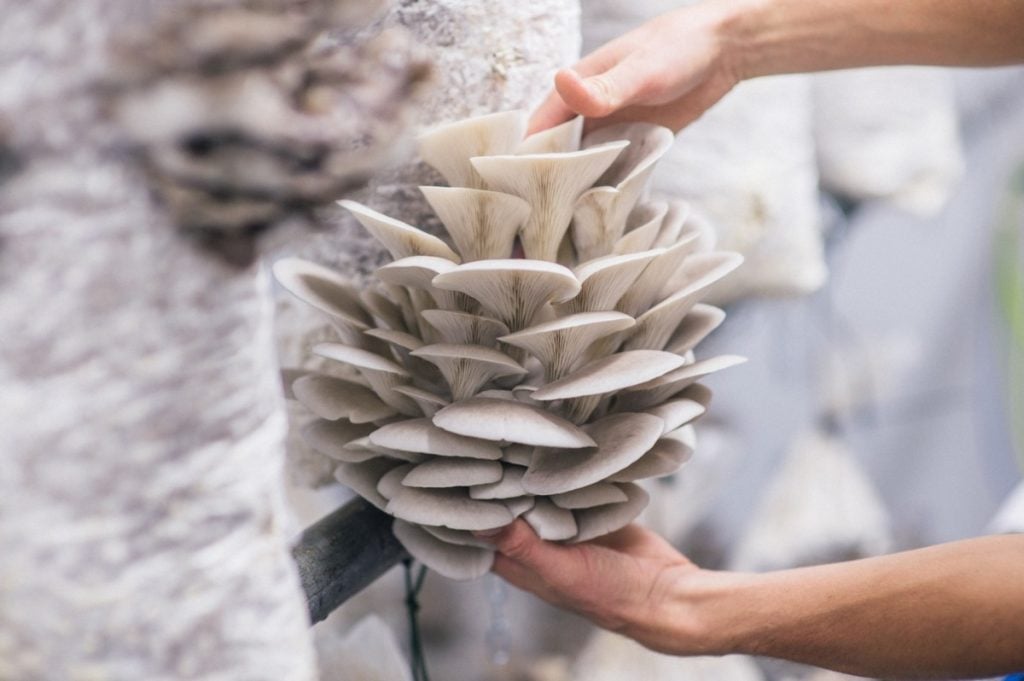
Once your mushrooms are ready to harvest, simply twist them off at the base with your hand. Or you can cut them off with a sharp knife.
For oyster mushrooms, you’ll want to harvest before their caps start to curl upwards. Otherwise they will start dropping spores, which is a mess to clean up.
To know when to harvest other mushroom varieties, refer to one of the species-specific guides in our Mushroom Growing Hub.
Or refer to instructions provided by the company that you purchased spawn from.
Step 7: Multiple Flushes
You can usually get multiple flushes (or batches) of mushrooms from one bag or log of straw.
After you’ve harvested your first flush of mushrooms, let your bags rest for around a week.
As long as your mycelium stays moist enough, you can usually get 1 or 2 more flushes. Although there will be a smaller harvest each time.
Watch closely for contamination after the first harvest. Compost or dispose of it as soon as any signs of mold appear.
How Do You Grow Mushrooms Outside in Straw?
Mushrooms can be grown outdoors in the spring and autumn. Normally the summer is too hot for most varieties and the winter is too cold.
You can grow mushrooms outside on straw using bags, just as you’d do indoors. They may grow faster or slower outdoors, depending on the temperature.
Some people grow mushrooms outdoors on straw using buckets or even laundry baskets.
You can also spread inoculated straw into a garden bed in a shady area. See our article How To Grow Mushrooms Outdoors With A Mushroom Bed for step-by-step instructions.
If you’re growing oyster mushrooms outdoors, we recommend using the blue oyster strain.
Blue oysters can tolerate cooler temperatures.
They also require a lot of fresh air in order to develop, which they can more easily get outdoors. They colonize straw quickly and fruit heavily if given these right conditions.
Can You Grow Mushroom Plugs in Straw?
It’s possible to grow mushrooms in straw using spawn plugs, but they aren’t ideal.
Plugs are specifically made for growing mushrooms in logs, as opposed to in more loose substrates like straw or sawdust.
You can try to grow in straw using plugs, but you’ll find that they grow more slowly.
It’s best to use grain spawn, which you can break up and spread more evenly throughout the straw.
How Long It Takes To Grow Mushrooms on Straw (And What Results to Expect)
Oyster mushrooms will grow at around the same speed on straw as sawdust or other common substrates.
You can speed up growth by adding some materials to supplement nitrogen, but this isn’t required.
Even without supplementation, you can expect oyster mushrooms to grow on straw in as little as 21 days.
We typically see a yield of around 5 lbs (2.2 kg) of oyster mushrooms from a 20 lb (9 kg) bag of straw.
Common Issues & Troubleshooting for Growing Mushrooms on Straw
Here are a few common issues we see with growing mushrooms on straw:
Too much moisture: When draining your pasteurized straw, make sure it’s not too wet.
You can check to see if you have the right moisture content by squeezing some straw in your hand. Only a drop or two of water should come out.
Not enough moisture: You can have the opposite problem of not having enough moisture.
To prevent this, make sure your straw isn’t too dry before bagging up.
Your substrate might also dry out over time if you’ve made too many holes in your bags or they’re too large.
Contamination: Mold or fungi spores grew before your mushrooms could get a foothold.
Make sure to follow strict protocols when pasteurizing your straw. Disinfect your hands and any surfaces that come into contact with the straw once it’s pasteurized.
Don’t forget to poke holes in your bags, or else you can create an anaerobic environment where only contaminants can grow.
Bad spawn: Make sure you’re buying from a reputable company. We have our own high-quality mushroom spawn available here
Try to minimize shipping time by ordering from a company close to you. Once your spawn arrives, use it quickly. It won’t be viable forever.
Wrong environment: Make sure that you’re providing your mushrooms with the right temperature, humidity and other conditions at each stage of the growing process.
Refer to How To Grow Mushrooms: The Ultimate Guide to learn about the mushroom growing life cycle and what mushrooms need to grow.
Final Thoughts
To grow mushrooms on straw, first you need to chop your straw into small pieces.
Then pasteurize your straw using either heat or a lime solution.
Next, drain your straw and allow it to cool. Mix in spawn at a ratio of at least 10% once your straw has cooled.
From there, put it into an appropriate container. The rest of the colonization and fruiting process is similar to other substrates.
Then it’s time to wait for your mushrooms to grow and enjoy!


