Growing mushrooms is a skill. To learn what works best for you and the mushroom species you’re growing takes practice and experimentation.
The good news is you don’t need to know everything to get started and you can grow mushrooms at home with minimal supplies and simple methods.
But, many factors play a role in growing mushrooms, and knowing how to avoid common problems and mistakes can help you succeed.
Read on to learn more about the most common mistakes mushroom growers make and how to avoid them.
1. Trying to Do Everything
Trying to do everything yourself all at once is one of the most common mushroom-growing mistakes beginners make.
Growing mushrooms is interesting and exciting, and many aspiring mushroom growers want to jump in and start growing mushrooms from scratch using spores.
But this requires sterile conditions, specialized equipment and lots of knowledge that you may discover aren’t necessary for your needs.
Trying to do everything yourself also increases the chances of failure, as there are many details to remember and several steps to complete in each phase.
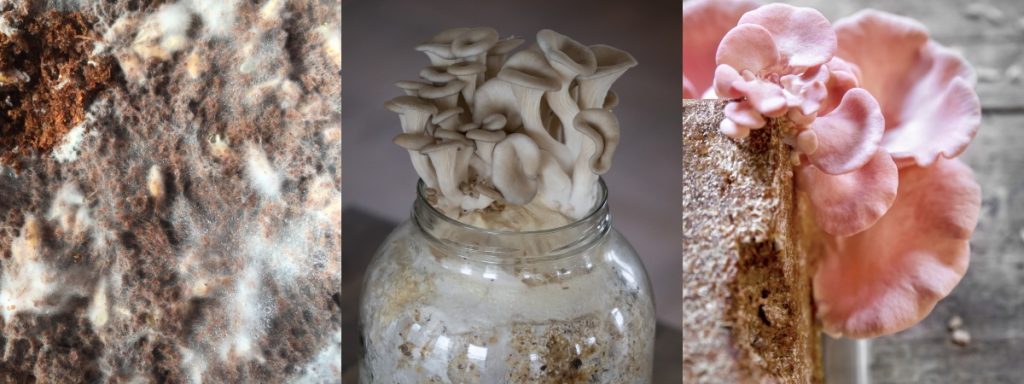
If you want to grow mushrooms as a hobby, we recommend starting with a mushroom grow kit, and once you have some experience, you can try the next step, buying spawn and making your own fruiting blocks.
If you plan on starting a mushroom business and selling mushrooms, we recommend starting with ready-to-fruit substrate blocks rather than trying to learn the entire process at once.
This will allow you to focus on getting your growing conditions right, learning what works for you and selling your mushrooms.
Once you are comfortable with this part of the process, you can move on to buying spawn, preparing and inoculating substrate and making your own fruiting blocks.
2. Impatience / Giving up Too Early
Like any new skill, it takes time to master mushroom growing, and it’s common to end up with a bag of mold on your first couple of attempts.
But don’t give up. Learn from your mistakes and keep trying, and you’ll soon become a competent grower.
The mushroom growing process takes patience and attention to detail at each stage.
Rushing or taking shortcuts often increases the chances of contamination and may prevent the mycelium or fruiting bodies from growing.
3. Assuming You Need to Sterilize Substrate
Many first-time mushroom growers assume they’ll need to sterilize mushroom substrate to grow mushrooms, but this is not the case.
The easiest way to get started is by pasteurizing a substrate or even adding water to hardwood or straw pellets without pasteurization.
During production, hardwood and straw pellets are pasteurized, and once hydrated, you can use them to grow oyster mushrooms and other easy to grow mushroom species.
Pasteurization also has the added benefit of leaving some beneficial bacteria alive.
These bacteria help combat contamination and allow you to inoculate the substrate without needing completely sterile conditions.
Our article, “How to Pasteurize Mushroom Substrate: 5 Easiest Methods.” has more information for you.
4. Lack of Knowledge
There’s a lot of information and some excellent books available on mushroom growing, but the amount of information can be overwhelming with lots of complicated procedures and terminology.
While you don’t need to know much to get started, basic knowledge of the mushroom life cycle and how mycelium obtains the nutrients it needs to produce mushrooms is beneficial.
Knowing how fungi reproduce and grow will help you understand what’s happening during the different phases of the mushroom growing process and increase your chances of success.
Other knowledge that’s vital for success is information on the species you have chosen to grow, including:
- What type of substrate do they need to thrive
- Their ideal growing conditions
- When and how to harvest them
And, even if you’re growing oyster mushrooms the low-tech way, you’ll need to learn a few simple techniques for pasteurization, inoculation and fruiting.

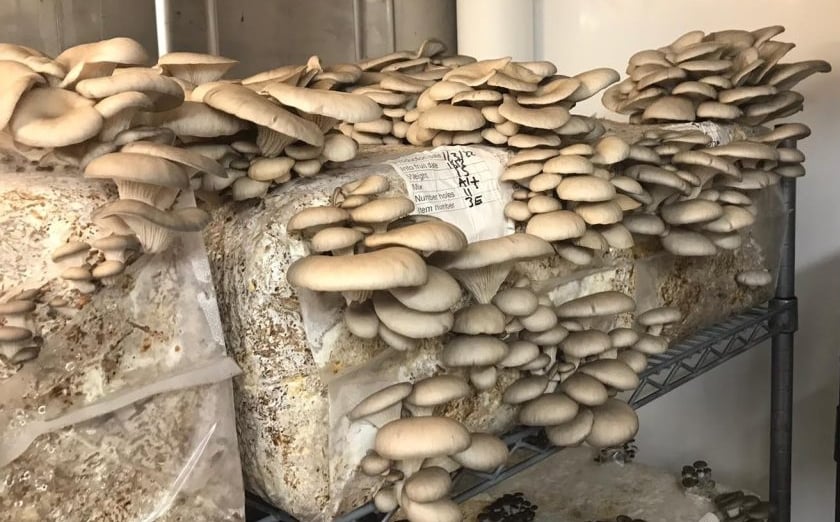
5. Scaling up Too Soon
A common mistake that small-scale mushroom farmers make is increasing production too quickly to a level they can’t keep up with.
It’s easy for growers to become overwhelmed when they scale their business too fast and don’t have the necessary equipment or procedures to cope with larger volumes.
Providing high-quality mushrooms regularly and consistently is crucial when running a mushroom business.
Scaling up too soon may compromise the quality of your mushrooms and customer service.
Our advice is to start small, and if you’re on your own, don’t try to grow more than 5 to 10 kg of mushrooms a week.
Once you have more experience and every part of the mushroom growing process is working smoothly, you can scale up.
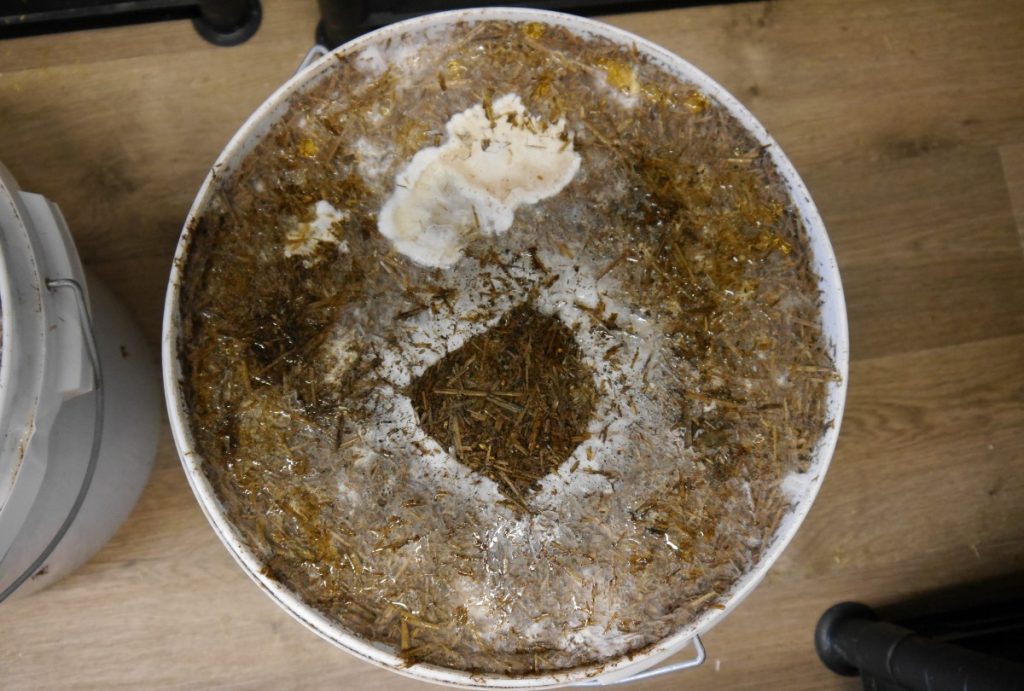
6. Contamination
Mushroom contamination is one of the most common problems faced by mushroom growers and taking steps to avoid contamination is an important part of mushroom growing.
The moist, nutritious conditions you create to grow mushrooms are also ideal for other organisms like bacteria and mold.
These harmful organisms or contaminants often grow faster than mushroom mycelium and substrate contamination is not the only contamination you need to avoid.
Different types of contamination can occur in each phase of the mushroom growing process.
Knowing what to look for can help you spot contamination early and prevent it from spreading.
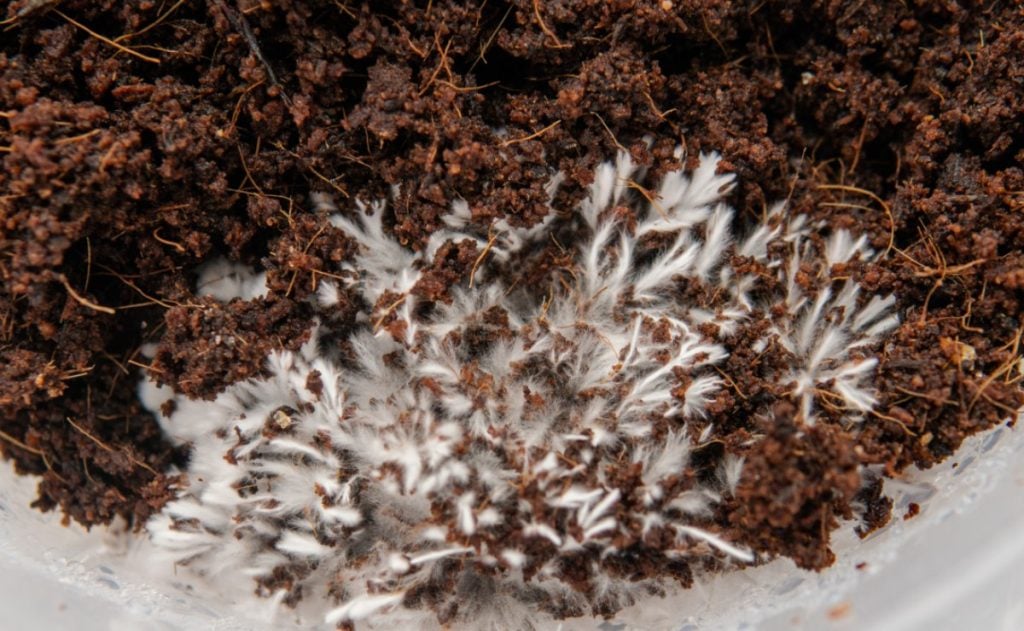
How Do I Know if Mycelium is Contaminated?
Healthy mushroom mycelium is white, and during incubation, you should see fine, white threads of mycelium spreading through the substrate.
But if you see green, orange, gray, brown, black or pink spots or slimy patches, your substrate is contaminated, and depending on the severity of the contamination, you may need to discard it.
How to Avoid Contamination
Contamination is one of the biggest challenges faced by mushroom growers. Even experienced growers sometimes lose crops due to contamination.
Here are some of the things you can do to help prevent contamination:
- Wash your hands regularly
- Always clean work surfaces and tools before you begin
- Use clean substrate materials
- Pasteurize or sterilize the substrate correctly
- Buy good quality spawn
- Use a laminar flow hood or glove box during inoculation to reduce airborne contaminants
- Ensure there’s enough air exchange inside the substrate
- Provide the correct growing conditions
7. Sterilization Errors
Nutrient-rich or supplemented substrates are more appealing to competitor organisms and need sterilization, as pasteurization won’t give the mycelium a big enough advantage.
But, sterilization is where beginner growers make several common mistakes, including:
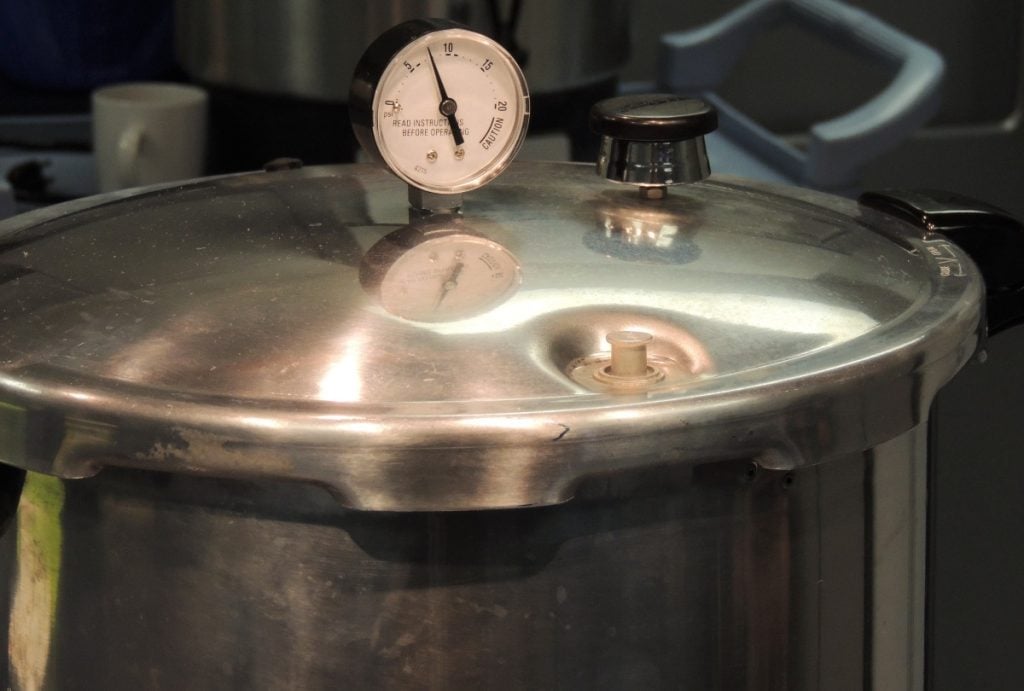
- Temperatures that are not high enough – To sterilize a substrate and kill off all bacteria and fungal spores, you need temperatures higher than 250°F (121°C).
Boiling water or steam is not hot enough, so you’ll need to add pressure to raise the temperature to 250°F (121°C) or above.
Most mushroom growers use pressure cookers or autoclaves to reach these temperatures.
To avoid this mistake, ensure you increase the pressure sufficiently to achieve the required temperature.
- Not enough time – The time required to completely sterilize a mushroom substrate depends on the size of your bags, bottles or jars, as the center of the substrate needs to reach the required temperature.
It generally takes 1 to 4 hours to sterilize substrate blocks in a pressure cooker at 250°F (121°C).
The minimum sterilization time for small blocks is one hour, and for large blocks, 3 to 4 hours.
Don’t rush the sterilization process. Always allow enough time for the amount of substrate you’re sterilizing.
- Lack of clean inoculation conditions – When you sterilize substrate correctly, it kills everything in the substrate, leaving a blank canvas for anything to grow.
This means you need very sterile conditions during inoculation to avoid introducing contaminants.
We recommend using a laminar flow hood during the inoculation process to help prevent contamination.
For more information on how to sterilize your mushroom substrate take a look at our article,”How to Sterilize Mushroom Substrate: A Step-by-Step Guide.”
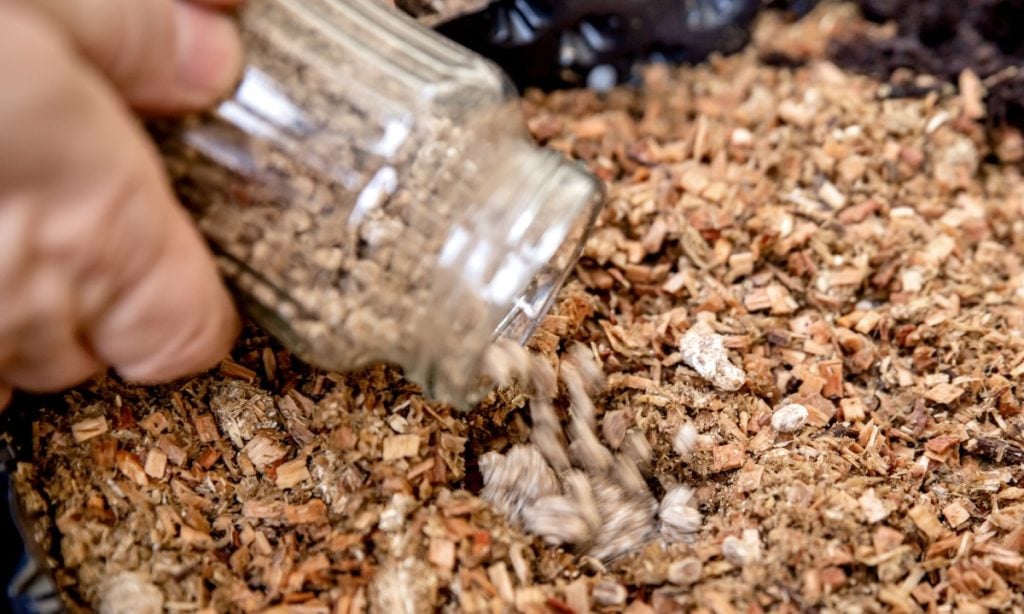
8. Poor Quality Spawn
The quality of your mushroom spawn is important, as inferior strains and old or contaminated spawn may provide smaller yields or even fail to grow.
To successfully grow mushrooms, you need the healthiest spawn possible, and it’s also a good idea to use proven strains.
Always buy spawn from a reputable supplier, ideally one that’s nearby, so the spawn doesn’t have to travel long distances.
Once you receive your mushroom spawn, use it as soon as possible, as it becomes less viable the longer you store it.
9. Inoculation Problems
Inoculation, the process of adding mushroom spawn to your prepared substrate, is another step of the mushroom growing process with common mistakes that you can easily avoid, including:
- Inoculating the substrate before it’s cool enough – This mistake is usually the result of impatience.
After hot water pasteurization or sterilization, you need to allow enough time for the substrate to cool.
If you add mushroom spawn to your substrate while it’s still too hot, the high temperatures will kill the mycelium.
We recommend leaving your substrate to cool for at least 8 hours after sterilization. - Unclean procedure or environment – Inoculating your substrate in a dirty environment leads to contamination.
Always make sure your hands, tools and workstation are clean before inoculation. And, if possible, inoculate sterilized substrate in front of a laminar flow hood to reduce airborne contaminants. - Incorrect amount of spawn – Too little spawn slows down colonization and increases the chances of contamination, while too much spawn can lead to the substrate overheating and killing the mycelium.
Recommended spawn rates vary depending on the substrate you’re using and the type of mushrooms you’re growing. A little research before you begin will help you avoid this mistake.
10. Substrate Issues
For fungi to thrive and produce lots of mushrooms, they need a substrate that provides all the necessary nutrients and the right environment.
Getting the perfect mix of nutrients, moisture and air exchange in a mushroom substrate takes practice, but avoiding common mistakes is a good start.
Here are some common substrate issues to avoid:
- A substrate that’s too dense – A dense substrate with fine particles can sometimes become compacted in the center of large blocks or bags.
Mycelium needs to breathe, and while it can tolerate higher levels of CO2 than mushrooms, it still needs fresh air exchange.
If your substrate doesn’t have enough fresh air exchange, you could end up with patches of uncolonized substrate.
Bear this in mind when selecting your substrate material and growing containers.
Chopped straw and bagasse are good choices for larger containers or buckets as they have a structure that facilitates fresh air exchange.
Sawdust, cardboard, paper and hardwood pellet substrates are better suited to smaller containers like bottles, jars or small grow bags.
- Poor air exchange – During colonization, a substrate needs exposure to fresh air for mycelial growth, but not so much that it dries out.
When using mushroom growing bags, your substrate should get enough air exchange through the breathable filter patches or micro-perforations.
But when growing mushrooms in jars, buckets or monotubs, you’ll need to make holes to allow fresh air exchange.
Growers usually cover these holes with micropore or another breathable material to allow for air exchange while still keeping the substrate moist.
- Too much supplementation – Supplements are nutritious organic substances added to a substrate to provide more nutrients for the mycelium.
Mushroom growers commonly use oat or wheat bran as supplements, but gypsum and alfalfa are also popular.
Supplementing a mushroom substrate helps the mycelium grow faster and produce more mushrooms.
With these benefits, it’s easy to get carried away and add more supplementation, but too much supplementation increases the chances of contamination, even after sterilization.
Growers typically supplement at a ratio of 5-10% dry weight, and you’ll need to experiment to see what works for you. We recommend starting at 5% and working your way up.
- Too much/not enough moisture content – Getting the right amount of moisture in a mushroom substrate takes practice.
If the substrate is too dry, the mushroom mycelium may grow very slowly, or not at all, and won’t fully colonize the substrate.
A substrate that’s too wet encourages the growth of mold and bacteria that prevent the mycelium from colonizing the substrate.
Why is My Mycelium Growing so Slowly?
The most common reasons for slow mycelium growth are substrates with incorrect moisture content or those that don’t have enough air exchange.
But even if your substrate is perfect, other factors can affect the growth rate of mycelium.
Cooler temperatures slow down mycelial growth, and using less spawn when inoculating the substrate will increase the time it takes for the mycelium to colonize the substrate.
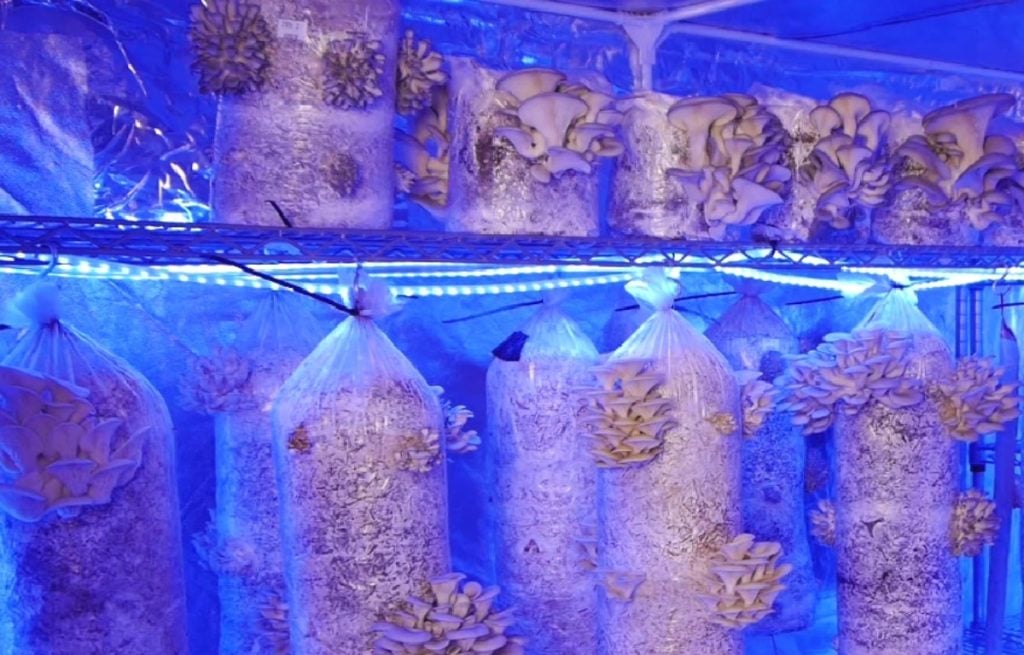
11. Wrong Growing Conditions / Environment / Climate
Mushrooms need specific growing conditions for incubation, pinning and fruiting, which vary depending on the mushroom species you’re growing.
It’s important to check the requirements for each type of mushroom you want to grow because providing the wrong conditions reduces your chances of success.
During fruiting, fungi need the right combination of humidity, light, temperature and fresh air to create healthy mushrooms.
Here are some common growing condition mistakes to avoid:
- CO2 levels that are too high – If the CO2 levels in a fruiting chamber are too high, it affects mushroom growth, resulting in mushrooms with small caps and long skinny stems.
To avoid this, you’ll need to ensure there’s enough fresh air flowing through the fruiting chamber.
Some growers use fans and CO2 monitors to help them get just the right amount of airflow.
- Incorrect moisture levels – Too little humidity causes mushrooms to dry out and stop growing, and too much humidity in a fruiting chamber increases the chances of contamination.
You can often maintain high humidity levels by misting your mushrooms with water twice a day. But growers in hot, dry climates may need a humidity tent or fruiting chamber to help maintain humidity levels.
Avoid fruiting chamber humidity problems by linking your humidifier to a humidity regulator to ensure humidity levels remain in the correct range throughout fruiting.
- Incorrect lighting – Not enough light results in long thin stems and pale-colored mushrooms, and too much light dries mushrooms causing them to crack and wrinkle.
To avoid this problem, try to mimic nature by placing your mushrooms in a spot with indirect natural light near a window away from direct sunlight.
Or, if you’re growing mushrooms indoors in a windowless space or mushroom grow tent, you can use artificial light to provide 12 hours a day of 6500-9000K white or blue light.
- Temperature too high or low for the species/strain being grown – Mushrooms thrive at room temperatures in many places, but different species require different temperatures.
If you live in an area with an extreme climate and want to grow fussy mushroom species or produce mushrooms year-round, you’ll need a fruiting chamber with temperature regulation.
12. Incorrect Harvesting
Even when you’ve made it through the complete mushroom growing process and can finally harvest delicious fresh mushrooms, you’ll need to avoid harvesting too early or too late.
Harvesting mushrooms too early will give you small mushrooms and lower yields, while harvesting too late can result in your mushrooms losing quality, drying out and releasing spores everywhere.
Harvesting too late also reduces the mushrooms’ shelf life, and you’ll need to use them quickly before they go bad.
Knowing when to harvest mushrooms can be tricky. You’re trying to balance letting them grow as much as possible for a good yield while not letting them get too mature.
The ideal point of harvest for each mushroom variety is different and something you’ll learn through experience…usually by harvesting too late a few times.
Generally, the best time to harvest mushrooms is when the edges of their caps are still slightly curled under.
Our article, “The Beginner’s Guide to Harvesting Mushrooms,” has more information for you, and take a look at the video below to learn when to harvest oyster mushrooms.
Final Thoughts
Growing mushrooms is extremely rewarding, and even though you may fail at first, don’t give up.
Lack of knowledge often causes mistakes, but you can grow mushrooms the low-tech way without expensive equipment and don’t need to know everything to get started.
With some knowledge and a little practice, you’ll soon be able to grow delicious fresh gourmet mushrooms.
To learn more about growing mushrooms, visit our Mushroom Growing Hub or sign up for one of our mushroom cultivation courses.
Our step-by-step introductory course shows you how to grow oyster mushrooms on a small scale using simple methods and minimal equipment.


