To successfully grow mushrooms, you’ll need to make sure that you’re using the correct substrate.
Using substrate to grow mushrooms is the equivalent of using soil to grow plants. It’s where the mushrooms will get all of their nutrients while growing.
Just like plants require soil with different properties, different kinds of mushrooms prefer specific types of substrates.
By the end of this guide, you’ll know what a mushroom substrate is and what it’s used for. You’ll know some common mushroom substrate recipes and the preferred substrates of different mushrooms. We’ll also teach you how to pasteurize or sterilize substrate and lots more.
What Is a Mushroom Substrate? What is it Used For?
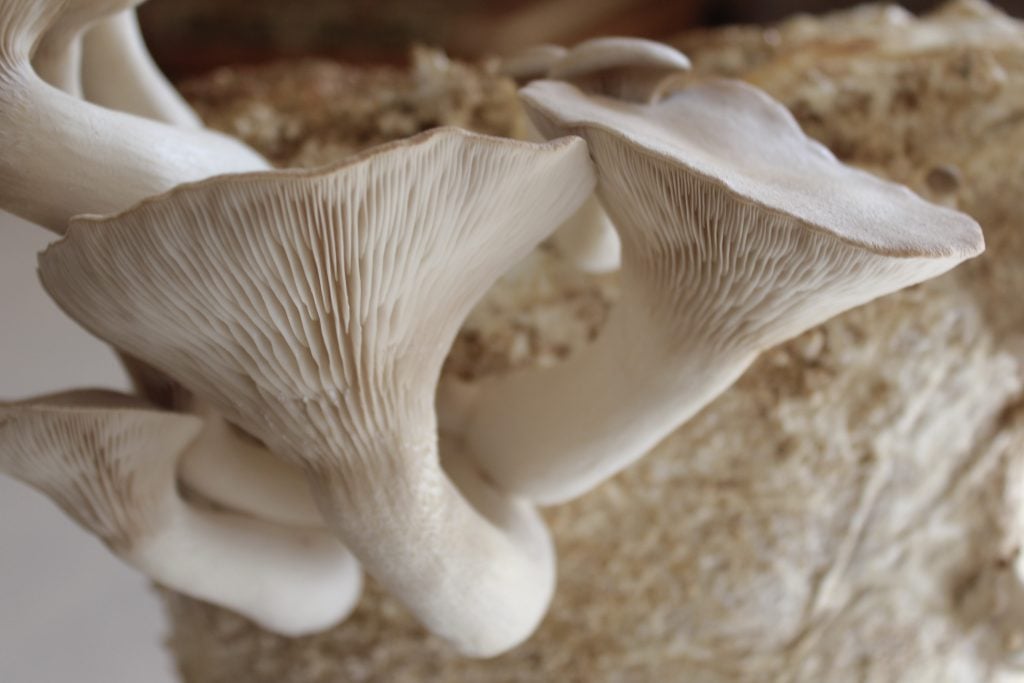
A mushroom substrate is a material that mushroom mycelium can grow and establish itself in. The substrate provides mushrooms with the nutrients, moisture and energy they need to grow and fruit.
There are a variety of different substrates that growers use. Different species of mushrooms have their own preferences. So it’s important to match your mushrooms with the correct substrate to have the best chance of success.
What Makes a Good Mushroom Substrate?
A good substrate is dense in woody, fibrous materials like lignin, cellulose and hemicellulose. (These contain a lot of carbon, which is the main food source for your mycelium.) Here are a few important things to keep in mind when choosing a substrate:
- Your substrate needs to have 1 to 2 percent nitrogen. Most substrates (like sawdust or straw) need to have additional materials added to them to reach this threshold.
- Your substrate needs to contain a small amount of magnesium, potassium, calcium, sulfur and phosphorus. Most raw substrates already contain these minerals, but this does vary depending on where the material came from. You’ll likely need to experiment here to see if you need to supplement with additional minerals.
- Your substrate needs to be slightly acidic, with a PH level of about 5 – 6.5. (Some mushrooms, like oyster mushrooms, can tolerate a PH up to about 8.)
- Your substrate needs to have a good structure to enable air exchange. This is necessary for the mycelium to colonize well.
- Your substrate needs a moisture content of 50-70%.
- . Finally, your substrate needs to have an absence of competing organisms. This provides a blank canvas for your mushroom mycelium to thrive.
If you want to skip the learning curve associated with making your own substrate, then check out our ready-to-fruit mushroom substrate blocks, which come fully colonised and ready to grow.
Preparing Substrate
Before a substrate can be inoculated with mushroom spores or mycelium, first it needs to be prepared. Water will need to be added to the substrate and it may also need to be amended with extra nutrients.
Once that is ready, the substrate needs to be sterilized or pasteurized. This kills off any competing mold or bacteria and gives the desired species of mushroom the best chance at taking hold.
If words like inoculation or mycelium seem overwhelming right now, our article How Do Mushrooms Grow? An In-Depth Explanation will help to get you up to speed.
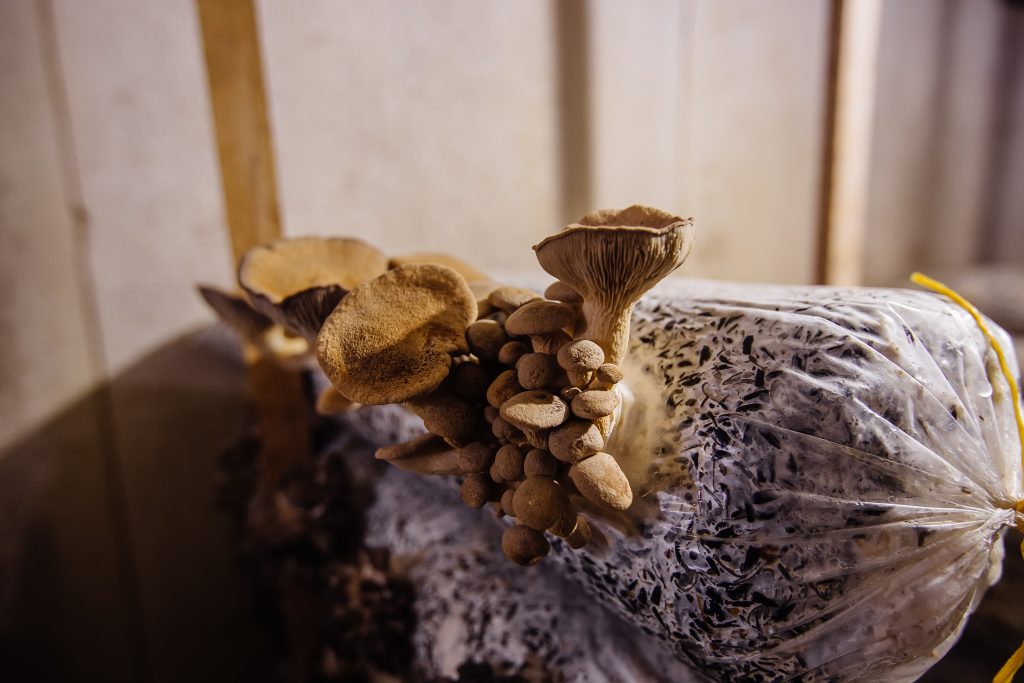
Mushroom substrate can be placed in a variety of containers. For commercial growers, it’s most common to pack substrate into large clear plastic bags. Home growers may prepare mushroom substrate jars, from mason jars or other small containers, or pack substrate into buckets.
Once your substrate is pasteurized or sterilized and in its final container, then it’s time to inoculate with mushroom spawn or spores to start the growing process.
You will know everything has been done correctly when you start to see signs of colonization, or the mushroom’s mycelium growing and spreading throughout the substrate.
The mycelium will need weeks or potentially months to decompose the substrate and spread completely throughout it. Once colonization is completely finished, the entire substrate will be covered in mycelium. At that point it’s ready to fruit.
For more information on the rest of the mushroom growing process, check out How To Grow Mushrooms: The Ultimate Guide.
Common Mushroom Substrate Materials (and Mushroom Substrate Recipes)
There are a wide range of materials that you can use as a substrate to grow mushrooms. Some are fairly conventional while others are a bit newer and more experimental. Here are some of the most common substrates that mushroom growers are currently using.
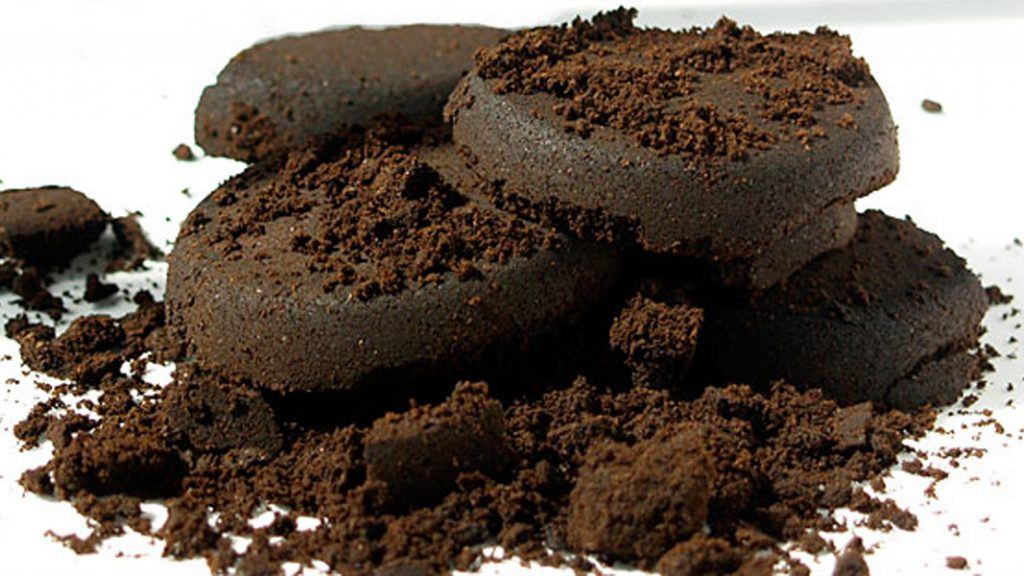
Coffee grounds
Here at Grocycle, we started off by growing on coffee grounds and we’ve been doing it for years ever since. If you contact local coffee shops, they will often save their spent coffee grounds and give them to you for free.
One great benefit is that the brewing process pasteurizes the grounds and you can start growing in them pretty much right away.
The recipe for growing in coffee grounds is also one of the easiest. Simply combine a kilogram of coffee grounds with 100 grams of mushroom spawn. You can optionally add 20% straw to your mix for better air exchange and a higher speed of colonization.
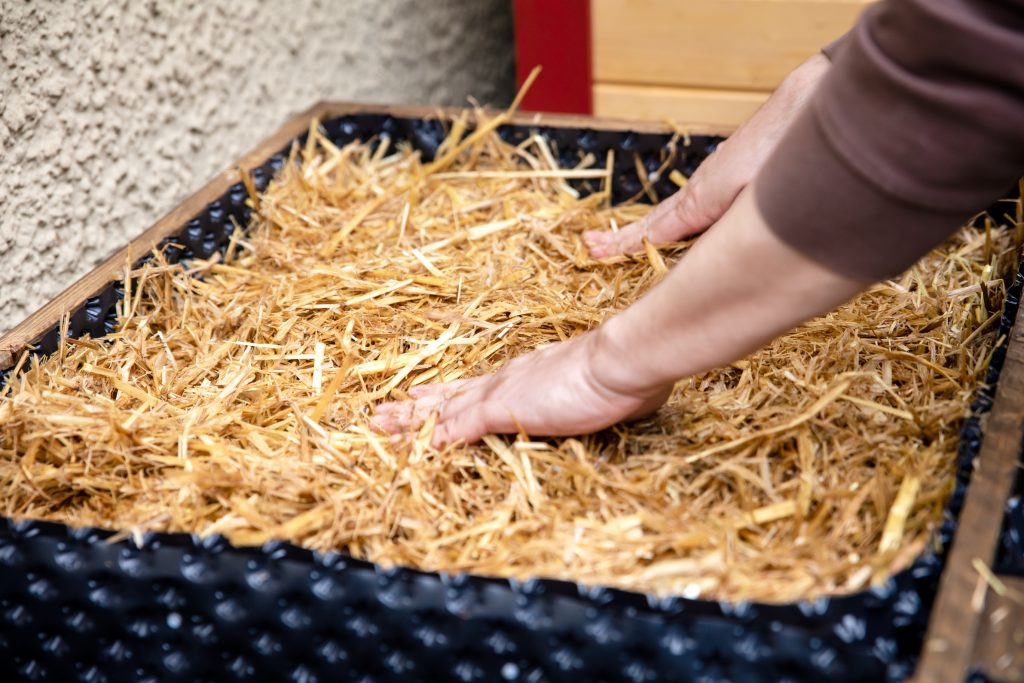
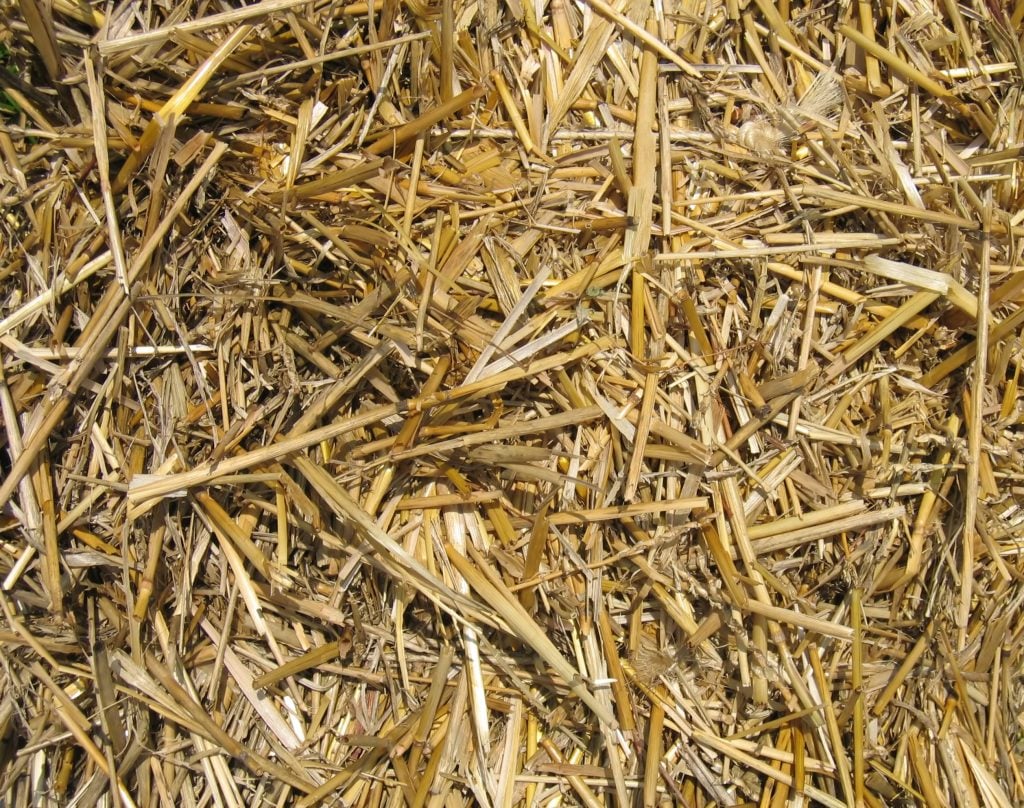
Straw
Straw is another cheap and effective material to use as a substrate. It can be purchased at farm stores or most places where you can find animal feed or bedding. You may also experiment with similar agricultural wastes like corn stalks.
You can either grow in a substrate composed of 100% straw or add supplements to provide additional nutrients.
There are several methods that you can use to prepare straw substrate. Many use chemicals like peroxide or calcium hydroxide, or rely on fermenting the straw for a week or more. We prefer to use a heating method that’s both quick and organic.
Start by cutting your straw into three or four-inch pieces. If you’re working with large quantities of straw, it can be easier to use a weed-whacker in a garbage bin to quickly shred the material.
To pasteurize your straw, put it into a laundry bag or pillowcase and submerge it in 160 degrees F water for one hour. On a small scale this can be done indoors on a stovetop. For larger operations, use a 55-gallon drum and a butane burner.
Once the straw is done, it needs to be drained well. When you squeeze a handful of the mushroom growing substrate, only a few drops of water should come out. At that point it’s ready to inoculate with mushroom spawn.
Coco Coir and Vermiculite
Coco coir is a material made of ground-up coconut shells and husks. It’s available for sale in most garden stores. Vermiculite is a yellowish-brown mineral that’s used to retain moisture and is also widely available at garden centers everywhere.
Mixing these two materials together can create an ideal substrate for growing some types of mushrooms.
Most recipes call for one part coco coir and one part vermiculite.
For a standard brick of dried coco coir (about 1.5 lbs) add eight cups of dry vermiculite, along with 16 cups of boiling water.
Soak the material in a five-gallon bucket for about an hour. Then mix everything up, put the lid back on and allow it to cool for four hours before inoculating.
Be aware that coco coir will expand by five to seven times in volume when you add water, so you’ll end up with a lot more substrate than it initially looks like!
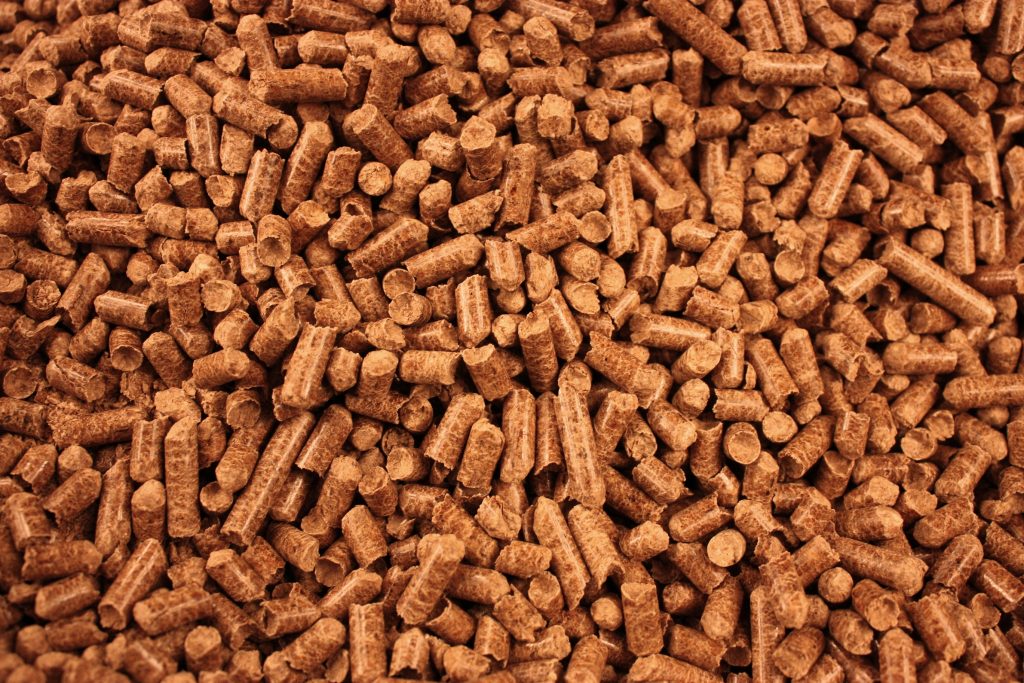
Hardwood Pellets
All forms of hardwoods like maple, oak or beech make a great substrate for several kinds of mushrooms. Just avoid using sawdust or pellets from softwood trees.
People use hardwood pellets for pellet stoves and grills and most hardwood stores carry them nowadays. They are quite inexpensive and in most places you can find a 40 lb bag for $5.
You don’t need the more expensive pellets made from woods like hickory or apple which are used for smoking meats.
To make a 10 pound block of substrate you’ll need 10 cups of hardwood pellets and 2.8 liters of water. Wood pellets don’t need to be sterilized, as the process of turning sawdust into pellets means they’re already sterilized.
However, most growers supplement their hardwood sawdust with bran. Wood alone may not have the nutrients needed to grow some types of mushrooms.
So 2 and a half cups of wheat or oat bran can be added to provide extra nutrients for the mycelium. Adding bran means the whole mixture needs to be pasteurized or sterilized.
Some farmers also mix hardwood pellets with different ratios of soybean hulls for a similar effect. This combination is often referred to as a “master’s mix” and can produce some impressive yields.
Manure
We don’t think that manure is an ideal growing medium for obvious reasons. You don’t want to be handling and heating up animal poop on a regular basis. However for some types of mushrooms, like common button mushrooms, it’s necessary.
You can use horse, chicken, cow, or other types of manure for mushrooms. Recipes usually call for two parts manure with one part coco coir.
Water then needs to be added to reach field capacity. That is basically the amount of water the substrate can hold without extra water pooling at the bottom. If you squeeze lightly, no water should come out and a hard squeeze should produce only a few drops of water.
The whole mixture then needs to be sterilized before it can be inoculated with mushroom spawn.
Logs
Yes, even solid pieces of wood can be considered a substrate! Logs are often used to grow shiitake and other varieties of mushrooms outdoors.
Most hardwood varieties of trees can work including beech, poplar, maple, oak, birch, elm and more.
Ideal logs for growing mushrooms are three to four feet long and four to six inches in diameter.
You don’t want to use wood that has been dead or dying for a while already. Other types of fungi may have already begun to colonize the wood and it can make it harder for your desired mycelium to establish itself.
Freshly cut logs should also be avoided as trees have natural fungi-preventing properties while they’re still alive. It’s best to store freshly cut logs somewhere clean and dry for a few months before inoculating.
To inoculate a log, holes are drilled four to six inches into the log in rows. Use a 5/16ths or 12 mm drill bit for optimal hole size. Rows are staggered two or three inches apart from each other.
Mycelium is introduced into the holes through the use of plug spawn. These are small pieces of wooden dowel that are colonized with mycelium that get hammered into the holes. Holes are then sealed with wax to prevent contamination.
We have an article titled How To Grow Mushrooms On Logs: The Ultimate Guide that goes through the whole process in more depth.
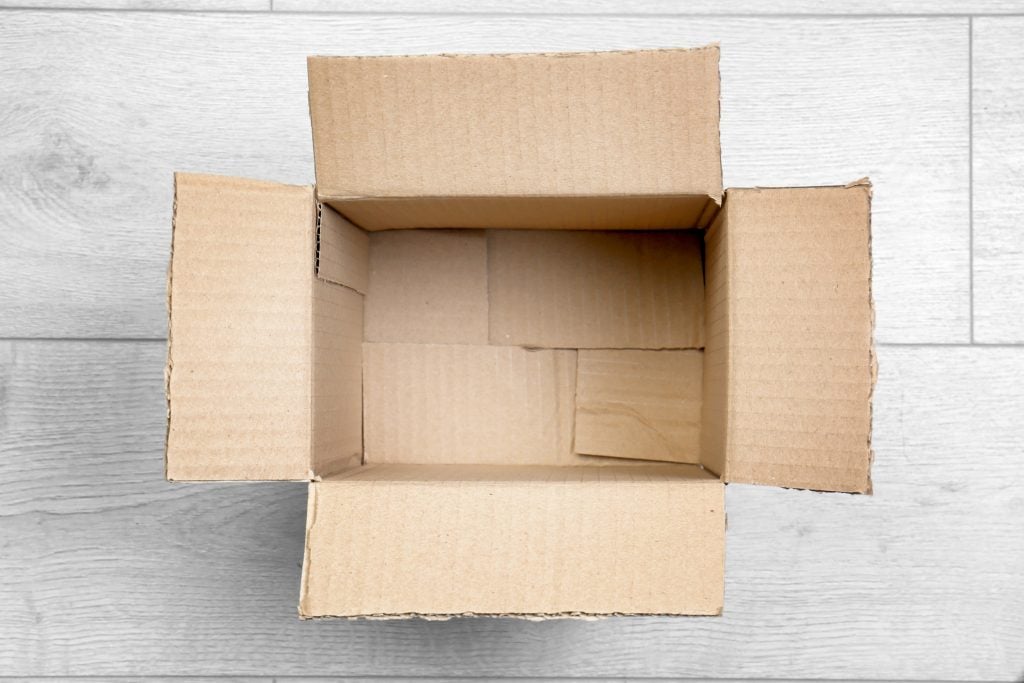
Cardboard
Cardboard is a good substrate for beginners who are just getting started with growing mushrooms at home. It’s cheap and easy to find. Cardboard retains moisture well while the corrugations allow for good air exchange.
Oyster mushrooms and a few other aggressive species will grow on only cardboard, although it’s helpful to mix it with coffee grounds or other supplements for best results.
You can even use cardboard to grow mushroom spawn from the stems of oyster mushrooms that you buy at the grocery store. All you need to do is layer the mushroom between layers of damp cardboard and mycelium will start to grow.
Growing on cardboard is so simple that you don’t really need a recipe. Just collect as much cardboard as you want to use and then soak it in boiling water.
Let your cardboard cool down and squeeze out any excess water and then you’re ready to add mushroom pieces to colonize it.
Some mushrooms will even grow on paper. Try growing mushrooms on a book for a fun and educational way to teach children about mushrooms.
How To Pasteurize or Sterilize Mushroom Substrates
Besides selecting a substrate to use, deciding when it’s appropriate to either pasteurize or sterilize the material is another important part in learning how to make mushroom substrate.
Some people have very complicated mushroom growing setups that involve cleanrooms with positive air pressure and expensive equipment.
However we’ve found that this makes the process a lot more complicated than it has to be, without a significant benefit. So we opt for a more Low Tech Mushroom Farm growing style.
See our article How To Set Up A Low Tech Mushroom Farm for a full guide.
We find that as long as you follow basic procedures for sterilization or pasteurization of your mushroom substrates, the chance of contamination is very low.
Keeping your surfaces clean and wiping them down with 70% isopropyl alcohol during inoculation is all that is needed for most growers.
What’s The Difference Between Pasteurizing or Sterilizing a Substrate?
Both pasteurizing and sterilizing substrate involve heating up the substrate in an attempt to destroy existing bacteria or fungi, but pasteurization heats substrate up to 185 degrees F, while sterilizing exposes the substrate to temperatures higher than 250 degrees F.
Keep reading to learn more differences.
How To Pasteurize Mushroom Substrate
The purpose of pasteurization is to get the substrate fairly contaminate-free and gives any mushroom culture that you introduce a good head-start. There are two ways to pasteurize:
Hot Water Bath Pasteurization
One way to pasteurize the substrate is simply to submerge it in boiling water for at least one or two hours. For most operations, we have found that pasteurization is sufficient to grow mushrooms with minimal risk of contamination.
Cold Water Lime Pasteurization
To do this method, soak your substrate in a bath of hydrated lime-treated cold water for 24 hours. This increases the pH of the water, killing contaminants in the process.
How To Sterilize Mushroom Substrate
Sterilization involves exposing the substrate to temperatures higher than 250 degrees F and also involves placing the substrate under pressure. Sterilization aims to completely eliminate all contaminants that might be in the substrate, both living and currently dormant.
Simply boiling a substrate doesn’t get it hot enough to completely sterilize. For full sterilization, a pressure cooker or similar piece of equipment is needed.
How To Sterilize Mushroom Substrate Without A Pressure Cooker
There are a few ways that you can sterilize a substrate without using a pressure cooker.
A process called tyndallization or fractional sterilization can also be used. This is accomplished by boiling jars or bags for a certain length of time over several days in a row.
The purpose of this is to kill both any microbial life that currently exists in the substrate, as well as any spores that may take a few days before they begin to grow.
Anything that gets your substrate above 250 degrees F for an extended period of time can sterilize. This includes putting your substrate in an oven or autoclave.
However the problem with this is that it cooks your substrate and will completely dry it out. Some substrates may also start to burn. If you sterilize your substrate this way, you’ll need to use distilled water to rehydrate it afterward while still keeping it sterile.
Why Is Pasteurization or Sterilization Necessary?
Pasteurization or sterilization reduce mold and bacteria and help ensure that the thing you’re trying to grow will have the best chance to get established.
The substrates that mushrooms like to grow in are very moist and full of lots of nutrition. While that’s an ideal environment for mushrooms, it’s also the ideal conditions for other things like mold and bacteria to grow.
Bacteria and mold can grow faster than mushroom mycelium can. If left to nature, these contaminants will outperform mycelium and take control of the substrate before mushrooms have a chance to get established in most cases.
So we need to do something to give mushrooms a bit of a head-start and ensure they colonize the substrate before other forms of mold or fungi can.
Pasteurizing your mushroom growing substrate is the equivalent of pulling as many weeds as you can out of the garden before planting vegetables. Sterilization is more like scorching the earth and killing every living plant and seed in it.
Do You Have To Sterilize Mushroom Substrate?
For some varieties of mushroom substrate, sterilizing is necessary to avoid contamination. For other kinds of substrate you can get by with only pasteurizing it.
The most important factor in whether you need to sterilize or pasteurize is the nutrition content of the substrate.
Manure is a perfect example of a substrate that should always be sterilized. By its very nature, it’s already teeming full of bacteria and microbial life.
It might not seem like a very appealing habitat to humans. But since it’s made of partially-digested food, it makes an easy food source for all kinds of different lifeforms.
Any substrate materials that could be considered food items need to be sterilized for similar reasons. This includes rye grain, popcorn, brown rice and wheat berries.
These substrates are all rich in nutrients and all kinds of different fungi and mold like to grow on them. You’ve probably observed in your own kitchen how mold will start to grow on food after just a week or two.
High-nutrient substrates need to be sterilized to give the mushrooms you’re growing a head start.
Less nutritious substrates can be pasteurized instead of sterilized. A good example of this is straw. Straw is the dried stalks of various grain plants after all of the grain has been removed.
While it still has some nutrients left in it, it’s not as nutrient-rich as grains themselves.
Coco coir, logs and cardboard similarly don’t need to be sterilized. Pasteurization is enough to remove most of your mushroom’s competition and give it a head start.
If you come across a new substrate that we haven’t discussed here, just ask yourself one question to see if it’s a material that should be pasteurized or sterilized. Is this something that a wild animal would eat?
Things like vermiculite and straw aren’t an appealing food source for farm animals or even rodents. Meanwhile animals and even humans will eat grains because they’re full of nutrition.
One thing to watch out for is when mixing substrates, also known as supplementing them. You may add a more nutritious substrate to another to make it more nutritious.
For example, adding manure to hardwood sawdust. Hardwood pellets or sawdust wouldn’t normally need to be sterilized. But once you supplement it with another material that makes it easier for mold or bacteria to grow, sterilization becomes necessary.
If you’re in doubt, you can sterilize any substrate to be extra safe. It just requires additional labor and equipment.
Fermentation of Straw as an Alternative to Pasteurizing
One thing mushroom growers can do instead of pasteurizing straw is to ferment it.
This involves submerging a bag full of straw underwater for about a week. If you’re fermenting a whole straw bale you’ll probably need to submerge it for longer, about two weeks.
During this time, the straw starts to be broken down (fermented) by anaerobic organisms. These are types of bacteria that can only survive in environments without oxygen.
As a result, all other organisms that normally require oxygen to survive are killed off. Once the wet straw is drained exposed to air again, all the anaerobic organisms are killed and the straw is essentially pasteurized.
One reason that we prefer to pasteurize instead of ferment is that this technique quite literally stinks. Think about the process of fermenting foods like sauerkraut, kimchi or kombucha.
This is basically the same process but involving straw. If you use this method, you’ll want to avoid getting any of the water on your hands or clothes. The smell is very difficult to get off.
The other downside to fermenting instead of pasteurizing is the time and planning required. When you’re fermenting, you’ll need to predict what your substrate needs will be a week or more out. If you’re pasteurizing, your substrate can be ready to use in just a few hours.
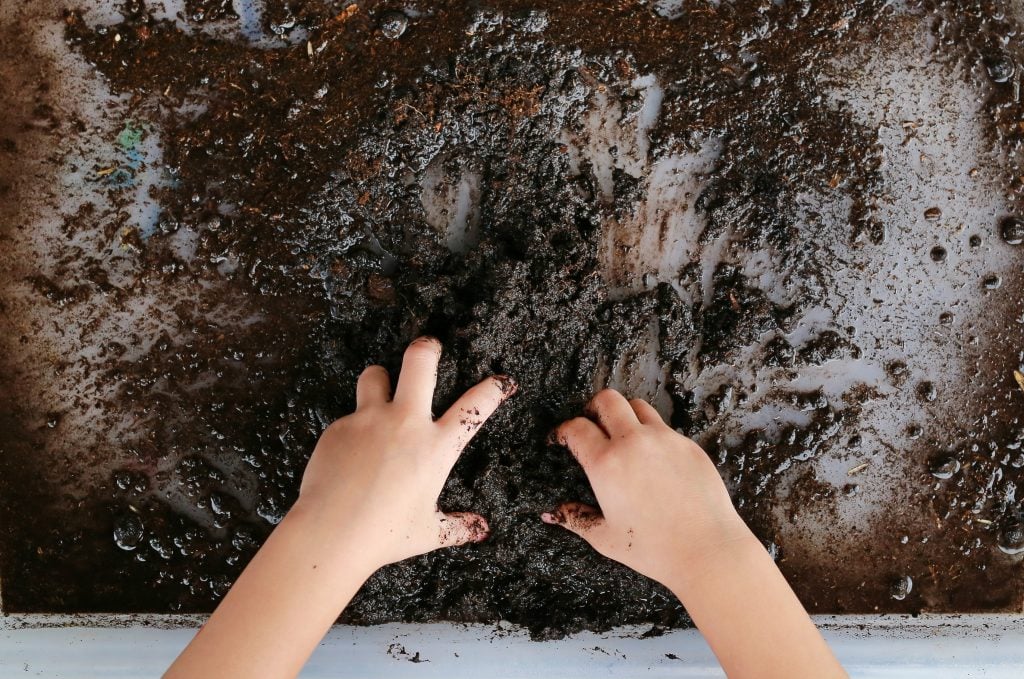
How Do You Mix A Mushroom Substrate?
There’s no easier way to mix substrate than simply mixing it up with your hands. Of course, be sure to wash your hands thoroughly before you begin and consider wearing a pair of disposable gloves.
For bigger batches you can use a large spoon or even a shovel depending on how much substrate you’re working with. You can also use a compost tumbler which is what we use here at GroCyle), or you can use a commercial substrate mixer.
Which Substrates Are Best For Which Types of Mushrooms?
As we’ve alluded to throughout this guide, different kinds of substrates are best suited to different mushroom species.
If you’re asking yourself “What is the best mushroom substrate?” Unfortunately we don’t have one catch-all answer that applies to every situation. If it was that easy, every mushroom grower would just be using one ultimate substrate!
Some species of mushrooms like oyster mushrooms are very aggressive and can colonize a wide variety of materials. Others prefer wood-based substrates.
Some varieties of fungi like truffles even prefer to grow on the roots of living trees, which makes them notoriously difficult to grow in a commercial setting.
Choosing Your Substrate
Choosing your substrate comes down to a few choices:
- How much time and money do you want to put into growing mushrooms? If you want to keep your time and money input low, look toward pasteurized substrates, not supplementing them, and choosing the species that grow well on those substrates.
- This is our approach at GroCycle and it scales up very well.
If you want to grow a wide range of gourmet mushrooms on a commercial scale and are okay with investing more time and money, look toward supplemented materials and having a method to steam and sterilize the materials.
That will enable you to branch out into many types of mushrooms.
- What substrate is available to you? Logically, you’ll want to choose a substrate that’s available to you locally. For instance, if straw isn’t abundant where you live, you may try coco coir.
Low Tech Mushroom Substrate
If you do choose to go the low tech route to grow you mushrooms, good substrate options include straw, straw pellets, sawdust pellets, sugar cane mulch, and coffee grounds. We’ll explore several of these in more detail below.
Straw
Straw isn’t very nutritious, so it’s not well suited for all varieties of mushrooms. However it can be quite effective for growing oyster mushroom species.
Other species of mushrooms that can grow on straw include agaricus species, wine cap (also known as garden giant), shaggy mane and enoki.
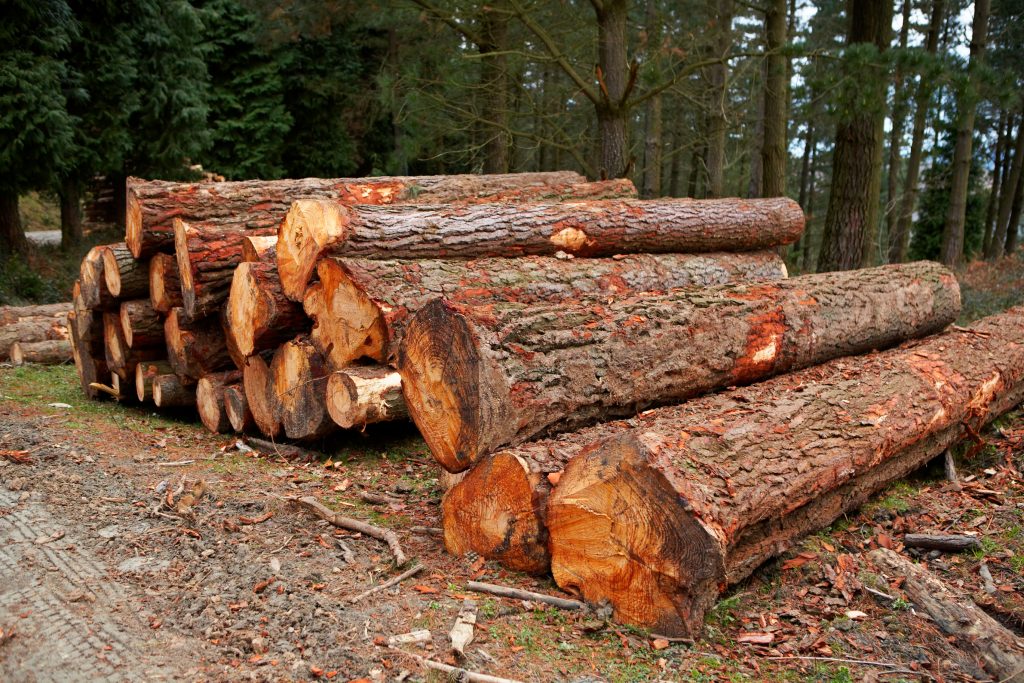
Logs or Sawdust
There are a wide variety of edible and medicinal wood-loving mushrooms. These include shiitake, maitake, turkey tail, lion’s mane and reishi. Some types of oyster mushrooms will also grow well on wood. Particularly king oyster mushrooms, which prefer wood over straw as a substrate.
Most mushrooms that grow well on logs will also grow on hardwood sawdust pellets or vice versa, since both are wood-based substrates.
Remember that if you’re using logs, you’ll want them to be fairly fresh cut. Logs that are already dead or rotting may be home to wild fungi and molds already.
Logs don’t need to be sterilized before use. But keep in mind that since they’re a more natural mushroom growing substrate material, they may be home to other species of fungus that could produce poisonous mushrooms. This is rare.
But make sure that you know how to identify the species of mushroom that you’re growing and take care that other types aren’t mixed in by mistake.
Supplemented Sawdust
If you’d like to grow a wider range of mushrooms on sterilized substrate, try a supplemented sawdust mix of 60% hardwood sawdust, 20% wood chips, 18% bran and 2% gypsum.
Masters Mix
Masters Mix, developed at Earth Angel Mushrooms is another simple substrate option that consists of 50% hardwood pellets and 50% soybean pellets. It tends to result in very good yields, but needs to be sterilized.
If you’re in the United States, you can buy bags of this already made from Mushroom Media Online.
Manure
You might think that manure would be an ideal growing medium for mushrooms. However most species of edible mushrooms don’t actually like it. The main exceptions are button, crimini, and portobello mushrooms.
These are actually all the same species of mushroom at different life stages.
Coffee Grounds
We only recommend growing oyster mushrooms on coffee grounds. This is a tried and tested combination.
A few other species of mushrooms like shiitake may grow on coffee grounds as well, but might not produce as good of a harvest compared to growing on hardwood.
Mixes
Some materials like vermiculite have no nutritional value on their own. However they may be mixed with other materials like coco coir or grain to provide better moisture retention or other qualities.
Experimenting with different substrate mixes is something that you can try once you’ve been growing mushrooms for a while.
However when you’re just learning how to make mushroom substrate, we recommend sticking with a single substrate to begin with until you can produce a consistent harvest.
Supplementing Your Substrate
If you’re thinking of growing mushrooms commercially, you may want to supplement your substrate to increase the yield of mushrooms. Most commonly, supplement materials are bran or seed derivatives.
Or, you can get them in pellet form as high-protein animal feed. The latter is preferably since it’s already pasteurized.
You’ll need to experiment to see how much supplementation to add, and the amount will also depend on whether the material you’re adding is sterilized. We recommend starting at 5% and working your way up.
What To Do With Spent Mushroom Substrate
If you’ve been growing mushrooms for any length of time, you’ll soon end up with big piles of spent substrate. This might leave you asking yourself “What can I do with an old mushroom substrate?” The most common choice for mushroom growers is to compost it.
It can be mixed into an existing compost pile. Or you can create a compost pile out of just used substrate that will naturally decompose and break down into a rich compost over time.
If you’ve got a garden, you can even mix the used substrate right into the soil.
Some large commercial growers will even process their mushroom substrate and sell it as compost to home gardeners.
If you’re lucky, you may get a few extra flushes of mushrooms from your compost pile or garden. Some species like oyster mushrooms can even take hold and spread and you’ll get free mushrooms growing in your garden year after year.
Some of your spent substrate can also be used to inoculate a new batch of substrate. That way you won’t need to buy mushroom spawn from suppliers and can have a truly self-sufficient operation. This kind of Low Tech Mushroom Farm may lead to slightly higher incidents of contamination though.
If you’re a farmer with lots of space then it’s easy to dispose of used substrate on your own. But what about people who are growing mushrooms in the city?
Nowadays many cities have a free composting program. You may be able to dispose of the used substrate in compost bins that get emptied each week.
Or you may need to drive the used substrate to a city depot that handles yard waste, compost and other recyclables to drop it off yourself.
If your city doesn’t offer any way to recycle your substrate, you can reach out to nearby farmers. They may want to add your used substrate to their own compost piles and will let you drop it off for free.
There have even been studies on using mushroom substrates as an ingredient in feed mixes for chickens and cattle.
Final Thoughts
Selecting the right substrate and preparing it correctly for the specific type of mushroom that you’re growing is critical for your success.
Some species like oyster mushrooms can grow on a wide range of substrates including straw or even cardboard. Other species are more particular and will only produce high yields when grown on a specific substrate.
Once you’ve selected the correct substrate you’ll need to either pasteurize or sterilize it to minimize the risk of mold and bacteria growth. This part of the process helps give your mycelium a head-start in getting established.
After your mushrooms are done fruiting, you can dispose of spent substrate by composting it.
Now you know how to create an ideal substrate for your mushrooms. It’s time to get growing!


