Have you ever wondered how you can produce your own mushrooms at home? Growing mushrooms on cardboard is one technique that is worth considering. Especially for beginners.
Many people think that a complicated laboratory setup with a sterile cleanroom is necessary to grow mushrooms. But that simply isn’t the case!
Small amounts of DIY mushrooms can be grown at home in a straightforward low-tech way. First you use the stem butt mushroom method to grow mushroom spawn on cardboard.
Then you can use the spawn to inoculate larger mushroom growing bags filled with cardboard.
Why Use Cardboard to Grow Mushrooms?
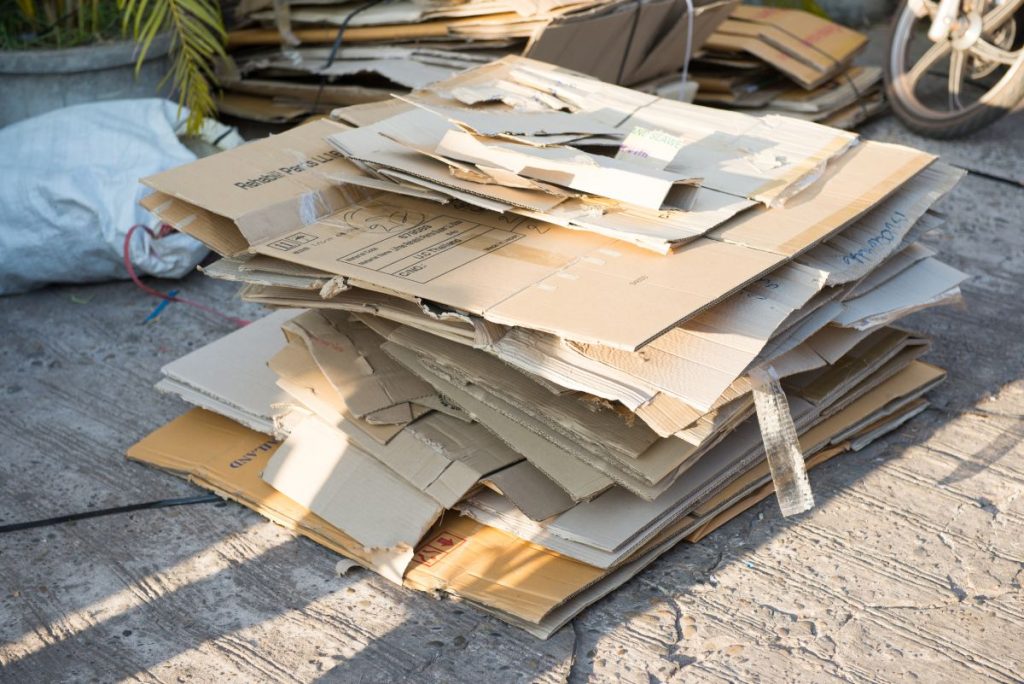
Cardboard is a cheap and plentiful material that everybody has access to. If you go into most shops and ask the staff, they will be happy to give you as many empty cardboard boxes as you want, free of charge.
This is a common request from people who are looking for free boxes when moving homes, so it’s something most employees will be used to hearing.
The boxes would just end up being compacted and recycled anyway, so they aren’t losing anything by giving them away.
Growing mushrooms indoors on cardboard is more environmentally-friendly compared to other substrate materials that you could use.
You’re re-using a product that already exists and adding another purpose to its life cycle before it gets destroyed.
Compare this with growing mushrooms on grains, which could otherwise be used to feed humans or animals instead.
Although cardboard is a bit bulky, it’s very lightweight and easy to move around compared to bags full of grain or coffee grounds.
Not every species of mushroom will grow on cardboard. But for those that will, we recommend giving it a try.
Is Cardboard Safe to Grow Mushrooms On?
Cardboard is generally considered safe to grow mushrooms on. Both cardboard and newspaper have been used by gardeners for decades to create compost and mulch for their gardens.
Farms can use cardboard or newspaper in their growing medium and still be considered organic, provided that:
- It does not contain glossy or colored inks. (Black ink is generally okay.)
- It is not treated with waxes, fungicides or other materials that make them water or grease-resistant.
Brown corrugated cardboard is made of recycled materials. Either existing paper products, or waste products from the lumber industry like sawdust.
Cardboard is unbleached and usually not treated with chemicals, so it’s considered one of the least processed paper products available.
Cardboard containers that come into contact with food are required to use food-safe dyes, often made from soy or other natural materials.
To be safe, we recommend only using plain large cardboard boxes that are used as shipping containers and have minimal ink on them.
You want to avoid smaller cereal boxes or other containers with colored ink which could contain heavy metals in their dyes.
If you want to be extra careful, you could always cut out the pieces of cardboard with ink on them and only use the areas of cardboard without any printing.
How Do You Grow Mycelium on Cardboard?
At this point, it’s important to distinguish between using cardboard to clone mushrooms and create mushroom spawn versus using cardboard as your main bulk substrate (or growing medium).
Both of these are possible, they just have different aims.
Growing mushroom spawn on cardboard is a simple low-tech way to create small amounts of mushroom spawn using the leftover stems from fresh mushrooms.
Growing mushrooms on cardboard substrate is a simple low tech way to grow the actual mushrooms using cardboard as the main bulk substrate.
In this next section, we will be briefly discussing how to use cardboard to make spawn using the stem butt method. Then we’ll explain how to use cardboard as your main growing substrate.
Trying to grow mushrooms for the first time? Our article How To Grow Mushrooms: The Ultimate Guide will help.
How Do I Make Cardboard Spawn?
Growing mushroom spawn on cardboard is a fairly straightforward process, even for beginners. In fact it can be a great experiment to get kids involved with if you’re trying it at home!
Supplies Needed:
- Fresh oyster mushrooms (You can eat the tops of the mushrooms, but keep the stems)
- Several large pieces of cardboard
- A large bucket or pot
- Water (tap water will work, but distilled or filtered water with chlorine removed is ideal)
- A plastic container
For a full overview with step-by-step instructions, see our article How To Grow Your Own DIY Mushroom Spawn.
Follow the guide linked above if this is your first time creating mushroom spawn on cardboard.
As a quick overview, you’ll want to rip your cardboard into small pieces. Then pasteurize it with boiling water. After the cardboard has cooled, you can layer it in a container with fresh oyster mushroom stem butts.
Then all you need to do is put your spawn in a cool and dark place for two or three weeks until it has fully colonized.
How To Grow Mushrooms on Cardboard
Once your mushroom spawn is fully colonized, there are a couple of different options.
If you’re mostly doing this as a hobby or science experiment, you can simply open the lid of the container and mist the mushroom spawn with water until tiny mushrooms begin to grow.
This is the easiest way to start growing a few mushrooms without any additional steps. However the yield will be very low.
We’re guessing that you want to grow a more substantial amount of mushrooms. Enough for you and your family to eat.
In this case, you’ll want to transfer our mushroom spawn into larger grow bags filled with more cardboard.
Below are the steps needed to set up your grow bags and start growing.
Step 1: Examine Your Spawn For Any Contamination
There isn’t much that you can do if contamination has taken hold of your mushroom spawn. You just have to toss the whole thing out and try again.
Take a minute or two to examine your mushroom spawn before you start to prepare your grow bags.
This will save you headaches and lots of wasted time if contamination is present. Adding contaminated spawn to your grow bags will almost certainly lead to moldy and unusable grow bags.
You want to be on the lookout for any strange green or black spots. If these are present, then your spawn has most likely been contaminated by mold and it needs to be thrown out.
A bit of yellow or brown in your mushroom spawn is not necessarily cause for concern. Most often this is simply the metabolites or waste byproducts that mycelium produces as it grows.
If your spawn is white and fluffy, then you’re ready to proceed to the next step.
Step 2: Prepare Your Cardboard
Hopefully you have lots of cardboard left over from when you prepared your mushroom spawn. If not, spend the two or three weeks while your spawn colonizes to collect more clean cardboard for your grow bags.
Before we can add cardboard to our grow bags, we need to break it up into smaller pieces. Plus it needs to be pasteurized to kill off as many contaminants as possible.
Cut or tear up sheets of cardboard into smaller pieces. Anywhere from 1 to 4 inches (3 to 10 centimeters) is a good size.
After you’ve got your cardboard broken down to a more manageable size, it’s time to pasteurize it.
Since we are dealing with such a large amount of cardboard, you probably won’t be able to fit it all into a large pot any more. Instead, we recommend using a 5 gallon bucket (approximately 20 liters.)
You can find these at most hardware or DIY stores for just a few dollars (or pounds.)
Place your shredded cardboard into the bucket. Then pour boiling water over it, put the lid on, and let it sit until it has cooled to room temperature.
If you absolutely can’t get your hands on a bucket or other large container, you can still pasteurize your cardboard in a large pot and simply do multiple batches. This has a higher risk of contamination though.
This is because you’ll be transferring your spawn between additional containers, and it will spend more time exposed to air where it may come into contact with mold spores and other contaminants.
So if at all possible, we recommend pasteurizing all of your cardboard in a bucket in a single batch.

Step 3: Fill Your Grow Bags
Once your cardboard has cooled, you can prepare your mushroom grow bags.
You can find purpose-made mushroom grow bags online. See our article How To Grow Mushrooms in a Bag for detailed information on what we look for in quality mushroom bags.
Squeeze the excess water out of your cardboard and layer it in your grow bag with mushroom spawn.
For growing oyster mushrooms, we have found that the optimal ratio is approximately 10% mushroom spawn and 90% cardboard in our grow bags.
This provides enough new substrate to give a good final yield on the bag. But it’s also enough spawn to give your mycelium a good chance at fighting off any potential contaminants.
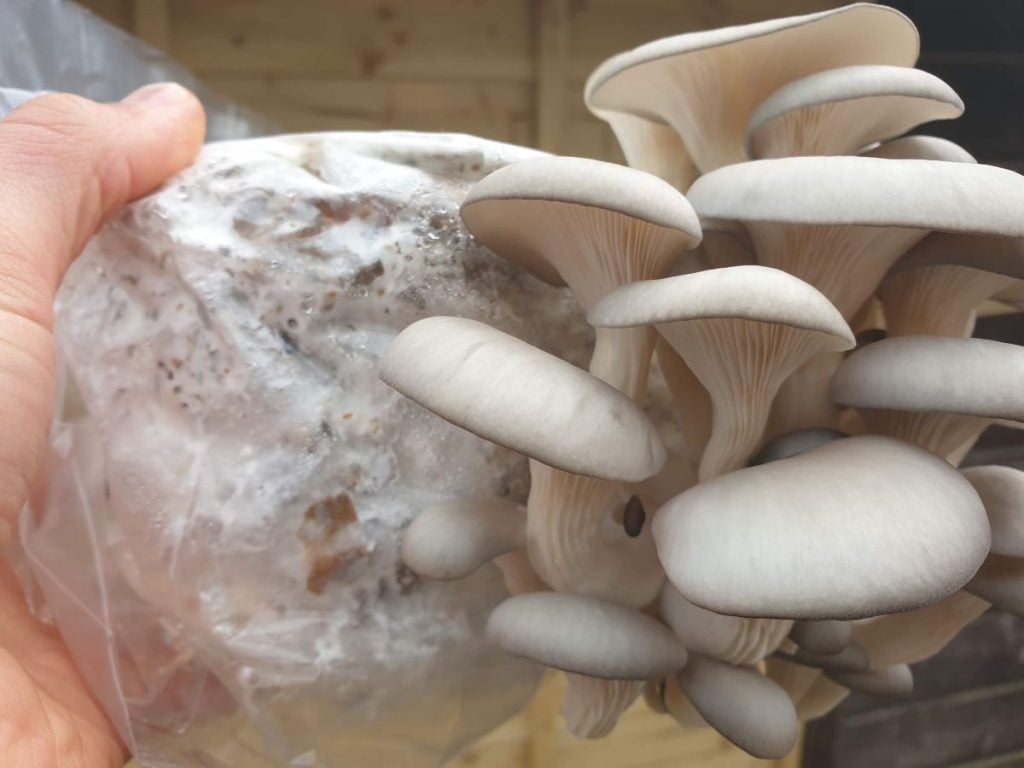
When you’re done, you should have a full bag. It should look like a lasagna made of alternating brown cardboard and white mushroom spawn layers.
Tie your bags off securely, as the top will remain closed for the rest of the grow cycle.
Once your bag is prepared, you’ll do the same thing as when you created your mushroom spawn. Put it away in a dark place for two or three weeks to incubate.
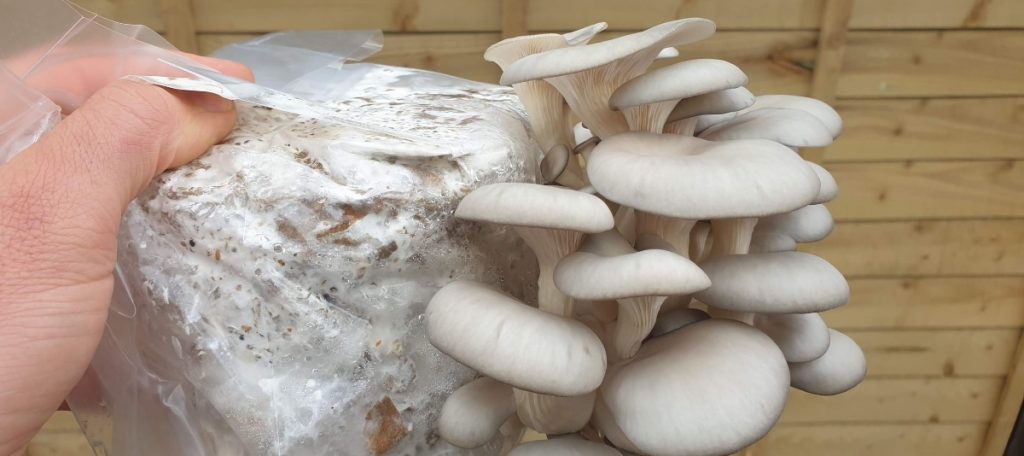
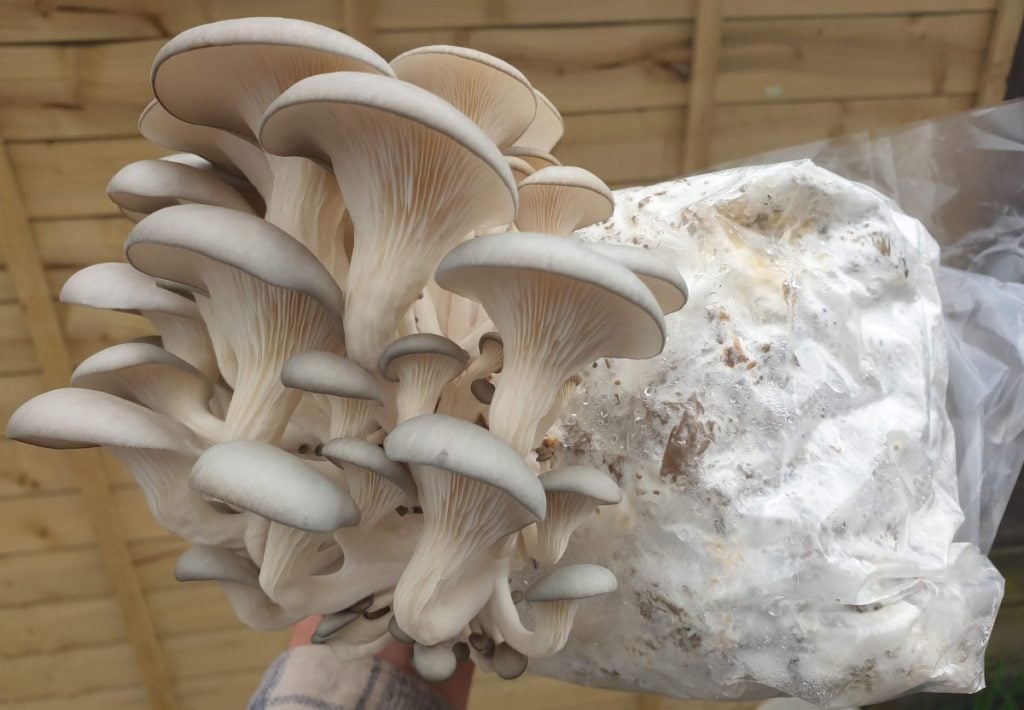
Step 4: Fruit Your Mushroom Grow Bags
Once the contents of your grow bags are fully white and colonized, you’re ready to fruit them.
Again, if your bags start showing signs of black or green mold at any point, they have become contaminated. You’ll need to throw them out and start over.
Particularly if you’re growing mushrooms commercially, it’s not worth risking the health of your customers with contaminated bags.
The good news is that if your bags have successfully colonized without contamination, most of the hard work is now over!
All that’s left to do is to cut a hole in the bag and keep your mycelium moist while it fruits.
Take a sharp knife and cut a large X across one side of your grow bag.
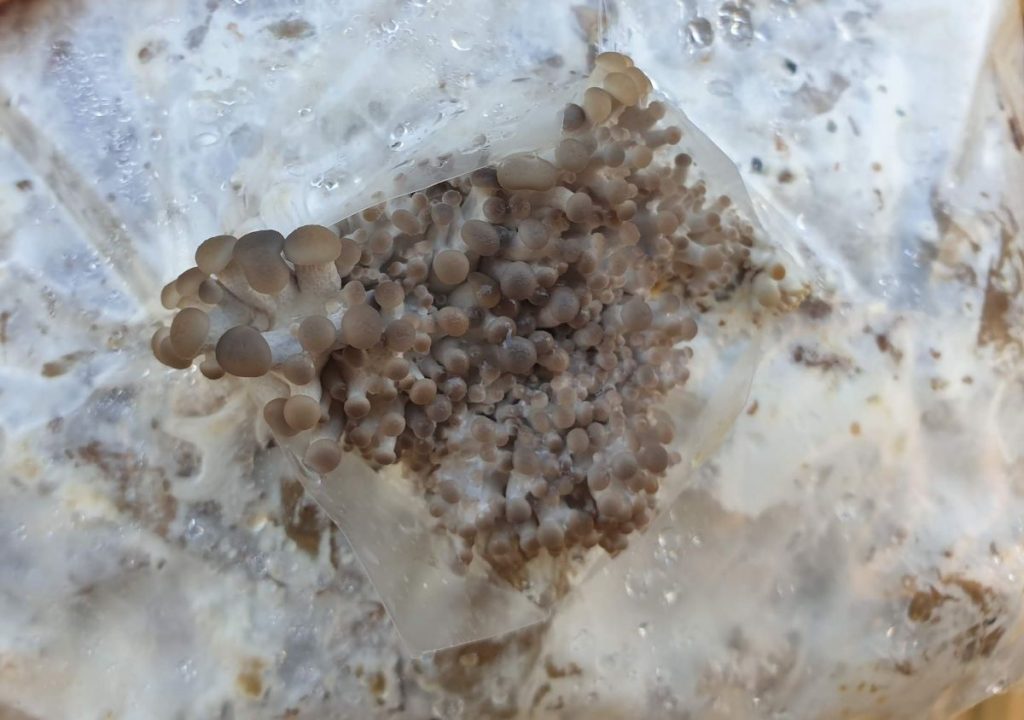
You will need to pull back the plastic and use a spray bottle to mist your mycelium on a daily basis. You may want to check multiple times per day just to ensure that your bag isn’t drying out.
After a few days, you should start to see pins forming around the opening in your bag. As long as you continue to spray it with water daily, you should have fully-grown mushrooms in just seven days.
Step 5: Getting Multiple Harvests From Your Mushroom Grow Bag
There are often still lots of nutrients left in your substrate after the first flush of mushrooms are harvested. You can get a second crop of mushrooms from larger bags.
So don’t throw your bags away as soon as you get your first harvest!
Simply flip your bag over and cut another X on the opposite side, just like you did the first time. Place your bag with the freshly opened side down in a pan filled with water and let it soak for a few minutes.
Then simply follow the same steps as above, spraying your bag with water daily until it fruits again.
Note that your second crop might take slightly longer than the first. You may also get less yield than the first time around. But it’s still enough extra mushrooms to be worth doing.
After your second harvest, you can compost the contents of your mushroom grow bag. Mushroom compost is great to add to your garden.
Pros and Cons of Growing Mushrooms on Cardboard
As with any food production technique, using cardboard to grow your own mushrooms comes with its own advantages and disadvantages.
In general, using cardboard is a great way to try growing mushrooms at home. But it isn’t necessarily the best choice for commercial mushroom operations.
Pros of Growing Mushrooms on Cardboard
- It’s cheaper than other methods. It’s easy to get free cardboard from local shops in your area who are just going to throw it away or recycle it.
If you want to grow on grains or other types of substrate, you’ll need to pay to buy it.
- It’s a great way to learn more about mycelium. It’s one thing to read about how mushrooms work and how mushroom mycelium colonizes a substrate. It’s totally different to actually see it happening before your eyes.
Growing oyster mushroom stem butts on cardboard is an accessible way for anyone to try growing mushrooms at home.
- More control over varieties. If you order mushroom spawn online, you may not know exactly what variety you’re going to get.
When you buy oyster mushrooms from the store and grow from stem butts, you know exactly what the mature mushrooms are going to look and taste like.
Cons of Growing Mushrooms on Cardboard
- It takes more time. If you order a GroCycle mushroom kit, you’re getting a substrate that has already been fully colonized.
Trying to start your own mushroom spawn from stems will add several more weeks before you see your first mushroom harvest.
- You need to learn a new process. As with anything, learning to grow mushrooms is a skill. There is a whole process and set of terminology that you’ll need to learn to do it on your own.
- Quality can be unreliable at first. Until you get familiar with the process, you should expect a less reliable harvest if you’re growing your own mushrooms on cardboard.
Using a GroCycle mushroom kit is fairly foolproof, whereas trying to create your own mushroom spawn has a higher risk of contamination and other problems.
- Cardboard contains less nutrients than other substrates. Other substrates like grains and rice, or even coffee grounds, are full of more nutrients than cardboard.
Since cardboard is essentially made from sawdust or other waste products, there is a limited amount of nutrition that mushrooms can extract from it and use to grow.
(Low nutrient content also lowers risk of contamination, so you might consider this a partial advantage too.)
- Low yield. While you can grow mushrooms on cardboard, it won’t produce the best results. As discussed above, cardboard is low on nutrients.
You’ll grow more mushrooms per bag if you use a more nutrient-rich substrate like coffee grounds. - Can be more hassle. Shredding up cardboard or breaking it into smaller pieces can be time-consuming work in large quantities.
Since cardboard is so bulky, it can also be a pain to transport large amounts of it. 10 pounds (4.5 kilograms) of cardboard is probably enough to fill up your car.
Compare that to the same weight in grain or brown rice which can be transported in a small bag and which will triple in volume when wet.
What Kind of Mushrooms Can Be Grown on Cardboard?
Cardboard can be used to grow a fair number of different mushroom species, but not all.
Growing oyster mushrooms on cardboard is what we recommend. Oyster mushrooms are an aggressive wood-loving species that can get all the nutrients they need from cardboard.
There is a lot of life left in the stem of an oyster mushroom and the mycelium is quick to colonize cardboard.
Growing shiitake mushrooms on cardboard is also possible, but tends to be a bit more difficult. While shiitake mushrooms are a wood-loving species like oysters, they are a bit less aggressive and need a more nutritious substrate to grow.
The mycelium of shiitake mushrooms grows more slowly than oyster mushrooms. That makes it easier for mold and contaminants to outcompete shiitake when it’s grown on cardboard.
You can certainly try to grow some shiitake on cardboard using the same method we’ve laid out above.
Look for mushrooms in the store with particularly white and fluffy mycelium already developing at the base of the stems for the best chance of success.
Overall, you’ll have better luck trying to grow shiitake mushrooms on a sawdust substrate.
Growing button mushrooms on cardboard is unlikely to be successful. Button mushrooms don’t grow on wood in nature. Instead, they prefer a substrate of straw mixed with horse manure. So if you’re looking to grow button, cremini or portobello mushrooms, we recommend looking into these substrates instead of trying to grow on cardboard.
When in doubt about whether a particular species of mushroom will grow on cardboard, think about where it likes to grow in nature.
Any mushroom that will grow on a tree or dying logs like oyster mushrooms or lion’s mane is likely to be successful with cardboard.
See our article A Complete Guide to Mushroom Substrates for more details.
Common Issues and Troubleshooting
There are a few common problems that beginner mushroom growers tend to run into when growing on cardboard for the first time.
- Contamination. Unless you’re fully sterilizing your substrate and following proper protocol, the risk of contamination is always there.
However you can greatly lower the risk. Wash your hands with hot water and soap throughout the mushroom growing process.
Wash your tools and containers with boiling water or alcohol. Soak your substrate in boiling water before inoculating it.
- Too wet or too dry. While too much moisture is a breeding ground for mold and bacteria, being too dry is also a problem.
Mycelium needs moisture to grow and produce mushrooms. Your substrate should be slightly damp at all times, but not soaking wet.
- No air exchange. Mushrooms need to take in oxygen and give off carbon dioxide just like animals do. If you try to grow them in an airtight container, the CO2 will build up and they will suffocate.
Your container needs some kind of air exchange. Whether that’s poking holes in it, or opening the container once a day to air it out.
- Wrong growing conditions. Mushrooms that prefer to grow on straw won’t do well on cardboard and vice versa.
Species that grow in warm tropical environments won’t grow well if temperatures are too low. Try to mimic the environment that your specific type of mushroom likes in nature.
Final Thoughts
Using cardboard is a great way to grow mushrooms for the first time. Growing oyster mushrooms on cardboard is made possible with a low-tech setup that doesn’t require a sterile lab environment.
The process is easy and you won’t need many supplies. With some free cardboard and a pack of oyster mushrooms from the grocery store, you’re on your way to your own mushroom harvest.
Growing mushrooms on cardboard does have some downsides to consider. There is a higher risk of contamination. Your harvest will also be smaller and less reliable.
But once you successfully grow your own oyster mushrooms, you can continue the process indefinitely by using stems from your mushrooms and fresh cardboard to continue creating new batches of mushroom spawn.


