If you enjoy the unique flavors of delicious gourmet mushrooms and have a little mushroom-growing experience, you should try growing shimeji mushrooms.
They’re a little more challenging than easy-to-grow species like oyster, shiitake and lion’s mane as they’re a little fussier and take longer to grow.
But many growers feel they’re worth the wait, and mushroom farmers worldwide are cultivating shimeji mushrooms indoors in bags and bottles or outdoors on logs.
And, as people discover their unique taste and crunchy texture and learn how versatile they are in dishes, demand for them is growing.
Read on to learn more about shimeji mushrooms, why they’re so popular, how to prepare and cook them and how to grow them indoors and outdoors.
What Are Shimeji Mushrooms?
Shimeji mushrooms (Hypsizygus tessulatus) are popular edible mushrooms native to East Asia but now also grown in Australia, Europe and North America.
In Japan, they use the term shimeji to describe several popular edible mushrooms and this sometimes causes confusion. But, mycologists generally consider two species to be contenders for the title of true shimeji.
Hon-shimeji (Lyophyllum shimeji), a mycorrhizal species that’s challenging to cultivate and not often found outside of Asia, and buna-shimeji (Hypsizygus tessulatus), the most well-known shimeji species outside of Japan and the one we focus on in this article.
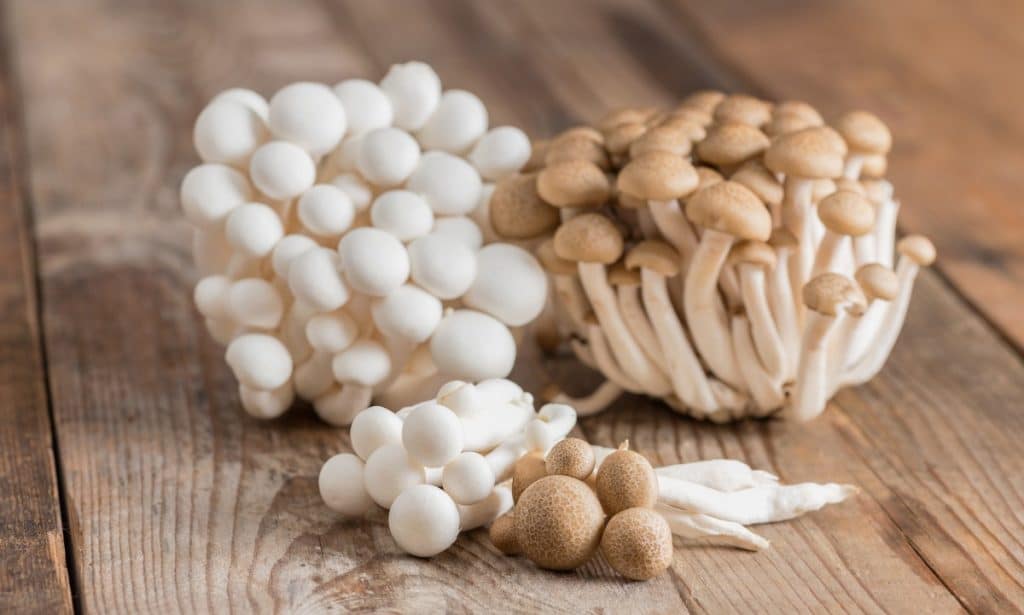
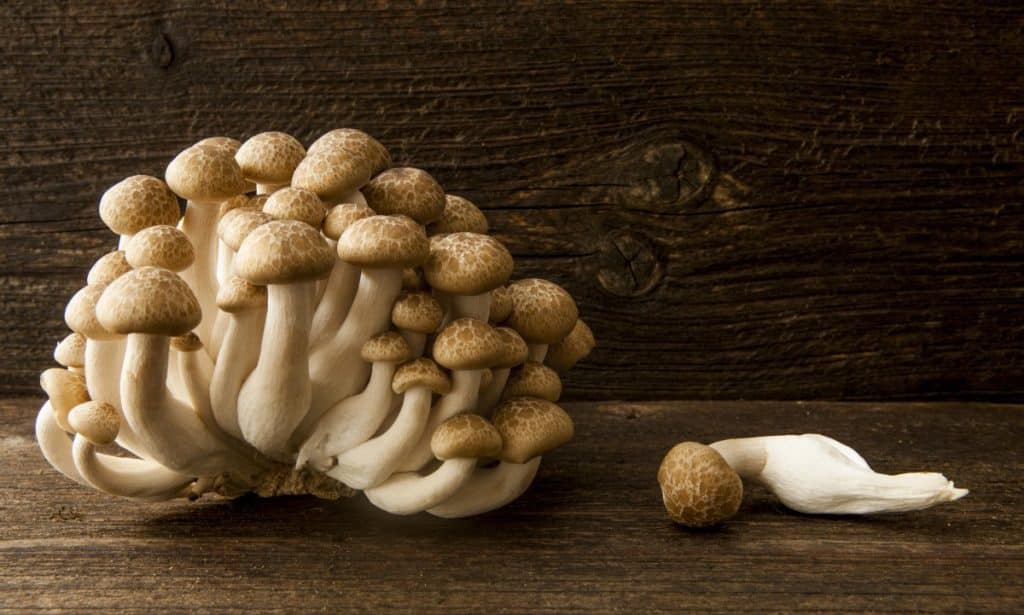
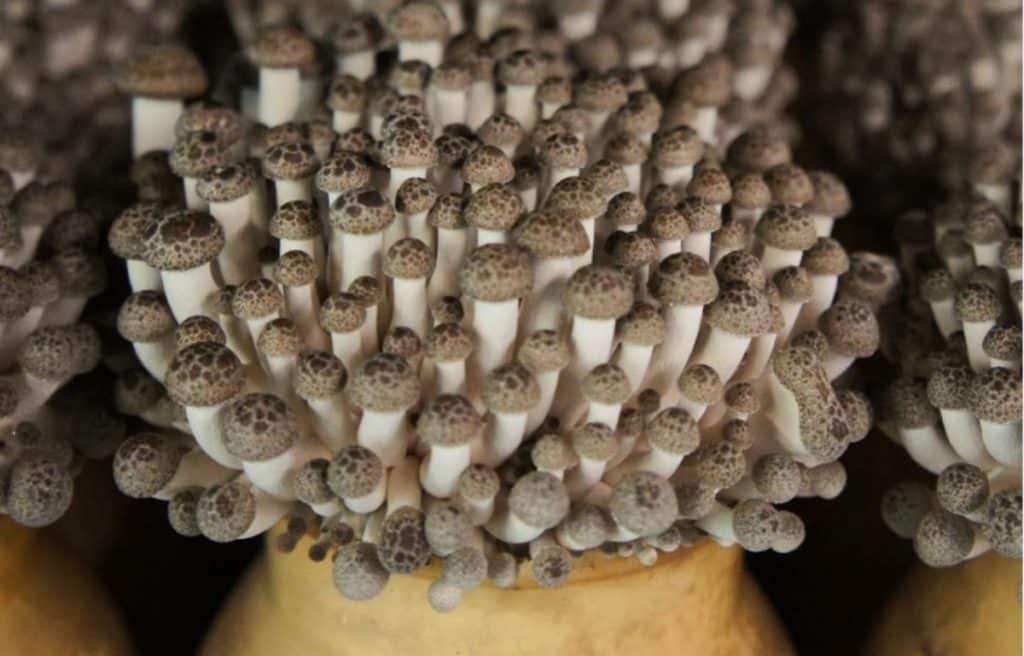
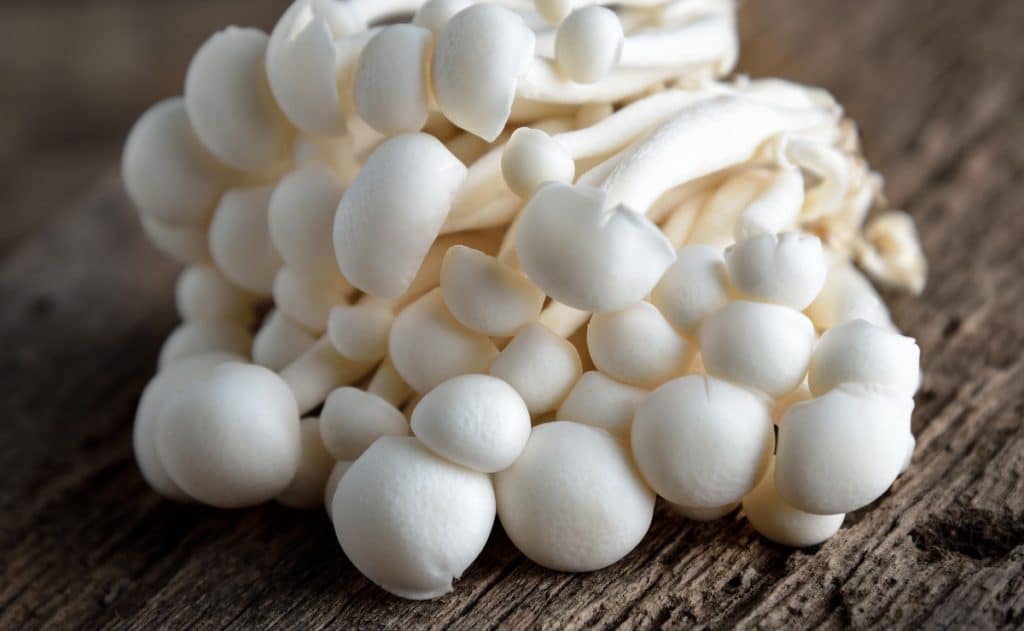
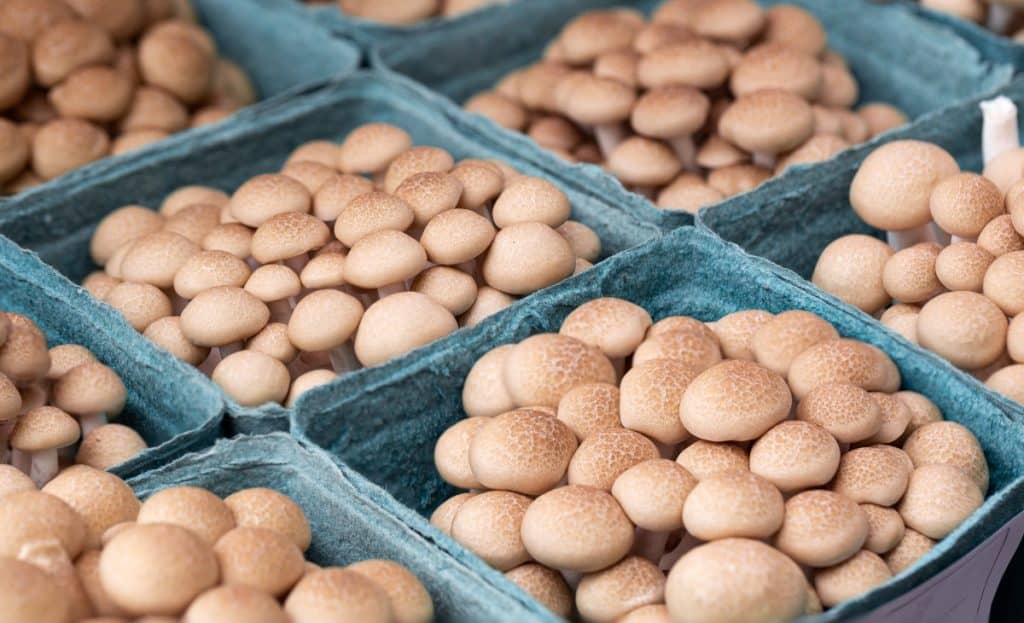
Hypsizygus tessulatus are saprophytic mushrooms that come in two color varieties. Commonly cultivated white shimeji and the original brown shimeji with beautiful mottled-brown caps.
What is the other name for shimeji mushrooms? Outside Japan, growers call shimeji “beech mushrooms” due to their fondness for growing on beech trees.
But these are not their only names. White shimeji are also called Bunapi-shimeji, white beech mushrooms or white clamshell mushrooms, and people refer to brown shimeji as Buna-shimeji, brown beech or brown clamshell mushrooms.
Where Do Shimeji Mushrooms Grow?
Although native to East Asia, especially Japan, China and Korea, you’ll also find wild shimeji in the rest of Asia, Northern Europe, Canada and North America.
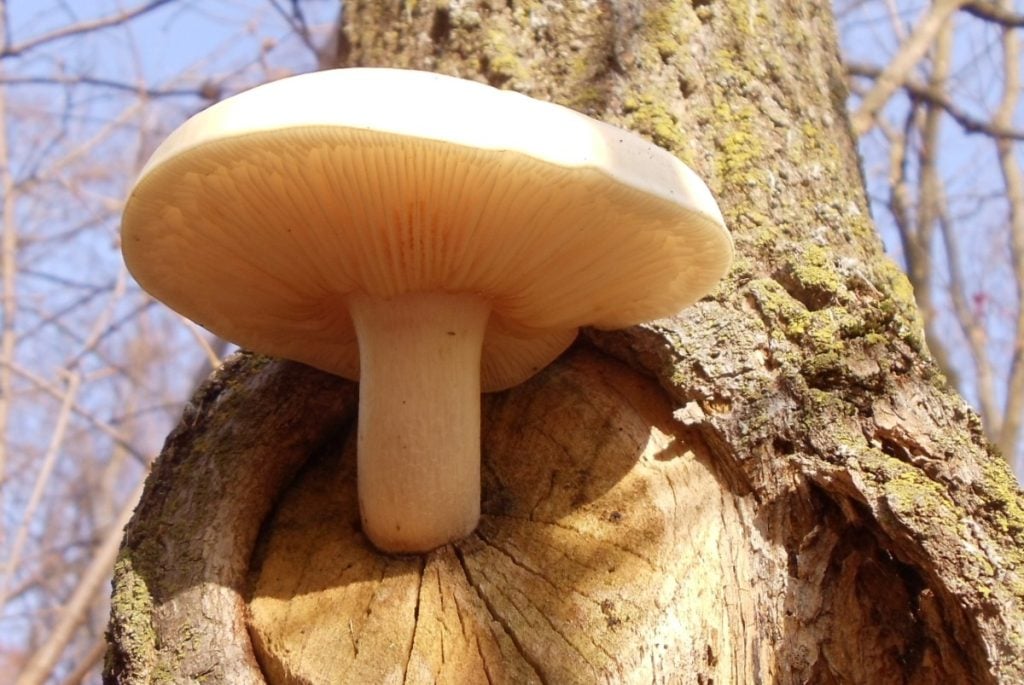
They’re related to the elm oyster mushroom (Hypsizygus ulmarius), and like elm oysters, you’ll often find shimeji growing out of scars, nooks and cracks high up in dead or dying hardwood trees.
Although commonly found on beech trees or stumps, they also grow on poplars, aspens, cottonwoods, maples and elms.
Shimeji need temperatures between 55 and 65°F (13 and 18°C) to fruit, and you’ll usually find them from late summer to early winter, but if conditions are right, you can find them year-round.
How to Identify Shimeji Mushrooms
Shimeji can be tricky to identify as wild shimeji look very different from cultivated shimeji that are grown in controlled conditions using high CO2 environments to promote long thin stems and smaller caps.
Wild shimeji usually grow in clusters of three or more mushrooms with 0.4 – 0.8 inch (1 – 2 cm) thick whitish stems 1 – 3 inches (3 – 8 cm) tall that join at the base.
They have convex caps 1.5 – 3 inches (4 – 8 cm) across with slightly inturned edges ranging from white to pale tan in color, sometimes with beautiful mottled spots when young.
Their whitish gills attach to the stem but don’t run down it like oyster mushroom gills.
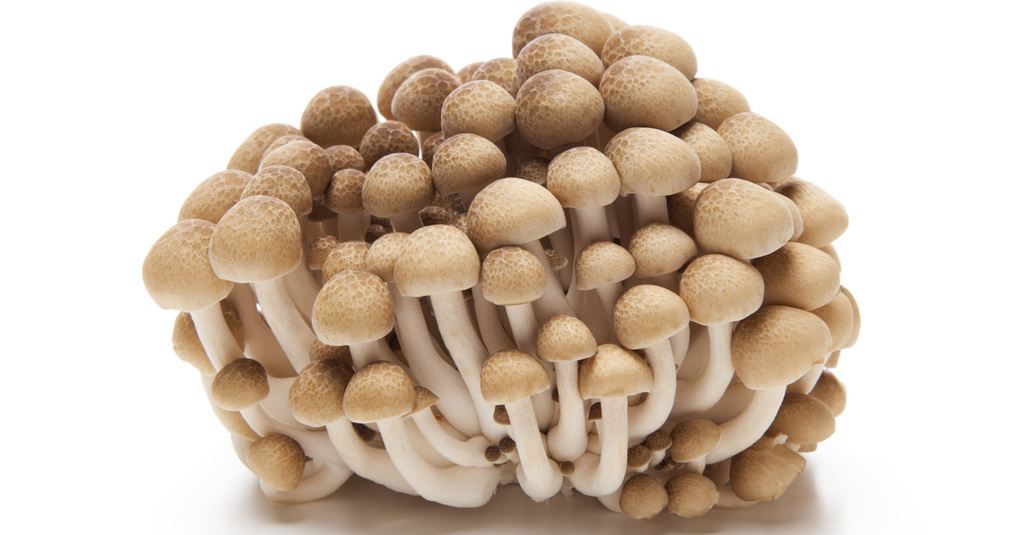
There are two popular varieties of cultivated shimeji, white and brown, but also hybrids of these that fall between the two.
Cultivated shimeji grow in large, dense clusters and have long, slender white stems topped with small round caps that are either white or light, mottled brown.
Shimeji Mushroom Look-Alikes
Shimeji mushrooms don’t have any poisonous look-alikes, but they’re often confused with elm oyster mushrooms in the wild.
One way to tell them apart is to take note of the trees they’re growing on. Shimeji prefers beech, aspen, cottonwood and sugar maple trees, while elm oysters prefer elms and box elders.
Another difference is their caps. Shimeji caps often have mottled markings, while elm oyster caps do not.
Shimeji also often grow in clusters of three or more mushrooms, while elm oysters usually grow alone.
The only other way to tell them apart would be to make a spore print and look at the shape of their spores under a microscope.
They both have white spores, but shimeji spores are smaller and rounder than elm oyster spores.
Can You Grow Shimeji Mushrooms at Home?
You can grow shimeji mushrooms at home, but they’re not one of the easiest mushrooms to grow, and are more often commercially cultivated.
Although slow growing and sometimes fussy, spawn suppliers rate growing shimeji, or beech mushrooms as they’re more commonly known in the West, as medium difficulty.
This is due to the fact that they take a long time to colonize a substrate and prefer cooler temperatures. But, if you buy a mushroom grow kit, growing shimeji can be easy.
Shimeji mushrooms are saprotrophic, meaning they feed on decaying organic material, and like other wood-loving species, you can cultivate them on hardwood logs or sawdust.
There are several options when deciding where and how to grow shimeji. Which is best depends on how experienced you are and whether you plan on growing them indoors or outdoors.
Below we cover the different ways you can grow shimeji mushrooms at home.
How to Grow Shimeji Mushroom With a Grow Kit
If you’re fortunate enough to have a supplier in your area, buying a ready-to-fruit grow kit is one of the easiest ways to grow shimeji mushrooms at home and a great way to learn more about this species.
Grow kits allow you to focus on fruiting the shimeji mushrooms as suppliers have already completed the inoculation and incubation phases for you, making the process quicker and easier.
Shimeji grow kits are ideal for beginner mushroom growers who have successfully grown oyster mushrooms and want to try a different species.
Follow the easy steps below to grow shimeji with a mushroom grow kit:
Step1: Get a Shimeji Mushroom Grow Kit
Order a shimeji mushroom grow kit from a reputable supplier nearby. Your grow kit will come with fully colonized substrate ready for fruiting and easy step-by-step instructions.
Some grow kits also include fine-misting spray bottles for misting the mushrooms.
Step 2: Cut a Hole in the Bag and Place it in Fruiting Conditions
Opening or cutting a hole in the bag exposes the mycelium to fresh air and helps to initiate mushroom pinning.
Shimeji enjoys slightly cooler temperatures, so place the grow kit in a spot with temperatures of 55 – 65°F (13-18°C) and 12 hours of indirect light to initiate fruiting.
Mushrooms need high humidity levels to grow, especially during the pinning phase, and you’ll need to mist the exposed substrate in your grow kit once or twice daily so it does not dry out.
If you live in a dry climate, you can place your grow kit in a clear tote with a bit of water or make a humidity tent with a plastic bag to maintain humidity levels.
Step 3: Watch Your Shimeji Mushrooms Grow
In 7 to 12 days, you should see small mushroom pins forming on the surface of the exposed substrate, and 5 to 10 days later, you’ll harvest your first flush of shimeji mushrooms.
How to Grow Shimeji Mushrooms Indoors in Bags or Bottles
Mushroom growers with some experience and commercial farms grow shimeji indoors in bags or plastic bottles using supplemented hardwood sawdust blocks as a substrate.
You can grow shimeji mushrooms indoors using the steps below:
Step1: Gather Supplies
Before you begin, you’ll need to gather all the required mushroom growing supplies, including:
- Shimeji mushroom spawn
- Hardwood sawdust or pellets
- Bran or other supplements
- Mushroom grow bags or bottles
You’ll need to sterilize the nutrient-rich substrate required to grow shimeji, and inoculate it in sterile conditions. Thus you’ll also need the following items:
- A pressure cooker
- Metal rack or jar lids
- A still air box or laminar flow hood
Step 2: Prepare the Substrate
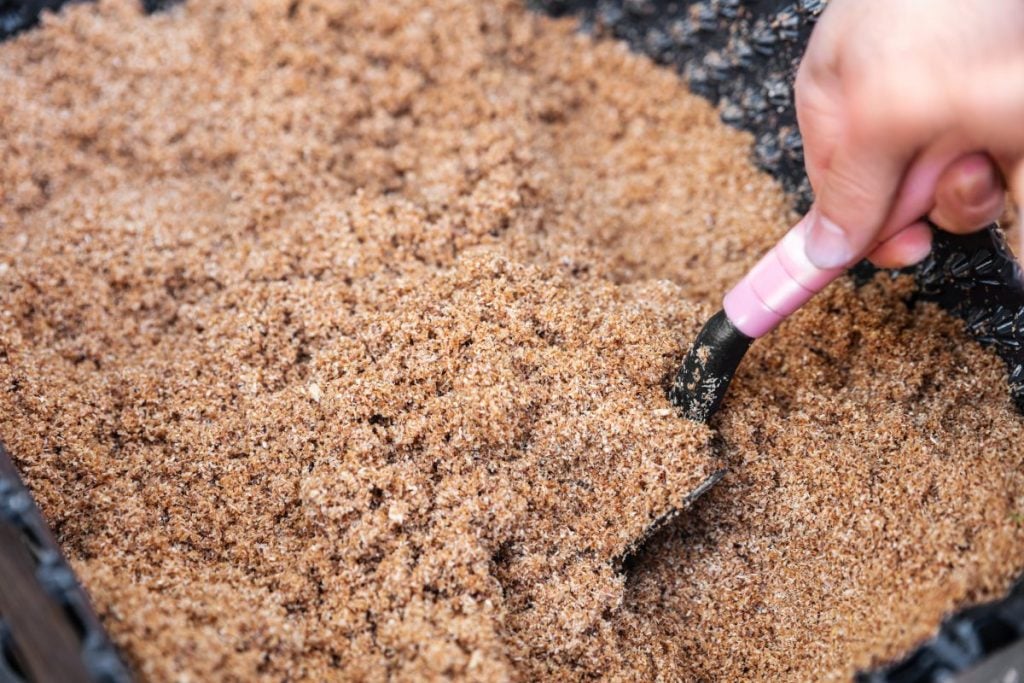
To prepare your substrate, combine the hardwood sawdust and supplements and then hydrate the mixture to 60%.
Shimeji prefers nutrient-rich substrates, so growers usually add bran or other supplements to the hardwood sawdust to provide additional nutrients.
Good hardwoods to use for shimeji are beech, elm, cottonwood, willow, oak or elder, and when it comes to substrate recipes, Master’s mix is a good option, or 80% hardwood sawdust and 20% wheat or oat bran.
For even more nutrients, some growers suggest a mix of 78% hardwood sawdust with 20% wheat bran, 1% sugar and 1% lime.
First, measure out your sawdust or pellets and supplements and combine them in a large tote or bucket.
Then add water at a rate of around 1.5 to 1.7 times the weight of the dry substrate and mix the substrate well to ensure it’s evenly hydrated.
Before adding the hydrated substrate mix to your bags or bottles, check it has the right amount of moisture.
The easiest way to check is to pick up a handful of your substrate and squeeze it lightly.
If more than a drop or two of water comes out, it’s too wet, and if no water comes out and the substrate isn’t staying together in your hand, it’s too dry.
When you’re happy with the consistency, put the substrate into your bags or bottles and fold or close them ready for sterilization.
Step 3: Sterilization
Shimeji mushrooms need nutritious substrates to produce high yields, and they’re not the only organisms that enjoy this type of substrate.
Other organisms, including mold and bacteria, also enjoy moist nutrient-dense organic material and usually grow faster than mushroom mycelium.
So you’ll need to sterilize your supplemented sawdust substrate to kill all living and dormant organisms and fungal spores and give your shimeji mycelium a head start.
First, fold your bags to prevent steam from entering through the filter patch, and cover the filters in your jar lids with foil to prevent extra moisture from entering.
To reduce the chance of damage to your bags or bottles, place your metal rack or jar lids at the bottom of the pressure cooker and put your substrate jars or bags on them.
Also, ensure your jars or bags are not touching the sides of the pot.
To sterilize your substrate, you need temperatures of 250°F (121°C) or more for at least 2 hours. You can achieve this in a pressure cooker with 15 PSI of pressure.
Allow your sterilized substrate to cool in the pressure cooker for at least 8 hours, as hot substrate can kill the mushroom mycelium.
When completely cool, you can move on to the next step, inoculation.
Step 3: Inoculation
Inoculation involves adding your shimeji mushroom spawn to your prepared substrate.
Before you begin, wipe down all work surfaces and clean your hands with soap to avoid contamination.
It’s best to inoculate your sawdust block using a laminar flow hood to help prevent contamination.
Add your shimeji spawn at a rate of 2-10% to the wet substrate and mix them. A higher inoculation rate means a shorter incubation period.
But don’t exceed 10% spawn to the wet substrate, as too much spawn can cause the substrate to overheat, killing the mycelium.
Step 4: Incubation
Place your bags in a warm, dark spot to incubate. During incubation, shimeji needs room temperatures of 70 – 75°F (21 – 24°C).
It will generally take the shimeji mycelium 4 to 6 weeks to fully colonize the substrate, but depending on the substrate used and conditions, it can take up to 90 days.
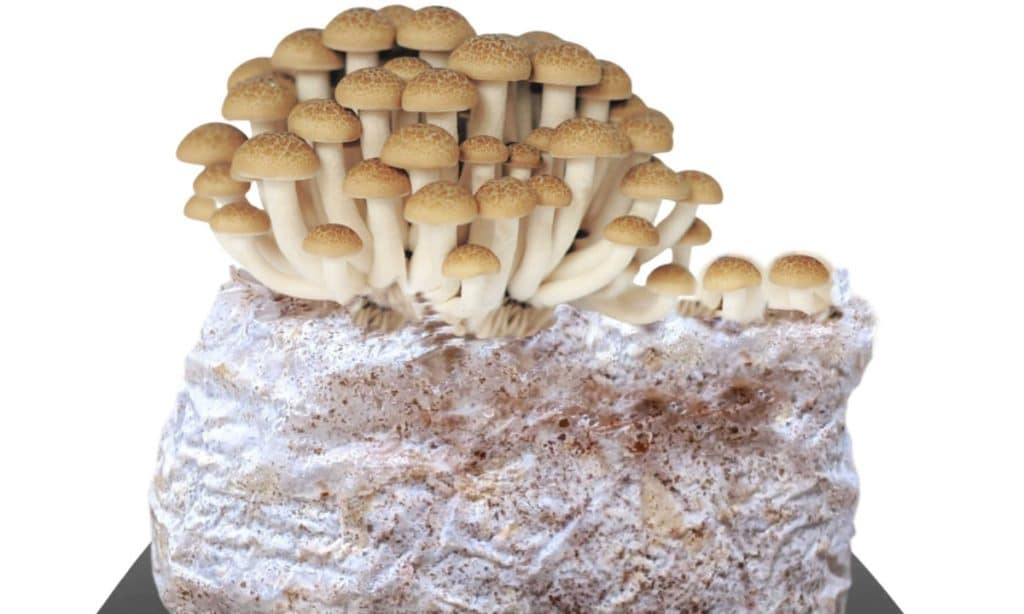
When your substrate is fully colonized, and the mycelium covering it gets denser, forming white blobs or bumps, pinning is beginning, and it’s ready for fruiting.
Step 5: Fruiting
To fruit shimeji, open the top of your grow bag or bottle and allow them to grow in the higher CO2 environment inside the top of the bag or bottle to get longer stems.
You can also grow shimeji in bags by cutting holes in the sides of your bag, but they’ll grow with shorter, thicker stems like wild shimeji.
During pinning, your shimeji needs high relative humidity levels of around 98%, but once the pins have formed and the baby mushrooms have started to grow, 90 – 95% humidity will do.
Depending on your climate, misting your mushrooms twice daily could suffice, but you may need to place your bags or bottles in a fruiting chamber to ensure they don’t dry out.
If your shimeji mushroom pins dry out, they’ll stop growing, turn black and die.
Ideal fruiting temperatures for shimeji are 55 – 65°F (13 – 18°C). Depending on where you live, this may be your usual autumn or winter room temperature.
In two to three weeks, you could harvest your first flush of mushrooms, and after another two to three weeks, you should get another flush from a bag of substrate.
Bottles usually only produce one flush as they contain less substrate and don’t provide enough nutrients for a second flush of mushrooms.
How to Grow Shimeji Mushrooms Outdoors on Logs
Growing mushrooms outdoors on logs takes much longer than growing them on sawdust. But many consider the wait worthwhile because instead of only getting two flushes, your logs will continue to fruit for several years.
You can grow shimeji mushrooms on logs using the steps below:
Step 1: Gather Supplies
The first step in growing shimeji mushrooms on logs is to gather the materials and equipment needed, including finding suitable logs and ordering spawn.
The best logs for growing shimeji are beech, oak, maple, willow, birch and elm. Always use fresh logs with intact bark, and don’t wait for more than a month from when you cut them before inoculating.
You will also need to order shimeji plug or sawdust spawn, depending on how many logs you plan on inoculating.
Plug spawn is perfect for small quantities of logs, and you won’t need to buy additional tools, but if you plan on inoculating more than 10 logs, sawdust spawn is more economical.
Apart from logs and spawn, you’ll also need:
- Beeswax or candle wax for sealing
- A drill and drill bit matching the diameter of the plug spawn dowels
- A hammer or a hand inoculator
- A small paintbrush or baster
Step 2: Prepare and Inoculate Your Logs
Drill a row of 1-inch (3 cm) deep holes every 6 inches (15 cm) apart down your log. Then drill another row of holes about 2.5 inches (6 cm) away from your first row, staggering the holes to form a diamond pattern.
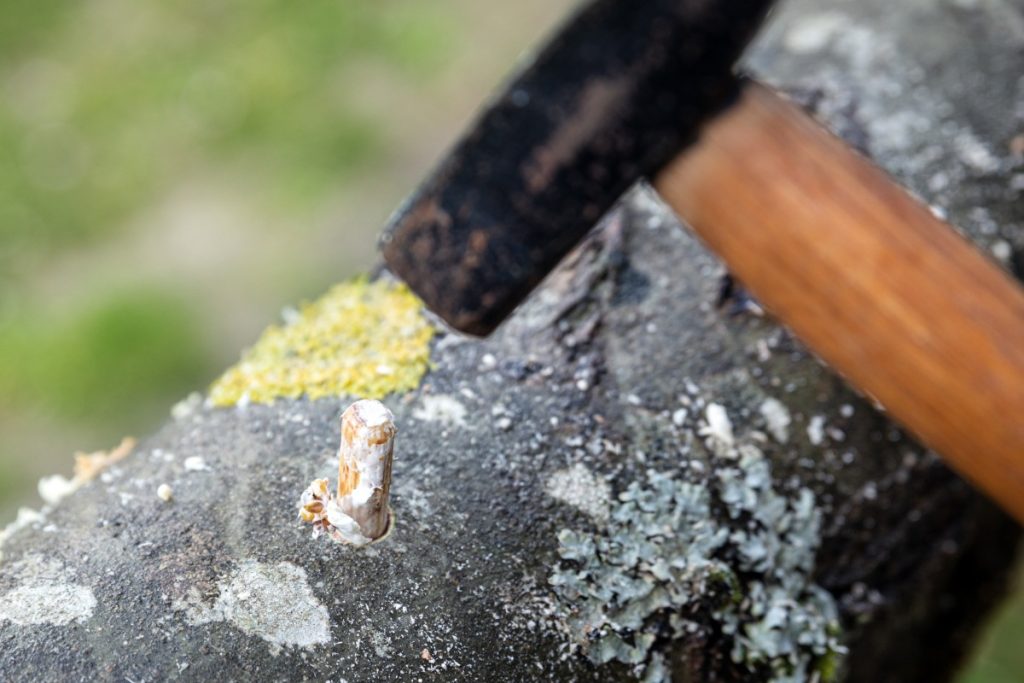
When you have holes all the way around your log, it’s time to insert your plug or sawdust spawn into the holes.
Gently tap the plug spawn dowels into the holes with a hammer, or if using sawdust spawn, use a hand inoculator to insert sawdust spawn into the holes.
Ensure your plugs or spawn are below the bark and flush or slightly below the log’s surface so you have a space of around 0.02 inches (0.5 mm) to fill with melted wax and seal the holes.
Once you have sealed the holes with wax, your logs are ready for incubation.
Step 3: Incubate Your Logs
Moisture is crucial during incubation. Begin by soaking your logs or using a sprinkler to ensure they are nice and wet. Then place them in a sheltered shady location, standing up or lying on their sides.
If there’s no rain, you may need to water your logs once or twice a week to ensure they don’t dry out. You can also partially bury them in well-drained sand or soil to help keep them moist.
How long it takes from inoculation to your first harvest differs, depending on the wood you’re using and your climate. But it can take up to two years before your logs produce their first harvest.
Fruiting won’t happen until colonization is complete. Harder woods take longer to colonize, and larger diameter logs take up to 3 months longer for every additional cm of diameter but produce more mushrooms.
Step 4: Fruiting
Around 12 to 18 months after inoculating the logs, look out for signs of mushrooms starting to grow. If there’s whitish mycelium visible at the ends of the logs, it indicates they’re ready for fruiting.
If there’s marbling on the log ends but no signs of growth, you can often initiate fruiting by shocking your logs.
The best time to do this is in the fall, as this is usually when wild shimeji fruit and temperatures are ideal for growth. To shock your logs, submerge them in cold water and soak them for 12 hours.
Your shimeji logs will produce mushrooms seasonally for three to six years, depending on their size.
When to Harvest Shimeji Mushrooms
The best time to harvest shimeji is when their caps are less than 1 inch (2.5 cm) across with the edges still curled under.
When their caps begin to flatten out, it indicates they’re almost mature and ready to release their spores.
Fortunately, shimeji don’t release as many spores as oyster mushrooms that will cover an entire room in spore dust if you don’t harvest them on time.
If you harvest shimeji later, when they’re larger, they’ll still taste good but may not have the same texture and won’t last as long before going bad.
It’s best to harvest your shimeji all at once. You can do this by gently holding the entire cluster and twisting it off at the base.
People who grow shimeji in jars or bottles sometimes harvest them by cutting across the top of the container, but pulled clusters usually last longer stored in the fridge.
Shimeji Mushroom Taste
Shimeji mushrooms have all the delicious mushroomy umami tastes you’d expect from gourmet mushrooms and a flavor that people describe as subtle, slightly sweet, buttery and nutty.
White shimeji mushrooms are milder and sweeter, while brown shimeji are richer with prominent nutty flavors.
Both brown and white shimeji retain their texture well when cooked, and people describe them as firm, crisp and slightly crunchy.
Can You Eat Shimeji Mushrooms Raw?
Although raw shimeji are not poisonous, they are bitter, and it’s best to serve them cooked.
When cooked, the bitterness disappears, and you can appreciate their subtle, nutty flavors.
Cooking also breaks down the proteins and other nutrients in shimeji, making them easier to digest. So to enjoy all the shimeji mushroom benefits, it’s best to cook them rather than eat them raw.
Can You Eat The Stems of Shimeji Mushrooms?
The stems and caps of shimeji are edible, and the long, firm stems add a nice crunchy texture to dishes.
The only part of a shimeji cluster you can’t eat is the base, where the stems join.
Shimeji Mushroom Price
In the UK, fresh shimeji mushrooms sell for between £10 to £27 per kg depending on the area and where you’re buying them. This is a similar price range to other gourmet mushrooms like oysters and shiitakes.
And in the USA, you’ll find fresh shimeji mushrooms for $19 to $25 per lb, which is a little more than oyster and shiitake mushrooms but similar to lion’s mane and king oyster mushrooms.
Where to Buy Shimeji Mushrooms
The best place to find fresh shiitake mushrooms is farmer’s markets, specialty stores and Asian grocery stores. Although some larger grocery stores are also adding shimeji to their mushroom range.
If you have a mushroom farmer nearby, you may also be able to purchase fresh shimeji directly from the farm or order them online for delivery.
Is Shimeji Mushroom Healthy?
Yes, shimeji mushrooms are healthy. Like other gourmet mushrooms, shimeji contain many beneficial macronutrients and are relatively high in protein, potassium and dietary fiber and low in fat.
Below are a few of the nutrients found in 100g of shimeji mushrooms (Hypsizygus tessulatus)
| Protein | 33.89 g |
| Fiber | 13.2 g |
| Carbohydrate | 50.1 g |
| Potassium | 1575 mg |
| Calcium | 98 mg |
| Phosphorus | 568 mg |
| Iron | 18 mg |
| Zinc | 5 mg |
Some of the other beneficial compounds in Shimeji mushrooms are vitamins B and D, glucans and niacin.
Glucans help boost immunity, control cholesterol and promote weight loss. Niacin helps with blood circulation, mental health and insomnia. And vitamin D has anti-aging properties and helps prevent osteoporosis.
Our article on the, “Health and Nutritional Benefits of Mushrooms,” has more information for you.
How to Store and Clean Shimeji Mushrooms
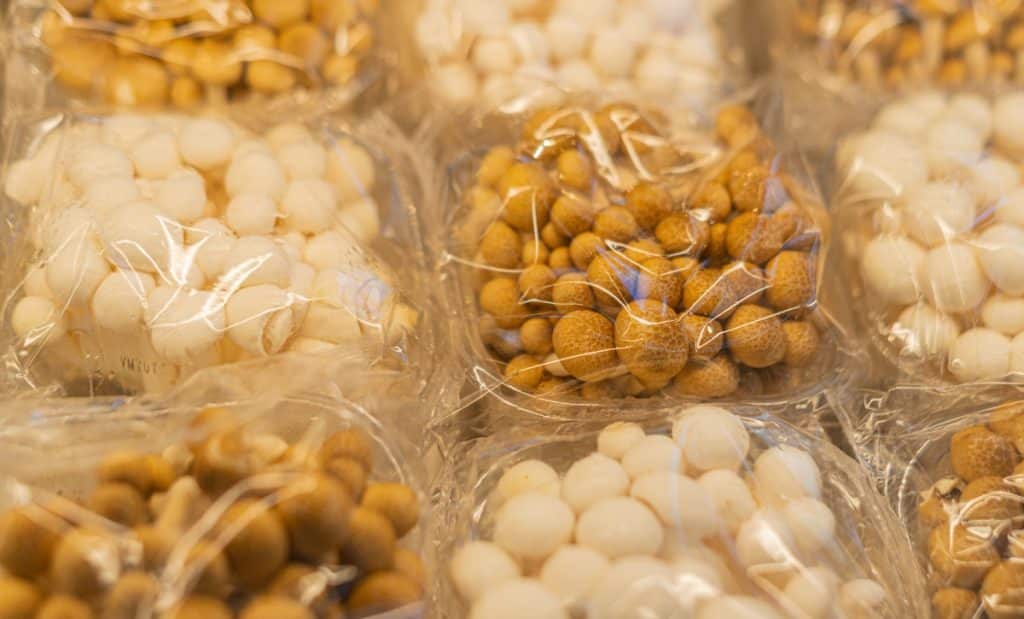
If you buy your shimeji in containers with a breathable plastic covering, you can store them in the fridge for a few weeks.
But if you buy loose shimeji or shimeji covered in impermeable plastic wrap, it’s best to put them in the fridge in a breathable container or paper bag and use them within 5 days.
Only clean your mushrooms immediately before using them, as sliced or washed mushrooms won’t last as long in the fridge.
The first step in cleaning shimeji mushrooms is to cut off the base of the cluster and separate the mushroom stems. Be gentle when handling your shimeji so you don’t bruise them.
Most cultivated shimeji are grown indoors and thus very clean. A quick rinse under running water is all you need to remove any dust or bits of the substrate.
Place your mushroom on a kitchen towel to dry, or pat them lightly with a paper towel to absorb excess moisture.
How to Cook Shimeji Mushrooms
Shimeji are versatile mushrooms, and their nutty, umami flavor and crunchy texture make them an excellent addition to many dishes.
You can cook them in several ways, using high or low temperatures and moist or dry-heat cooking methods, including stir-frying, roasting, baking, steaming, boiling and sauteing.
Whichever method you choose, don’t overcook your shimeji, as this may cause them to lose their firm, crunchy texture.
Here are some of the ways people commonly use shimeji:
- As a pizza topping
- With cream cheese as a dip
- In Japanese dishes like ramen, rice bowls and miso soup
- As filling in an omelet
- In vegetable stir-fries
- Sauteed in butter and served as an appetizer
One of our favorite ways to cook mushrooms is to saute them, as this accentuates their flavor and texture.
Here’s a quick and easy shimeji mushroom recipe for you to try.
Sauteed Shimeji with Garlic, Butter and Soy Sauce
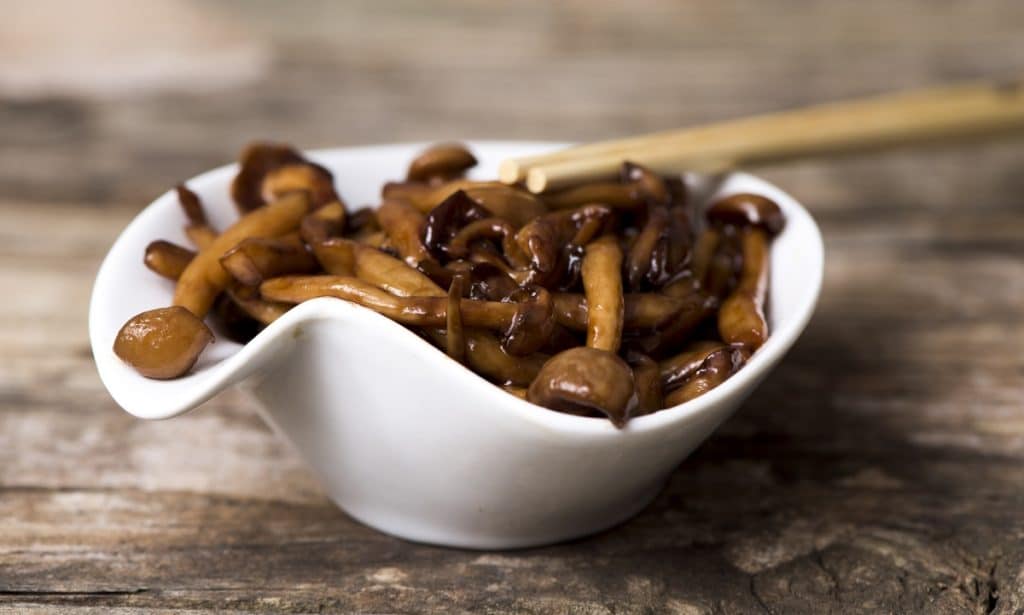
This delicious, easy-to-make sauteed shimeji recipe adapted from Simply Living Recipes only takes 10 minutes, is full of fabulous flavors and provides a quick meal or tasty side dish.
Ingredients
- 2 teaspoons olive oil
- 5 oz (150 g) white or brown shimeji mushrooms separated and cleaned
- 1 tablespoon soy sauce
- 1 teaspoon rice vinegar (Can also use white vinegar or wine)
- 1 tablespoon butter
- 1 teaspoon minced garlic
- Chopped chives for garnish (can also use scallions or green onions)
- Salt to taste (optional)
Instructions
- Heat olive oil in a heavy-based skillet over medium heat, and when hot, add the shimeji mushrooms and saute them until they’re just starting to brown.
- Add the soy sauce and rice vinegar, and cook for around 3 more minutes. Then move the mushrooms to one side of the pan and add the butter and garlic to the other side.
- Sauté the garlic until fragrant, around 3 seconds, and mix everything together.
- Cook for another minute or so for the shimeji to reach the desired color and consistency. Add salt to taste.
- Put the shimeji into a serving dish, sprinkle with chives and serve hot.
Our article, “30 Of The Best Mushroom Recipe Ideas,” has more great recipes for you, and in “25 Of The Best Vegan Mushroom Recipes,” we share 25 of our all-time favorite vegan mushroom recipes.
Final Thoughts
Shimeji mushrooms are healthy, delicious and very versatile, which is why they’re gaining popularity worldwide and are now readily available outside of Asia.
They’re saprotrophic mushrooms, meaning you can grow them at home on hardwood logs or supplemented sawdust, and in many places, you can now source shimeji culture or spawn to do so.
But they’re not one of the easiest mushrooms to grow, and if you’re a first-time mushroom grower, we recommend starting with hardy oyster mushrooms.
To learn more about mushrooms and their life cycle, visit our Mushroom Education Hub.
And if you’re interested in growing mushrooms, our Mushroom Growing Hub has loads of valuable resources to help you get started.