Blue isn’t a color that you commonly find in fungi.
The blue oyster mushroom is a rare exception, which makes it really stand out.
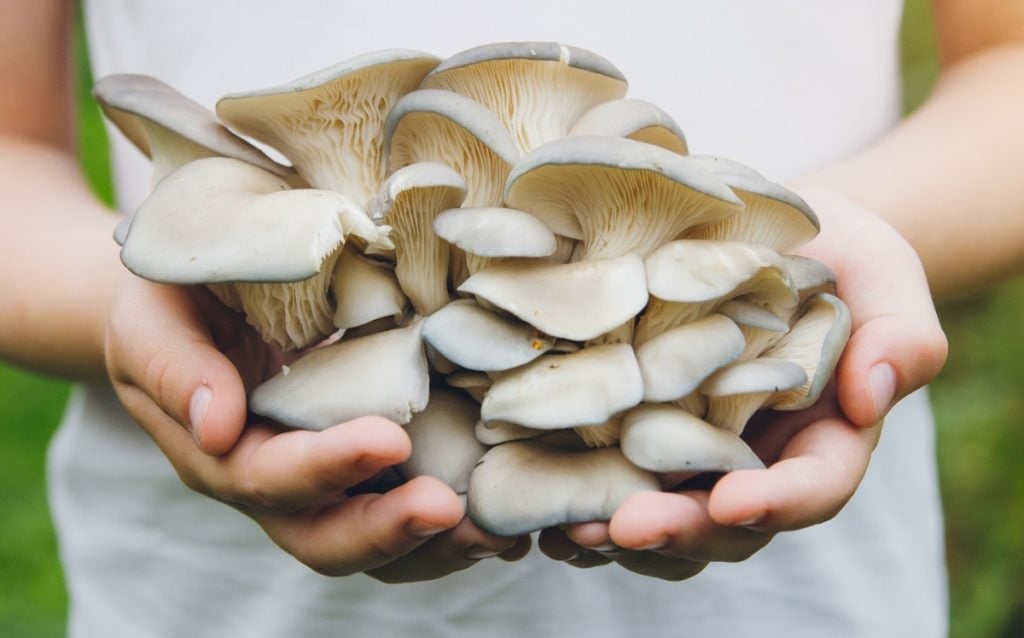
Blue oyster mushrooms aren’t just interesting to look at either. They’re also delicious, healthy for you and easy to grow.
In this article, you’ll learn all about blue oyster mushrooms. We’ll explain step-by-step how to grow them yourself and how to store them. Plus, we’re sharing some tasty recipes you should try with them.
What Is a Blue Oyster Mushroom?
The blue oyster mushroom is a subspecies of oyster mushrooms. Its scientific name is Pleurotus ostreatus var. Columbinus.
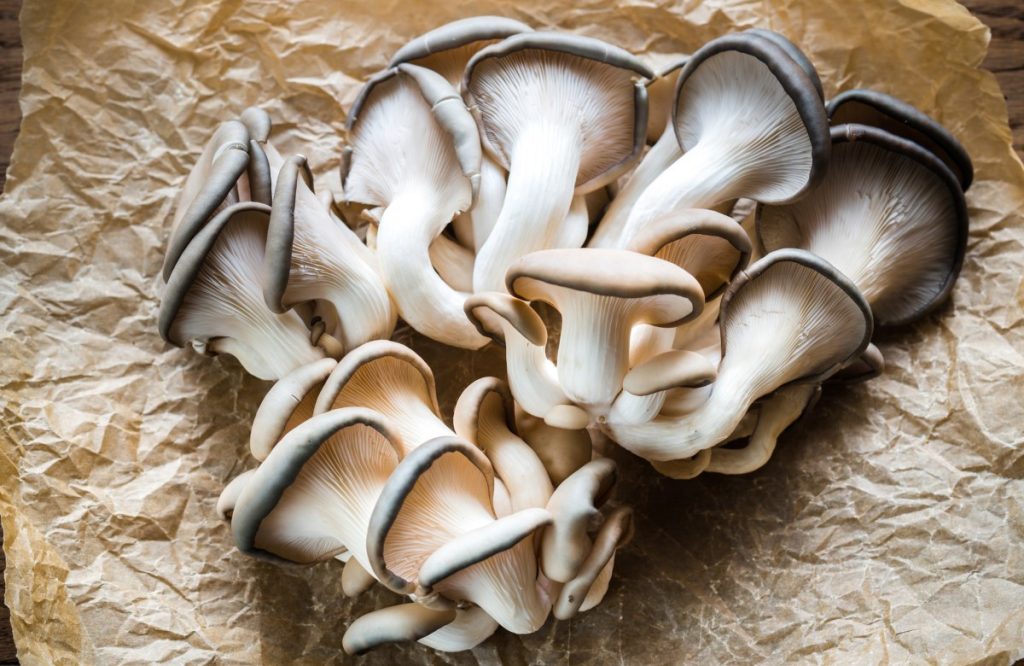
Like other types of oyster mushrooms, the blue oyster is edible and widely used in the culinary world. Their caps are thick and meaty and are enjoyed in meals around the world.
Blue oyster mushrooms are fairly easy to find in nature.
For mushroom farmers, they’re fast colonizers which are quite easy to grow. Plus there’s a good amount of demand for them in most areas from chefs and farmer’s markets.
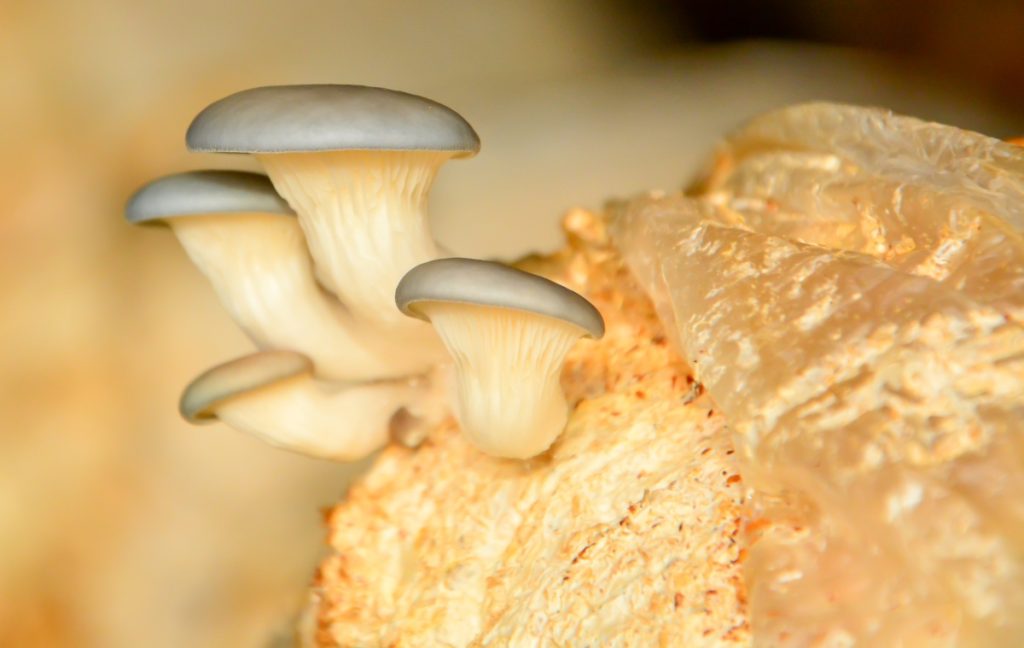
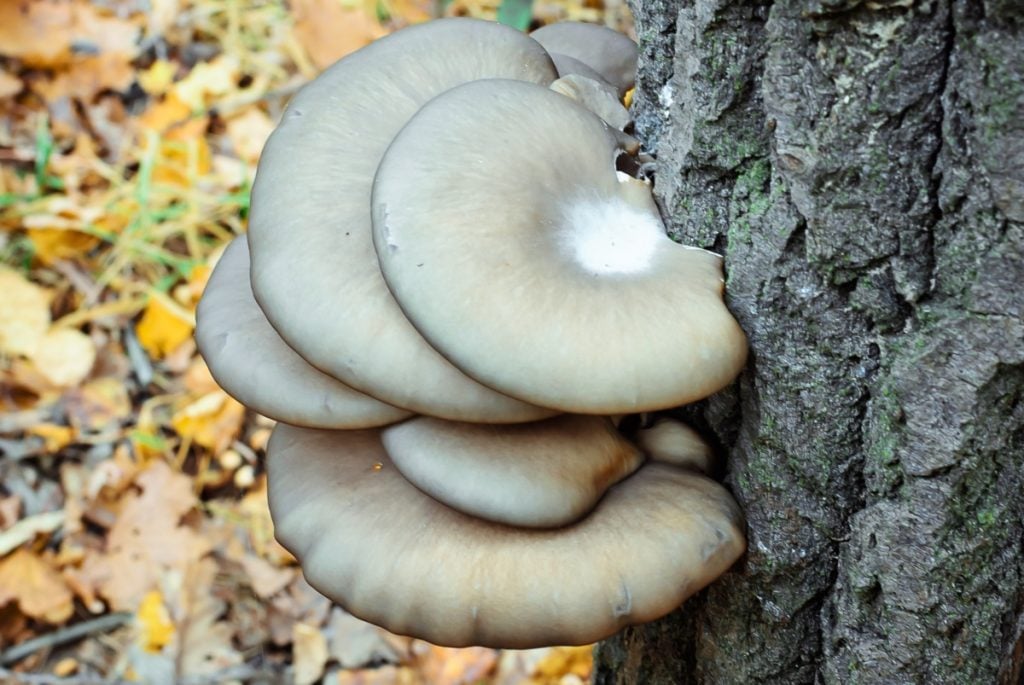
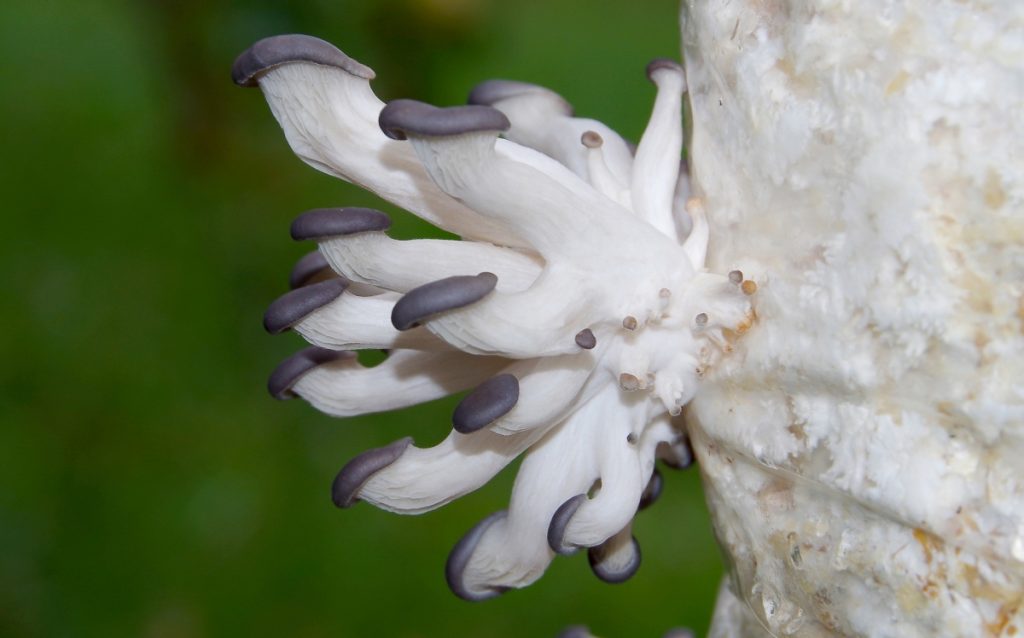
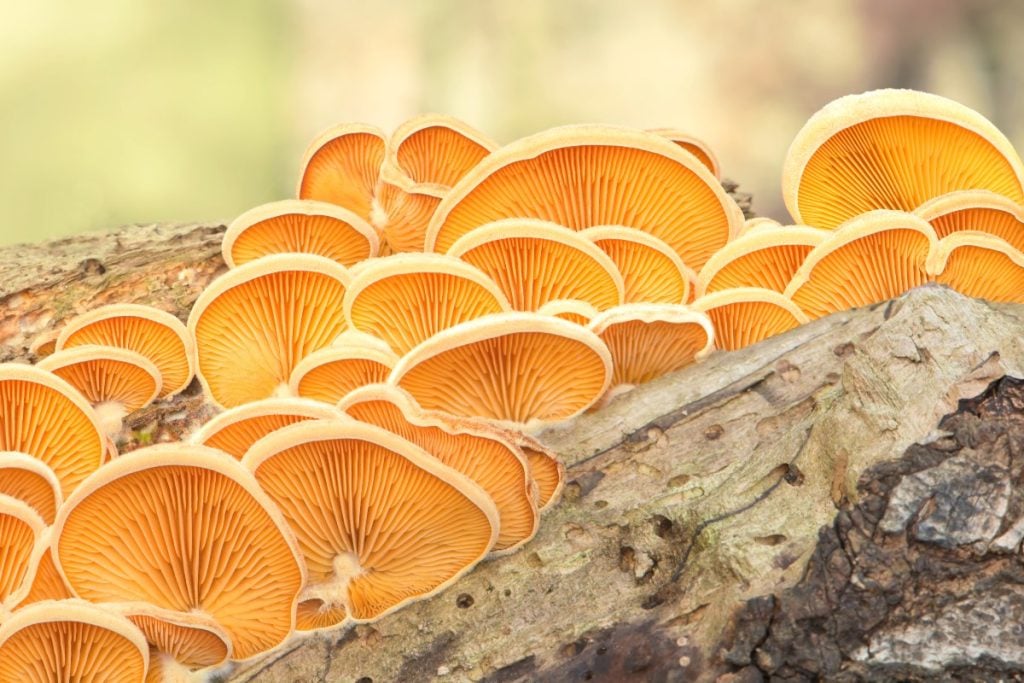
What Does a Blue Oyster Mushroom Look Like?
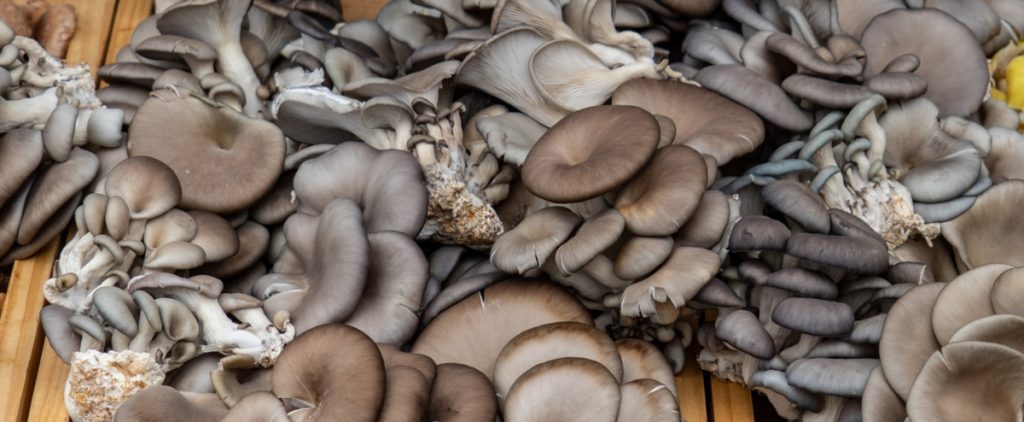
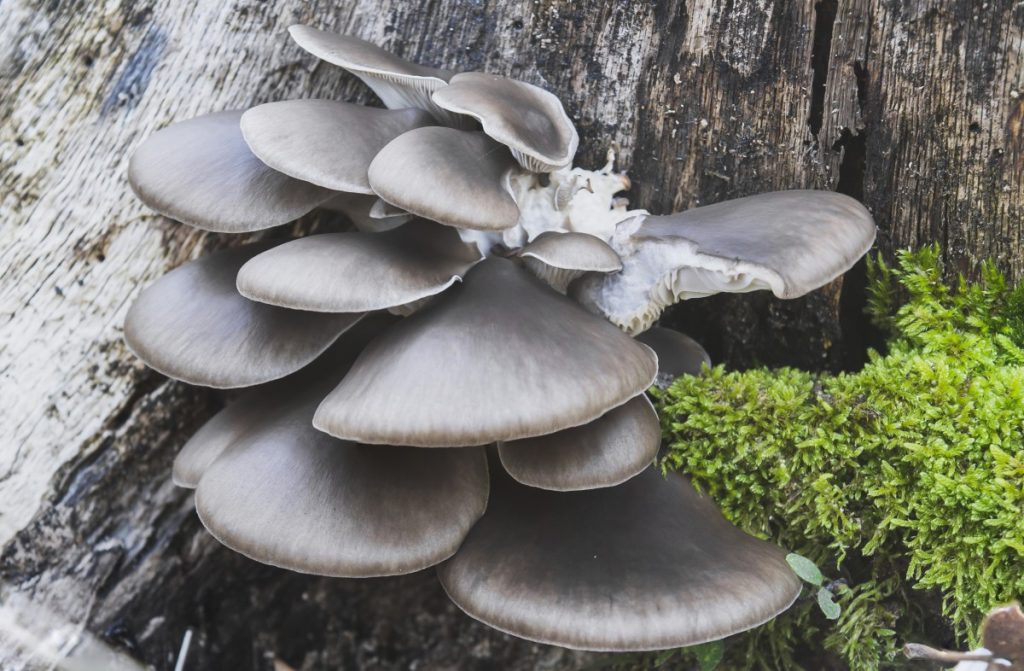
The caps of blue oyster mushrooms can range in color from blue to a grayish color.
It largely depends on the conditions that they’re grown in. Temperature particularly plays a part.
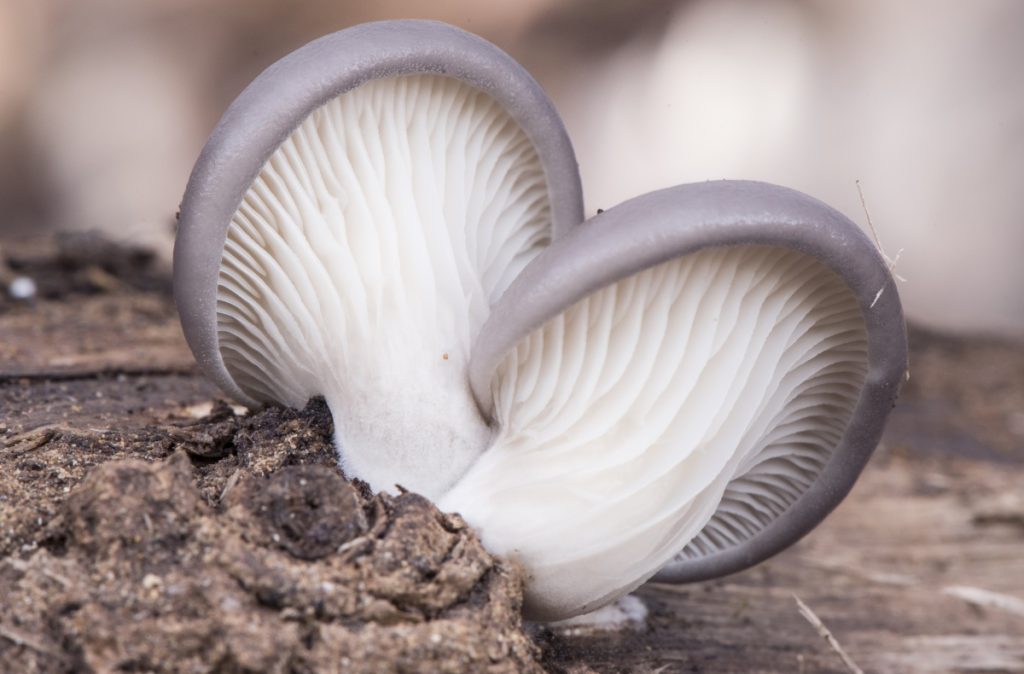
The blue oyster has gills that are light gray in color and run along the full length of the cap’s underside and stem.
Since all oyster mushrooms are closely related, they all look quite similar to each other. The main difference at first glance is only their different colors.
So in terms of shape and physical structure, a blue oyster looks very similar to a pearl oyster or other oyster mushroom varieties.
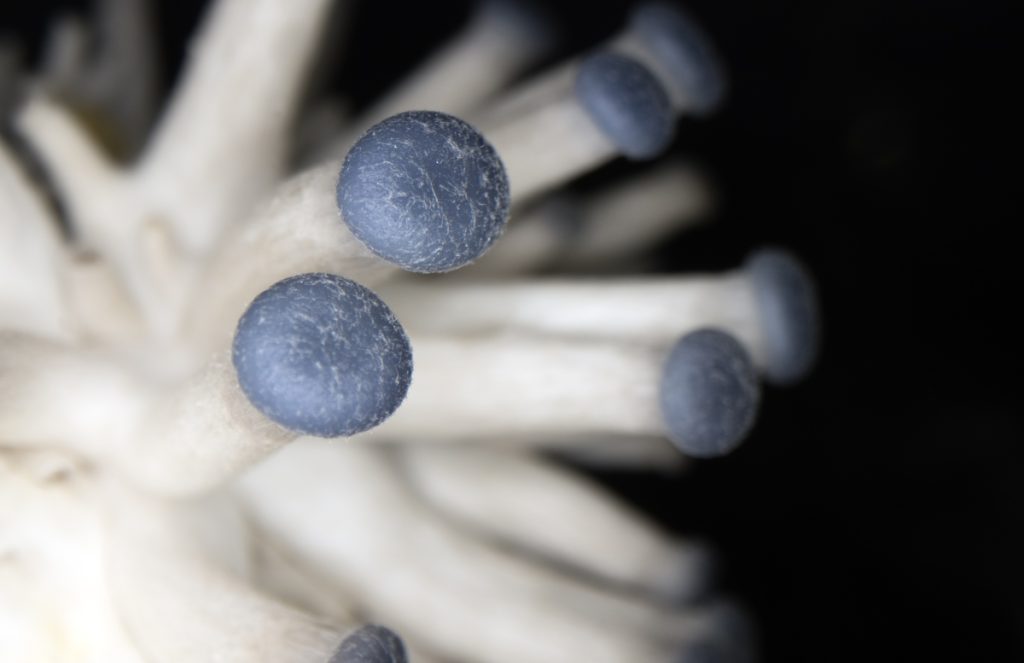
When oyster mushrooms first begin pinning, they start out blue and then start to turn gray as the mushroom grows.
Can You Eat Blue Oyster Mushrooms?
Yes, you can eat blue oyster mushrooms.
The cap is the most enjoyable part of the blue oyster mushroom to eat.
Blue oyster mushrooms typically have a thicker cap than most other varieties of oyster mushroom. They have a more meaty texture.
While the upper part of the blue oyster stem is edible, it has a tougher texture compared to the rest of the mushroom.
Some people will cook only the caps and discard the entire stems. Although we consider this to be wasteful!
Read Can You Eat Mushroom Stems? How to Cook With Them and learn how to put those stems to good use.
The bottom part of the stem is almost always discarded though. It can have bits of wood or dirt that are difficult to remove and is simply too tough to eat.
What Does Blue Oyster Mushroom Taste Like?
You’ll get different opinions on what blue oyster mushrooms taste like, depending on who you ask.
Blue oyster mushrooms definitely have a meaty or savory flavor, like many mushrooms. They’ve also got a slightly chewy texture that makes them feel a little similar to meat.
Beyond that, the flavor is a bit more subtle and up for interpretation.
Some people say that blue oysters have a mild seafood flavor.
There are even those that say they taste like actual oysters from the sea. Although we have to wonder how much their name puts this impression in people’s minds.
We’ve heard other people describe blue oysters as having a very mild subtle licorice or anise flavor. The term “woodsy” is also commonly used.
While you can eat blue oysters raw, they taste best when cooked. They’re reported to have a slightly metallic and unpleasant taste when consumed raw.
When pan fried or roasted until they’ve caramelized a bit, they’re delicious.
Try them out yourself and see what you think!
Read Mushroom Taste Guide: How 16 Popular Mushrooms Taste to get a better understanding of how various popular mushrooms taste.
Where and When Do Blue Oyster Mushrooms Grow?
Blue oyster mushrooms thrive in regions with cooler temperatures.
They most commonly grow in the spring and autumn.
Your best chance of finding them is when outdoor temperatures are between around 55 – 65 F (12 – 18 C). Although they can sometimes be found growing even during the summer.
They’re reported to have first been found in Europe. But today, blue oyster mushrooms can be found in North America, Europe and Asia.
They’re particularly common in the wild within the northern hemisphere.
Blue oyster mushrooms grow in humid biomes like forests and mountains. They grow best when humidity is between 50 and 70 percent
You can find blue oysters growing on rotting, dead or dying wood. They have a preference for deciduous hardwood trees like beech and oak, although they will grow on others as well.
How To Grow Blue Oyster Mushrooms (Step by Step Guide)
Blue oysters are an excellent mushroom to grow. That’s true regardless of whether you’re an experienced mushroom farmer or a complete beginner.
Growing blue oyster mushrooms at home is easy and they also produce a good yield. They’re fast growing and great for regions with cooler temperatures.
One caveat is that blue oyster mushrooms need plenty of fresh air exchange during the fruiting stage to develop properly.
If this is your first time ever growing mushrooms, you might want to start with a mushroom grow kit.
Our GroCycle Mushroom Growing Kits are ready to harvest in just 14 days and greatly simplifies the growing process.
Below are our instructions for starting your own blue oyster mushrooms from premade spawn. This is more of an intermediate difficulty project.
To get started, you’re going to need the following supplies:
- Blue oyster mushroom spawn (can be ordered online)
- A substrate material to grow the mushrooms on (straw, sawdust or coffee grounds)
- Bags to grow the mushrooms in (filter patch bags, or even regular freezer bags for your first time)
- A spray bottle (which has never contained chemicals, water only)
Step 1: Pasteurize Your Growing Medium
Cardboard, fresh coffee grounds, hardwood sawdust pellets or straw can all be used for growing blue oyster mushrooms.
The goal of these materials is to provide nutrients and hydration for your blue oyster mushroom mycelium.
But first we need to make sure your substrate is relatively clean and free of other competing organisms like mold. We accomplish this by pasteurizing the material.
Sawdust Pellets
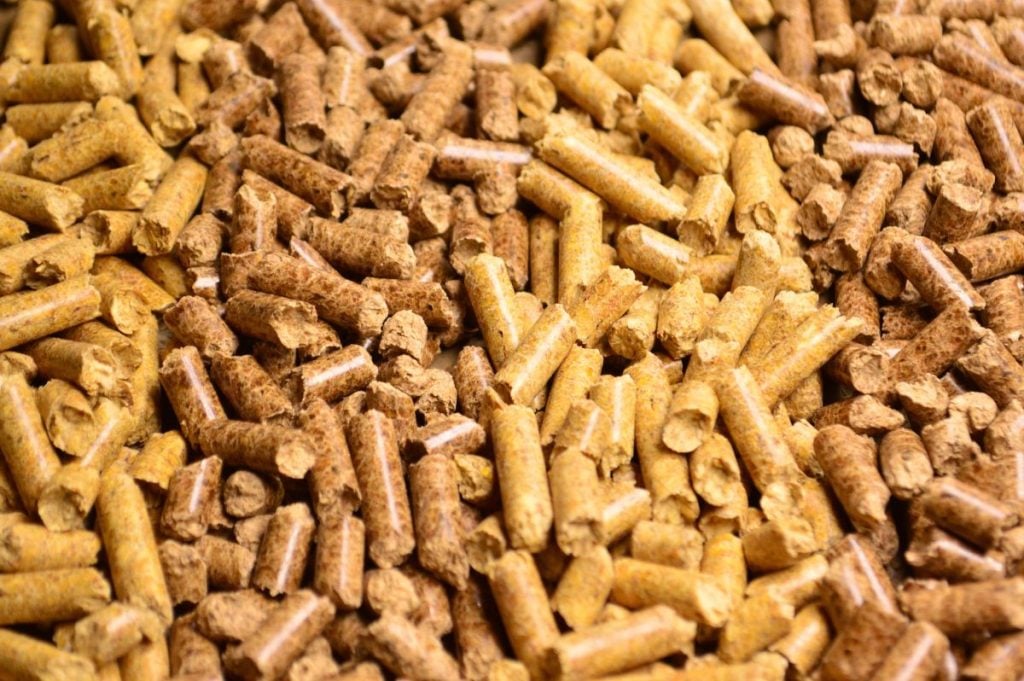
If you use sawdust pellets, you can skip the pasteurization step. This is because sawdust pellets are already sterilized by heat and pressure during their manufacturing process.
Simply add equal weight of water and pellets and allow them to soak for half an hour. Then mix thoroughly to break the pellets up and ensure they’re evenly hydrated.
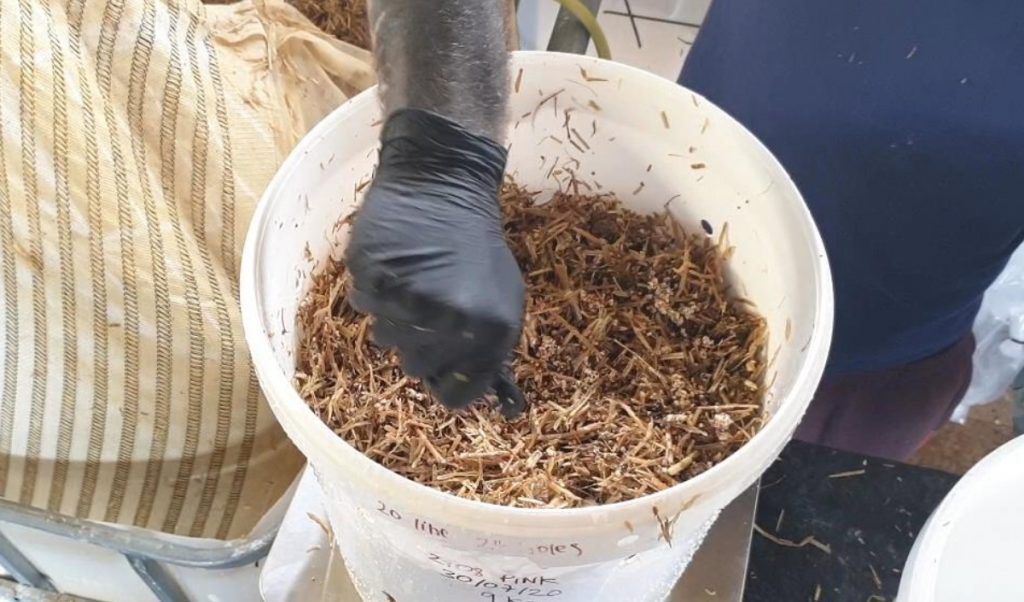
Straw or Cardboard
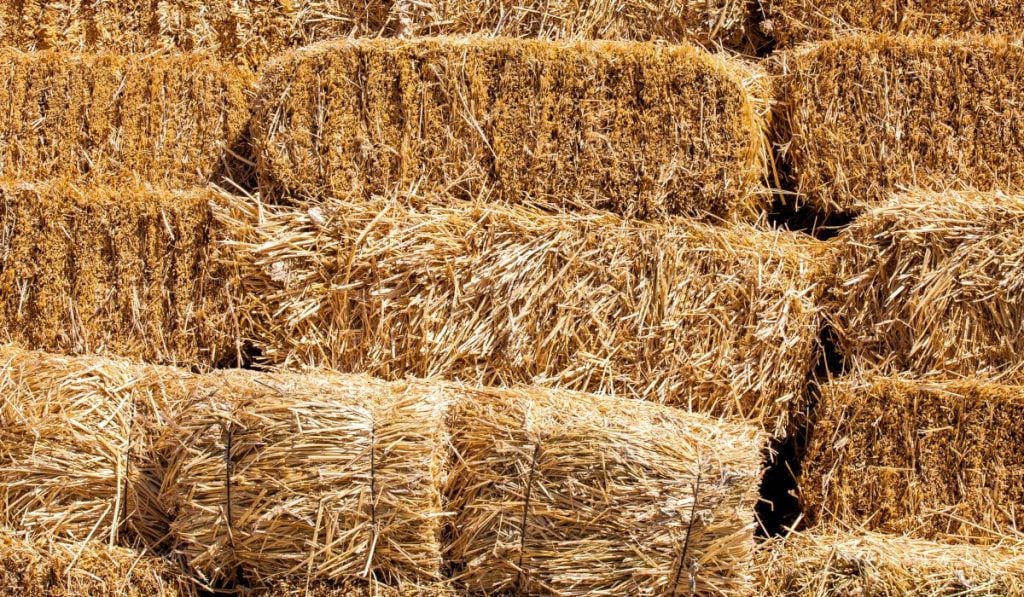
Straw is one of the most common growing mediums for larger blue oyster mushroom projects.
Cardboard works as an alternative that you can get for free, although it contains less nutrition than straw.
The process for pasteurizing either straw or cardboard is similar.
First, cut your straw or cardboard into small pieces. Approximately 5 – 10 cm (2 – 4 inches) is ideal.
Then soak the material in hot water (65 – 80 C or 149 – 176 F) for 2 hours. Allow your substrate to cool to room temperature before moving on to inoculation.
Alternatively, you can soak in a high pH lime bath for 12 hours. This is best for larger batches.
Add 4 cups (0.95 liters) of hydrated calcium hydroxide or calcium oxide to a 45 gallon (204 liter) drum of fresh water. One drum of lime water can be used to treat around 20 kg (44 lbs) of straw.
Food-grade calcium hydroxide is sometimes referred to as pickling lime and can be purchased where you would normally buy canning or food preservation supplies.
Coffee Grounds
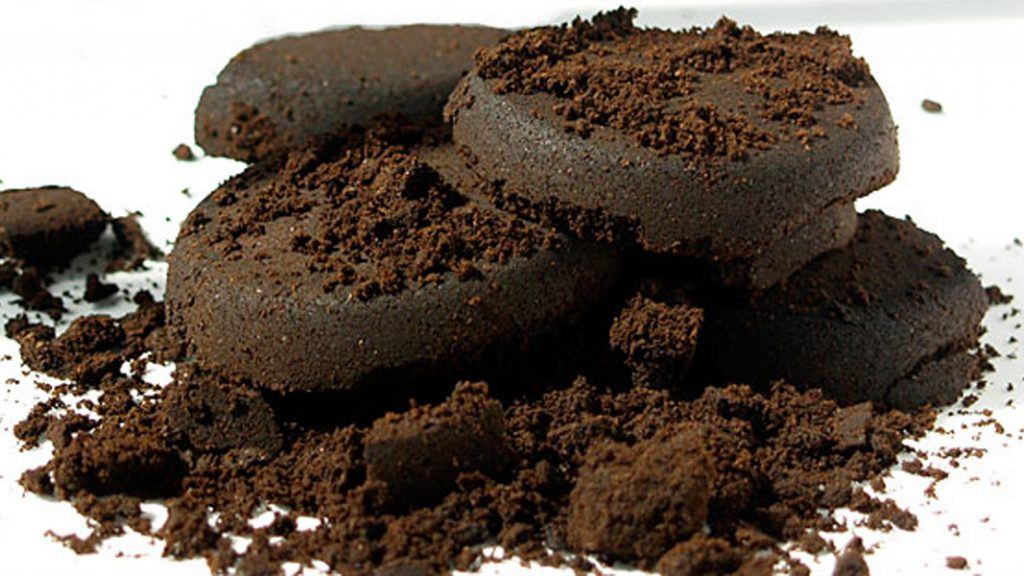
You can typically go to a coffee shop in your area and they’ll be happy to provide you with all the spent coffee grounds you’d like.
Coffee grounds are already pasteurized and hydrated by the coffee brewing process. So re-pasteurizing them is optional, similar to growing on sawdust pellets.
It’s important to only use fresh coffee grounds though. You want coffee grounds that were brewed within the past 24 hours.
Otherwise they may begin to develop mold that will compete with your blue oyster mushroom spawn and contaminate your bags.
You can grow on 100% coffee grounds in small bags (1 kg, 2.2 lbs or less). For bags any larger than this, you’ll want to mix in 20% to 50% straw.
The straw will help prevent compacting, excess moisture and reduce the risk of contaminants.
Step 2 – Inoculation
Once your substrate has been pasteurized and prepared, it’s ready to be inoculated with blue oyster mushroom spawn.
From this point on, extra care must be taken with regards to cleanliness and hygiene. You don’t want to re-introduce contaminants back into your clean substrate.
Make sure to clean your hands thoroughly with soap and water or alcohol before handling your materials. Wipe down all of your work surfaces with a cleaning spray as well.
Check Moisture Content
Before adding in your mushroom spawn, double-check that your growing medium is properly hydrated.
You can do this with a simple squeeze test. Squeeze the substrate in your hand and see how much water comes out.
You’re aiming to have only a couple drops of water come out.
If too much water comes out, it means your substrate is overly wet and will need to be dried out a bit before inoculating it.
If no water comes out, then your substrate is too dry and you’ll need to add a bit more water.
Mix in Mushroom Spawn
Once you’re happy with your substrate, you can break your blue oyster mushroom spawn into small pieces and mix it in with your hands.
The more mushroom spawn you add, the faster your substrate will get colonized.
We recommend a spawn rate of 10%. That means for every 10 lbs (4.5 kg) of substrate, you’ll want to add 1 lb (0.45 kg) of spawn.
You can spread your substrate out on a clean countertop or use a large plastic box to make the mixing process easier.
Bag Everything Up
Once you’ve thoroughly mixed your spawn and substrate, it’s time to place everything into grow bags.
You can buy special-purpose mushroom grow bags with air filter patches already included.
If you’re not using a bag with a filter patch, then poke a few small holes every 4 inches (10 cm) or so around the entire bag. This will allow for fresh air exchange.
Once you’ve filled your bags, seal up the top with tape, a rubber bag or some other kind of tie.
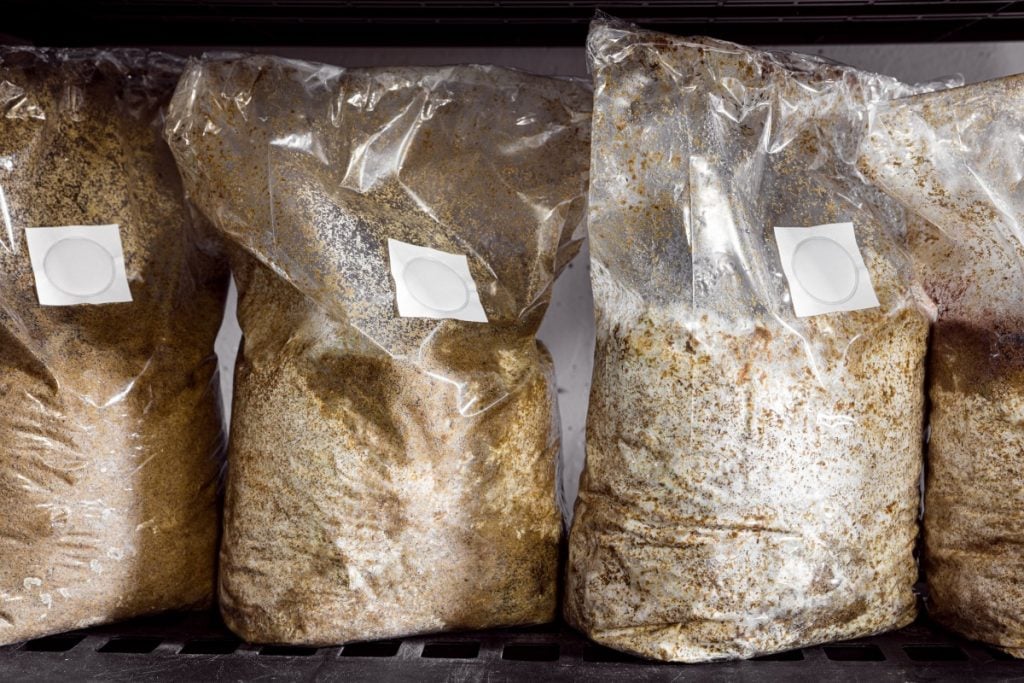
Step 3 – Incubation
Now most of the hard work is done.
Next, you need to place your bags in a dark, warm (24 C or 75 F) room to incubate.
Your blue oyster mushroom spawn will begin to colonize the substrate and you’ll see root-like mycelium spreading throughout it.
Blue oyster mushrooms will take about 2 or 3 weeks to fully colonize their substrate.
Monitor your bags every couple of days for signs of contamination. If you see strange-colored molds or insects and other pests, you will probably need to discard your bags and start over.
You’ll know that you’re ready for the next step when your substrate is completely covered in fluffy white mycelium.
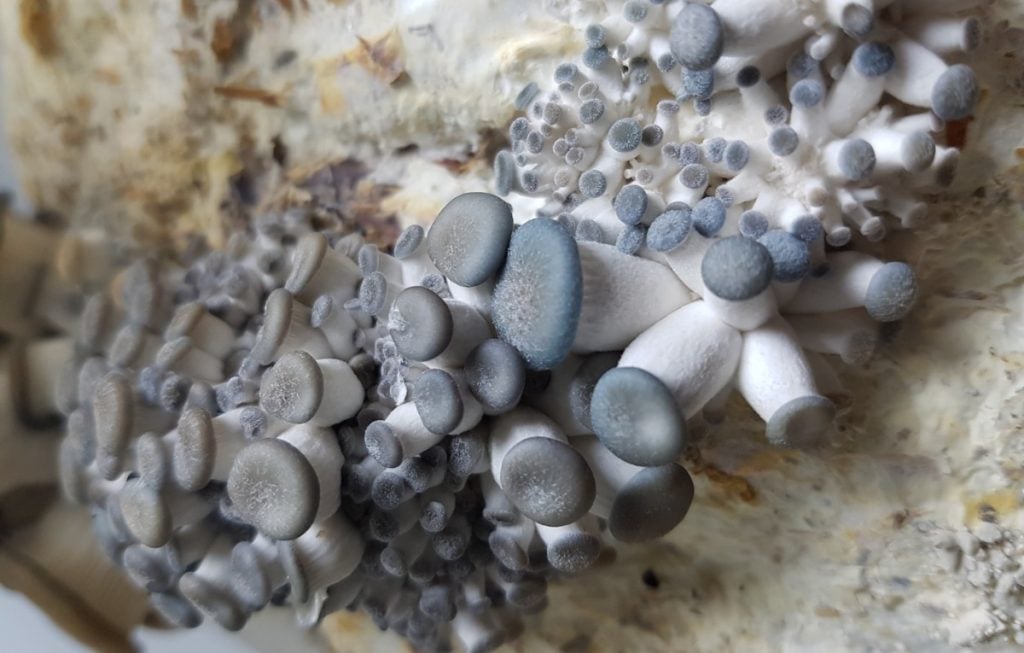
Step 4 – Fruiting
Your mushrooms are ready to start fruiting once the substrate has been fully colonized by mycelium.
To signal that it’s time for them to grow, we place our bags in a space with autumn-like conditions.
These include lots of fresh oxygen, low level light, cooler temperatures and high humidity.
In these conditions, small pins will begin to form that will eventually become mushrooms.
Fresh Air
Fresh air and plenty of air exchange is the most important criteria for successfully growing blue oyster mushrooms.
When it’s time to fruit, cut 2 inch (5 cm) X-shaped slits in your bag. This will signal to your mycelium that it’s time to grow and clusters of mushrooms will appear at each of these slits.
Regardless of the size of your fruiting chamber, you’ll want some type of fan to ensure good air circulation.
Temperature
Another factor that differentiates blue oyster mushrooms from other oyster varieties is their preferred temperature.
Blue oyster mushrooms are a cold weather strain that prefers temperatures between 12 to 17 C (54 to 63 F) for fruiting.
When you grow blue oysters within this temperature range, they’ll properly form and their caps will have a nice blue color.
While you can grow blue oysters at higher temperatures, their color becomes a lighter blue or grey color which may be less desirable.
They may also grow a bit misshapen at higher temperatures.
Humidity
For smaller batches of mushrooms, you can manually spray them with a water spray bottle a couple of times per day to keep the substrate hydrated and humid.
Larger fruiting chambers should have a dedicated humidifier to keep humidity within the range of 85% – 90% relative humidity.
You can use an electronic hygrometer to automatically turn your humidifier on when the humidity gets too low.
Light
Blue oyster mushrooms only need a low level of light as a signal to start fruiting.
Avoid direct sunlight. You can use indirect light such as a shaded windowsill.
However, we prefer to have a dark fruiting chamber and then use LED light strips inside. That way we have complete control over the light levels that our mushrooms are exposed to.
Read our article How to Build a Mushroom Fruiting Chamber: 7 Steps to create the right fruiting chamber for any size of mushroom growing operation.
Watching Your Mushrooms Grow
If you create the conditions above, you should start to see mushroom pins forming within 7 days.
Over the next week or so, you’ll see these tiny mushrooms begin to double in size every day until they’re ready to harvest.
Step 5 – Harvesting
If you’ve done everything correctly up to this point, you should now have fully-grown blue oyster mushrooms. Congratulations! Now it’s time to harvest.
So what’s the ideal time to harvest your blue oyster mushrooms?
You want to watch for when the largest mushroom caps go from turning downward to flattening out.
Once the edges of oyster mushrooms start turning up, there’s a risk that they’ll start dropping spores. They also start to dry out and might not taste as good if harvested late.
This part of the process can happen fast. Sometimes the difference between harvesting too late or too early is only a few hours.
So as your blue oyster mushrooms are reaching maturity, you’ll want to check on them several times per day.
We recommend erring on the side of picking them a little early rather than late. Once they start dropping spores, it can be quite a mess to clean up.
Over time, you’ll start to get a feel for the best time to pick your mushrooms.
To harvest, use a sharp knife and cut the entire cluster off at the base.
We don’t recommend twisting and pulling clusters off by hand, as it can damage the mycelium and introduce contaminants. Particularly if you want to get another flush out of your bags.
Getting Multiple Flushes
Blue oyster mushrooms will typically produce multiple flushes, or rounds of mushrooms per bag.
After your first harvest, don’t immediately compost your bags. At least as long as they still look healthy and aren’t showing signs of contamination or drying out.
As long as you keep moisture levels and humidity high, you should start to see a second batch of mushrooms form after another two weeks or so.
You might be lucky enough to even get a third flush out of each bag. Although as the mycelium uses up the nutrients of the substrate, you’ll get less and less mushrooms each time.
Eventually it’s time to compost or throw away your spent substrate and start a new batch.
How To Clean and Store Blue Oyster Mushrooms
To clean blue oyster mushrooms, you can just wipe off any large bits of dirt with a paper towel. Then trim off the tougher or dirty ends of their stems.
Since blue oyster mushrooms grow on wood, they don’t get as dirty as other varieties of mushrooms that grow on dirt.
There isn’t nearly as much grit or little pieces of dirt to clean out.
It’s best to not wipe them down with any water until just before you want to cook them, if at all. That way they’ll last longer without spoiling.
Rinsing blue oyster mushrooms with water can cause them to soak up more moisture. This can negatively impact their texture and flavor.
The best way to store blue oyster mushrooms is in a refrigerator.
You can place them either in a paper bag, or in a plastic bag that isn’t closed all the way.
It’s best to give them a little bit of airflow even while in the fridge. Store them in the main compartment of your fridge, not in a produce drawer.
When stored this way, blue oysters will last in the fridge for up to a week. Although the fresher they are when eating them, the better.
If you buy blue oyster mushrooms from a shop and it’s wrapped in plastic wrap, open the plastic up a bit so they are able to get some airflow as well.
You’ll know your blue oyster mushrooms have gone bad if their texture gets slimy and they have an unpleasant odor. At that point, throw them away or compost them.
How to Tell if Mushrooms are Bad: The Telltale Signs can help if you’re unsure.
However if they’re only looking a little dry and shriveled, you might still be able to salvage them. Prepare them in sauces or soups where they can soak up some additional liquid.
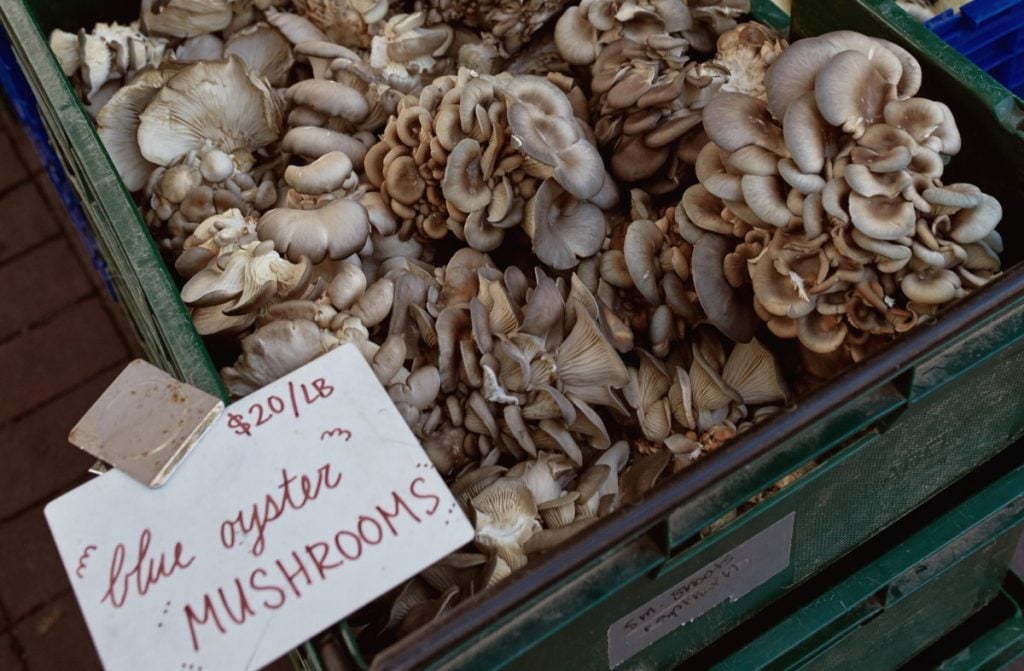
How Much Do Blue Oyster Mushrooms Cost?
The prices for blue oyster mushrooms will vary depending on where you live, if there are local growers and other factors.
Generally, 1 lb (0.45 kg) of blue oyster mushrooms costs between $10 and $15 (£6 and £9) at retail.
If you’re a mushroom grower, you can expect to sell blue oyster mushrooms for a wholesale price of around $5 to $8 (£3 – 5) per pound.
For a small kit that allows you to grow blue oyster mushrooms at home, you can expect to pay between $20 and $40 (£15 and £30).
You can expect a blue oyster mushroom kit to produce approximately its own weight in mushrooms.
So a kit that contains 2.2 lbs (1 kg) of spawn will produce approximately that same amount of mushrooms over 2 or 3 flushes.
Plus you end up with much fresher mushrooms, which you can harvest literally minutes before cooking them.
You can buy a GroCycle Mushroom Grow Kit here.
Lastly, you can also buy dried blue oyster mushrooms. 1 lb (0.45 kg) of dried oysters costs approximately $40 – $50 (£30 – £38).
Keep in mind that dried oyster mushrooms weigh considerably less than fresh ones.
3 ounces (85 grams) of dried oyster mushrooms will become approximately 1 lb (454 grams) once rehydrated.
Where To Buy Blue Oyster Mushrooms
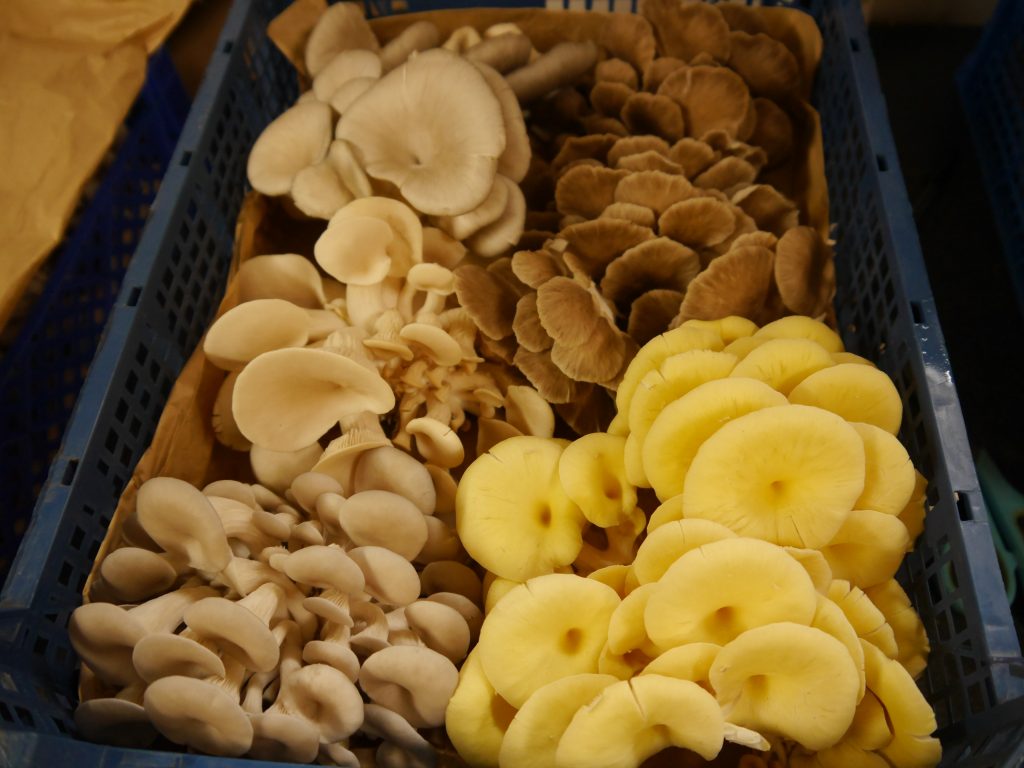
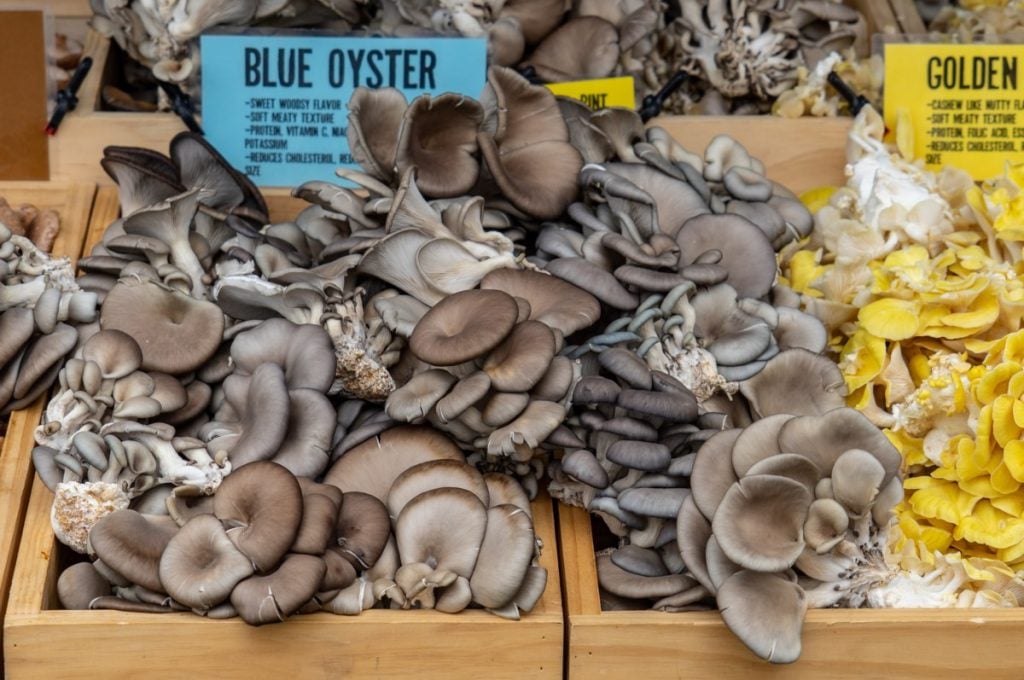
Blue oyster mushrooms are less common in most grocery stores. Most shops will carry pearl oyster mushrooms instead.
Blue oysters and pearl oysters are very close in terms of flavor, size and texture. Pretty much every characteristic except color.
So if you aren’t picky, you can just buy whatever oyster mushrooms are available in a shop near you for a close approximation.
If you want to try blue oyster mushrooms specifically, you’ll need to look a little harder.
Blue oyster mushrooms are commonly used in Asian cuisine. So if you have an Asian market nearby, it’s the first place you should check.
You can also stop by your local farmer’s market to see if any vendors are selling blue oyster mushrooms as well.
What if all of the above options leave you empty-handed? Then you’ll need to buy some blue oyster spawn or a kit and grow them yourself.
Blue Oyster Mushroom Lookalikes
The mushrooms that you’ll most likely confuse a blue oyster with are other varieties of oyster mushrooms.
These include:
- Pearl oysters
- Golden oysters
- Pink oysters
- Phoenix oysters
- King oysters
You aren’t likely to confuse blue oysters with golden oysters or pink oysters, which have their own distinctive colors.
You’re most likely to confuse a blue oyster with a pearl oyster mushroom. If you come across pearl oysters with grayish caps, they can be difficult to distinguish to the untrained eye.
The good news is that blue oysters and pearl oysters taste practically identical. So it’s not a huge deal if you mix them up.
Phoenix oysters are also very close in appearance to blue and pearl oysters. The main difference is that they have a smaller and more pale cap.
Read Phoenix Oyster Mushroom: What They Are + How to Grow Them for a full explanation.
Again, they taste very similar to blue oysters, so it’s not a big deal if you get them mixed up.
King oysters, on the other hand, have a very distinct appearance. They have fat, meaty stems that make up most of the mushroom. Their caps are proportionally much smaller.
King oysters also tend to grow more individually. You won’t see them sold as a big cluster like blue or pearl oysters.
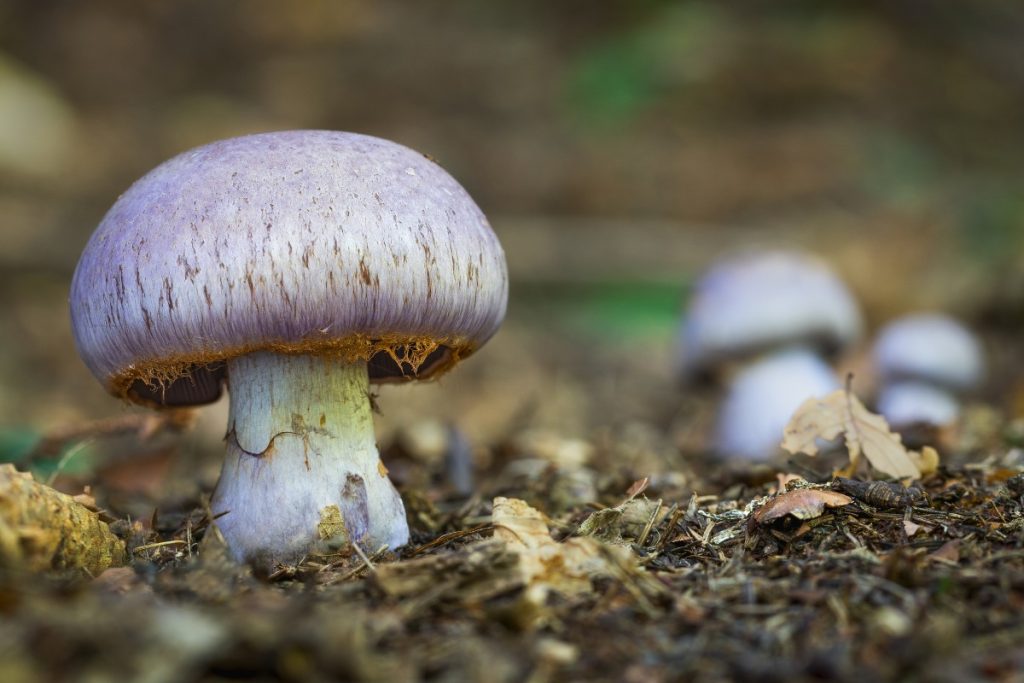
Indigo Milk Cap (Lactarius indigo)

Out in the wild, an indigo milk cap is the most likely mushroom to be confused with a blue oyster.
An indigo milk cap has a bright vibrant hue. It also has large prominent gills that might look like a blue oyster mushroom from underneath.
However, the gills don’t run down the stem like on an oyster mushroom.
The indigo milk cap will also produce a bright blue latex when you break or cut it.
The good news is that the indigo milk cap is edible, although not as tasty as an oyster mushroom.
They’re said to have a flavor similar to a portobello mushroom, but with a more grainy texture.
Cortinarius Mushrooms
Some mushrooms in the Cortinarius family can be blue in color.
They look more like a typical toadstool type mushroom as opposed to an oyster mushroom though, so they are pretty easy to distinguish.
They’re more likely to be confused with an indigo milk cap. The difference is that Cortinarious species don’t release any latex when cut.
Cortinarius mushrooms also have a brown spore print, where indigo milk caps have a cream-colored spore print.
Panus Conchatus
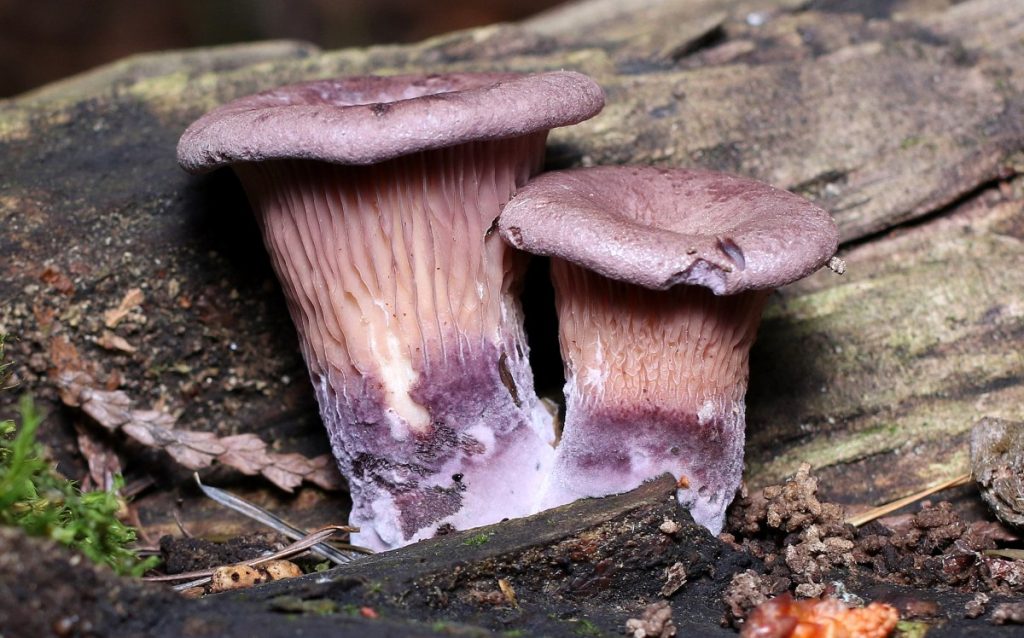
The panus conchatus mushroom looks similar to an oyster mushroom.
They’ve got a similar oyster-shaped cap. The name “conchatus” is Latin for “shell-like.” These mushrooms also have gills that run down the stem like an oyster.
You can distinguish them from blue oysters because they have more of a purple or brownish color.
Panus conchatus mushrooms grow on rotting wood throughout North America and Europe. So you may come across them in the same habitats where you’d find wild oysters.
This mushroom is considered inedible. It’s too tough and leathery to eat, but it’s not poisonous.
Panellus Serotinus
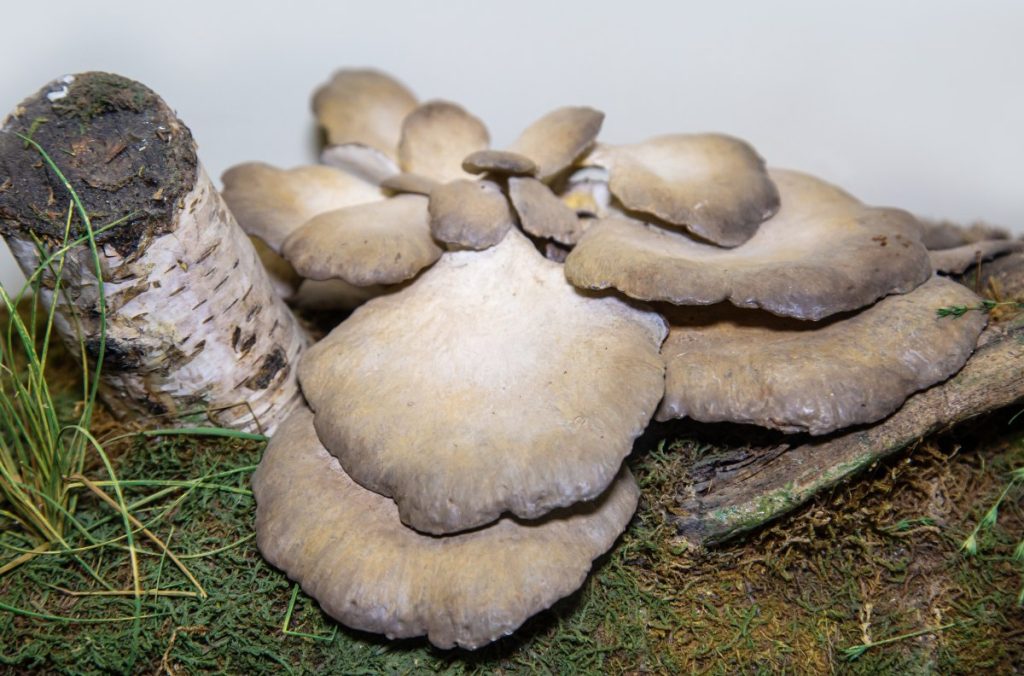
These mushrooms look quite similar to blue oyster mushrooms. They’re even sometimes called “late oyster” mushrooms.
They grow in much smaller clusters than oyster mushrooms and tend to look more like a shelf or bracket fungus.
These mushrooms are considered mostly inedible. Some say they taste tough and bitter. Other people say they’re edible but it depends what type of tree they’re growing on.
Omphalotus Nidiformis
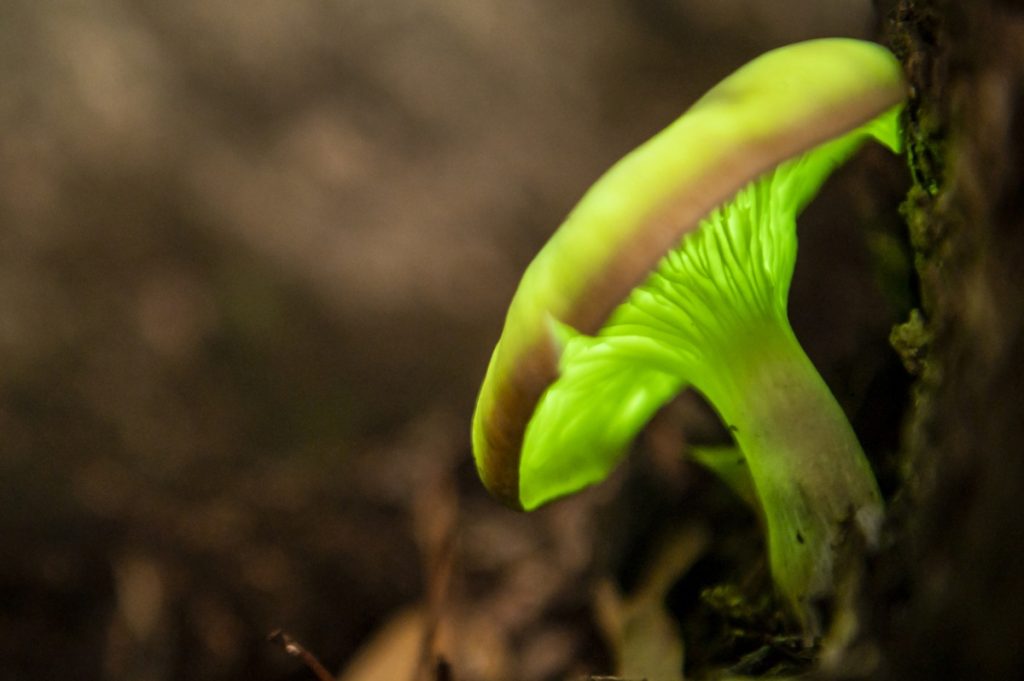
Also known as ghost fungus, omphalotus nidiformis looks quite similar to an oyster mushroom.
It’s quite pale (almost white) in color, so you aren’t as likely to confuse it with a blue oyster compared to a pearl oyster.
The easiest way to tell ghost fungus apart from oyster mushrooms is the fact that it glows in the dark.
Ghost fungus is poisonous and will cause cramping and vomiting for several hours if eaten.
Mock Oyster or False Oyster
The mock oyster (phyllotopsis nidulans) looks like an orange-colored oyster mushroom. It’s found across Europe and North America.
Its main distinguishing feature is that it has a fuzzy cap with tiny hairs all over it. It also has an unpleasant smell.
While mock oysters are edible, they don’t taste nearly as good as a blue oyster mushroom. So it’s best to avoid them.
Health Benefits of the Blue Oyster Mushroom
All oyster mushrooms varieties have been shown to:
- Lower blood pressure
- Help lower high cholesterol
- Boost the immune system
- Have potential anti-cancer benefits
- Act as an anti-inflammatory
For more information, be sure to check out our article called Health Benefits of Oyster Mushrooms.
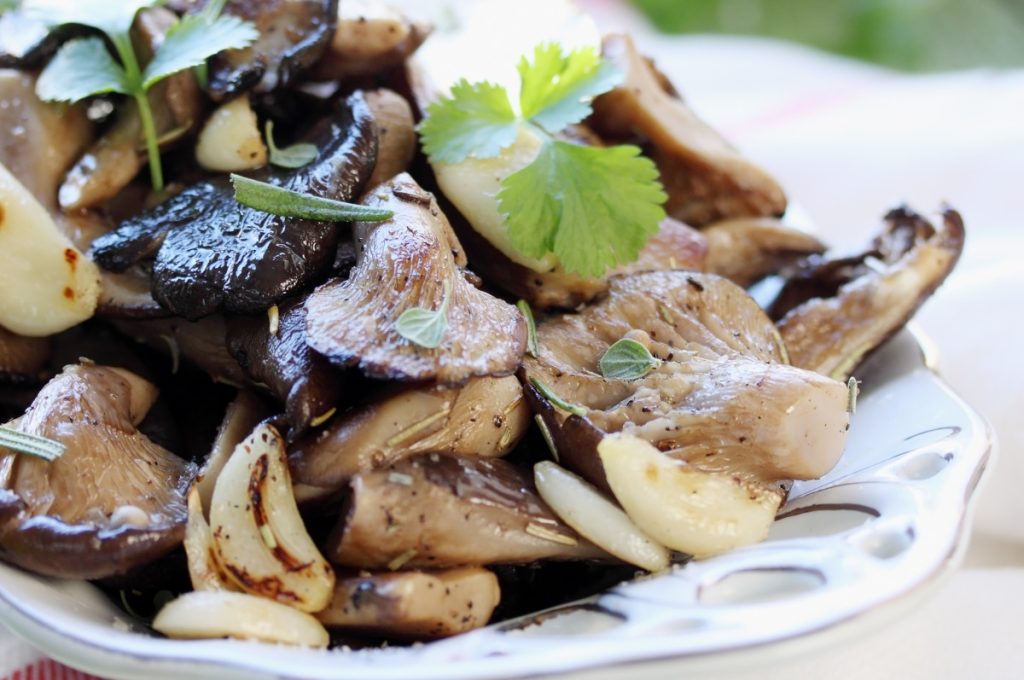
Blue Oyster Mushroom Recipes
Blue oyster mushrooms are a versatile ingredient that can be cooked a bunch of different ways.
Try out a blue oyster mushroom recipe below to see for yourself:
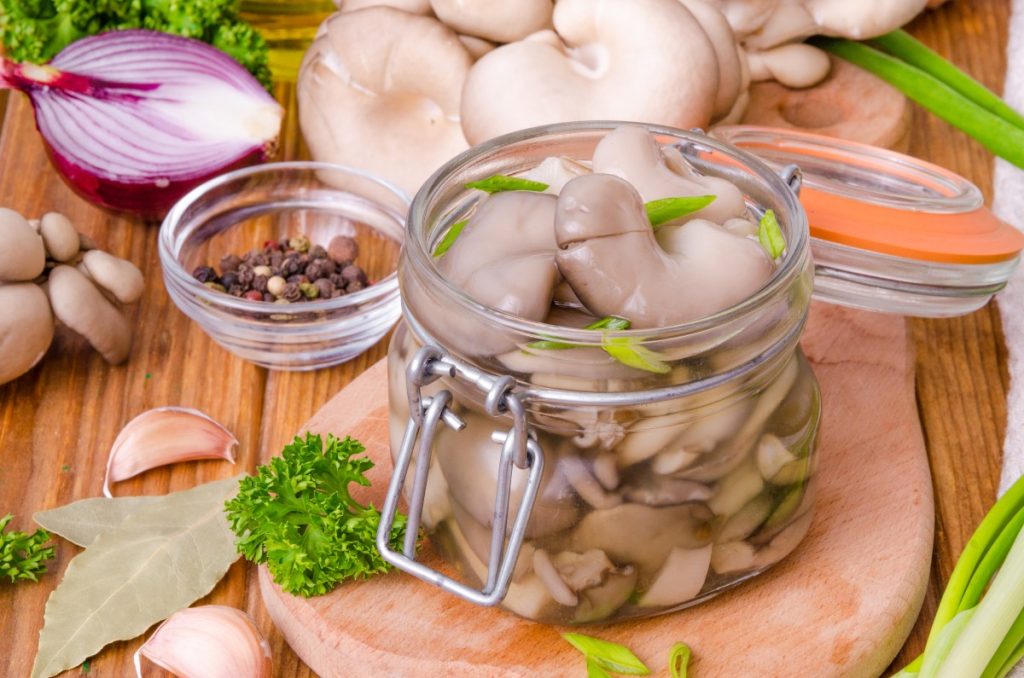
- Pan fried with vinegar, soy sauce and garlic
- In your favorite pasta dish
- Dehydrated into mushroom jerky
- Added to stir fries
- In a mushroom soup or stew
- Create an oyster mushroom omelet or frittata
- Pickle them in vinegar
Basically, we recommend trying them in any recipe that calls for mushrooms!
Check out 5 Easy and Delicious Oyster Mushroom Recipes for a few more of our favorites.
Final Thoughts
Blue oyster mushrooms are similar in appearance and taste to a pearl oyster. The main difference is their blue or gray colored cap.
It’s less common to find blue oyster mushrooms in grocery stores. The good news is they’re one of the easiest mushrooms to grow at home yourself.
They’re a delicious addition to all sorts of recipes and they’re good for you too.
Try growing your own blue oyster mushrooms and see for yourself!