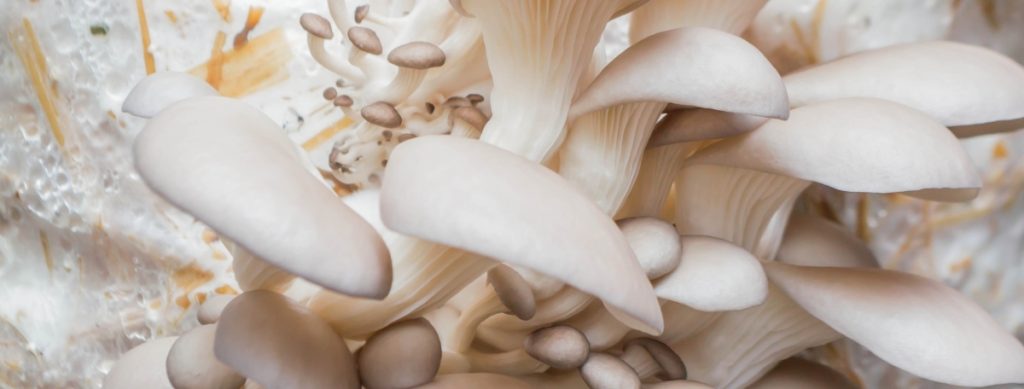
A Martha Grow Tent allows mushroom growers to produce an impressive amount of mushrooms. All with minimal expense or DIY skills required.
In this article, you’ll learn what a Martha Tent is and the reasons for using one. We’ll provide you with a step-by-step guide for how to build a Martha Grow Tent for yourself.
Then we’ll provide a list of common Martha Tent problems you may run into and how you can troubleshoot them yourself.
What Is a Martha Tent?
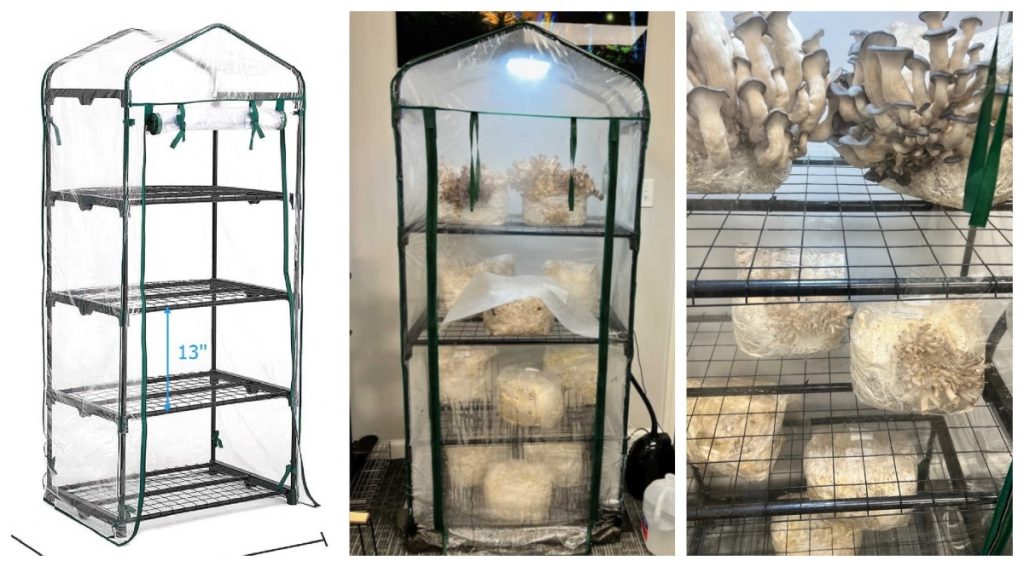
A Martha Tent is a medium-sized mushroom fruiting chamber. Typically it’s more of a DIY project than something you can purchase as a full kit or pre-assembled.
Most open rooms aren’t a great place to grow mushrooms. The humidity and temperature is too low.
Using a Martha Tent allows you to control and optimize the environment and conditions that your mushrooms need to grow.
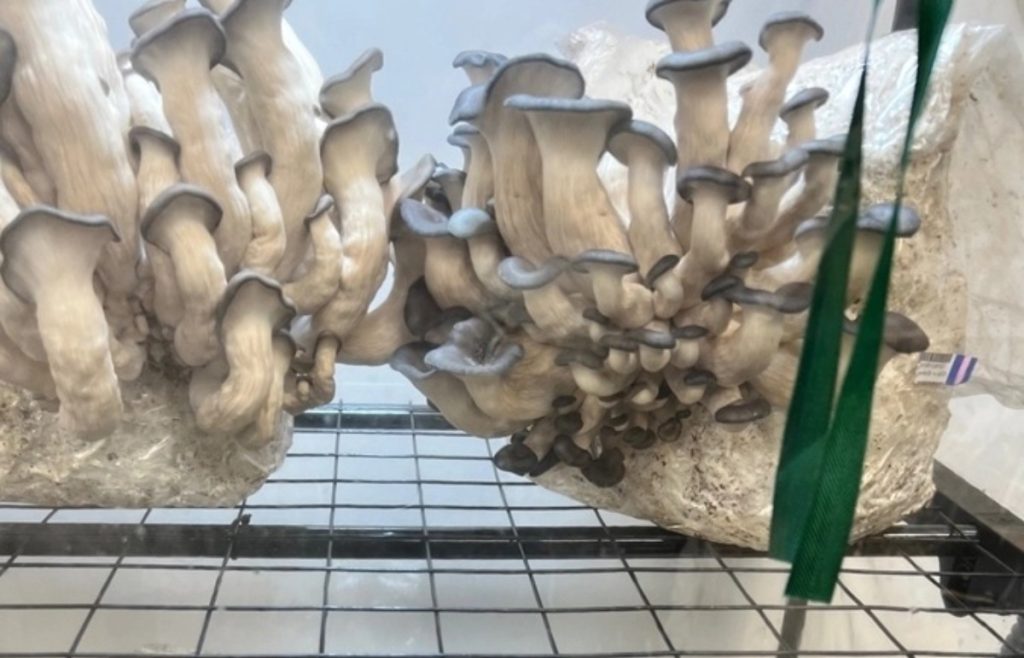
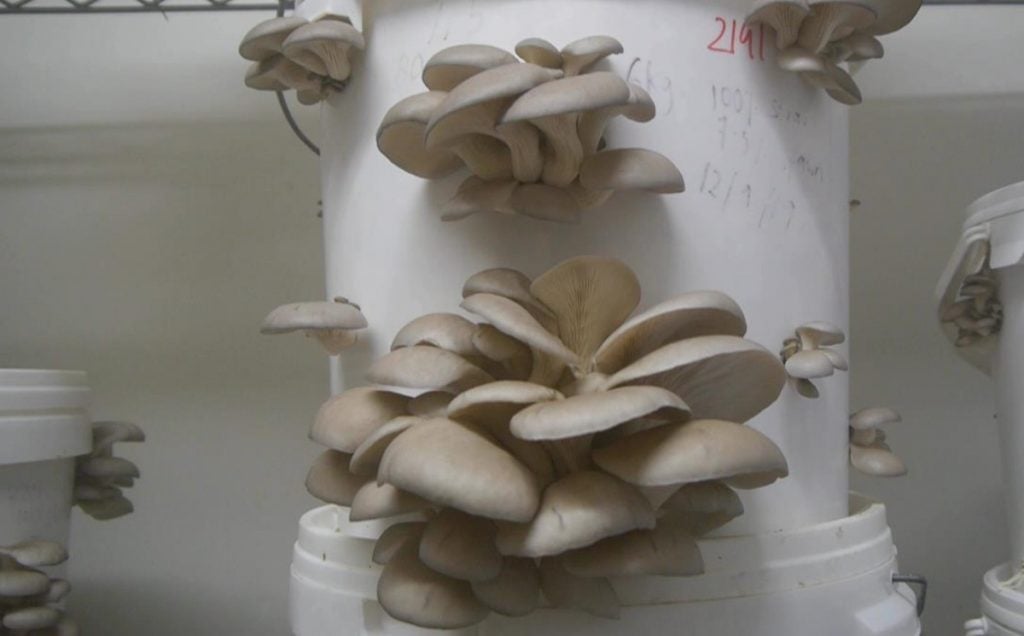
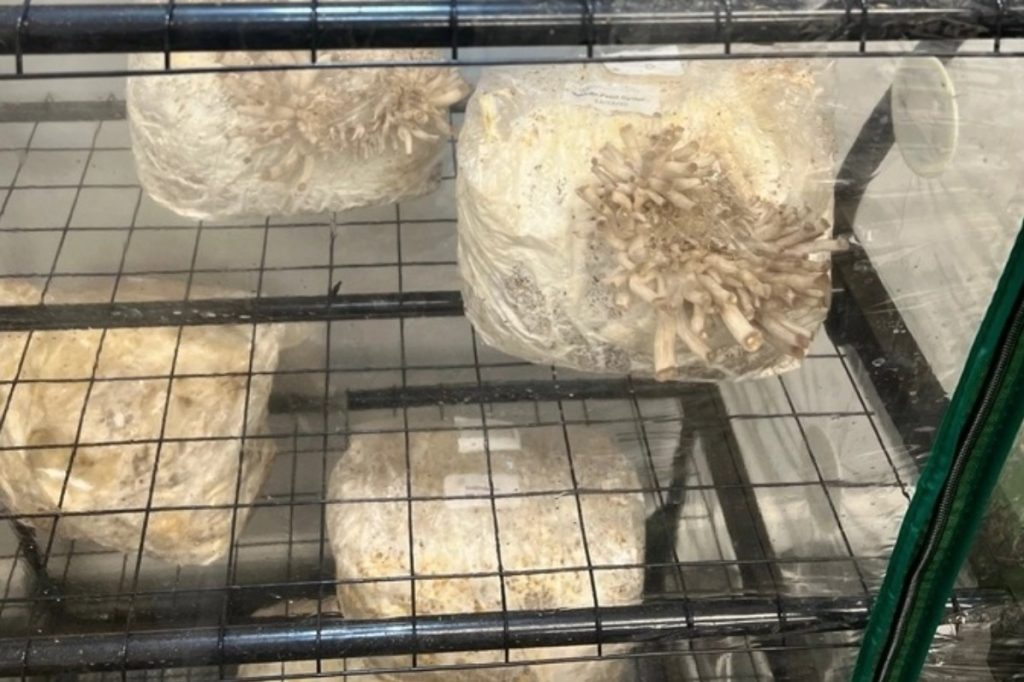
You can use a Martha Tent to fruit mushrooms from trays, bottles, jars or blocks. Most Martha Tents aren’t large enough to fit a mushroom column bag.
A great thing about Martha Tents is how flexible they are. You can fit them in your basement, the corner of your kitchen or even a closet. There are also designs to fit nearly any budget.
You can also scale up the size of your tent to produce up to a few pounds or kilograms of edible mushrooms each week. They can be used to grow a variety of different mushroom species.
Whether you’re a beginner or intermediate mushroom grower, Martha Tents are a great setup for growing mushrooms at home all year round.
Read How Long Does It Take To Grow Mushrooms? All Questions Answered to see when you should expect your first batch of mushrooms.
Why Is It Called a Martha Tent?
The Martha Tent gets its name from American businesswoman Martha Stewart.
The first Martha Tent was created by a mushroom grower who converted a Martha Stewart Portable Closet into a mushroom grow chamber.
A portable closet is basically a clothing rack that’s wrapped in clear plastic.
The term Martha Tent has become a slang term for any mushroom grow chamber of a similar size and structure. That’s where the connection to Martha Stewart ends.
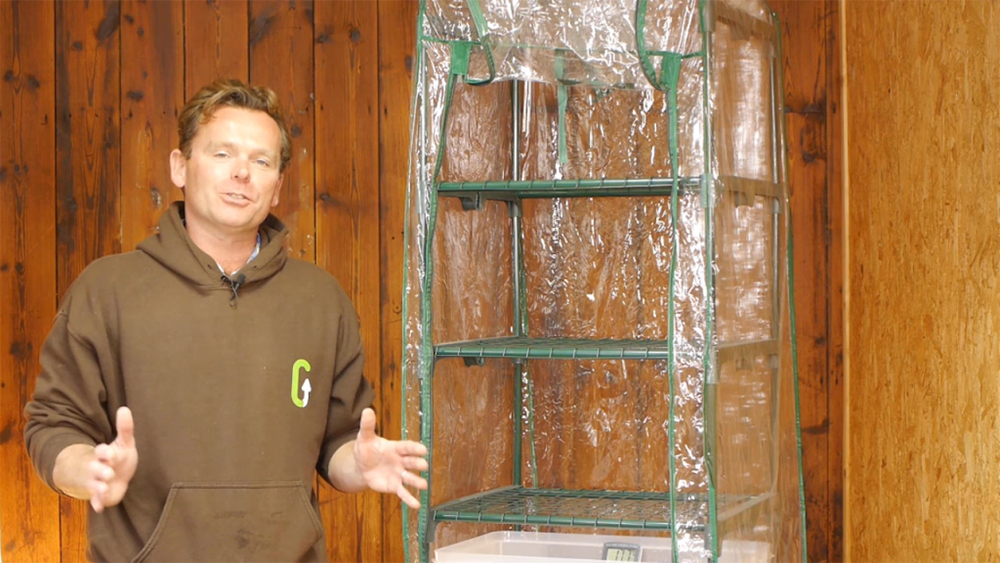
Today, most people use a mini greenhouse to create their Martha Tent instead of a portable closet.
Most mini greenhouses come with 4 shelves pre-installed. That means less customization is needed to start growing mushrooms in them.
Really though, a Martha Tent can be any small-to-medium sized mushroom fruiting chamber. Especially those with a clear plastic zip-up cover for easy access.
Why Would You Want To Build a Martha Tent?
Mushrooms need a high humidity environment to grow. Otherwise they’ll dry out or never form properly.
You probably don’t want to be living in a room with humidity of 85%, so you’ll need to put them in their own enclosed structure like a Martha Tent or larger hydroponic tent.
Having your mushrooms in a tent also helps keep the temperature a bit warmer than room temperature. This will help most mushroom varieties to grow better.
Not quite ready to build a Martha Tent yet? Why not try growing in buckets using The Ultimate Guide to Growing Mushrooms in Buckets?
Pros and Cons of a Martha Grow Tent
A Martha Tent has pros and cons compared to other mushroom fruiting chambers that you could use.
It offers more space and higher yield than a smaller shotgun fruiting chamber. But it’s smaller and more portable than a larger grow tent or dedicated fruiting room.
Martha Tents are a great setup for intermediate growers who have some experience and success growing smaller kits or single bags.
They’re the next step in growing on a larger scale, while still keeping things relatively low-cost and able to be kept in an average home or apartment.
Since Martha Tents use clear plastic and are usually kept in your living area, they’re easy to check up on and see how things are progressing.
A big downside to most Martha Tents is that they use small humidifiers that will need to be refilled with water frequently. So carrying water back and forth can be a chore.
Although they’re fairly low-tech, it will probably take a good deal of tweaking to get everything working optimally.
Depending on your setup and what you’re growing, you might also need to get a bit creative with your shelving and how you fit everything together.
Martha Tents work best for substrates that are already fully colonized. You’ll be venting air in through the bottom which can cause contamination more quickly.
You’ll want a separate spot for your mushroom growing bags or jars to colonize before adding them into the tent.
Lastly, you’ll need a tray to catch excess condensation. Otherwise you’ll ruin your carpet or hardwood flooring with moisture over time.
What Growing Conditions Are You Creating Inside a Martha Tent?
The goal of Martha Tents is to control and maintain four conditions for optimal mushroom growth: Temperature, humidity, light and fresh air exchange.
Humidity
Martha Tents trap and maintain high levels of humidity with their plastic sheeting.
In a low-tech Martha Tent, humidity may be introduced with a simple spray bottle filled with water a couple of times per day. Or you can use a tray of perlite too.
Most Martha Tents are a bit more high-tech and feature an ultrasonic humidifier, plus a humidity controller to maintain the desired moisture content inside of the tent.
Depending on the mushroom species you’re growing, you’ll want a relative humidity of 70 – 95%.
Fresh Air Exchange
Mushrooms crave low CO2 conditions when fruiting. They inhale oxygen and exhale CO2 just like people.
So if CO2 levels inside your Martha Tent become too high, their growth may suffer, or they might even suffocate.
Low CO2 levels are also an indicator of fresh blowing air in nature, which signals to mushrooms that it’s a good condition to mature and drop their spores.
In a Martha Tent, we use a fan to pull oxygen into the tent and to vent stale air and CO2 out.
If you’re letting your Martha Tent vent directly into your living space, then you’ll want to have a filter patch to catch any spores on their way out.
Alternatively you can go a little more high-tech and connect some ducting to your fan to blow the air directly out a window.
Light
For most of the year, we don’t need to introduce any artificial lights to our Martha Tent. They receive enough ambient light just from being in a room with a window during the day.
Mushrooms don’t need light to photosynthesize like plants. The light acts more as a trigger to tell the mycelium that they’re in proper fruiting conditions.
If you can provide around 12 hours of sunlight and 12 hours of darkness per day, that will work perfectly.
In winter months you may get as little as 7 hours of sunlight per day. In this case you can supplement with some simple LED lighting if you aren’t getting the growth you desire.
Temperature
As with light, in most cases your Martha Tent will maintain an adequate temperature just based on the ambient heat in your home.
Most mushrooms fruit in temperatures between 12 – 26 C (55 – 80 F). So the temperature that’s comfortable for you will also likely be what your mushrooms like to grow in.
If you can, it’s better to stay to the lower end of that range for best results. Or you can select a strain of mushrooms that specifically prefers to grow in your home’s regular temperature.
During the winter in colder climates, or if you’re growing your mushrooms in an external building like a shed or garage, you may need to add extra heat.
Some Martha Tent owners add extra heat with heating pads or heated water humidifiers.
Be sure not to place your Martha Tent too close to radiators, air conditioning units, vents or registers. You want to maintain a consistent, stable temperature.
Looking for something a bit larger or smaller? How to Build a Mushroom Fruiting Chamber: 7 Steps has something for growers of every size.
How To Build a Martha Grow Tent (Step by Step)
There are any number of different Martha Tent designs available online.
We’ll provide two versions and you can decide which will work best for you. The first is a more simple design and the other is an automated version.
Materials You Will Need
- A mini greenhouse (5 shelf design recommended, but 3 or 4 will work)
- Drip tray
- Scissors and/or knife
- Marker*
- Screwdriver (flathead aka slotted)
- Ultrasonic humidifier*
- Humidity controller*
- Fresh air exchange fan*
- 4 inch (10 cm) ducting and hose clamp*
- Filter patch*
- Foam*
- Duct tape and/or zip ties*
* Items marked with an asterix are optional and only required for the automated version. You can add none, some or all depending on the level of automation you’re looking to achieve.
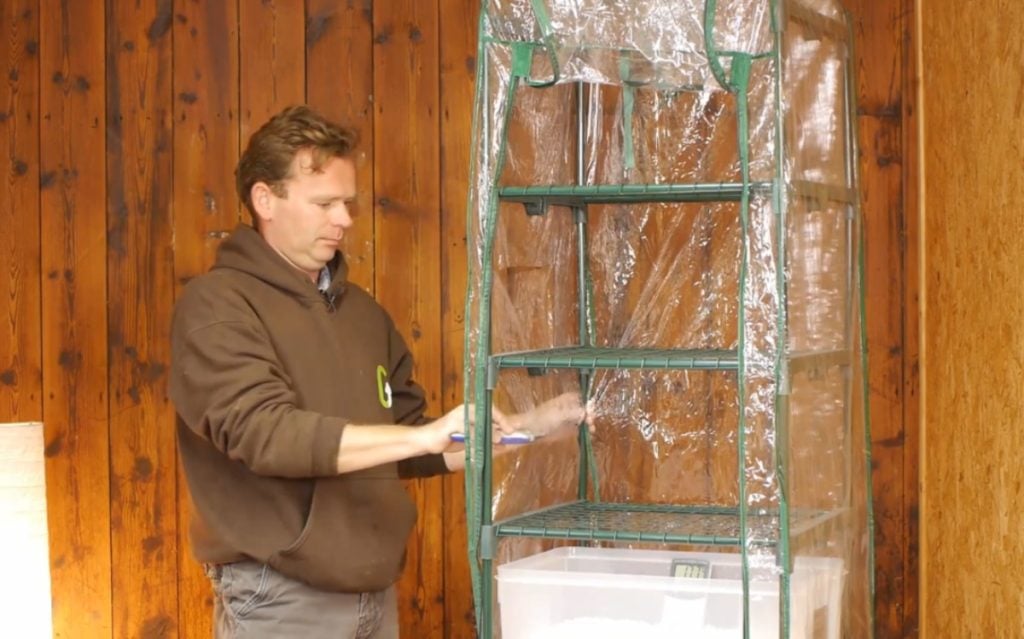
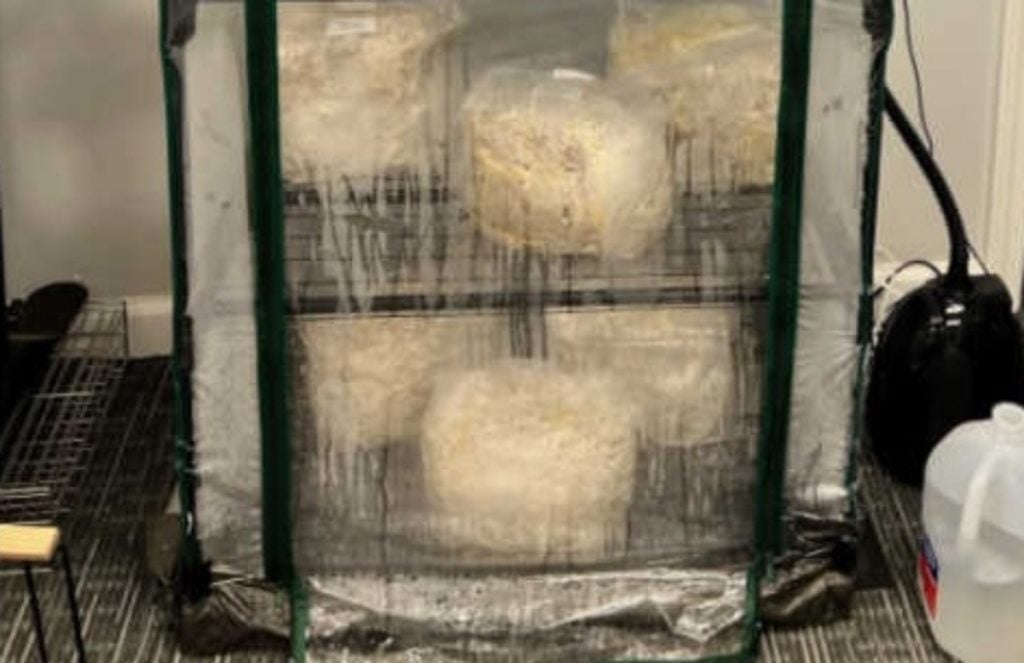
Step 1: Assemble Your Tent
For either the simple or automated plan, your first step will be to assemble your greenhouse tent.
If you’ve bought your mini greenhouse new, then it should come with its own set of assembly instructions.
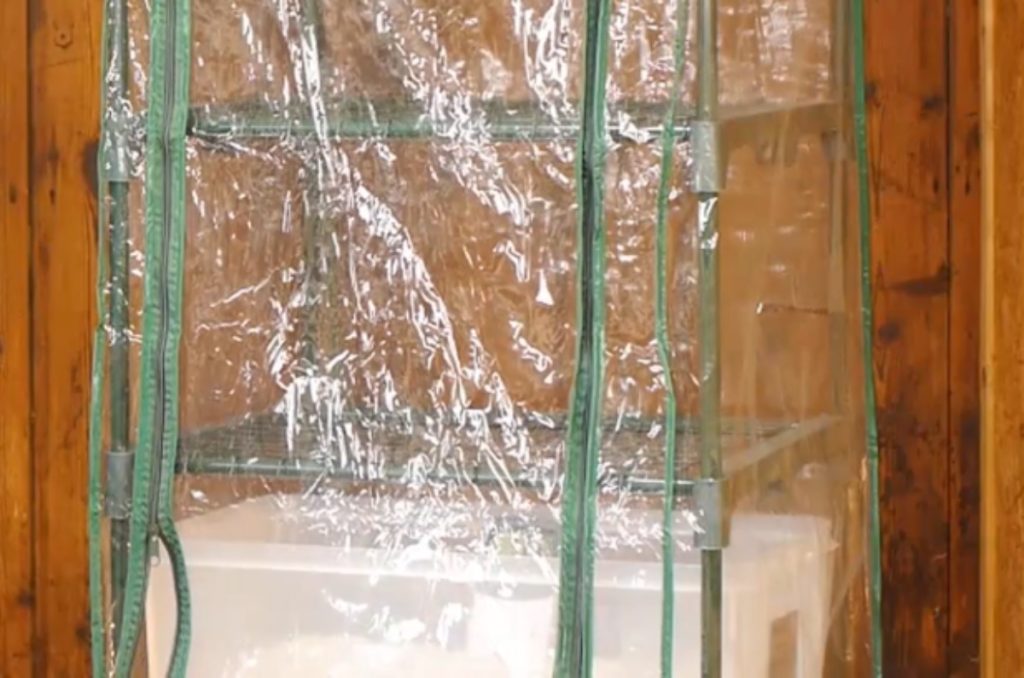
The basic steps are assembling the outer frame, fitting the shelves in and then putting the plastic cover over it.
If your model has the option to take a shelf from the bottom and put it at the top, we recommend doing so.
Your humidifier can sit directly on the drip tray at the bottom and it’ll help maximize the total amount of usable space within your Martha Tent.
This is especially true if you’re going to be using a fresh air exchange fan, as you’ll want it to sit on the top shelf to vent out stale air.
After your greenhouse tent is all put together, now is a good time to lift it up and put your drip tray underneath. This will help prevent moisture damage to your flooring.
For the Simple Version – Cut Ventilation Holes
If you don’t plan to add a humidifier, fan, light, or temperature control to your Martha Tent, then at this point you’re almost all set.
All you’ll want to do is cut some small holes in your tent for some ventilation using scissors or a knife. Then when it’s time to grow, just leave the zipper slightly ajar.
We recommend starting off by poking just a few holes for fresh air exchange. Then later on, if CO2 levels seem too high you can always add more holes to adjust.
For humidity, we’re going to be simply adding a tray on the bottom level with some wet perlite.
This simple version will have no specific lighting or temperature control. Just situate it indoors near a window.
Step 2: Humidity System
This step onward is specific to the automated version where you’ll want factors like humidity and air exchange controlled for you.
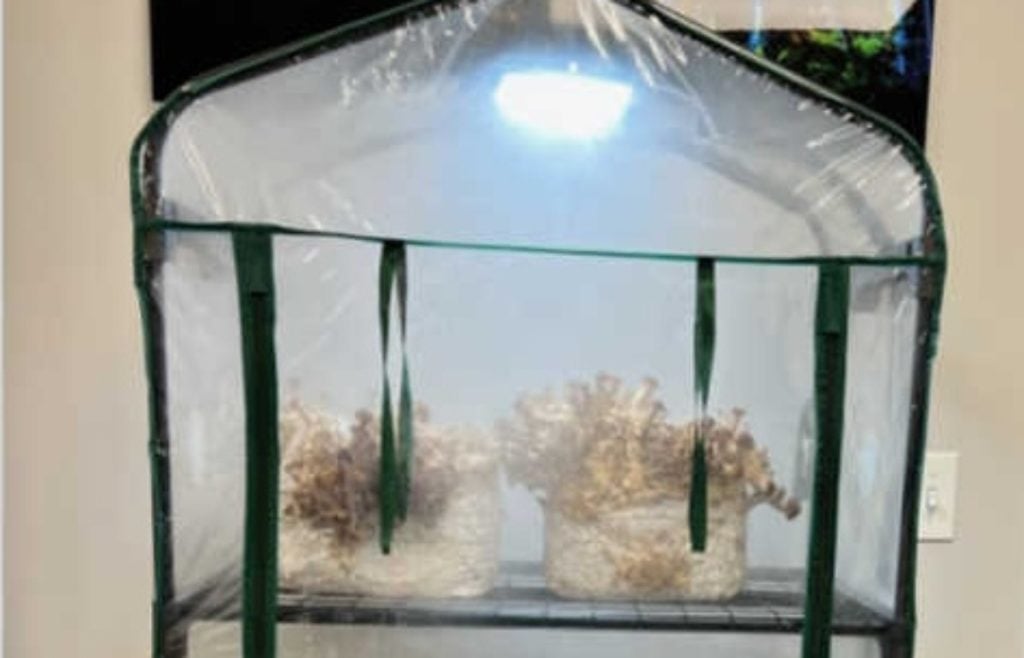
Place your ultrasonic humidifier on the drip tray of your bottom of the tent or on the lowest available shelf.
If you’re going to put your humidifier directly on the drip tray, we recommend putting a piece of plastic or metal underneath to raise it up a bit.
That way it’ll be less likely to have direct contact with water and cause a short.
Feed the electrical wiring of the humidifier out under the bottom of the plastic sheeting. That way they’re out of the way and can be plugged into a nearby outlet or extension cord.
Try to position the mist from your humidifier in a way that it won’t be directly spraying on your mushrooms. Otherwise they might become oversaturated with water.
Next you’ll want to set up your humidity controller. It will monitor humidity levels within the Martha Tent and keep them within your desired range.
Feed the sensor from your humidity controller into the tent and place it on the top shelf. Like with the humidifier, the wiring can come down the side of the tent and out under the plastic.
Your humidity controller will sit outside the tent and you’ll plug your sensor and humidifier into it.
We recommend setting your controller to maintain a low range of 80% and a high range of 90%.
That means the humidifier will turn on when humidity drops to 80% and it will stay on until humidity reaches 90%.
From there, you can monitor your setup and see if the mushrooms seem like they’re either too wet or too dry and adjust accordingly.
For a slightly more complicated setup, you can create a DIY humidity system outside of the tent.
It’s beyond the level of complexity we’ll cover here, but you can find specific step-by-step instructions on how to create one of these online.
The basics are that you’ll want a large plastic tote bin, a computer fan and a pond fogger.
The pond fogger creates humidity inside the plastic tote. Then the computer fan will vent this humidity through a duct and into your tent.
The main benefit to this type of humidification system is that it holes a much larger reservoir of water. That means it needs to be refilled much less frequently than an ultrasonic humidifier.
There are even some setups where you can hook the tank directly to your water supply, so you never need to fill it by hand.
Step 3: Installing Your Fan
Next you’ll want to install your fan, so you have a way of creating fresh air exchange within your Martha Tent.
Place your fan on the top shelf inside of your tent.
Make sure that the exhaust end is facing toward the outside of the tent.
Then trace a hole with a marker on your tent where the exhaust is and cut it out. Make it slightly smaller than the inside of the exhaust, so the plastic sheeting will fit snugly around your fan.
Gently push your fan through the opening that you’ve created. The seal with the plastic should help hold your fan stable on the shelf.
Feed the wires down the side of your tent and out the bottom, as we did with the humidifier and sensor wires.
If you aren’t going to be ducting your fan out a window, then you’ll want to add a filter to the fan exhaust. This will catch any spores so they don’t get released into the rest of your house.
Use a 4 inch (10 cm) hose clamp to hold the filter in place and tighten it with a screwdriver.
What if I Place My Fan Wrong?
If you place your fan backwards, you’ll create positive pressure inside the tent. You’ll easily notice if you’ve got your fan setup backwards if the tent starts to bow outwards like a balloon.
It is possible to grow with positive pressure, and in fact many commercial mushroom farms are setup like this, but they have well designed airflow systems that move the outgoing air though duct systems and filters.
For a small tent setup at home, it’s often best to run a negative pressure setup. That way, fresh air will get pulled into the tent from the bottom and old air will be removed out through the top.
This will help pull spores and excess moisture out of your Martha Tent which can more easily be ducted outside, instead of blowing spores out from around the cracks in the grow tent into the room of your house.
Automating Your Fan
You don’t need to have the fan in your Martha Tent running every minute of the day.
Use either a simple timer or a CO2 controller to tell your extraction fan when it should turn on and off.
If you’re using a timer, you’ll need to experiment and find the right balance depending on your fan size and air output.
We recommend starting off by setting your fan to run for 2 minutes every hour, if your timer allows for 1 minute increments.
If you have an older timer that only does 15 minute increments, then start off by turning your fan on for 15 minutes every 4 hours and adjust as needed.
A CO2 controller will provide a more exact solution that keeps your Martha Tent within a specific CO2 range.
Setup for a CO2 controller is essentially the same as a humidity controller. Feed the sensor in and position it on the top shelf of the tent and connect the fan to the controller.
If using a CO2 controller, we recommend starting off with CO2 levels of somewhere between 1,200 and 1,500 ppm.
CO2 concentrations below 800 ppm will result in mushrooms that are too small and numerous. Above 2,000 ppm mushrooms will start to become deformed with long stems and small caps.
Optional: Ducting Your Fan Out A Window
If you’ve got a nearby window available, we recommend putting in a little extra effort to vent your Martha Tent outside.
Even with a filter, some spores may still get through and into the rest of your home. This can bother people with allergies or sensitivities to mushroom spores.
Some people also develop allergies if exposed to oyster mushroom spores over an extended period. So it’s best to limit contact as much as possible.
Adding ducting to your Martha Tent is straightforward.
Just add a 4 inch (10 cm) duct to the exhaust of your fan that’s long enough to reach to a window.
Fit the other end of the duct out the window. For a long-term solution, fit a piece of foam or a wood board into the open window with a hole large enough for the duct to fit through.
It’s very similar to how you’d vent out a portable air conditioner unit.
If you want to try growing mushrooms outdoors, we recommend reading How To Grow Mushrooms On Logs: The Ultimate Guide.
Step 4: Temperature and Lighting
As mentioned earlier, most Martha Tents won’t require controlling temperature and lighting for most of the year.
However, if you’re growing in an opaque grow tent or unheated structure then you’ll need to automate these aspects too.
To control temperature, add a heating mat on each shelf underneath your mushrooms.
You can buy waterproof heating mats designed for seedling germination for this purpose.
These mats will help maintain temperatures approximately 10 – 20 F (5.5 – 11 C) above the ambient air temperature of the room your tent is in.
Many of these seedling heat mats will come with a thermostat controller of their own. But if not, you will need to buy and connect them to a separate thermostat.
For lighting, we recommend LED lighting strips. They’re easy to install (most come with a strong adhesive backing) and they’re very energy efficient.
The spectrum or color of light doesn’t matter as the mushrooms only need a minimal amount of light to signal that it’s time to grow.
Put your lights on a timer with a 12 hour on/off cycle.
Martha Grow Tent Placement
Martha Tents don’t take up a large amount of space, so they offer a lot of flexibility in terms of where you can put them.
There are a few factors to take into consideration with where you place your Martha Tent.
You definitely want your tent to be near an electric and water supply.
If you’re planning to vent the outcoming air, you’ll also want to pick a spot near a window. But you don’t want the tent in direct sunlight where your mushrooms will get baked either.
It’s best to avoid placing your Martha Tent in a bedroom or other frequently-used living space in case you’re sensitive to mushroom spores.
They might leak out of the tent, no matter how careful you are.
Common Martha Tent Issues and How to Troubleshoot Them
Especially in the beginning, you’re going to need to closely monitor your Martha Tent to make sure your mushrooms have their optimal conditions.
Here are some signs to look for and how to fix them.
Mushrooms are developing fuzzy stems – This can be a sign of either excessive moisture or carbon dioxide. Try lowering one variable at a time and see how your mushrooms adjust.
Mushrooms have skinny stems – This is another sign that CO2 levels might be too high. Increase the amount of time your fans run, or ideally use a CO2 controller.
Spores are escaping into your living space – Use a filter on your fan exhaust to capture spores, or vent air directly outdoors. Check for leaks and holes in your plastic tent where spores may be escaping. You could setup your fan to pull air out (negative pressure) instead of pushing it in (positive pressure). This may reduce the amount of spores escaping through gaps into your room instead of exiting through the ducting.
Fan clogging up with spores – Make sure to harvest your mushrooms early before they fully open and begin dropping spores. This is particularly important for oyster mushrooms.
Your fan will naturally accumulate a buildup of spores over time and needs to be cleaned periodically to keep it in working order.
Not enough air exchange – For our simple version of a Martha Tent, cut more holes or larger holes in your tent to allow for more fresh air exchange.
For the automated version, set your fan to run more frequently or install a larger fan.
Mushroom caps are cracked or brown, or drying out before they grow at all – Not enough humidity.
Be sure your humidifier doesn’t run out of water and that your humidity controller is set to a high enough relative humidity level. It should be at least 80% relative humidity or higher.
Mushrooms pin but then stop growing – This is typically caused by either low humidity or a temporary drop in humidity levels.
Make sure you’re providing consistently high humidity. If your humidifier isn’t able to hold enough water to keep your tent humidity up overnight, buy or make one with a larger reservoir.
Pale mushrooms – This can be a warning sign that either your mushrooms aren’t getting enough light, or the temperature is too high. Adjust one variable at a time and see if it improves.
Substrate is not colonizing – You shouldn’t be putting your spawn into a Martha Tent during the colonization phase. Store them in a dark location with high CO2 until they’re ready to fruit.
Martha Tent Tips and Tricks
Here are some tips and tricks to make your mushroom growing in a Martha Tent a bit easier.
- If you don’t have a drip tray, you can place a small tarp under your Martha Tent to catch excess moisture. Roll up the edges and clamp it to the legs of the tent.
- Clean your tent periodically to reduce risk of contamination and spore buildup. You can use rubbing alcohol or antibacterial wipes on the plastic sheeting and shelves.
- For a more hands-off cleaning approach, fill your humidifier with water and about 1 or 2 tablespoons of hydrogen peroxide and run it. (Don’t do this with mushrooms inside!)
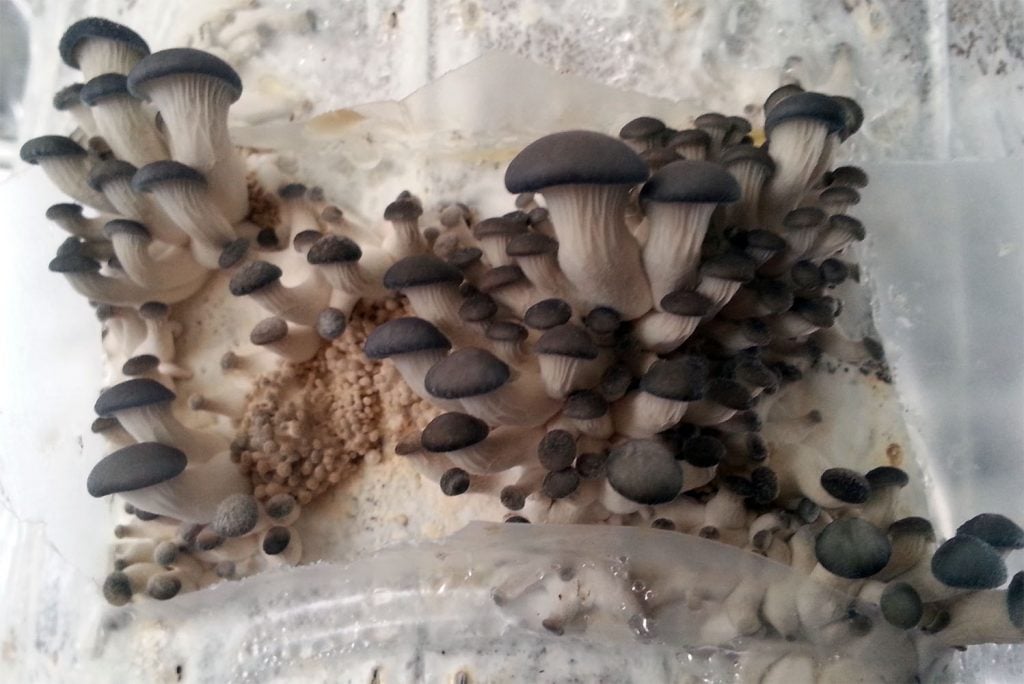
- Martha Tents can be used to grow a wide variety of mushrooms. Experiment with oysters, lion’s mane, turkey tail, shiitake, reishi, pioppino and more!
- Turn your fan on to test that it’s facing the right way before adding mushrooms to your tent. This will help prevent unnecessary spores from getting into your living space.
- Direct sunlight will turn your Martha Tent into a greenhouse and raise temperatures to levels that may kill your mushrooms. Expose it to indirect sunlight only.
Final Thoughts
A Martha Grow Tent is the natural next step for someone transitioning from a beginner to intermediate mushroom grower.
It gives you control over the temperature, lighting, humidity and fresh air exchange of your mushrooms. Plus it’s adaptable to a variety of growing methods.
This setup will allow you to produce up to several pounds of mushrooms per week. And it’s relatively inexpensive and easy to set up too.
When you’re ready to move on to something larger, check out our article How To Set Up A Low Tech Mushroom Farm or sign up for one of our mushroom growing courses.


