Growing mushrooms at home is extremely rewarding, and there are several ways for you to get your hands on delicious edible and medicinal mushroom species.
But not all mushrooms are equal, and when you come across a strain you really enjoy, making a liquid culture and multiplying the mycelium is a great way to ensure an ongoing supply.
Read on to learn more about mushroom liquid culture, why it’s useful, how to make liquid culture and how to use your liquid culture to grow more mushrooms.
What Is Liquid Culture?
Liquid culture, often called LC for short, is a sterilized nutrient-rich solution containing live mushroom mycelium. Mushroom growers use liquid culture to grow, store and transfer mushroom mycelium to other growing mediums.
Knowing how to make a liquid culture is beneficial for small-scale home growers and the ingredients and equipment are relatively easy to source.
But, using a sterile technique is very important, and you’ll need a pressure cooker to sterilize your solution and a clean space for inoculation.
Is Liquid Culture the Same as a Spore Syringe?
Liquid culture is not the same as a spore syringe. A spore syringe contains mushroom spores in sterile water, while a liquid culture contains living mushroom mycelium in a nutrient-rich solution.
Our article, “Liquid Culture vs. Spore Syringe: Which is Right for You?” has more information on the differences between these two and how to choose the best one for you.
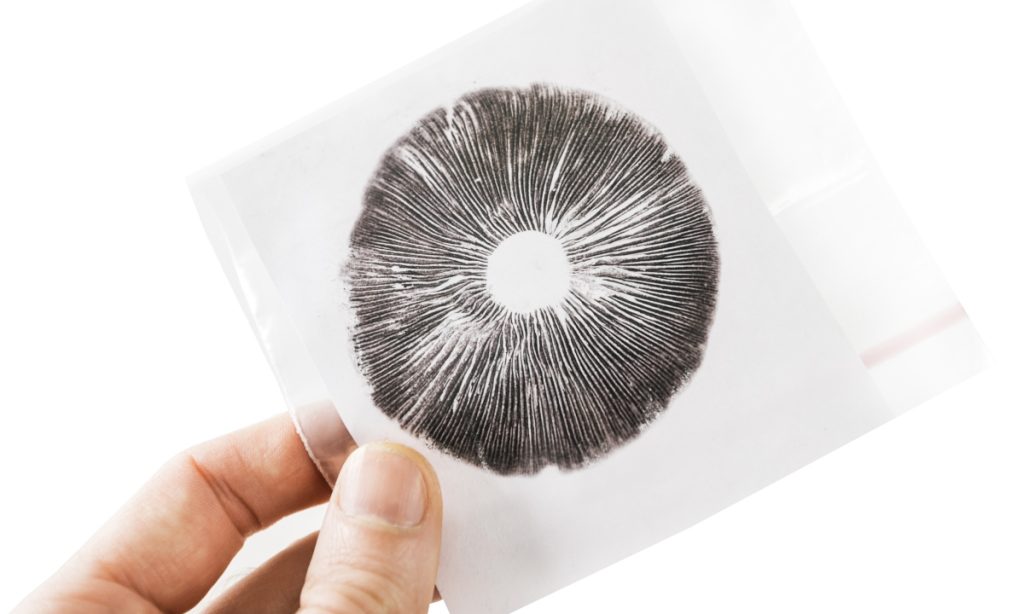
Can You Make Liquid Culture From Spores?
Yes, you can make liquid culture from spores, but it takes much longer for the mycelium to form and colonize the nutrient-rich solution.
Another downside of making liquid culture with spores is that when two spores combine to form hyphae, they create a new strain, making it difficult to predict the genetic traits.
If you decide to make a liquid culture using spores, you can purchase a spore syringe online or make a mushroom spore print and collect the spores yourself.
How to Make Liquid Culture Step-by-Step
There are a few methods for making a liquid culture, so before you begin, you have a few decisions to make, including:
- Which mushroom species do you want to grow? If possible, select a proven strain that’s hardy and fast-growing.
- Whether you’re going to add mushroom culture or spores to your nutritious solution? We recommend using a mushroom culture rather than spores, as you know what you are getting when you multiply up a pure culture.
- Which sugar are you going to use in your solution? Several liquid culture recipes are available, with malt extract, honey and corn syrup being popular choices.
Once you have decided, follow the steps below to make your liquid culture:
Step 1: Gather Supplies
To make a liquid culture, you’ll need the following:
- Mason jars with modified lids – You can buy AirPort or grain spawn jars online, and they come with lids that have a self-healing injection port and a filter for air exchange. Alternatively, If you already have the mason jars, you can purchase the AirPort lids separately, or for a more cost-effective method, you can modify standard mason jar lids yourself.
- A sugar to provide nutrients. Organic honey, corn syrup, corn sugar, light malt extract and dextrose (glucose) will all work.
- Pressure cooker for sterilization.
- Glass marble, pieces of glass or a magnetic stir bar and plate. You will use these to assist with stirring the culture during incubation. (Optional)
- Mushroom spores or culture. You can order spore syringes, liquid culture or agar culture online.
- 10ml syringes with 16 to 18-gauge needles or a scalpel (depending on your choice of culture).
- Sterile gloves.
- Isopropyl alcohol.
- An alcohol burner or another steady flame source to sterilize the needle or scalpel.
Step 2: Create a Nutrient Rich Solution
Once you have all your supplies, it’s time to create a nutritious solution for the mycelium to feed on.
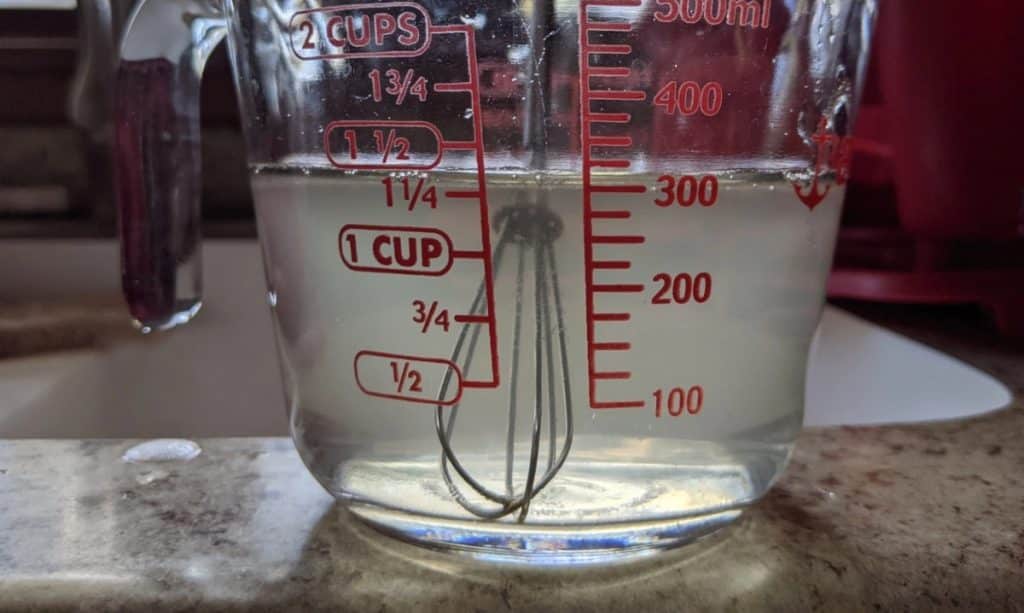
How do you make a liquid culture solution? Most growers agree that 4% sugar to water is the best ratio, but anywhere from 3% to 5% will be fine.
The amount of water and nutrients required will depend on the size of your jars. But generally, aim to fill your jars to around 80%.
For example, if you’re using a pint (473ml) jar, add 400ml of water and 4 teaspoons (16g) of your chosen sugar and stir until completely dissolved.
Liquid Culture Recipes
There are many liquid culture recipes that you can use to make your liquid culture solution. But you can also play around with ingredients until you find a solution that works for you.
Some growers add extra ingredients to speed up mycelial growth, but be careful with these as they can cause the solution to be cloudy, disguising any contamination.
Here are some popular liquid culture recipes:
- Light malt extract (LME) recipe: Add 20g of Light Malt Extract (LME) and 2g of yeast extract to 500ml of water and stir until dissolved. This is one of the most commonly used recipes.
- Karo liquid culture recipe: Add 16g of Karo light corn syrup to 400ml of water and stir until completely dissolved.
- Honey liquid culture recipe: Add 16g of honey (4 teaspoons) to 400ml of water and stir until the honey dissolves.
- Karo and LME recipe: Add 16g of Karo light corn syrup and 4g of Light Malt Extract (LME) to 500ml of water. Combine the ingredients in a small saucepan and slowly heat while stirring until the liquid is clear. Do not boil the mixture.
- Potato dextrose agar (PDA) recipe: Boil two peeled and chopped potatoes in 500ml water for 30 minutes. Strain the liquid to remove the potato pieces, then add 20g of dextrose and 15g of agar and stir until dissolved.
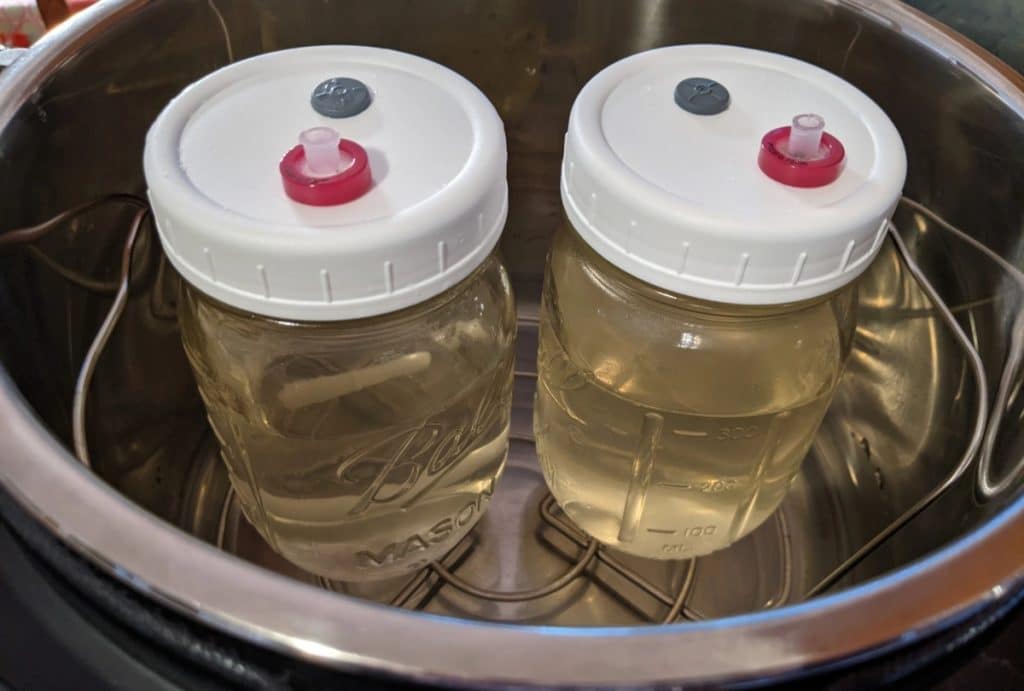
Step 3: Sterilization
Once your solution is ready, put it in the jar and add a glass marble, pieces of glass or a magnetic stir rod. Then, close the jar with an AirPort or modified mason jar lid.
To modify a standard mason jar lid, you can use a hammer and nail to make a hole and cover it with two strips of micropore tape.
Cover the top of the closed jar with tin foil to prevent any water from getting in through the filter. Then, place the jars in your pressure cooker, ensuring they do not touch the sides.
Use a metal rack, jar lids or a cloth to lift the jars off the bottom of the pressure cooker. Doing this helps to prevent cracking.
Add water to your pressure cooker and, following the manufacturer’s instructions, sterilize your jars for 30 minutes at 15PSI.
When the time is up, turn off the heat and leave the jars to cool inside the pressure cooker.
Step 4: Inoculation
Inoculation is the process of adding mushroom spores or mycelium to your sterile growing medium.
You can use a spore syringe, liquid culture or agar culture to inoculate your solution. Regardless of which you use, you’ll need to work in sterile conditions.
If you’re using an existing liquid culture, ensure it is from a trusted vendor or a pure culture so you don’t multiply contaminants.
The nutrient-rich solution you have created is perfect for growing mycelium. But it’s also ideal for contaminants like mold and bacteria.
Most growers use a clean workstation in front of a laminar flow hood, but you could also use a still air box or glove box.
Before you begin, check that your solution has cooled to room temperature, and wipe down the lid, jar exterior and workstation with alcohol.
Insert the needle of your spore or liquid culture syringe into the jar through the self-healing injection port or hole on the jar lid and inject the solution into the jar.
If the needle is new, you won’t need to sterilize it, but if you’re using an old one, you’ll need to sterilize it with a flame before use.
Gently shake the jar to distribute the newly inserted spores or mycelium throughout the solution.
When using agar culture to inoculate the solution, you’ll need to remove the jar’s lid, increasing the chances of contamination. So, this method is best done in front of a laminar flow hood.
Using a heat-sterilized scalpel, quickly cut and transfer a piece of agar culture from your agar plate to the jar and close the lid.
Our article on cloning mushrooms has more information on agar plates and how to use them.
Step 5: Incubation
During incubation, the mushroom mycelium will grow throughout the solution, feeding on the nutrients you have provided.
All you need to do is place your jar in a sheltered spot with consistent temperatures.
Ideal incubation temperatures vary from species to species. So, it’s best to research the correct incubation temperatures for the mushroom species you’re growing.
Check your jars daily, but do not disturb them until you see clumps of mycelium forming. How long this takes depends on the species you’re growing and the conditions you provide.
Liquid or agar cultures generally colonize the solution quicker than spores as they contain living mycelium. You could see the first noticeable growth in 2 to 7 days and have complete colonization within 3 weeks.
How long does it take to make a liquid culture from spores? When using spores to make a liquid culture, it generally takes 5 to 15 days for noticeable mycelium to form and another 7 to 21 days for complete colonization.
Once you see clumps of mycelium forming in your solution, you need to swirl or agitate the mixture to introduce oxygen and break up and distribute the mycelium for even colonization.
You can do this by simply swirling and shaking the jar, or for more effective stirring, insert something, for example, a glass marble, before sterilization to help with the agitation.
If you’re using pieces of glass or a marble, be careful not to shake too vigorously as you may crack the jar.
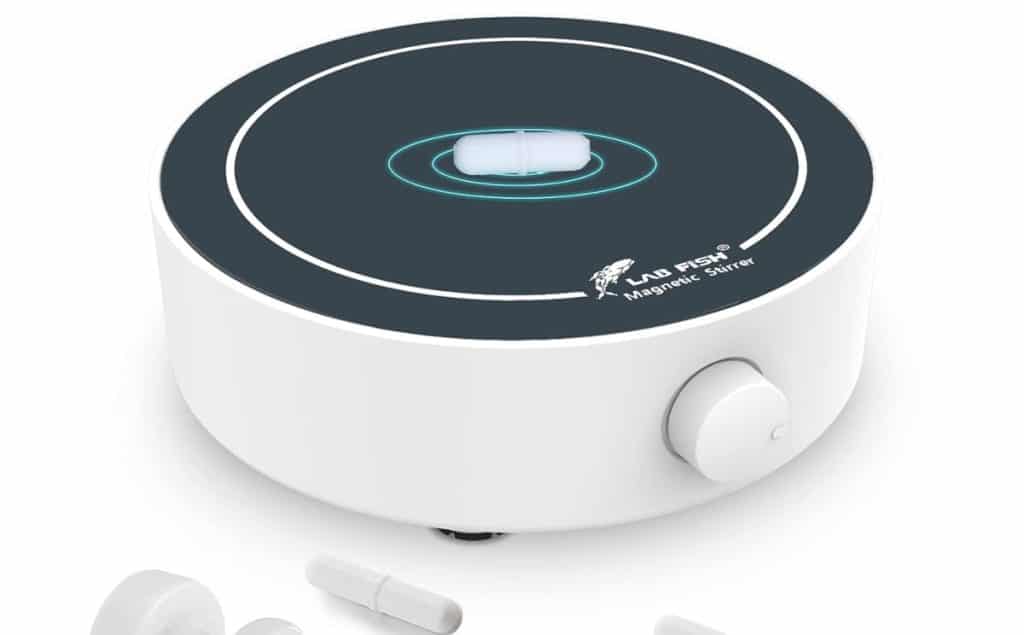
Growers who regularly make liquid culture often choose to use a magnetic stirrer.
This involves inserting a magnetic stir bar into the solution and using a rotating stir plate to move the magnet in the jar, creating a vortex that breaks up and distributes the mycelium.
How Often Do You Need to Stir or Shake a Liquid Culture?
There are several opinions on this, but generally growers recommend swirling, stirring or shaking your jar once a day.
If you have a very slow-growing strain, you may only need to shake it every second day when you see a clump or cloud of mycelium forming instead of small strands.
Maintaining a uniform distribution of mycelium throughout the culture helps to encourage healthy growth.
How to Store Your Liquid Culture
To extend the life of your mushroom liquid culture, store it in a cool, dark place like a refrigerator or cool basement.
The cooler temperatures help to slow down the mycelial growth, and keeping it away from UV light helps to ensure the culture remains viable.
How Long Can Liquid Culture Be Stored?
When stored correctly, mushroom liquid culture will last in the fridge for 6 to 12 months, but generally, growers recommend using it within a month or two as this is when it’s most viable.
Liquid Culture Contamination
During incubation and storage, you’ll need to check your liquid culture regularly for signs of contamination.
Here are some of the signs to look for:
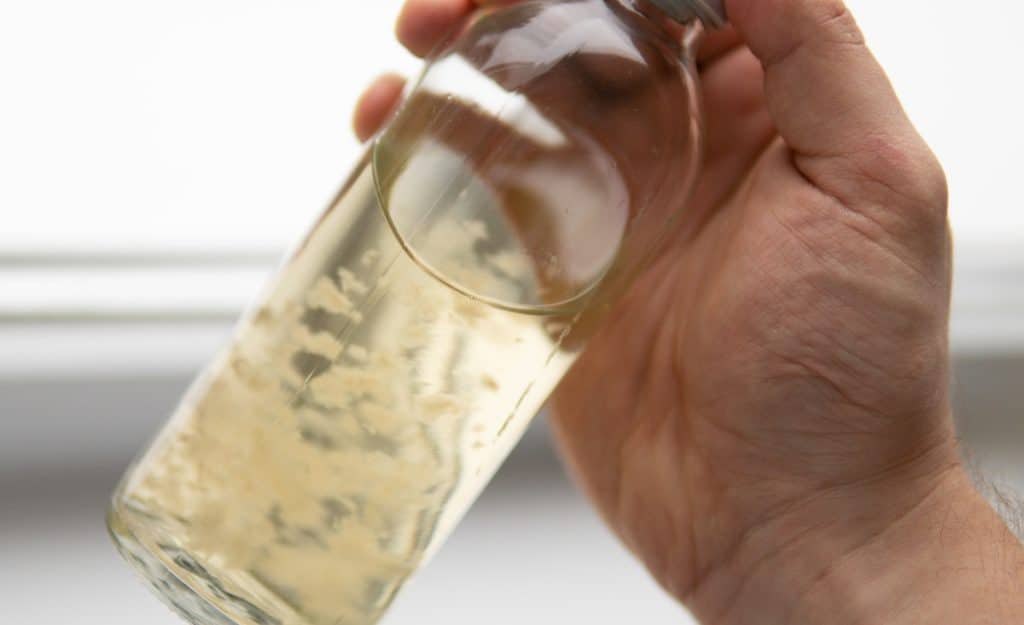
- The whole liquid is cloudy, and nothing grows – this is a sign of bacterial contamination and is easier to spot than other forms of contamination as nothing grows.
- Your liquid culture smells foul, and the jar is slightly pressurized – another sign of bacteria contamination.
- You can see a green moldy scum layer floating on top – a sign that mold is growing in your culture. It will more than likely also smell stale.
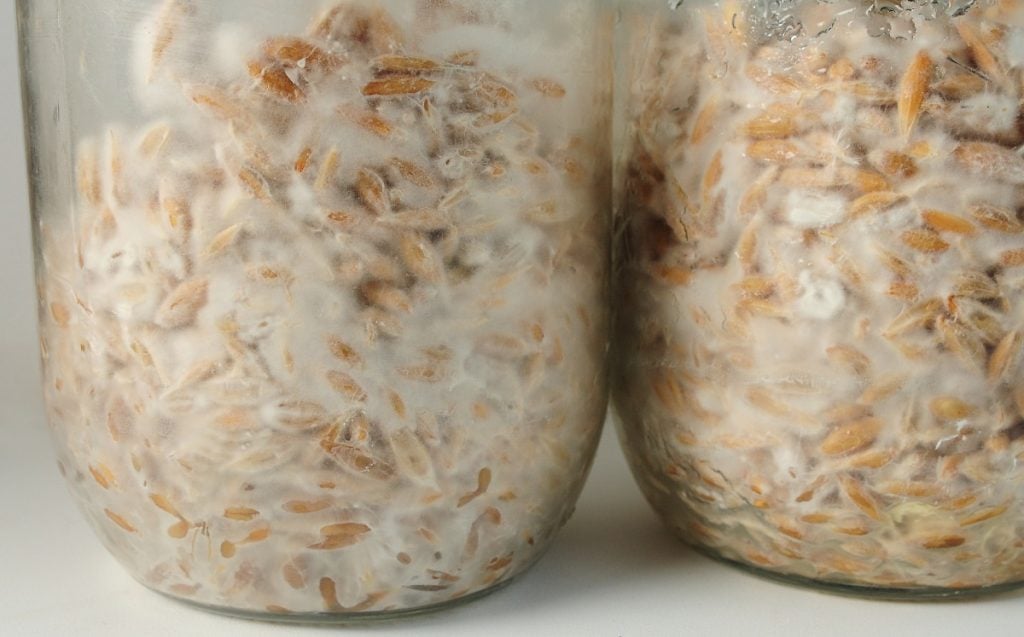
- Fast-growing white clumps that are erratically shaped – may be a sign of white mold contamination but are sometimes difficult to tell apart from mycelium. Check for a stale smell and take note of the shape of the growths to be sure.
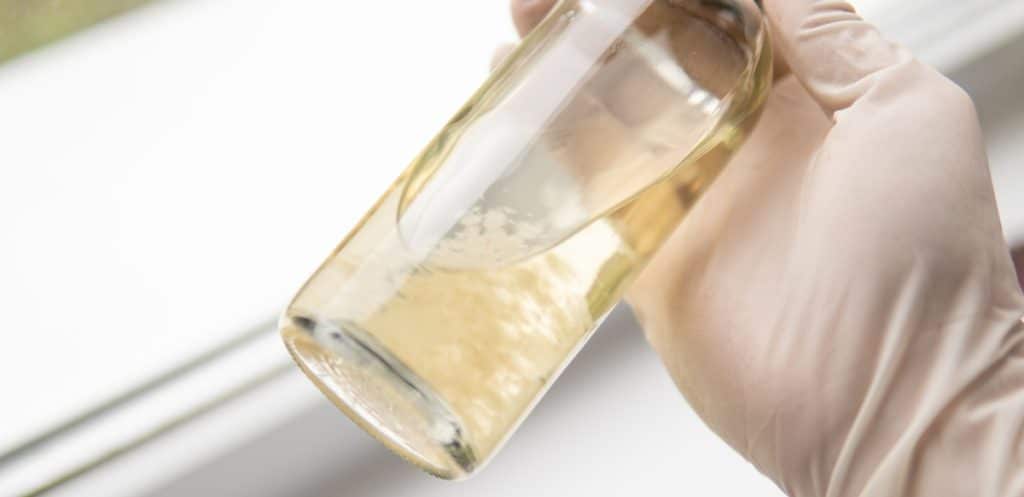
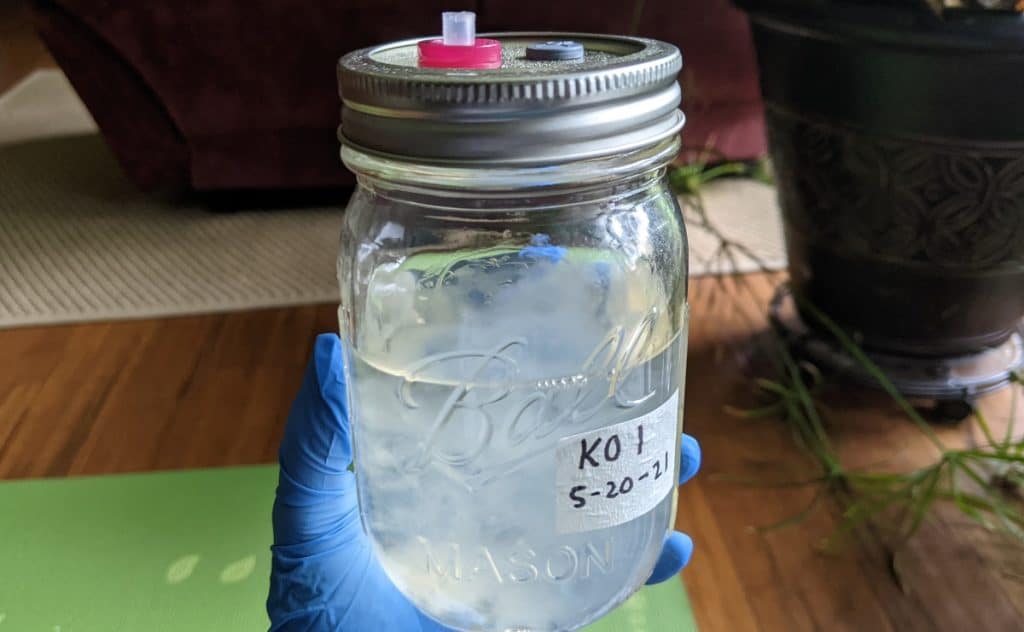
What Does Healthy Liquid Culture Look Like?
Healthy liquid culture is clear with clean white blobs of mycelium floating in it. If you leave the mycelium undisturbed, it will form a large, structured clump. But if you stir it, there will be lots of smaller blobs.
The liquid should be clear enough to see through to the other side of the jar. Sometimes, a liquid culture will become slightly cloudy and later clear up again.
This happens when there’s a little bacterial contamination, but the mycelium has a big enough head start and is strong enough to fight off the bacteria and colonize the culture.
The Advantages and Disadvantages of Liquid Culture
Liquid cultures allow mushroom growers to multiply and store their favorite mushroom strains and have several advantages, including:
- Relatively inexpensive as most of the equipment needed is regular household items, making it more accessible for beginners
- Provides a large amount of mycelium that you can multiply several times and use to produce an ongoing supply of your favorite mushrooms.
- Using liquid culture can increase colonization rates and reduce incubation time as it contains viable living mycelium. And, because you have an almost unlimited supply of mycelium, you can use a little extra and reduce colonization times even more.
But like most mushroom growing techniques, liquid culture also has a few disadvantages to consider, including:
- Needing a sterile work environment and technique to prevent contamination. It’s not always easy to keep your workspace and equipment completely clean. It often takes new growers a few attempts to create a contaminant-free liquid culture.
- Spotting contamination in your liquid culture can be challenging, meaning you only find out it’s contaminated when you use it and spread the contamination.
- Monitoring your culture and regularly agitating or stirring it is very hands-on. You’ll need to be around for the entire incubation period.
How to Use Liquid Culture
You can use your liquid culture to make more liquid culture or to inoculate sterilized grain and make grain spawn. You can also use liquid culture to inoculate a substrate directly, but growers don’t recommend going this route.
They suggest first creating grain spawn and then using it to inoculate your bulk substrate.
This is because grain spawn is easier to break apart and distribute evenly throughout your substrate, increasing the colonization rate and reducing the chances of contamination.
Follow the steps below to use your liquid culture:
Step 1: Prepare Your Workspace
To help prevent contamination, you’ll need to work in sterile conditions. Cleanliness is crucial.
Wipe down all surfaces and tools with 70% isopropyl alcohol and work in a clean, closed environment to minimize airborne contaminants or, even better, in front of a laminar flow hood.
Take your jar of liquid culture from the fridge and let it get to room temperature.
Ensure your sterilized jars or grow bags of grain and a new sterile syringe and needle are close by, and wipe the outsides of all the containers with isopropyl alcohol.
Step 2: Stir the Liquid Culture
Stir or shake your liquid culture jar to help break up the mycelium and distribute it evenly throughout the solution, making it easier to get the mycelium-rich solution into the syringe.
Step 3: Transfer the Liquid Culture
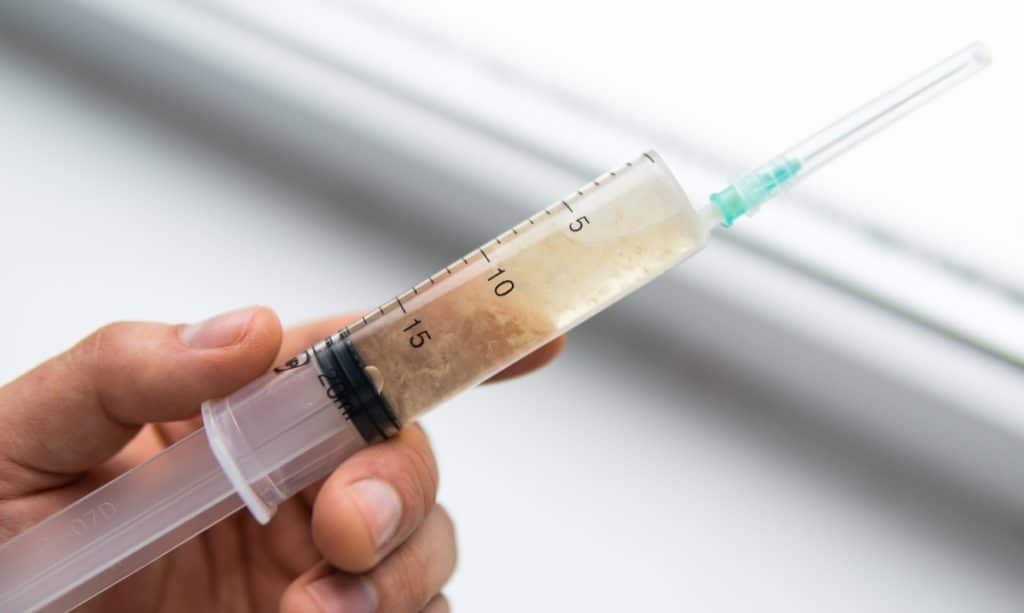
Insert the sterile needle of an empty sterile syringe into the self-healing port or hole in the lid of the liquid culture jar and slowly draw up the mycelium-rich solution.
Then, inject the liquid culture into your grain jars or bags using their injection ports. Generally, growers recommend using 1 to 2 ml of liquid culture per pound (453 grams) of grain.
Based on this, you can use 1 to 2 ml of liquid culture to inoculate a quart-sized (946ml) grain jar and 10 ml of liquid culture for a 5 lb (2.3 kg) bag of sterilized grain.
Final Thoughts
Knowing how to make a liquid culture allows mushroom growers to multiply the mycelium of their favorite strain of mushrooms, providing an almost unlimited supply.
Even though it’s relatively easy to make liquid culture without expensive equipment, you’ll need to use a sterile technique to prevent contamination, which can be challenging.
Like most skills, mushroom growing takes time and practice to perfect, and you’ll learn by trial and error. So don’t give up if your first batch of liquid culture shows signs of contamination.
To learn more about growing mushrooms at home, visit our Mushroom Growing Hub or download our free training.


