In this article, we will explain the full step-by-step process for how to grow mushrooms in a bag.
Most commercial mushroom farms use bags for at least one part of their mushroom-growing operation. As the name suggests, a mushroom grow bag is one that’s specifically designed to be used for growing mushrooms.
You can use bags to grow a variety of different mushrooms, depending on which substrate or growing medium you fill your bags with.
Mushroom grow bags come in all kinds of different sizes and thicknesses. There are even specific brands of mushroom bags that we prefer over others.
We will go in-depth and cover the different kinds of bags that are available, as well as discuss the ones that we recommend.
Why Grow Mushrooms in a Bag?
We have experimented with growing mushrooms in all sorts of different containers and growing mediums over the years here at GroCycle.
Although we also like to grow mushrooms in buckets, most of our production is done in mushroom growing bags. They simply produce the most consistent result and the best yield with the least amount of work.
You may want to use glass mason jars or plastic containers if you’re creating small test batches of spawn.
But when you’re producing large amounts of mushroom spawn, using grow bags will make the entire process a lot easier.
During warmer months, growing mushrooms outdoors is also an option. Our article How To Grow Mushrooms Outdoors With A Mushroom Bed will teach you what you need to know.
Below are some reasons why growing mushrooms indoors in bags is the obvious choice.
1. Ease of Manipulation
With grow bags you can break up your spawn inside of the bag to mix everything up and improve the speed of colonization.
It’s also much easier to get spawn out of a bag to add it to a bulk substrate. Simply cut it open and pour the contents out.
Getting a fully colonized spawn out of a glass jar or rigid plastic container can be quite difficult in comparison.
You’ll probably resort to using a spoon to break your spawn into smaller pieces, which increases the risk of damaging the mycelium or introducing contaminants.
2. Inexpensive and Disposable
Even if you’re buying a small number of bags on Amazon, you can find them for around $1 (£0.70) each. Growing in mushroom bags can help keep your startup costs low.
One big downside of using bags to grow mushrooms is the additional plastic waste that is created. Toward the end of this article, we will discuss some reusable alternatives like plastic buckets that you may want to consider instead.
3. Flexible
Mushroom bags can be hung up, allowing you to cut holes into all sides and have mushrooms grow out in every direction. If you’re growing out of a glass container, you’re limited to only growing upwards out the top.
4. Easy To Monitor
Clear plastic bags make it easy to see what’s going on with your substrate. You can closely monitor it as it colonizes and watch out for contamination.
With opaque buckets it’s much harder to tell when your substrate is fully colonized or if something has gone wrong.
Even for mushroom species like shiitake that are traditionally grown on logs, we still prefer to use mushroom grow bags instead.
It speeds up the process and gives you far more control over the growing environment of your mushrooms.
5. Can Withstand Sterilization
Many mushroom growers sterilize their substrate before inoculating with mushroom spawn.
Mushroom cultivation bags are made from a high grade polypropylene plastic which can handle the high temperatures inside an autoclave where it may reach up to 250F (121C).
This enables you to fill the bag with your mushroom substrate and then heat sterilize it already loaded in the bag.
Then you simply open the bag up briefly under sterile conditions to add your mushroom spawn, before sealing and incubating.
How Do Mushroom Grow Bags Work?
When you’re learning how to grow mushrooms in a bag, you’ll realize that there are actually multiple stages of the mushroom growing process where bags can be used.
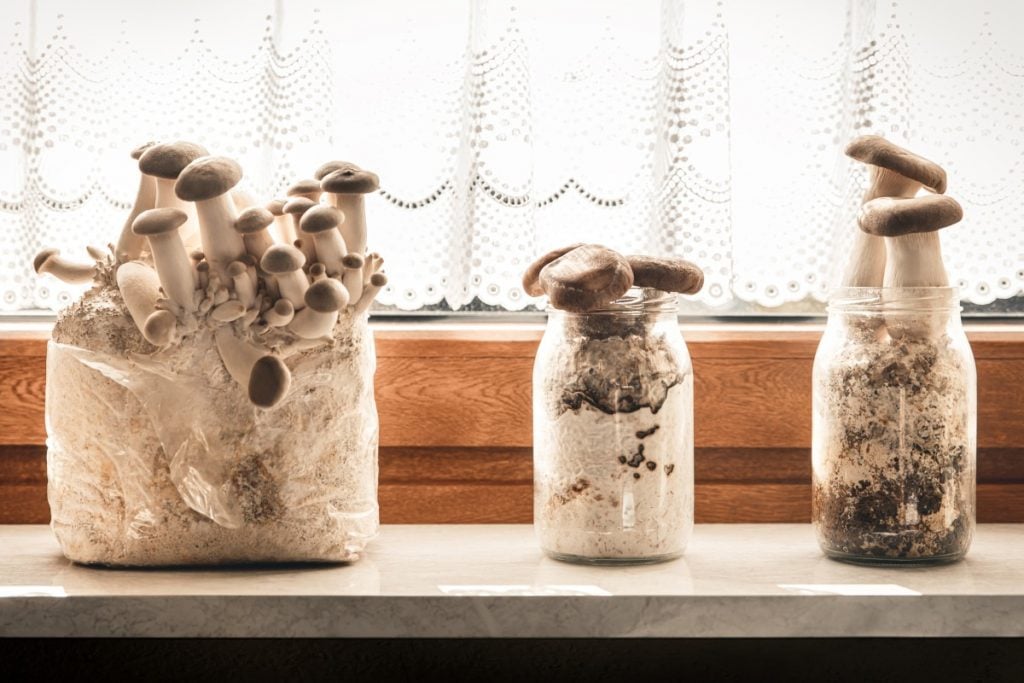
Learning how to grow mushrooms in a spawn bag is perhaps the most important. Spawn bags are how mushroom growers turn small amounts of inoculants into large amounts of mushroom spawn.
Larger growing bags are filled with mushroom substrate (normally several pounds or kilos at a time) and inoculated with spawn so that they can grow a much larger mushroom harvest.
Straw, sawdust or wood chips may be used as a substrate depending on the variety of mushrooms desired. Once the substrate has been fully colonized by the mycelium, it can be fruited (allowed to produce mushrooms.)
Once your mushroom grow bags are ready for fruiting, you have a couple of options.
In most cases, the bag will be moved to a fruiting room with a light source, high humidity and fresh air exchange. All that’s needed is to cut some slits into the bag and to mist the openings daily.
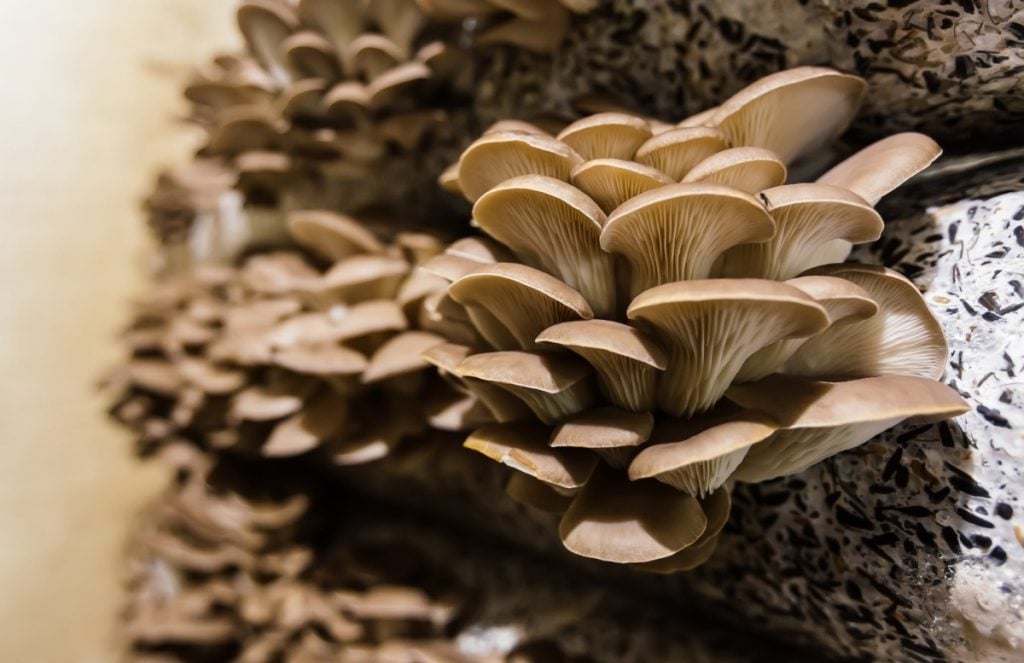
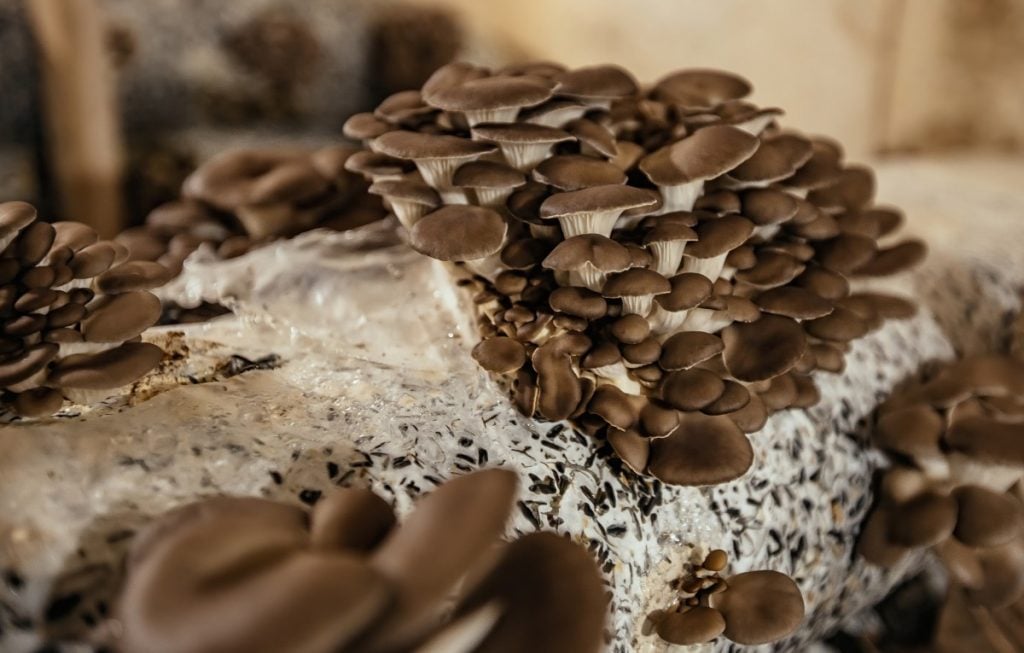
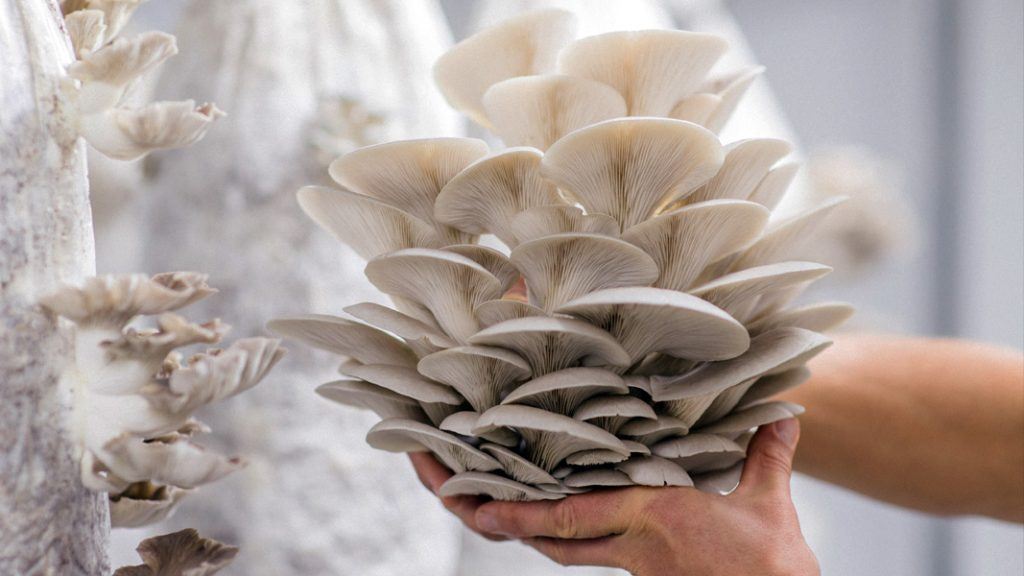
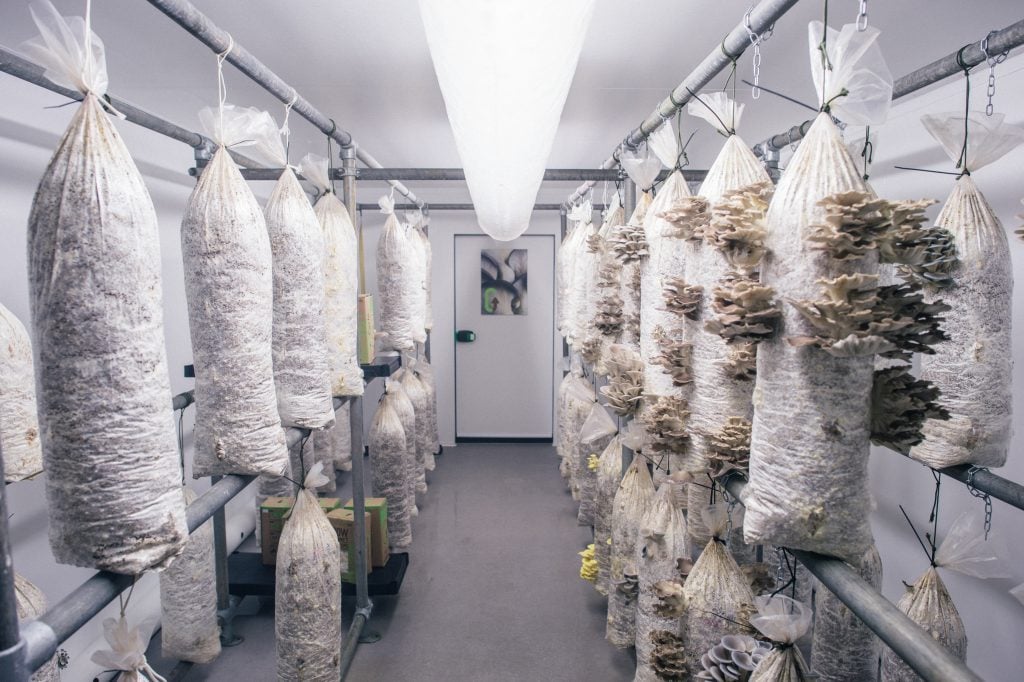
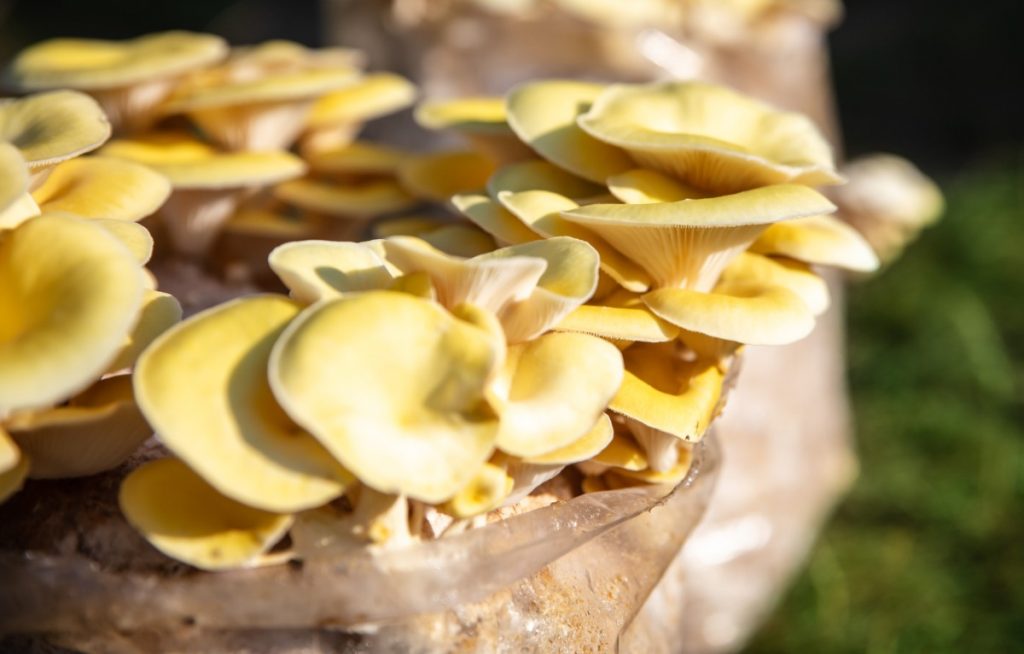
Other times, the colonized substrate will be used as a fruiting block. This is common when growing King Oyster mushrooms on sawdust in bags.
The top of the bag is simply opened up and the mushrooms are able to grow out of the top of the bag.
The bag helps to keep most of the block contained at a high level of humidity and prevents contamination, while the open top allows for fresh air exchange and room for the mushrooms to grow.
How To Use a Mushroom Grow Bag (Step by Step)
The easiest way to grow mushrooms from bags is to simply buy a GroCycle Mushroom Kit.
Our kits come already fully inoculated and colonized. All you need to do is open them up and mist them with water. Mushrooms will start to grow in one to two weeks.
If you want to go a step further, you can learn more of the process yourself. There are a few different ways to go about growing mushrooms in a bag.
We think the easiest way to do it at home is the process that we have outlined below.
If you would prefer to learn this process by watching instead of reading, Adam goes over all of the same details in this video below:
Step 1: Gather Supplies
Before you get started, there are three main supplies you’ll need to have on hand.
- Substrate (straw pellets)
- Mushroom spawn (oyster mushroom grain spawn)
- A bag to mix everything and let your mushrooms grow
We like growing on straw pellets the best. However you can also experiment with wood pellets or chopped straw.
What we love about both wood and straw pellets is that they’re already pasteurized in the manufacturing process, where they undergo high pressure and high heat. So they are already really clean, straight out of the bag.
See A Complete Guide to Mushroom Substrates for some other substrate options worth considering.
You could use buckets or other containers. But we find that bags are the most reliable way to grow mushrooms, especially for beginners.
Since bags are see-through, you can observe everything that’s happening throughout the entire process.
Step 2: Prepare Your Mushroom Grow Bags
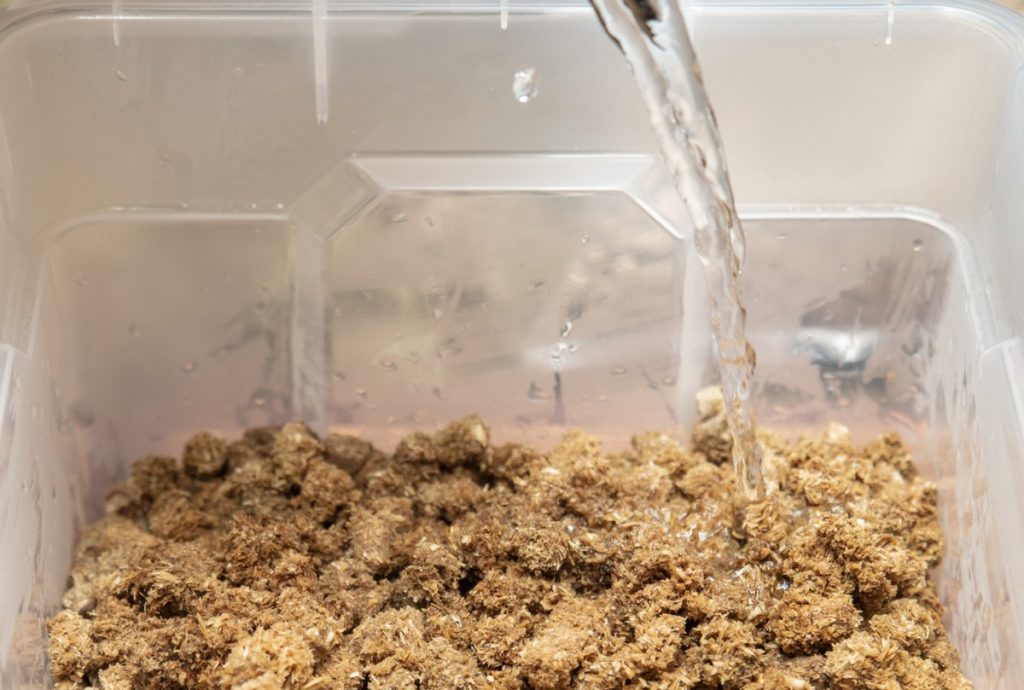
Start by adding cold water to your straw or sawdust pellets. We use 720 grams (3.5 ounces) of straw pellets with 1080 milliliters (36.5 fluid ounces) of water. This is a hydration rate of 60%.
If you’d like, you can use hot or boiling water to further pasteurize the pellets. In our experience we’ve found this is not necessary though.
Once you add water to the pellets, let them sit for 30 minutes until they are fully hydrated. If you do use hot water, allow the mixture to return to room temperature before proceeding.
Then it’s time to mix your substrate with the spawn.
We add 180 grams (6.3 ounces) of oyster mushroom grain spawn to our hydrated pellets. This is a ratio of about 10% spawn compared to the amount of substrate.
You can adjust the ratio as needed for larger or smaller amounts. Just be sure to keep the proportion of your pellets, water and spawn the same.
Once you’ve added your spawn, it’s time to give everything one final mix and then load your plastic bag with the mixture.
When we use straw or sawdust pellets, we leave the top third of our bags empty to allow for air exchange through the filter.
If you’re using chopped straw however, you can fill the bag all the way to the top. The larger straw particles allow for much better air exchange.
All that’s left now is to seal the bag up.
Step 3: Seal your Mushroom Grow Bags
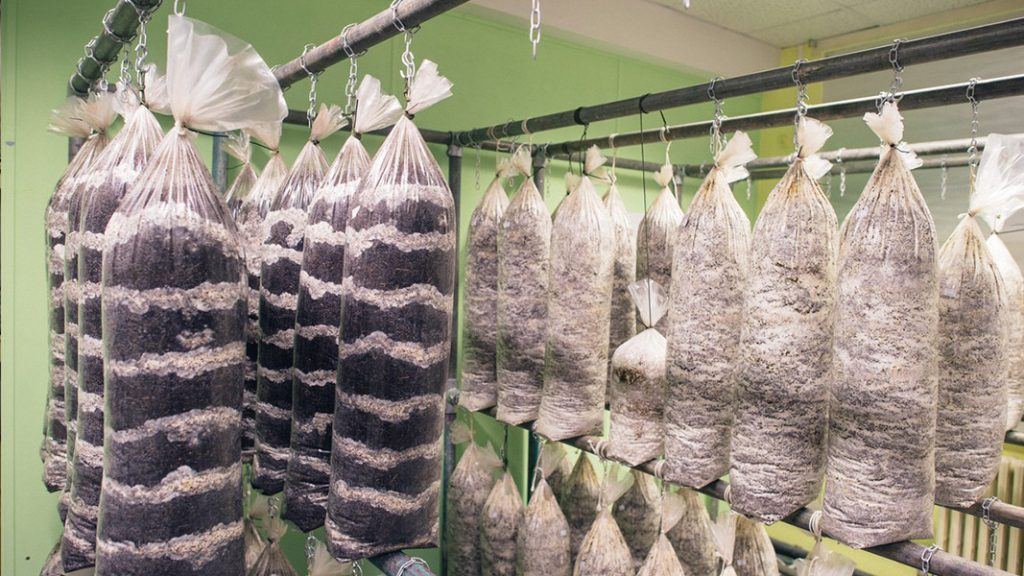
Most mushroom growing bags don’t come with a specific way of sealing them, so you’ll need to find your own way of sealing them up after they’re inoculated.
The easiest way is to twist the top of the bag and wrap a zip tie or wire around it.
High-volume operations will use an impulse sealer to seal their bags shut. This machine melts the plastic to form a seal. On a large scale this can save you time and effort.
An impulse machine costs about $100 (£70) so it doesn’t make financial sense for home use though.
Step 4: Incubate Your Mushroom Grow Bags
At this point, there isn’t much to do except for wait.
All you need to do is keep your bag in a warm place inside your house. Between 20 to 24 C (68 to 75 F) is an ideal temperature range.
Luckily for most people, that’s also around the ambient temperature inside your home.
It can help to also store your bag in a dark place.
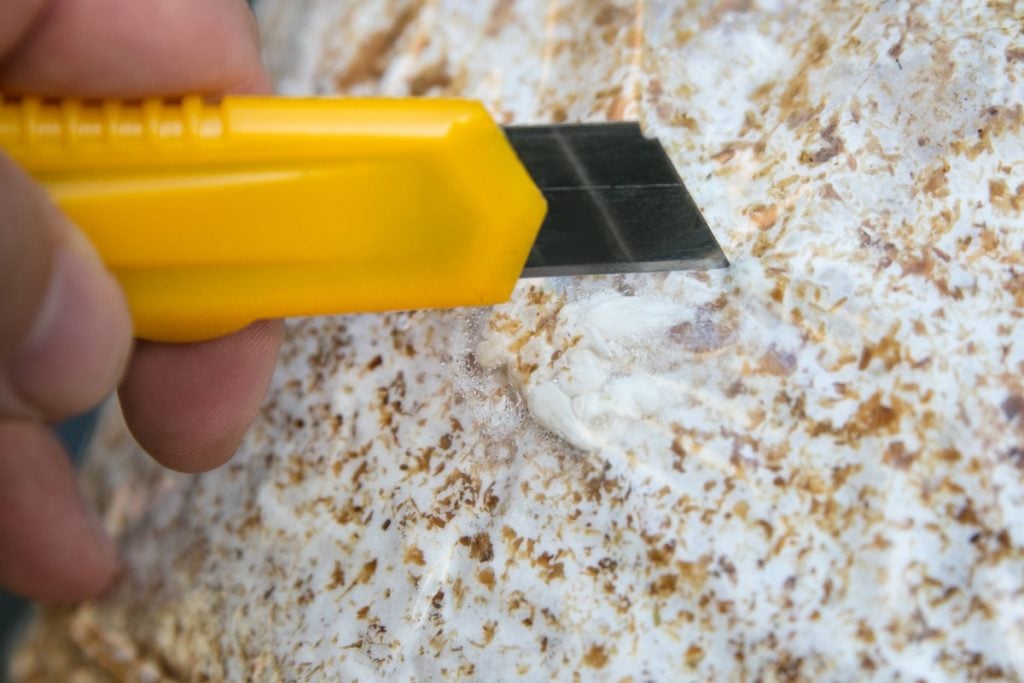
After a few days, you will start to see little white spots forming in your substrate. Eventually these will take over the entire bag.
For oyster mushrooms, the entire process takes about two to three weeks. You will know your bag is ready to fruit when the entire substrate is covered with bright white mycelium.
Step 5: Trigger Your Mushrooms to Start Fruiting
It’s time for your hard work to pay off and actually grow some mushrooms now.
Use a pair of scissors to cut a cross into the front of your bag. You will need to pull down the flaps where you cut and give the mycelium a good misting with water a couple of times per day.
We recommend cutting a small (5 cm or 2 inch) hole on the side of your bag, as opposed to the top.
If you cut the top of the bag or open the entire top, we have found that the substrate tends to dry out quicker and you will usually get lots of tiny mushrooms instead of a few groups of large ones.
Only one hole is needed in your bag per 1.6 pounds (750 grams) of the substrate. For most bags, one hole is enough. But for really large bags you may want to cut multiple holes.
If you have extra empty space at the top of your bag, we recommend folding it down and taping it in place. Otherwise sometimes mushrooms will try to grow out of the top.
During the fruiting stage, your mushrooms need humidity, light and fresh air to grow. You’ll provide humidity by spraying your bag daily with water, so let’s talk about light and air.
Most homes will naturally have enough fresh air exchange.
If you find that your mushrooms start to grow long and thin, you can open up a window once or twice a day for five to 10 minutes just to get some more fresh air in.
Any indirect source of light is enough for mushrooms to grow. A windowsill or your kitchen counter is fine.
Mushrooms don’t photosynthesize light like plants do. They simply use the light as a cue that it’s time to start growing.
Step 6: Harvest Your Mushrooms
If you’ve done everything correctly, you should start to notice little mushrooms beginning to form after five or size days. Then they will start to grow very quickly and double in size each day.
After about two weeks you’ll be ready to harvest the mushrooms.
You’ll know your oyster mushrooms are ready to harvest when the caps have opened up but not gone completely flat yet.
To harvest, just put your hand underneath the mushrooms and twist.
If they don’t come away easily they might not quite be ready yet. Give it another day and try again.
Step 7: Consider Creating A Fruiting Chamber
This process will work great if you’re just occasionally growing mushrooms.
If you’re growing mushrooms more regularly and want to cut down on maintenance, you might want to create a fruiting chamber to help hold in the humidity and minimize the amount that you need to spray your mushrooms with water.
You can create a basic fruiting chamber from a large plastic box filled with perlite. Perlite is a natural material that can expand to hold moisture.
If you do make a fruiting chamber, be sure to poke some holes into the box so that your bag still gets some air exchange.
What we have described above is commonly referred to as a Shotgun Fruiting Chamber. You can learn how to make one from our article How to Build a Mushroom Fruiting Chamber: 7 Steps.
Re-Using Mushroom Grow Bags
We don’t recommend reusing mushroom grow bags.
Over time the plastic will get weaker, plus you’ve cut a hole during the fruiting stage which will be difficult to completely seal back up.
Since new bags are so inexpensive, it’s safer to just use a new bag with every batch. Otherwise you risk a used filter that could have an increased risk of contamination, or bags breaking open.
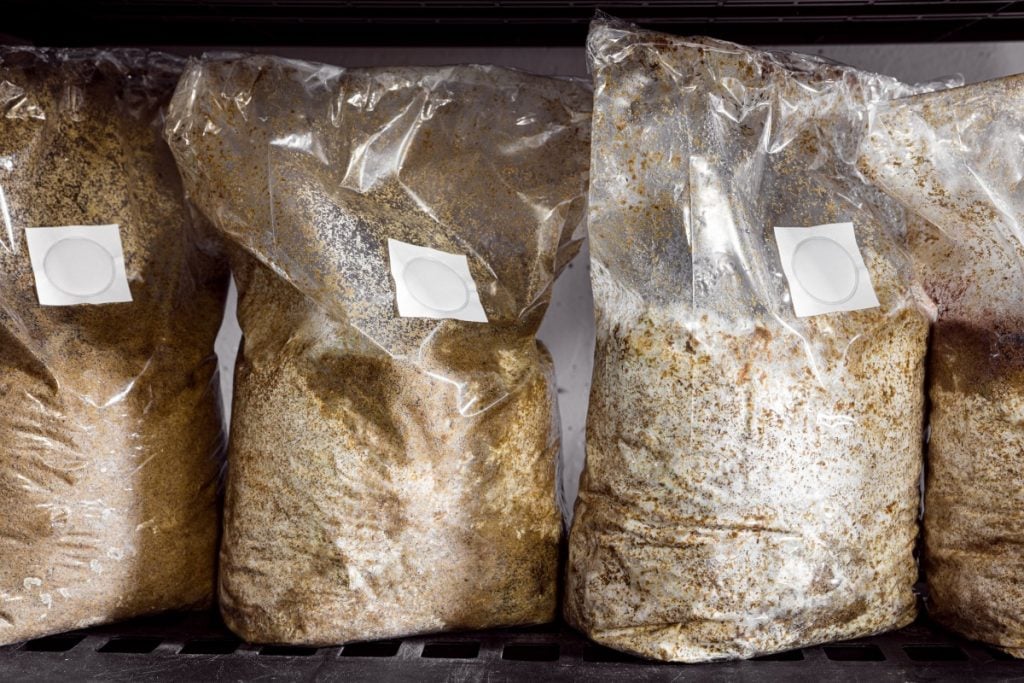
What Filter and Bag Sizes Are Best?
Spawn bags can come with filters that range anywhere from 0.2 microns to 5 microns. A smaller number means the filter is finer and allows less air and contaminants to pass through it.
For spawn bags, we recommend a micron rating of 0.5 microns.
If you use a 0.2-micron filter you may not get enough air exchange. If you use a 5-micron filter you’ll get more air exchange but also a much higher chance of contamination. 0.5 is optimal.
In terms of bag size, it really depends on how many mushrooms you want to grow. Generally the larger the bag is, the more efficient it will be.
In other words, you’ll get a lot more mushrooms out of a big bag for the amount of time and effort you put into it.
For five pounds (2.2 kilograms) of sawdust or straw substrate, you’ll want a bag that is about 18 inches (45 centimeters) tall and 8 inches (20 centimeters) wide.
We feel like that’s a good size for most beginners. Bags that are too small don’t produce enough to be worth it. But overly large bags are inconvenient and unwieldy to handle.
You will also want to consider the thickness of your bags. The thicker the plastic is, the less likely it is to rip or tear. However thicker plastic is also more expensive.
Most grow bags are between 0.09 and 0.16 inches (2.2 mm and 4.0 mm) in thickness. Even on the lower end, it is rare that we’ve had a bag rip.
So we would recommend starting off with thinner and less expensive bags and just use care when handling them.
What Materials To Use For Mushroom Grow Bags
Mushroom grow bags are made almost exclusively from plastic. Other materials like cloth are too permeable and will lead to the substrate drying out and too many contaminants getting in.
Cheaper bags will be made from polyvinyl chloride (PVC.) We recommend avoiding bags made with this kind of plastic, as it is one of the more environmentally toxic forms of plastic.
Although PVC is considered a food-grade material, there is some evidence that can release chemicals called phthalates into foods.
In our opinion, polypropylene (PP) is a better choice for plastic grow bags that will be in direct contact with a food product.
Different Types of Mushroom Grow Bags
You can find all kinds of different mushroom grow bag brands online.
Although most of them are white label products where a bunch of companies are putting their name on bags that come from a relatively small number of suppliers in China.
There are a few brands that we have used and trust though.
Unicorn Bags is a company that specializes in filter patch bags for growing fungi.
Their bags are made in the US (in Texas specifically) so we trust that they have a higher standard with better quality materials than bags being mass-produced in China.
The downside is that their bags are sold in lots of 1,000. So they aren’t a viable option for someone who only wants to grow a handful of bags per year, though you can often find re-sellers offering smaller quantities on ebay or amazon.
Their bags are made from polypropylene and polyethylene. Unicorn sells bags with and without patches and have various kinds of bags for all techniques, both sterile and non-sterile.
SacO2 is another reputable company that offers polypropylene and polyethylene patch bags.
They are based out of Belgium, so shipping costs will be lower for European customers compared to ordering from America. As with Unicorn Bags, SacO2 sells their bags in boxes of 1,000.
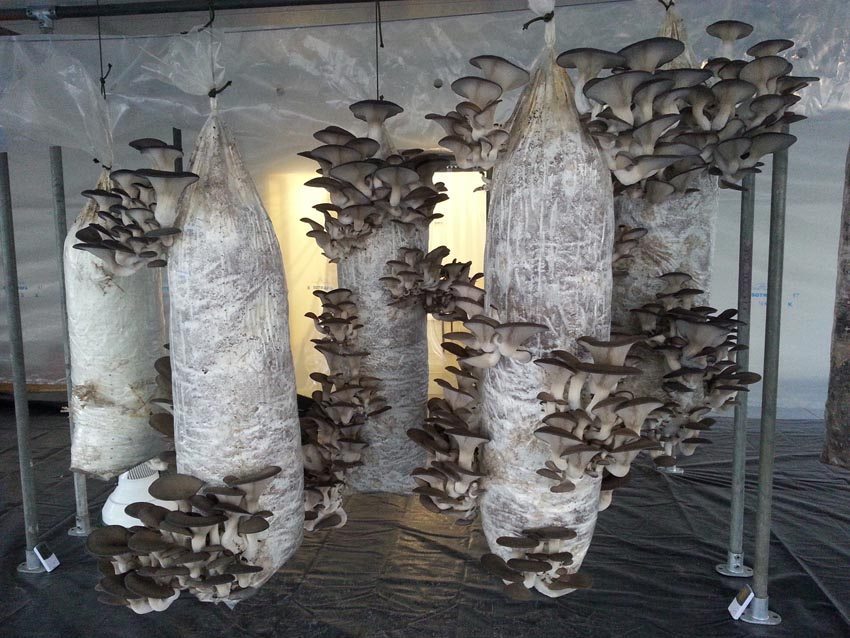
For large mushroom farms growing oyster mushrooms, column bags (also known as clear poly or lay flat tubing) are also a cost-effective option.
These bags are cheaper, but they don’t come with filters so you will need to punch holes in them for air exchange.
If you’ve seen a large-scale mushroom farm then you’ve probably seen these types of bags in use before. They look like large punching bags and are typically held up on large metal bars.
If you don’t want to purchase specially-made bags and just want to try growing one or two bags of mushrooms at home, large freezer bags are an often overlooked but viable option.
These bags are made from thinner plastic that is more prone to split and they cost more per bag. But if you just want to try out growing mushrooms once to learn the process, it’s an easy way to get started.
Like with column bags, you’ll need to punch some holes into them for air exchange.
Alternatives To Growing Bags
Growing mushrooms in plastic bags is a bit wasteful. At the end of the process, the plastic bag is thrown away. If you’re looking for a plastic-free alternative for farming mushrooms, check out our video below.
We explain how you can grow mushrooms using bottles, containers, buckets and biodegradable bags:
Final Thoughts
Bags are the most widely-used containers when it comes to growing mushrooms.
They provide a perfect high-humidity environment for the mushroom spawn to grow while also providing a protective barrier that keeps contaminants out.
When it comes time to fruit, plastic bags are far more convenient than glass or plastic containers.
You can easily cut a hole of any shape or size on any side of the bag. On glass containers, it’s hard to mix up materials or remove the substrate once it has been fully colonized.
If you’re planning to grow mushrooms on a large scale or for a long period of time, then bags are the obvious way to go.
While the use of one-time plastic bags is not the most environmentally-friendly solution, its many advantages make it the superior choice over other options.


