More and more people are becoming aware of the benefits of eating mushrooms, including their delicious flavors and numerous health benefits.
For many, this means moving past only using common button mushrooms and including gourmet mushrooms of all shapes and sizes in their meals.
And even though grocery stores now offer a much wider range of specialty mushrooms, the best way to have an ongoing supply of fresh mushrooms is to grow your own at home.
However, not all mushrooms are easy to grow, and many of the most expensive gourmet mushrooms are difficult to cultivate and usually foraged in the wild.
Morel mushrooms are one of these species. But although tricky, it’s not impossible to grow morel mushrooms at home.
Read on to learn why you should grow morels, where they grow best, why they’re challenging to grow and how to grow morel mushrooms at home, outdoors and indoors.
What Are Morel Mushrooms?
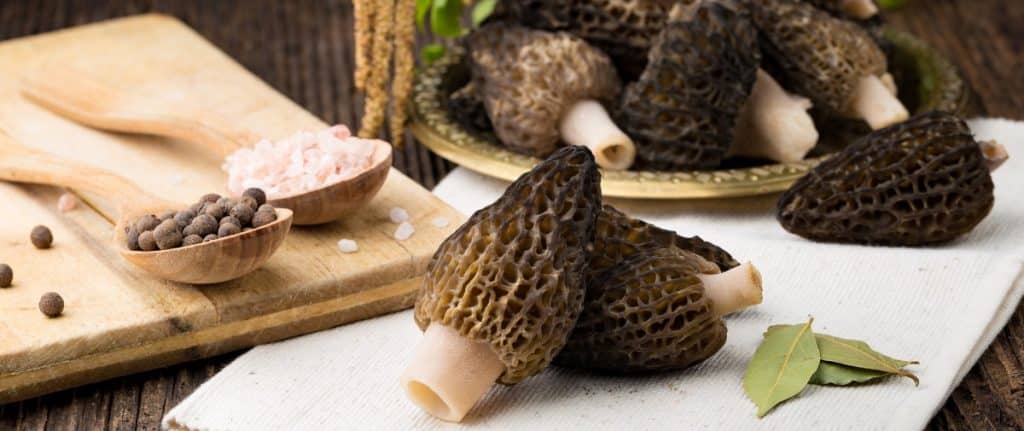
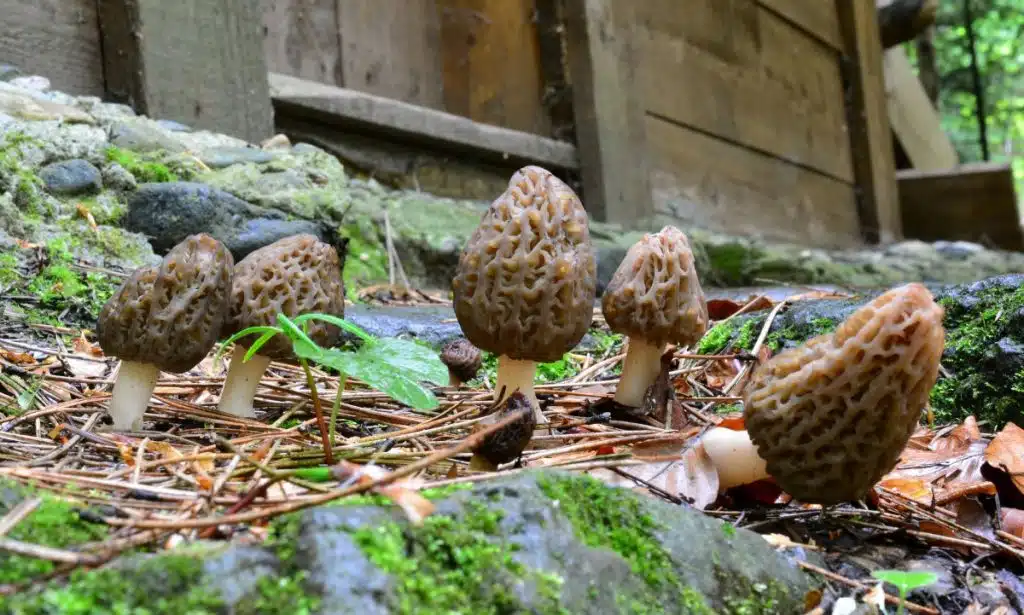
Morels are unusual-looking edible mushrooms, prized for their unique taste and texture.
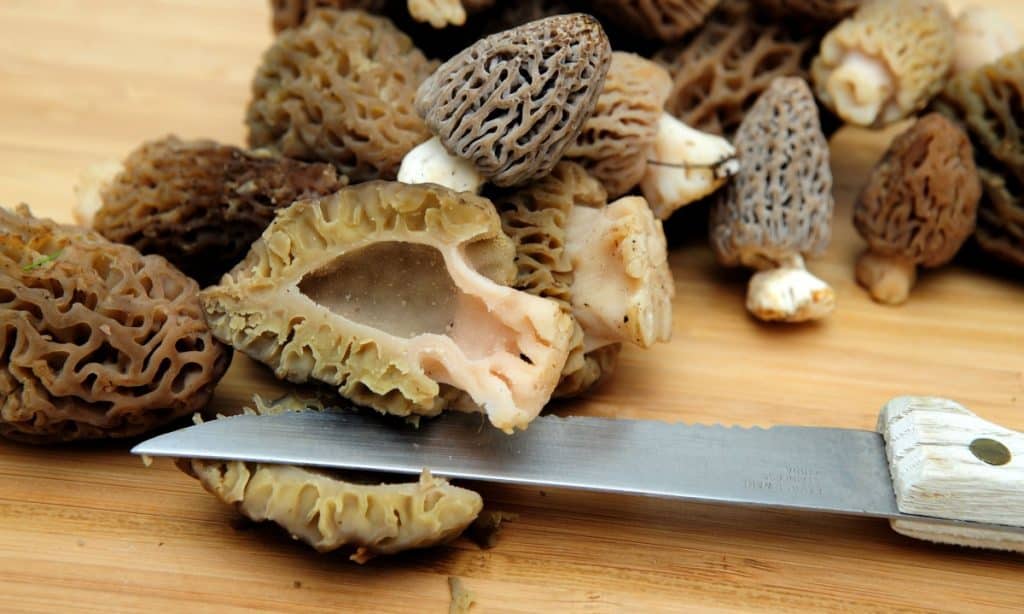
In the wild, they range in color and size but are identifiable by their cone-shaped caps that have a pitted honeycomb texture on the outside and are hollow on the inside.
Sought after by chefs for their subtle earthy, nutty and sometimes mildly smoky flavors, morels are one of the more expensive gourmet mushrooms at farmer’s markets.
They’re commonly used to create risottos, soups and sauces, and their unmistakable flavors and meaty texture make the dishes unforgettable.
One of the reasons they are so expensive is because, until recently, morels were all foraged in the wild during a short growing season, limiting availability.
Can I Grow My Own Morel Mushrooms?
Depending on the climate in your area, you may be able to grow morels outdoors in your garden and with perseverance even indoors.
Morels are definitely not one of the easiest species to grow and traditionally were not cultivated on a large scale, as methods were unreliable and unpredictable.
But, if you’re patient and persevere, you can grow morels outdoors in your garden in a mushroom bed or around tree roots.
Scientists have also made progress and developed a method for indoor cultivation, but the process is a lot more complicated than when growing many other gourmet species.
And some people argue that cultivated morels are not as tasty as those harvested in the wild or grown outdoors.
Why Grow Morel Mushrooms?
Growing morels will give you an annual supply of fresh morels that are rare and often very expensive, if you can get them at all.
Like other mushrooms, morels are full of beneficial nutrients, but what makes them so appealing is their unique appearance, texture and flavor.
Foragers who know where to find morels keep the knowledge to themselves and return to their secret spots yearly during morel season.
This scarcity makes them expensive, and morels go for $30 to $90 (£21 to £65) per pound when fresh, $250 (£180) per pound or more when dried.
Where Do Morels Grow Best?
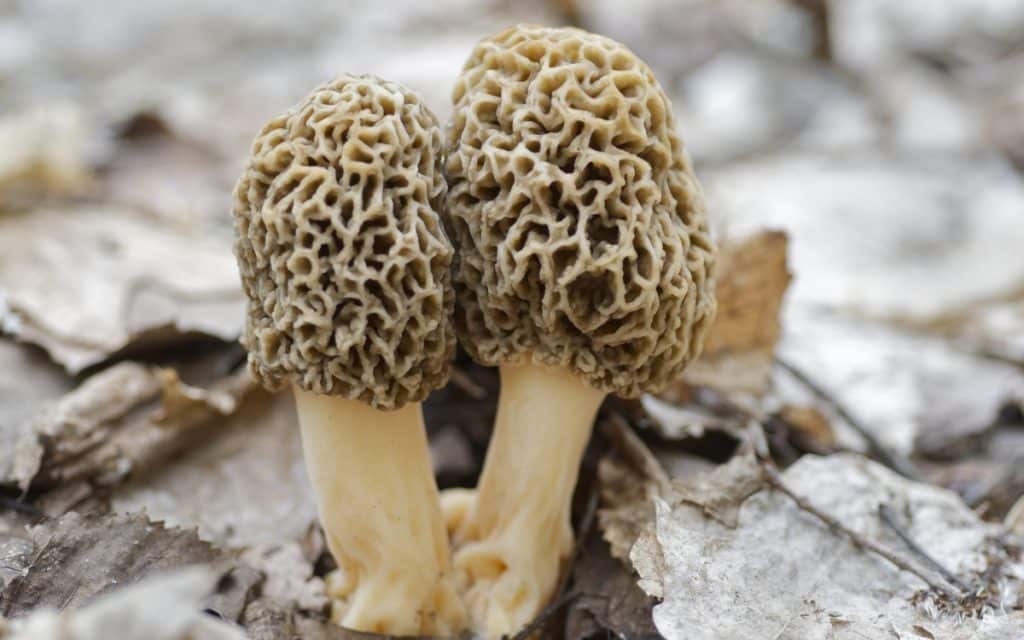
Morels enjoy cool, moist conditions and are usually found in spring growing in woodlands or the edges of forests throughout the northern hemisphere.
Morels grow best in areas with several weeks of freezing winter and a definite transition to spring.
You’ll usually find morels in the leaf litter under decaying elm, ash or apple trees, but they also grow on sycamore, aspen and poplar trees and in recently burned or disturbed areas.
Some morels are mycorrhizal and have a symbiotic relationship with trees, becoming saprotrophic when their host trees die.
But other strains, including most cultivated morels, are saprotrophs, meaning they get all the nutrients they require from decaying woody matter.
Shade is important for morels, and if you plan on growing them in your garden, you’ll need to plant them under a tree or use shade cloth to shield your morel patch from direct sunlight.
Why Are Morel Mushrooms Difficult to Grow?
Morels are fussy, and conditions must be just right for them to grow. They also have an extra phase in their life cycle called sclerotium, which makes cultivation more difficult.
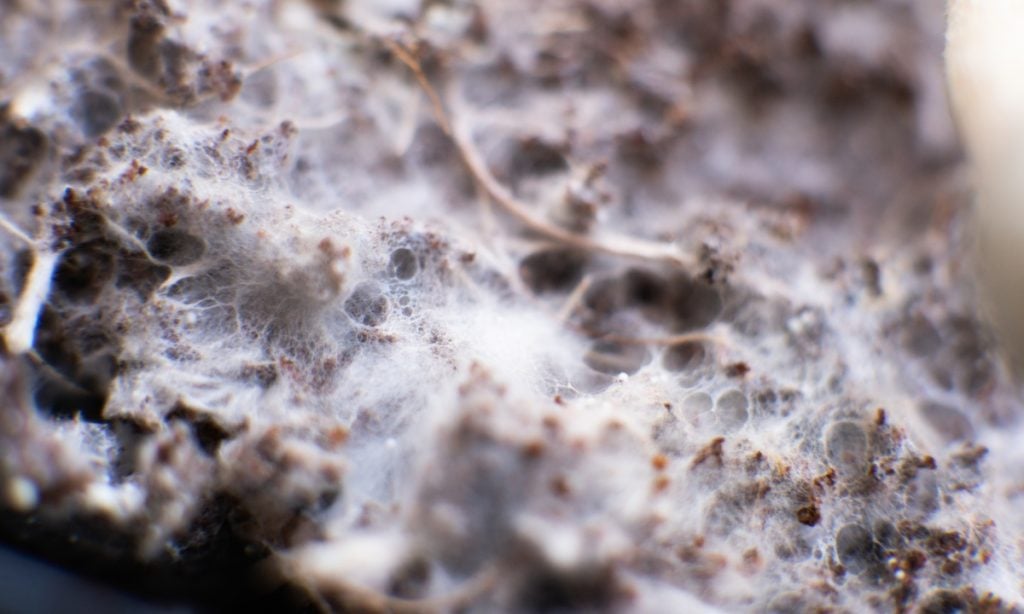
When morel mycelium colonizes a substrate, it forms sclerotium in the top section of the substrate.
Sclerotium consists of a mass compressed mycelium with food reserves that may be part of a dormant phase of the morel life cycle.
Depending on weather conditions, sclerotium may be the first stage of mushroom formation, quickly forming fruiting bodies when conditions are just right.
But if the conditions are incorrect, the sclerotium grows new mycelium instead, and you don’t get any mushrooms.
Even in the wild, morels are fussy and unpredictable, and may fruit one year but not the next.
People who attempt growing morels, indoors or outdoors, generally have a 40% success rate, but Danish biologists claim their new indoor cultivation method has a 90% success rate.
How Long Does it Take to Grow Morel Mushrooms?
Morels take longer to grow than most other mushrooms. If you’re growing morels outdoors using mushroom spawn or a spore slurry, it can take 2 to 5 years to get your first morel mushrooms.
But, once baby morel mushroom pins appear, they grow fast, and you’ll be able to harvest fresh morels in less than 2 weeks.
Using the new indoor morel mushroom cultivation method that scientists are perfecting, it takes around 22 weeks to go from an agar plate culture to ready-to-harvest morels.
How to Grow Morel Mushrooms Outdoors
Although morels are picky, and conditions must be just right for them to fruit, people have successfully grown them in areas with a definite transition from winter to spring.
When growing them outdoors, you don’t have control of weather conditions, meaning that even if you do everything correctly, you may not be successful the first time.
But be patient. Often, the mycelium is still growing underground, and when you have a spring with perfect conditions, morels will appear in your mushroom bed.
The key to success is carefully prepared soil with plenty of decaying woody matter, enough shade and moisture, and spawn of proven morel species.
Although you can grow morels from spores using the spore slurry method, morel kits with spawn are the easiest way for beginners to grow morels outdoors and provide the best chance of success.
Follow the steps below to grow morels outdoors with morel spawn:
Step 1: Gather Supplies
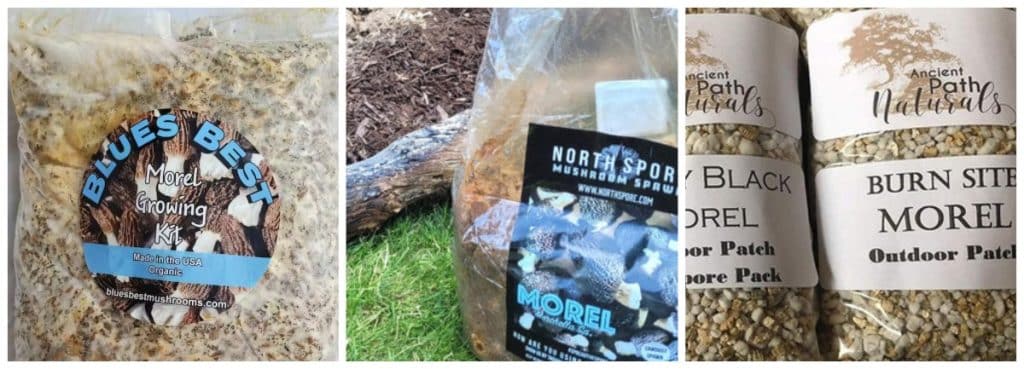
Order your morel mushrooms spawn from a reputable supplier. Morel spawn is often sold as a morel mushroom growing kit, and comes with easy-to-follow instructions.
You can get morel spawn in the form of sawdust spawn, plug spawn or grain spawn. For an outdoor bed, sawdust spawn or plug spawn is best.
Different suppliers offer different species of morels, and it’s best to use a species that suits your planned planting area.
If you have poplar, oak, elm, ash or fruit trees on your property, you can try planting yellow morels (Morchella esculentoides) close to these trees.
But if you don’t have these trees, the landscape morel (Morchella rufobrunnea) or burn-site morel (Morchella exuberans) are better for mushroom beds.
Step 2: Choose a Location
When deciding where to put your mushroom bed, there are a few factors to consider, including:
- Shade – Morels do best in a shady location with very little to no direct sunlight in summer
- Water – Maintaining the right amount of moisture is critical when growing morels. Choose a spot that will get natural rainfall and that you can easily water in case of insufficient rain.
- Organic matter – Morels feed on the nutrients in tree stumps, and people often grow morels around decaying tree stumps, but if you don’t have a tree stump, you can also mix wood chips into the soil.
Step 3: Prepare Your Mushroom Bed
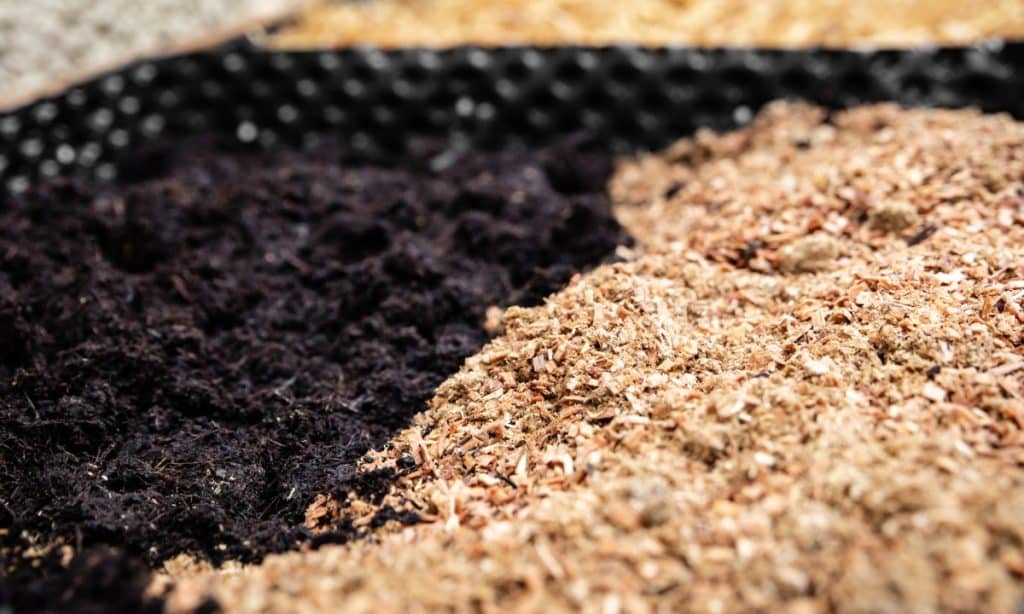
When planting morels, you’re trying to mimic the conditions on the edge of a woodland, and well-mulched loamy soils work best.
Choose a shady spot in your garden and mark out a bed 4 by 4 feet (120 by 120 cm), as most spawn kits provide enough spawn for a bed this size.
Morels enjoy well-drained, loose, sandy soil with a pH range of 6.0 to 7.5 and lots of organic matter.
Loosen the top layer of soil, and if your soil is very sandy or has some clay, add plenty of compost before planting your morels.
Wood ash is also a good additive, as morels thrive in areas damaged by forest fires, and wood chips from ash, elm or apple trees also work well.
Step 4: Add Spawn to The Bed
Mushroom growers call the process of adding mushroom spawn to your prepared bed inoculation.
Your spawn kit will come with instructions, but generally, inoculation involves mixing the spawn into the top layer of soil and mulching it with a 1 to 2-inch (2.5 to 5 cm) layer of compost or wood chips.
If you can’t get spawn and are trying the spore slurry method, you would simply pour the slurry onto the prepared bed and add a layer of mulch on top.
Step 4: Incubation
Incubation is the phase of mushroom growth during which the mushroom mycelium spreads through the mushroom bed, consuming the organic material you have provided.
During this stage, moisture maintenance is crucial. If you have chosen a good location for the bed, it may need very little care.
But if you have periods of warmer weather with little to no rain, check your bed to ensure it is not drying out.
Dig down into the soil underneath the mulch with your fingers. It should be damp. If it feels dry, water your mushroom bed with a sprinkler.
Avoid overwatering as waterlogged beds will encourage mold growth and may cause the morel mycelium to rot.
Step 5: Fruiting
Keep an eye on your morel mushroom bed in spring. But remember, it takes anywhere from 2 to 5 years before you’ll get your first morel mushrooms.
Morels usually begin to grow in spring when temperatures warm to 43 – 50°F (6 – 10°C). Watering the bed with a sprinkler when temperatures reach this range can help to stimulate fruiting.
Lookout for mushrooms when daytime temperatures reach 60 – 70°F (15 – 21°C)
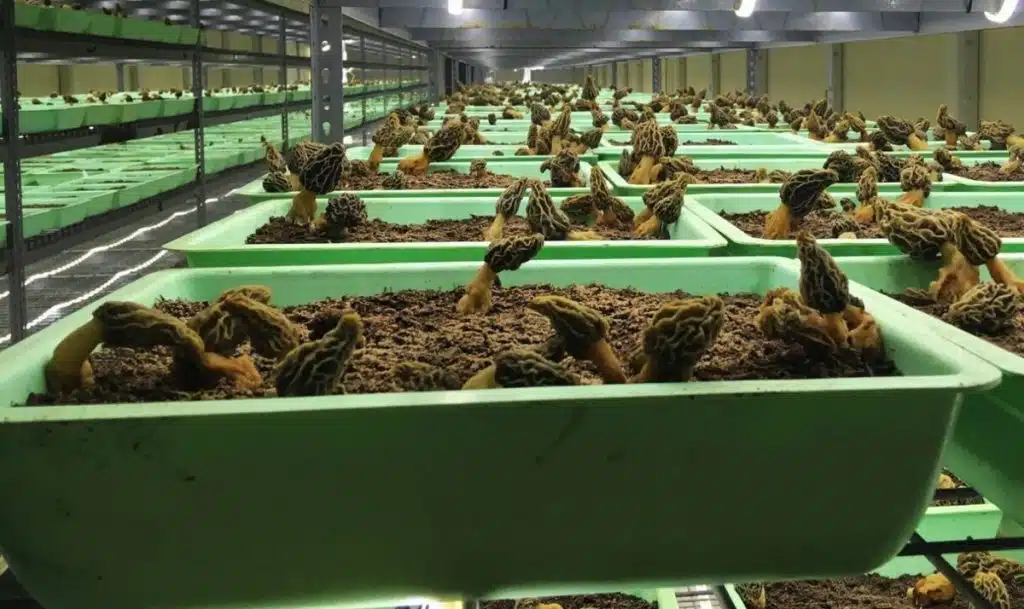
How to Grow Morel Mushrooms Indoors
The advantage of growing mushrooms indoors is that you can control the growing conditions, meaning you could grow morels all year round.
But growing morels indoors is tricky, and even if you mimic their natural condition as best you can, success is not guaranteed.
Scientists and mushroom farmers have patented several methods of indoor morel cultivation for commercial applications, but these require equipment that most home growers don’t have.
Some growers, however, have had success growing morel mushrooms indoors as a fun project by mimicking the outdoor process using the steps below:
Step 1: Gather Supplies
As with growing morels outdoors, you can use morel spores or spawn to grow morels indoors.
While making a spore slurry from fresh morels is a relatively easy and cheap option, you won’t always have access to fresh morels, and the process will take longer, increasing the chances of contamination.
You also need to ensure that you have a morel species that’s saprotrophic and won’t need a symbiotic relationship with a tree to grow.
We recommend ordering morel spawn from a reputable supplier rather than making a spore slurry, as it provides a better chance of success.
You’ll also need to gather the materials required to make your morel mushroom substrate, including:
- Organic compost
- Potting soil
- Sand
- Lime, if necessary to adjust the pH
Wood chips or shavings from elm, ash or apple trees or some fresh ash from these trees are also excellent additives.
Lastly, you’ll need to source some containers. Morels don’t need lots of substrate and grow well in trays.
Commercial growers use horticultural trays, but you can use old baking trays or pans with holes in the bottom for drainage.
Step 2: Prepare the Substrate
For an easy substrate mix, growers recommend 50% organic compost, 30% potting soil, and 20% sand with some powdered limestone, if necessary, to increase pH.
You can usually find all these ingredients at your local gardening store.
Others use a slightly more complicated substrate recipe and combine 30% sand, 20% potting soil and 50% organic matter.
They recommend an organic matter mix of 10% rice hulls,5% peat moss, 5% soybean meal and 80% hardwood chips from ash, elm, apple or maple trees.
This, however, is a nutrient-dense substrate mix that will need sterilization to prevent contamination.
Step 3: Inoculation
Inoculation is the name given to the process of adding mushroom spawn or spores to your growing medium.
First, add a 2-inch (5cm) deep layer of substrate mix to your trays, water the substrate and allow excess water to drain out the holes in the bottom of the tray.
You want your substrate to be moist but not waterlogged.
When drained, you can add your mushroom spawn to the substrate following the supplier’s instructions.
Step 4: Incubation
Place your tray of inoculated substrate in a dark room or tote with temperatures of 65 – 70°F (18 – 21°C) and 90% humidity.
Depending on the climate in your area, you may need a fruiting chamber to maintain these conditions.
It usually takes 4 to 6 weeks for morel mycelium to colonize a substrate and create sclerotium.
When you see white mycelium with brownish lumps of sclerotium on the top of your substrate, move the tray into a refrigerated space with temperatures of 34 – 40°F (1 – 4°C) for two weeks.
This cold period before fruiting simulates the transition from winter to spring and helps to initiate pinning.
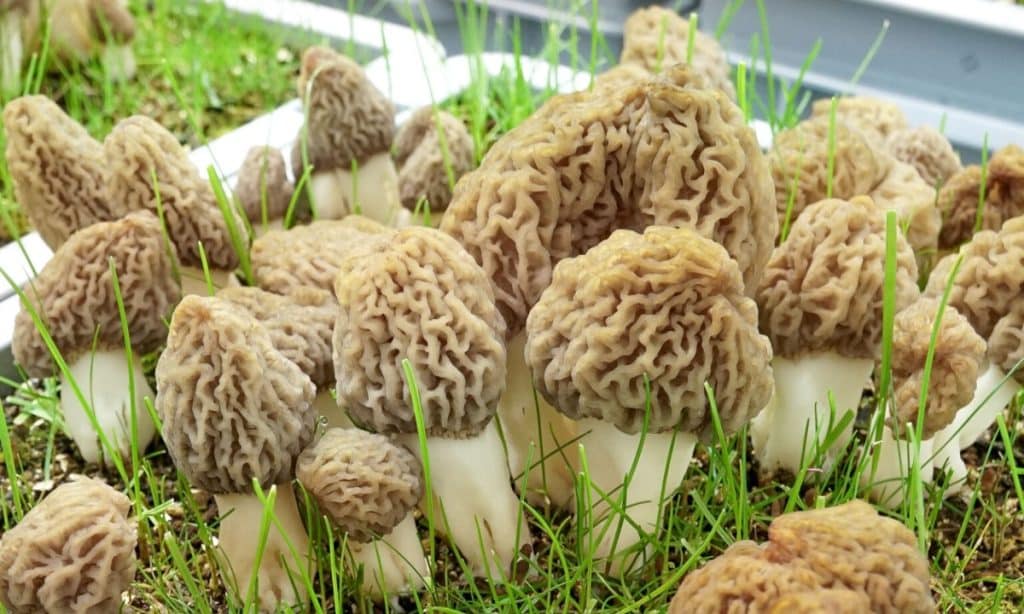
Step 5: Fruiting
After two weeks, remove the tray from the fridge and place it in fruiting conditions. Morels need temperatures of 70 – 72°F (21 – 22°C) and 90% humidity for fruiting.
They also need a daily cycle of 12 hours of light and 12 hours of darkness using indirect sunlight or artificial lighting.
In around 7 days, you should see morels beginning to grow.
How to Harvest Morel Mushrooms
Foragers have an ongoing debate about the best way to harvest mushrooms.
The truth is that no matter whether you pick, pinch, pull or cut your morels, you won’t seriously harm the mushroom mycelium.
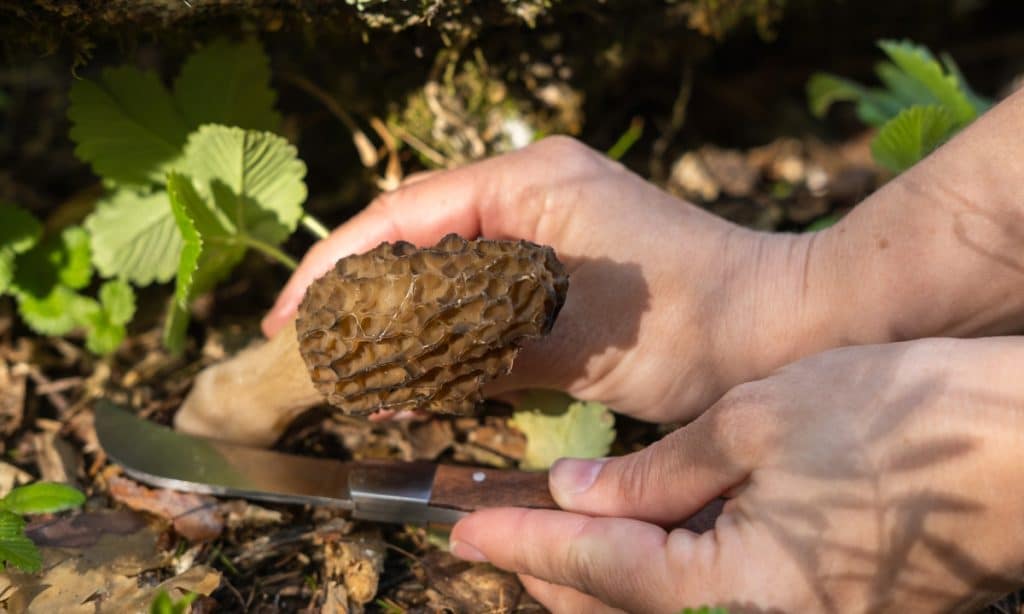
The benefit of pinching or cutting morel mushrooms is that you put a lot less dirt into your bag or basket, and cleaning your mushrooms will be much easier.
As morel mushrooms have honeycomb caps with plenty of nooks and crannies for dirt, we recommend cutting the morel stems just above the ground with a small knife.
Growing Morel Mushrooms for Profit
Morels are currently cultivated commercially outdoors, with China being the biggest producer. And although several people have patented indoor morel cultivation methods, most are not farming them commercially.
Due to the complexities of growing morels and the time and equipment needed for large-scale production, it’s often not very profitable.
As a result, many mushroom farmers prefer to focus on profitable, easy-to-grow gourmet species like oyster, shiitake and lion’s mane mushrooms.
If you’re interested in learning more about the patents and commercial morel cultivation, The Mushroom Company has a morel cultivation resources page with links to this information.
Final Thoughts
Morel mushrooms are unique, highly sought-after mushrooms that are notoriously difficult to grow.
But with the right conditions, a little luck and a lot of patience you can grow them at home.
We recommend beginner mushroom growers start with hardy, easy-to-grow species like oyster mushrooms.
They will provide an ongoing supply of delicious gourmet mushrooms while you learn the intricacies of growing fussier species.
To learn more about growing mushrooms at home, visit our Mushroom Growing Hub or take one of our mushroom cultivation courses.


