Mushroom cultivation on logs started in Asia 2,000 years ago. But only recently the practice has been applied commercially in the West.
In this article, you’ll learn everything you need to grow mushrooms on logs. Including what types of mushrooms you can grow, what type of logs to use, and a step-by-step guide on the entire process.
Why Grow Mushrooms On Logs?
If you own a farm with some forest or even a small woodland, there are several good reasons to cultivate mushrooms on logs.
- They diversify the types of products you can offer;
- They diversify your revenue streams;
- Allow you to add value to wood species you have that are otherwise undesirable;
- Offer more employment and extend the work period for your employees;
- You can cultivate a wide range of medicinal and edible mushrooms in your forest undergrowth;
- To develop new markets for your products;
- It’s a cost-effective way to produce fresh, healthy, and nutritious mushrooms.
If you are thinking about way to grow you mushrooms, then read my guide of how to grow mushrooms outdoors with a mushroom bed.
If you’d like to watch a video where we guide you through how to grow mushrooms on logs then watch this:
What Types Of Logs Can You Inoculate?
Most hardwood species are good for growing both shiitake and oyster mushrooms. So you can choose your logs based on what type of hardwood is available on your land or in your area.
Shiitake like oak, sugar maple, and red maple in particular.
I’ve found that Oyster mushrooms tend to grow best on white birch.
Alder, birch, oak, maple, beech, poplar, balsam, aspen, elm, and willow will all work though.
How Long Do Mushrooms Take To Grow On Logs?
Most mushrooms will take 1 to 2 years after the logs are inoculated before they start producing their first harvest.
However, you should be able to harvest mushrooms off the same log for 6 or 7 years once they start producing.
What Kind Of Logs To Look For?
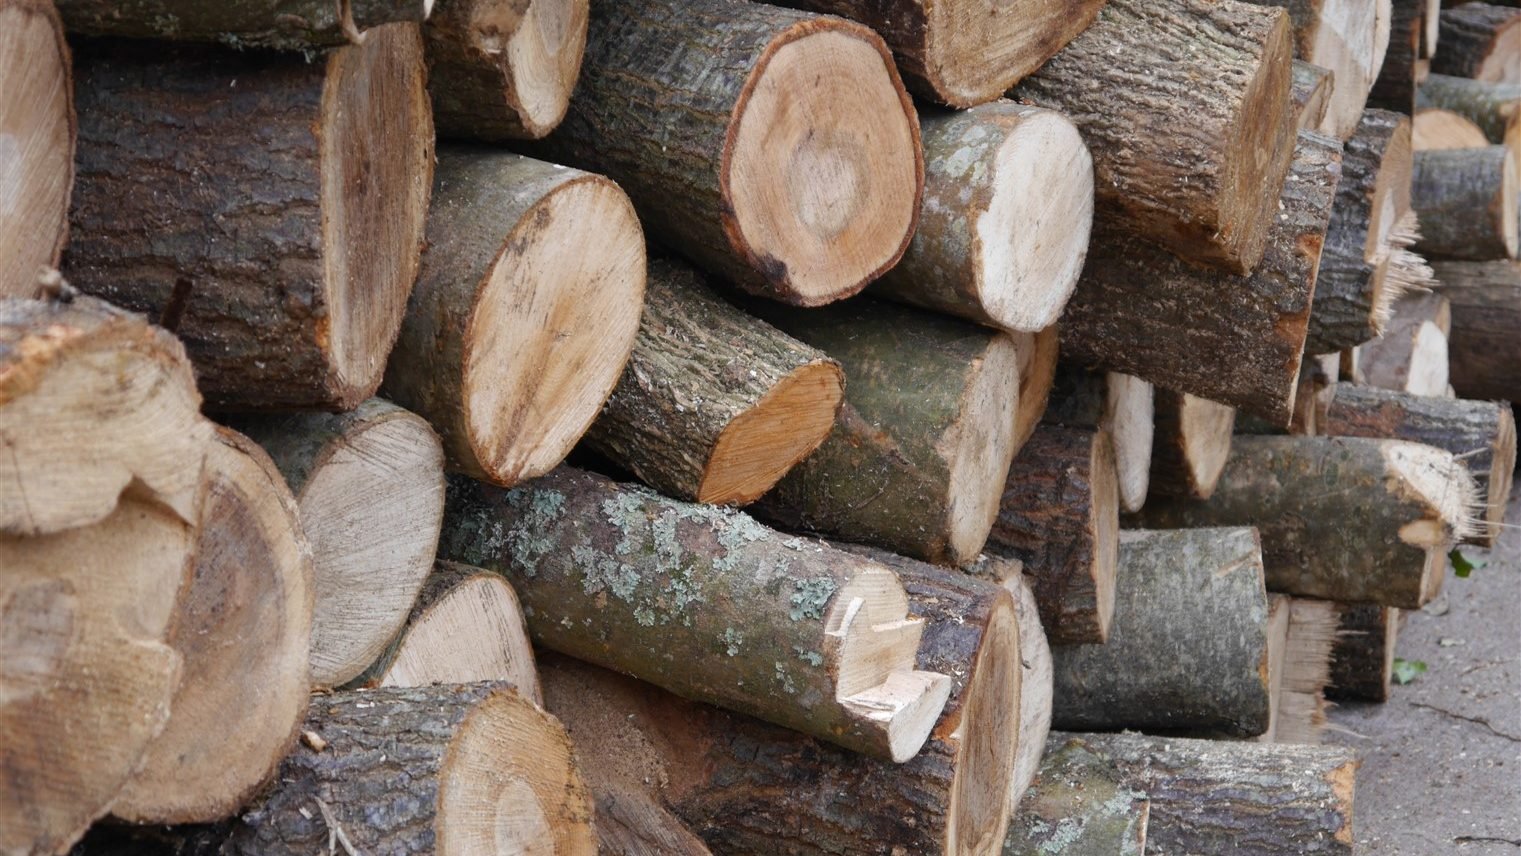
It’s important to choose healthy trees when selecting logs. Any trees with decayed wood or signs of infection have an increased risk of competition due to pre-existing fungi that might already exist in the logs.
Logs are best if harvested during the fall or winter months. This is because trees are in a period of dormancy during this time so their sugar concentration is higher and bark stays attached to the tree better.
Logs used to grow mushrooms can vary in size. However, the larger a log is, the longer it will take for mycelium to colonize the entire length and begin producing mushrooms.
Once a larger log is colonized, it will produce mushrooms for a longer time period though.
It’s important to take moving logs into account when deciding on size. Oversized logs can be hard to move and cause injuries.
Ideal log dimensions for mushroom growing are between 3 and 4 feet (up to 1.25m in length) and a diameter of 3 to 10 inches (8 to 25 cm.)
Alternatively, you can also inoculate fresh tree stumps using the same techniques that you’d apply to logs.
Where To Place Logs Once Inoculated
Mushroom logs need to be kept somewhere shady, humid, and warm. Maintaining good air circulation is important to prevent mold.
You’ll also want to keep your logs near a water source, as you’ll need to hose them down to keep them moist throughout the incubation and fruiting stages.
Good places to store your logs include:
- Up against the side of a building to provide shade.
- At the bottom of a south facing slope or basin. This will keep your logs warm and humid.
- Under a forest canopy that prevents direct sunlight from reaching the logs.
- Underneath shade netting.
Be sure to pick a location that’s relatively close and accessible. You’ll want to water your logs at least every couple of days. If you check out the end of this video tour inside our low tech mushroom farm, you’ll see how we grow our mushroom logs under the canopy of a nearby tree, with some shade netting laid over the top of the logs.
They’re positioned near to a water tap which we attach a sprinkler to in dry weather, and they’re right next to our indoor growing rooms, so we frequently pass the logs for easy monitoring and harvesting.
- Read my article of 5 Things I Wish I Knew Before I Started Growing Mushrooms For A Living here.
What Types Of Mushrooms Can I Grow On Logs?
You can grow both edible and medicinal mushrooms on trees. Here are a few options:
Oyster Mushrooms (Pleurotus ostreatus)

Oyster mushrooms come in a range of colors and tastes.
While they’re commercially grown on substrates like straw or coffee grounds, in nature they grow on trees, so logs are a great choice.
They have a short incubation period, which means you can harvest oyster mushrooms from your logs within the fall of the same year that you inoculate them.
Once established, the logs can produce mushrooms from spring to fall.
They’re high in nutritional content and they’re relatively easy to market if you plan on selling them.
They produce quite well on hardwood, especially beech.
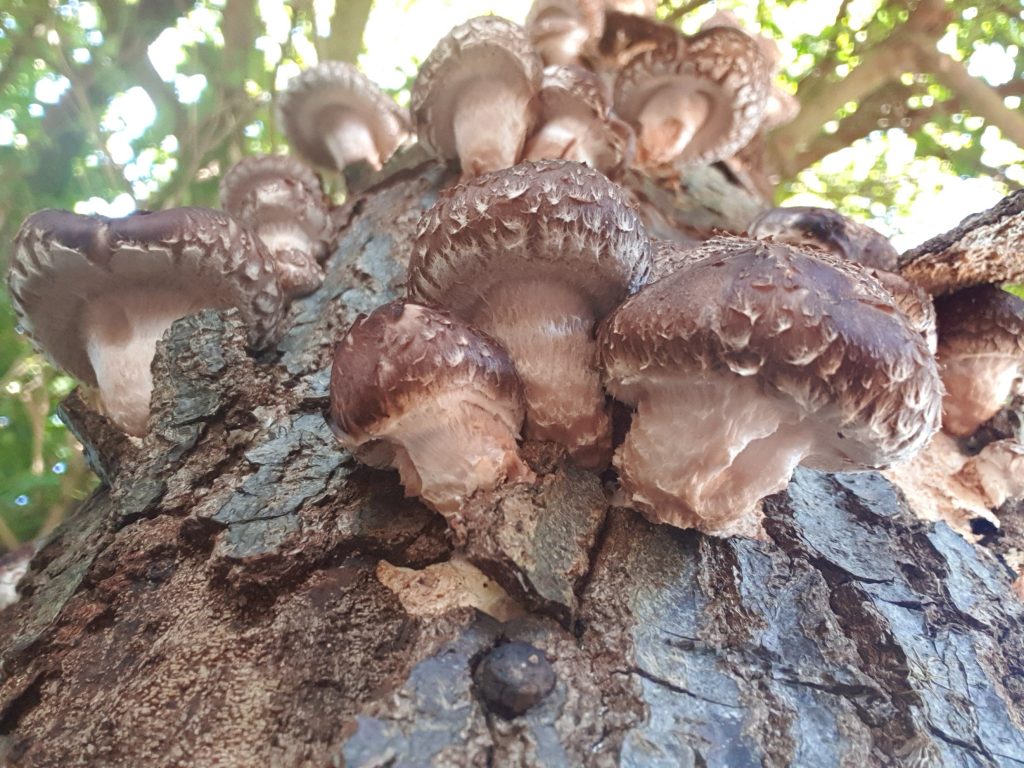
Shiitake Mushrooms (Lentinus edodes)

In the West, it seems like an exotic mushroom. But shiitake mushrooms is the second most cultivated mushroom in the world.
It has a firm texture and adds a great flavor to foods, especially in Asian cuisine. It also has medicinal properties including lowering cholesterol and stimulating the immune system.
Its incubation period is longer than that of oyster mushrooms and will take between 9 months and 2 years to start fruiting.
Shiitake mushrooms maintain its taste when dehydrated, and it’s easy to rehydrate again. So drying them is a great way to store large amounts before they spoil.
Lion’s Mane (Hericium erinaceum)

Lion’s mane is a unique looking mushroom with white teeth or needles, which give it a shaggy look and this is where it gets its nickname.
Lion’s mane grows well on a wide variety of woods including beech, elm, poplar, and maple.
These mushrooms grow very large, at around 40 cm in diameter once mature. To get the largest fruiting bodies, use logs that are at least 10 inches in diameter. The bigger the logs, the bigger the mushrooms will be.
The mycelium produces mushrooms in the spring and fall. Depending on the type of wood used and size of the log, it can take between 1 and 3 years for lion’s mane to start producing.
It has many medical benefits, but it’s also edible.
Marketing this mushroom can be difficult since people aren’t usually familiar with it, but it has a great taste when cooked, similar to lobster.
Reishi (Ganoderma lucidum)

Reishi isn’t edible, it’s purely a medicinal mushroom. It’s best dried and ground into powder to be prepared as a tea.
It prefers to grow on oak and plum logs. This mushroom won’t fruit until the second season after inoculation.
Reishi requires high humidity, so it’s best to put logs in direct contact with the soil surface. Stacking logs will likely make them too dry to produce. Some people even bury their reishi logs halfway in the ground.
Other Mushrooms

These are just four of the potential mushroom species that you can grow on logs. Other popular choices include Maitake, Nameko, Chicken of the Woods, and Pioppino.
You could experiment to see which kinds of mushrooms grow best in your region and on which type of wood.
Types Of Inoculants
When growing mushrooms on logs, the two main types of inoculants are plug spawn and bulk sawdust spawn in bags.
Plug spawn are small wooden dowels that have been pre-inoculated with a specific type of mushroom mycelium. They normally cost about $20 for 100 plugs.
They work quite well for beginners since you just have to drill some holes into your logs and hammer them in.
When Should You Inoculate Logs?

Logs can be inoculated with mycelium in the spring as soon as the risk of last frost has passed.
Most wild mushrooms grow in the fall. So it’s best to inoculate your logs by the end of May to give your mycelium a chance to get established and avoid having to compete with indigenous species.
Growing Mushrooms On Logs: Step By Step

Start by finding some fresh logs. The time from when your tree was cut down to inoculating shouldn’t be more than 1 month. If you let them sit around for too long, there’s a risk of other types of fungus beginning to populate the logs.
Once you’ve felled some trees and cut your logs to length, you’re ready to inoculate them.
A tip before you get started: it’s important to keep track of data such as what type of wood you’re using, the date of inoculation, and what type of mushroom you’re using.
This will allow you to track your success and adjust to make improvements in the future.
1. Figure Out How Many Spawn Plugs You Will Need
A 4 foot log usually requires about 30 to 50 plugs for full coverage.
To figure out how many plugs you’ll need for any given log, you can use this formula:
Number of holes = (Length of the log in cm x diameter of the log in cm) / 60
2. Drilling The Holes
You want to start by drilling a row of holes every 6 inches (15 cm) apart down your log.
I’d recommend leaving about 2 inches from both ends of the log without holes. Holes should be about 1 inch (3 cm) deep.
This is deep enough that a small space will be left underneath your plug when you hammer it into the log, which gives an ideal place for mycelium to start developing.
Place a piece of tape on your drill bit at the 1 inch mark so that you know exactly how deep you need to drill without measuring every time.
The company that sells you your spawn plugs can tell you what kind of drill bit you’ll need to use. Normally a 5/16th drill bit is pretty standard.
Once your first row of holes is complete, you want to position your next holes in a staggered row. Start your next row of holes about 2.5 inches (6 cm) away from your first row of holes, and stagger the row to create a triangle or checkerboard type pattern.
3. Inserting Plug Spawn
Your plug spawn dowels should be easy to get started in the hole. To get them fully inserted, all you need to do is gently tap them with a hammer.
Your plugs should be below the surface of the bark and flush with the actual wood of the log. That way you’ll be able to seal the hole up with wax.
If you’re using sawdust spawn instead of plugs, you’ll need a special spring-loaded inoculation tool that inserts the spawn deep into the holes you’ve drilled.
- Read my guide of How to Grow Your Own DIY Mushroom Spawn here.
4. Sealing The Plugged Holes
This is an important step. Don’t skip it and think that your mycelium will be safe uncovered!
The first thing you’ll need is wax. Cheese wax is most common for sealing up holes, but you can also use other types of wax such as candle or beeswax.
You’ll also need some way to heat up your wax and melt it. You can use a crock pot, an old deep fryer, or just use an old pot on a propane stove.
Once your wax is melted, you’ll want to use a wax dauber to apply the wax to your holes. They’re inexpensive to buy, or you can try to make your own out of a cotton ball or cloth, or even use a small brush.
If you act quickly, you can even use a small syringe to apply the hot wax.
Cover all of your plugs with a light coating of wax to completely seal them. This will prevent contamination by mold or other fungi, as well as protecting against insects and other pests and keeping moisture in.
Some people even suggest sealing both ends of your log to maximize the amount of humidity it retains, but that might be overkill.
5. How To Store Your Inoculated Logs

You’ll want to store your logs in a shady place, like up against the side of your house or underneath a tree like we have here.
There are several different ways to store logs during incubation.
Alternatively another popular way to store logs is to alternate your logs, laying two in one direction, and then two perpendicular, alternating back and forth to build up a tower of logs.
The main thing you want is to store your logs with good air circulation but also a good level of humidity.
You can cover your logs with shade cloth if you want to, just to protect them a bit more from sunlight.
6. Maintenance / Incubation
You’ll want to water your logs with a hose once or twice per week for 10 minutes to maintain the appropriate level of moisture in them. If they dry out completely, your mycelium will die.
This is why it’s important to locate your logs within reach of your garden hose. Otherwise you’ll be making a lot of trips back and forth with buckets!
7. Initiating / Shocking Your Logs
You can speed up the production of your mushrooms by initiating or shocking your logs. This is done by allowing them to soak in cold water for 24 hours. You can do this in a stream or pond, a child-size swimming pool, or get creative and use other objects like bathtubs or canoes.
You should give your logs at least 6 to 9 months before you shock them to ensure the mycelium has had a chance to colonize most or all of the log. Shocking is a useful strategy to start producing mushrooms instead of waiting 2 or 3 years for it to happen naturally.
8. Harvesting
Most mushrooms grown on logs will fruit once or twice per year. Usually in the springtime and autumn. Increased rainfall and big variations in temperatures signal to mushrooms that it’s time to fruit.
It’s important to regularly check on your logs to see how they’re progressing. Once mushrooms start growing, they can grow quite fast. Fully grown mushrooms can appear from nothing in just a couple of days.
After about 3 weeks of growing, most mushrooms are too tough and woody to be edible any more. Plus the longer you leave them on the log, the more at risk they are to being eaten by insects and other pests.
Shiitake mushrooms should be harvested while their caps are still closed and they’re about 5 cm in diameter. This usually only takes 2 to 7 days after they begin growing.
Oyster mushrooms should be harvested while there is still a bit of a curl in their shape, before the rim gets completely straight and stretched out.
- Read my Guide of How To Set Up A Low Tech Mushroom Farm at own.
FAQs
Can I Take Bark Off Logs Or Should I Leave It On?

I recommend leaving bark attached to your logs. It has two important functions. It serves as a natural barrier to protect mycelium from insects, parasites, and other types of fungus. Plus it helps to keep humidity and moisture in the log.
The thicker a log’s bark is the better. It will last longer and hold in moisture even better.
How Long Does Inoculation Take?
One person can insert about 100 plugs per hour. That includes drilling, inserting the plugs, and sealing with wax. It’s best to batch your tasks together, such as doing all drilling at once, all plug inserting at once, and all sealing at once.
Even better is getting a team of three people to each take on one of these tasks. With a team of three people, you can inoculate logs with about 400 plugs per hour.
How Can I Transport Mushrooms?

All mushrooms are quite sensitive to bruising and damage. It’s best to transport them in a container that allows for lots of air circulation like a paper bag or basket.
How Long Will Mushrooms Stay Fresh Off The Log?
Fresh mushrooms will only last in the refrigerator for a few days or up to a week.
For most types of mushrooms, drying them out in a food dehydrator or oven is the way to go if you’ve harvested more than you’ll be able to eat within a week.
So now you know a lot more of what it takes to grow mushrooms on log. Will you give it a go?
- Read more about growing mushrooms in my Ultimate Guide: How To Grow Mushrooms.


