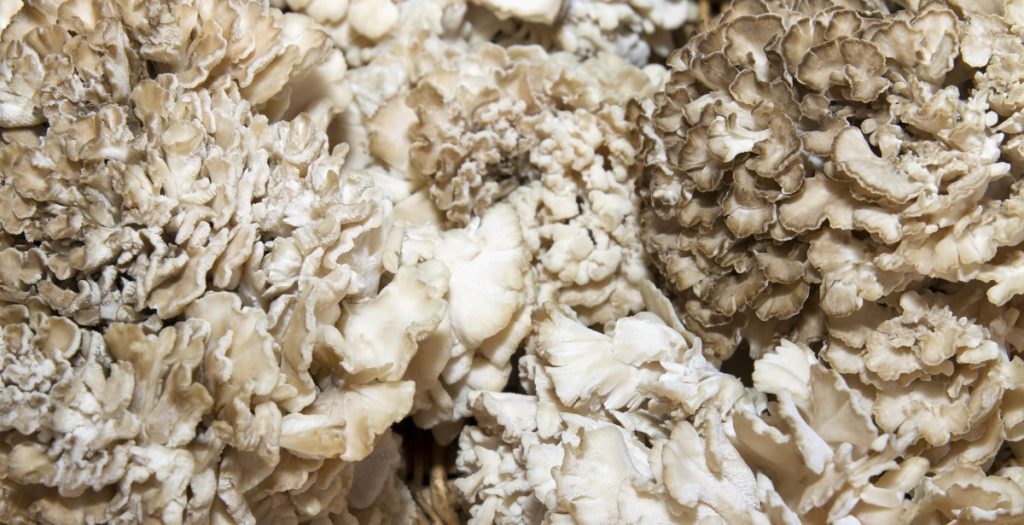
Maitakes are interesting mushrooms to cultivate but not one of the easiest mushroom species to grow as they take a long time to fruit.
However, as more people discover the benefits of these nutrient-dense, versatile mushrooms, demand is growing, and mushroom farmers are adding maitakes to their offerings.
You can also grow these wood-loving, saprotrophic mushrooms at home on hardwood substrates.
However, one of the things you’ll need when growing maitake mushrooms is patience. You cannot rush the process.
Read on to learn the ideal growing conditions for maitake mushrooms, how long they take to grow and how to grow them indoors and outdoors step-by-step.
What Are Maitake Mushrooms?
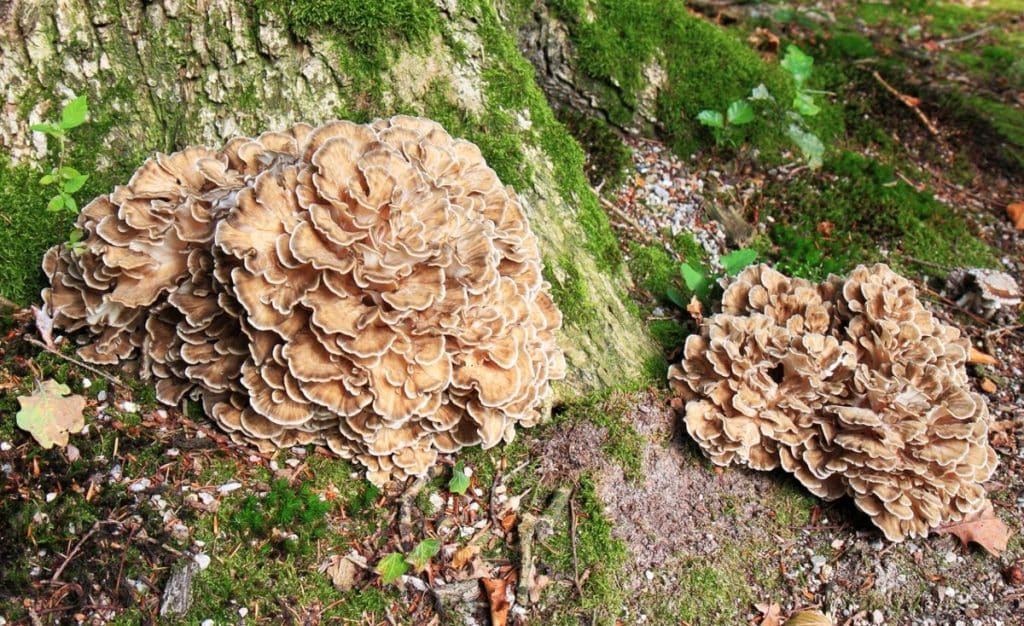
Maitake mushrooms are delicious, soft-flesh, polypore fungi that grow at the base of oak and other hardwood trees in temperate forests.
They have several names, including “hen of the woods,” because they grow in large feathery clusters that resemble the ruffled feathers of a fluffed-up hen on a nest.
Native to Japan and North America, these delicious culinary and medicinal mushrooms contain numerous vitamins, minerals, and antioxidants.
Maitake mushrooms have been used in traditional Japanese and Chinese medicine for centuries, and now modern research confirms their potential health benefits.
You can forage for wild maitake mushrooms, but because of their brownish color and shape, they can be hard to spot when the ground is covered with leaf litter.
You can also grow maitake mushrooms at home, although they are not the easiest species for beginner mushroom growers.
Can You Grow Maitake Indoors?
You can grow maitake mushrooms indoors, but they’re one of the most challenging species to grow consistently well.
This is because they take a long time to grow, and their fruiting phase involves a multi-step process, requiring a change in environmental conditions after initial growth to promote fruitbody development.
Mushroom farmers use bags of amended hardwood sawdust substrate to grow maitake mushrooms indoors.
And, as they’re sensitive to other mushrooms and need specific growing conditions, it’s best to grow them in a dedicated fruiting chamber.
Different Ways to Grow Maitake Mushrooms
There are several different ways to go about growing maitake mushrooms. Which is best for you will vary, depending on your experience, space and available substrate.
Here are some of the ways to grow maitake mushrooms:
1. Maitake Mushroom Growing Kit
There are numerous maitake mushroom growing kits available. These come with everything you need to start growing maitake, including detailed instructions on caring for your mushrooms.
The easiest indoor maitake mushroom grow kits, typically consist of a bag containing a fully colonized substrate block ready to start the fruiting process.
You also get maitake mushroom grow kits for growing mushrooms on logs. These come with everything you need to grow mushrooms on logs, excluding the logs.
But, although some grow kit producers say the process is relatively easy, most caution that as their fruiting phase is more complex than most other cultivated mushrooms, maitakes are better suited to more experienced mushroom growers.
2. Indoors in Mushroom Grow Bags.
If you don’t want to go the grow kit route, you can also buy maitake mushroom spawn and source and prepare a substrate to grow mushrooms indoors in bags.
This method allows you to grow more mushrooms, but it takes longer, and you’ll need a pressure cooker to sterilize your substrate and a clean, sterile location for inoculation.
3. Outdoors on Logs
You can grow maitake mushrooms outdoors on oak logs, but as they’re slightly parasitic on host trees in nature, they require a somewhat different method than most other log-grown mushrooms.
They are also not fast-growing and prone to being outcompeted by other fungi.
Thus, growers recommend first sterilizing your oak logs by pressure cooking, steaming or boiling them.
Then you’ll need to incubate them in sealed bags with a filter until fully colonized, and finally, bury them outdoors in a shady spot.
Ideal Growing Conditions for Maitake Mushrooms
Providing ideal growing conditions is one of the most challenging aspects of growing mushrooms.
In nature, fungi can remain dormant inside organic substrates until the ideal combination of humidity and temperatures occurs and triggers fruiting.
To create ideal growing conditions for maitake mushrooms, you’ll need the following:
Nutritious Substrate
In the wild, maitake mushrooms almost always grow at the base of oak, maple or elm trees. Thus, the ideal hardwood logs or sawdust for their substrate should be from these trees.
Growers have found that maitakes grow best with some added nutrients.
Substrates with 65% hardwood sawdust and 35% soybean hulls are popular. But, you’ll also have success growing maitakes on substrates consisting of 80% hardwood sawdust and 20% bran.
The moisture content of your substrate is also important, and while most mushrooms thrive in substrates with 60% moisture, maitakes do well with a substrate that’s slightly on the dry side.
Aim for 57.5% moisture in your maitake mushroom substrate, and remember the amount of water you’ll need to achieve this may vary from sawdust to sawdust, depending on the particle size.
Humidity
Maitake mushrooms enjoy an environment with constant high humidity levels of 90% or more.
Aim for as high a humidity as possible in your grow room without allowing water droplets to form on the mushrooms, as this encourages the growth of contaminants.
Many mushroom farmers use humidifiers with a humidity control system to maintain constant humidity levels.
Air Flow
Maitake mushrooms don’t like too much airflow and often produce larger yields when the top part of the bag is left above them to protect them from drafts.
However, you’ll need enough airflow in your growing space to keep CO2 levels below 1000 ppm. If the CO2 levels go above 1500 ppm, it can cause the mushrooms to produce small, thin caps.
Lighting
Maitake mushrooms don’t need light during incubation and initial pinning, but once you open the bag and place them in fruiting conditions, they need light to develop properly.
A regular day and night light cycle of 12 hours light and 12 hours darkness is recommended and some growers have found that maitake do best with 500 – 1000 lux of light, which is more than most other species.
Temperature
Many people think maitake mushrooms prefer cooler temperatures, but this is not the case.
Although they will tolerate temperatures as low as 40°F (4°C), they grow best in warmer temperatures and can tolerate temperatures of up to 75°F (24°C).
Room temperatures of around 68 – 73°F (20 – 23°C) are ideal for incubation and pinning and during fruiting try to keep your growing room consistently between 60 and 64°F (16 and 18°C).
How Long Does it Take to Grow Maitake Mushrooms?
Maitake mushrooms take longer to grow than many other species, and their incubation and initial fruiting phase can take up to four months.
However, once you cut open the bag and move it into fruiting conditions, the maitakes develop quickly and are ready for harvest in around a week.
How to Grow Maitake Mushrooms Indoors Step-by-Step
Now that you have a better idea of the conditions needed to grow maitake mushrooms and how long it will take, here are some steps to follow to grow maitake mushrooms indoors:
Step 1: Gather Supplies
The first step when growing maitake mushrooms indoors is to gather all the supplies you’ll need, including:
- Maitake mushroom spawn
- Hardwood sawdust or pellets for substrate
- Bran or soybean hulls to provide additional nutrients
- Mushroom growing bags
You’ll also need some equipment to prepare and inoculate your substrate, including
- A bucket, tote or large bowl to mix and hydrate the substrate
- A pressure cooker to sterilize the substrate
- A clean workspace and a still air box or laminar flow hood for inoculation
- Alcohol and a clean cloth to wipe down all surfaces
- Gloves, clean overall and a mask to help prevent contamination
You’ll find all the supplies you need online, but we recommend sourcing substrate material in your area if possible.
Always buy high-quality maitake mushroom spawn from a reputable supplier, preferably in your area, to reduce the transportation time.
Low-quality or old spawn will reduce your chances of growing maitake mushrooms successfully.
It’s also crucial to ensure that you buy spawn that growers have cloned from a proven strain of maitake mushroom, as many strains don’t fruit well.
Step 2: Prepare Substrate
There are two parts to preparing a mushroom substrate, the first step is hydration, and the second is sterilization.
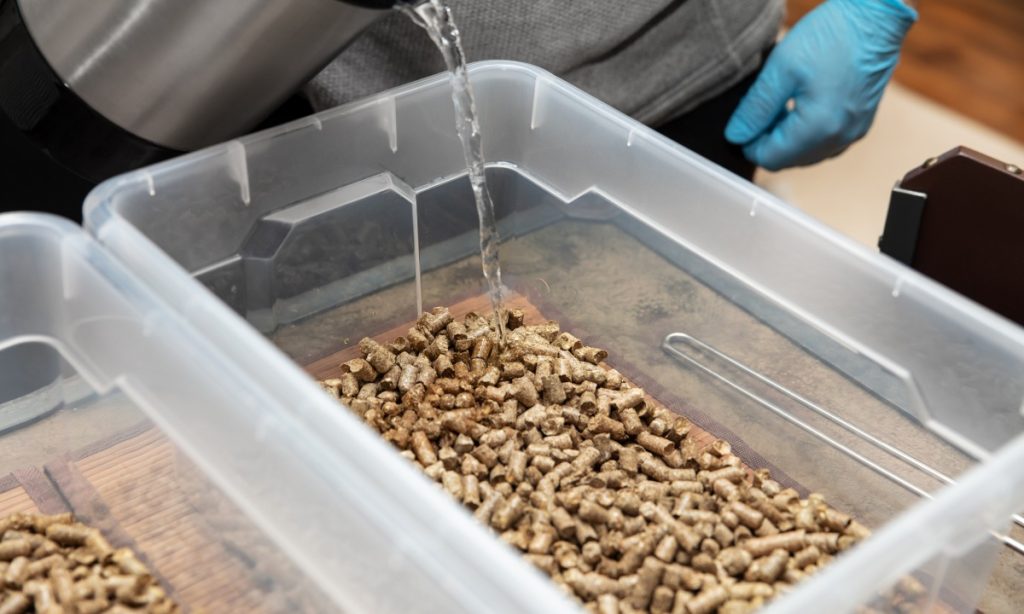
1. Hydrate your substrate
When preparing your maitake substrate, the goal is to mix the sawdust and supplements and then hydrate the mixture evenly to between 57.5 and 60 percent.
First, measure your hardwood sawdust or pellets and bran or soy hull supplements, and combine them in a large tote or bucket.
Then add water at a rate of around 1.5 to 1.7 times the weight of the dry substrate and mix it all together using your hands or a large spoon.
Before you move on to the next step, you’ll need to ensure the mixture is correctly hydrated. A squeeze test is the easiest way to do this.
Grab a handful of the substrate and squeeze it lightly. A drop or two of water should come out.
If more water is released the substrate is too wet and if no water comes out and the substrate is not clumping together in your hand, it’s too dry.
2. Sterilize your substrate
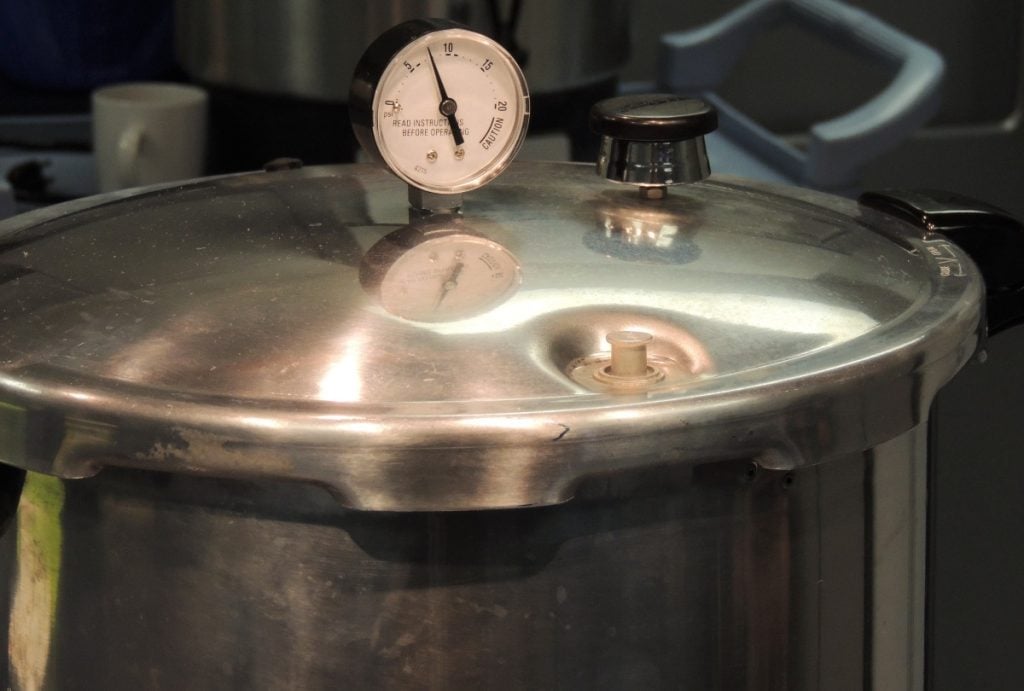
Once you are happy that your substrate has the correct moisture content, it’s time to put the substrate into your grow bags and sterilize them in a pressure cooker.
This step is crucial when growing maitake mushrooms as they’re not vigorous growers.
If you do not eliminate competitor organisms like mold or bacteria, they will easily outcompete the maitake mycelium and take over the substrate.
To sterilize a mushroom substrate properly, you need temperatures above 250°F (121°C) for at least 2 hours.
Generally, you’ll need 15 psi of pressure to achieve these temperatures when using a pressure cooker.
Our step-by-step guide to sterilizing mushroom substrates has more information for you.
Step 3: Inoculation
“Inoculation” is the name growers have given to the process of adding mushroom culture, spores, or spawn to a nutrient-rich growing medium.
In this case, inoculation means adding your maitake mushroom grain spawn to the bags of sterilized sawdust substrate.
Contaminants are often introduced to sterile substrates during inoculation. So, it’s crucial to perform this process inside a still air box or in front of a laminar flow hood to help reduce the chances of contamination.
Grain spawn suppliers recommend an inoculation rate of 2 to 10% of the weight of the wet substrate.
A higher inoculation rate reduces the incubation period but you should not exceed a 10% inoculation rate and most growers recommend an inoculation rate of 5 to 6%.
Our article on mushroom inoculation has more information for you on this phase of the mushroom growing process.
Step 4: Incubation
Once you have inoculated your bags, the mushroom mycelium needs time to grow through the nutritious substrate you have provided.
This stage of mushroom cultivation is called incubation.
Incubation for maitake mushrooms takes longer than most species and can take 6 to 10 weeks.
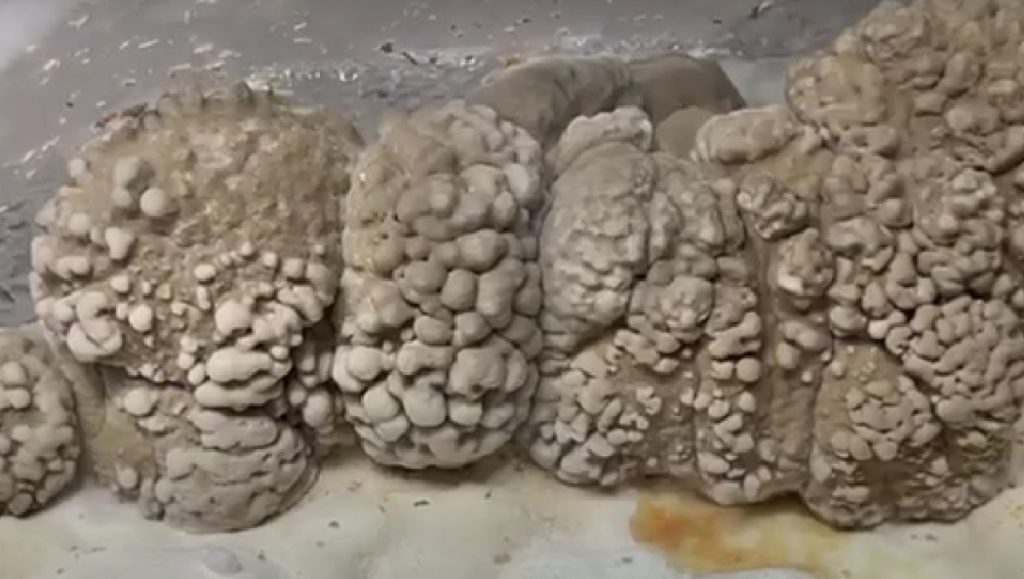
After around 3 weeks, the substrate block will be covered in white mycelium, but it is not ready for fruiting yet.
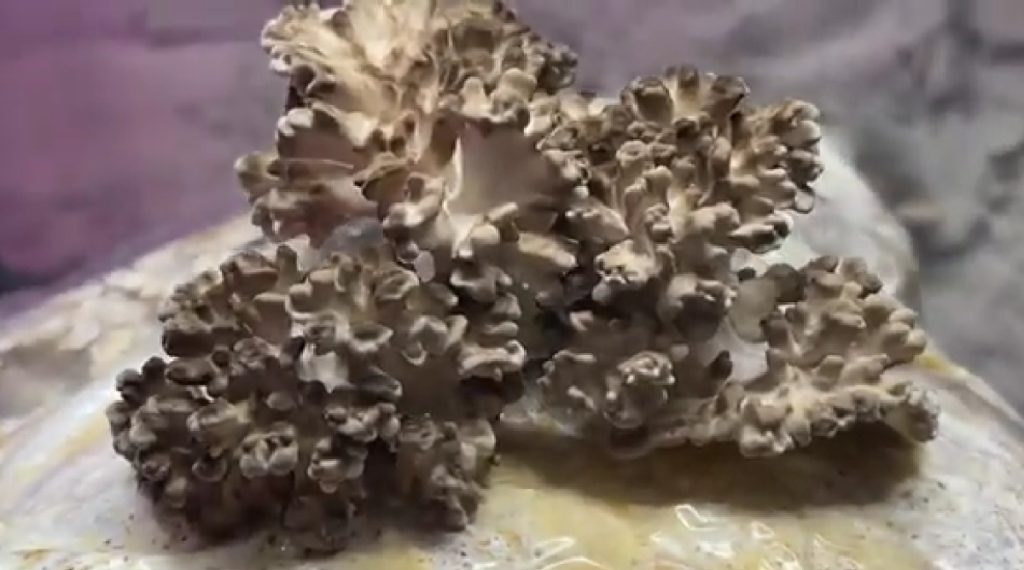
During the next phase, the top of the mycelium gets dark and forms little bumps that some growers call spider eyes.
These bumps are the first signs of maitake mushroom pinning, and at this point, you should leave them in the bag to continue growing for another 3 to 5 weeks.
Step 5: Fruiting
Maitake is a tricky mushroom to fruit because you need to know when they are ready for you to open the bag and place them in fruiting conditions.
When growing maitake in bags, you only have a window of around a week to get this right.
If you wait too long, they don’t develop correctly, and if you open the bag too soon, they’ll either abort, fail to form correctly or take ages to grow.
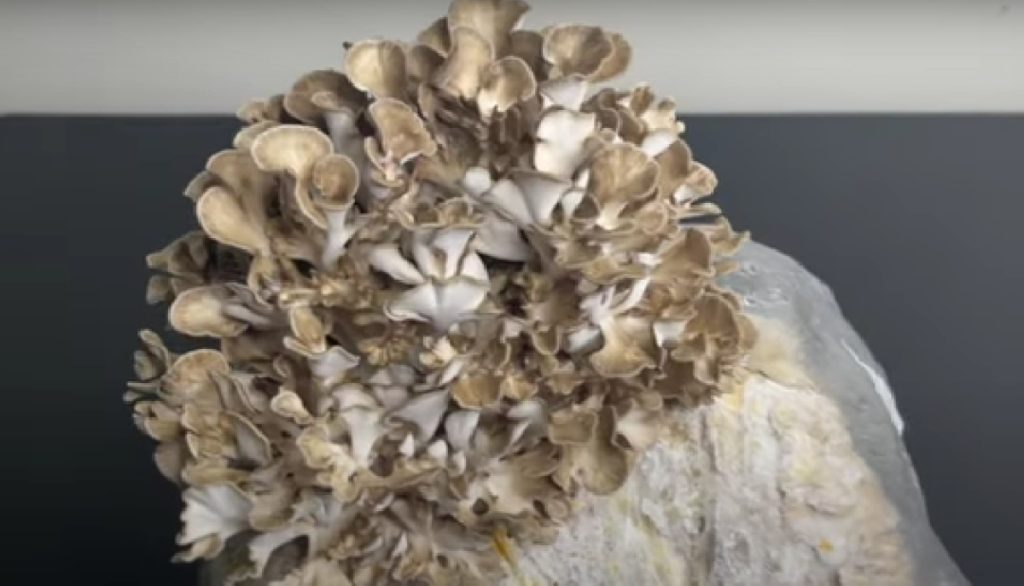
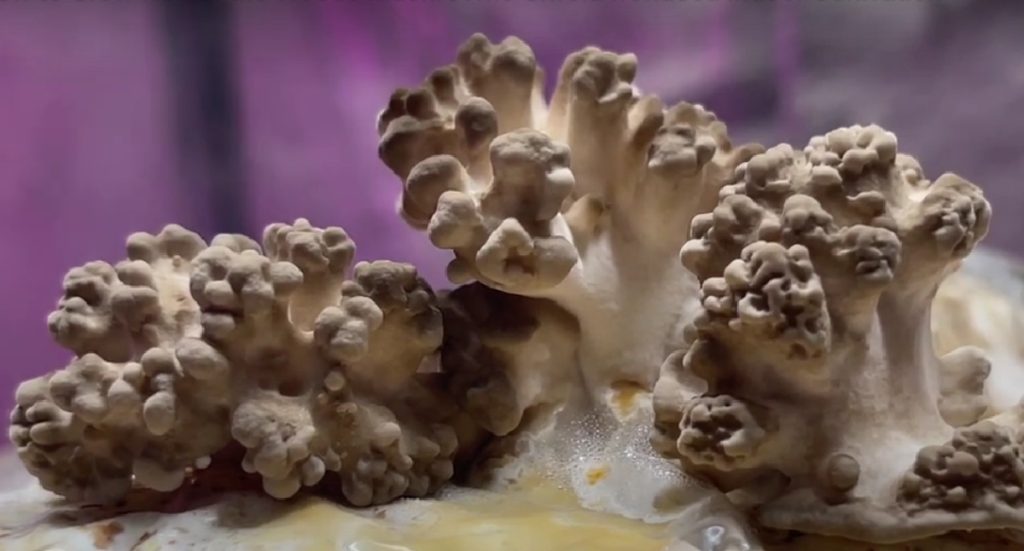
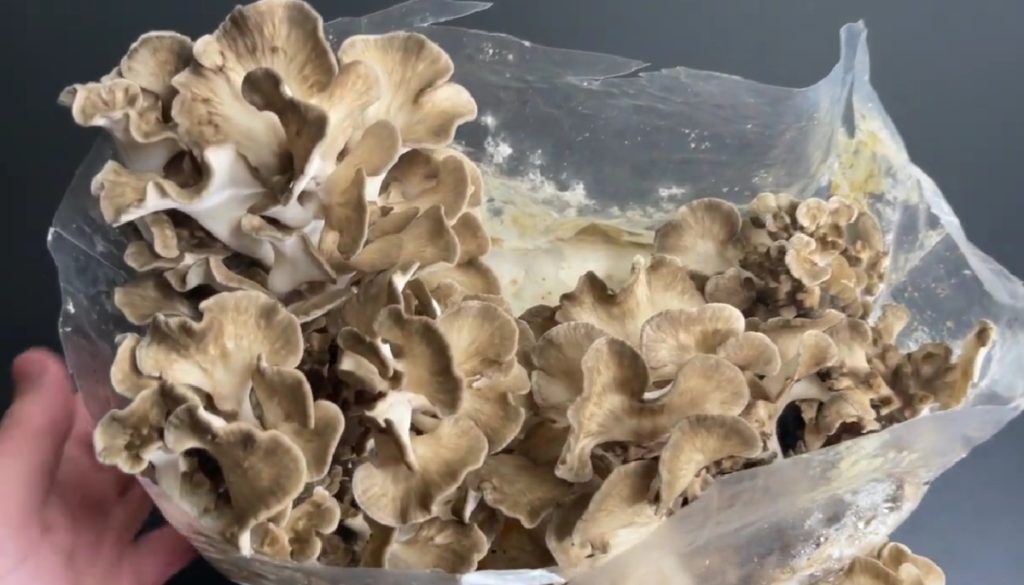
When they have developed from gray, brain-like blobs or knobs to the beginning of fingers or stems branching out, it’s time to cut off the top of the bag and move the block into a fruiting chamber.
Maitake mushrooms like to grow up the side of the bag on the edges of the substrate block, so you’ll need to be careful when opening the bag not to damage them.
Maitake doesn’t like lots of fresh airflow, so growers recommend cutting the bag near the top, leaving a section above the mushrooms to block excess airflow. You can cut the bag off just above the substrate, and your maitake will still grow, but you’ll get a smaller yield.
We also recommend cutting a slit down one side of the bag so that the mushrooms can push the bag outwards as they grow.
Within 12 hours of opening the bag, you should notice the fingers expanding and getting dark outer margins.
Maitake grows fast from this point and it only takes 1 to 2 weeks to go from fingers to fully mature fronds ready to harvest.
Another thing to note is that maitake doesn’t like to grow in a room alongside other species. We are unsure why, but maybe they’re sensitive to other spores.
It’s best to fruit them in a fruiting chamber on their own.
What Are the Conditions for Maitake Fruiting?
Maitake mushrooms go through various stages during fruiting and each of these needs slightly different conditions, which is why they are not the easiest species to grow.
During primordia initiation, or pinning, while they are still in sealed bags they need the following conditions:
Temperature: 68 – 73°F (20 – 23°C)
Relative Humidity: 95%
Light: 100 – 500 lux
CO2 levels: 2000-5000 ppm
And once you cut the top of the bag open to continue fruiting they need the conditions below:
Temperature: 60 – 64°F (16 – 18°C)
Relative Humidity: 85% – 95%
Light: 500 – 1000 lux
CO2 levels: 1000 ppm or less
Step 6: Harvesting
Harvesting your maitake mushrooms at the correct time is important as it affects their flavor and texture.
The best time to harvest maitake mushrooms is before they release their spores. You’ll know they are ready when their caps are open, but the edges are still slightly curled under.
To harvest your mushrooms, hold the entire cluster at the base, close to the substrate block, and gently pull and twist it off.
Try not to disturb or damage the mycelium below as it could provide another flush of mushrooms in three to four weeks.
How to Grow Maitake Mushrooms Outdoors on Logs Step-by-Step
Although many mushroom farmers cultivate maitake mushrooms indoors in fruiting chambers, if you have access to oak logs you can grow them outdoors on logs.
The process is somewhat different from how you would grow many other species as maitake needs extra help to outcompete other fungi.
Follow the steps below to grow maitake mushrooms on logs:
Step 1: Gather Supplies
Gathering all the supplies you’ll need is the first step when growing maitake mushrooms on logs.
Most importantly, you’re going to need oak logs. The best logs are those cut from white, red or bur oak trees.
Apart from a source of fresh oak logs, you’ll also need the following:
- Maitake sawdust or plug spawn
- If you use plug spawn, you’ll also need a drill, drill bit, log sealing wax and a wax applicator
- XL filter patch bags or large autoclavable bags with collars and foam plugs
Step 2: Cut Your Logs
Cut fresh logs from healthy, living oak tree branches. Try to cut pieces that weigh more than 2 pounds (1 kg), but keep in mind the size of your bags and pressure cooker.
Generally logs around 8 inches (20 cm) in diameter and 8 to 11 inches (20 to 28 cm) long work well and easily fit inside bags, pressure cookers or large pots.
If you’re using plug spawn, drill holes in your logs before heat treating them.
Step 3: Heat Treat The Logs
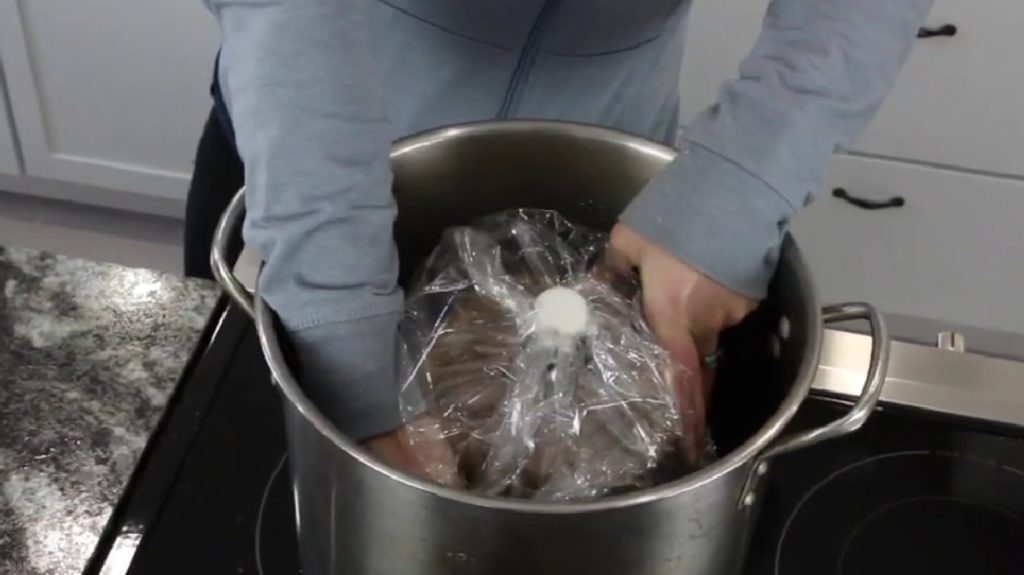
There are three options for heat treating your logs, pressure cooking, steaming or boiling.
We recommend pressure cooking them as this ensures you kill any potential competitor organisms, but if you do not have a pressure cooker, steaming or boiling are effective alternatives.
The first step is to place your logs standing upright inside an autoclavable bag. Some growers use XL filter patch bags, but others prefer large autoclavable bags with collars and foam plugs.
Now use one of the methods below to heat-treat your logs:
- Pressure cooking – Place the bagged log inside the pressure cooker on a rack so the bag does not touch the bottom or sides of the cooker and sterilize at 15 psi for 120 minutes. Keep the pressure cooker closed while the log cools down.
- Steaming – Place the bagged log inside a steamer and steam for three to six hours. Leave the lid on the steamer while the log cools.
- Boiling – Place the bagged log on a rack in a pot of boiling water and boil it constantly for one hour.
Field & Forest have a great video that shows you how to heat treat your logs using each of these methods
Step 4: Inoculation
Once your sterilized log has cooled to room temperature, you can use one of two methods to inoculate the logs, depending on the spawn you purchased.
It’s best to wipe down any tools with alcohol and inoculate your logs in a clean, draft-free workspace to reduce the chances of contamination.
If you purchased plug spawn, you’ll need to remove the logs from the bag, tap the plugs into the holes, and seal the holes with wax before returning the logs to your bags for incubation.
If you’re using sawdust spawn, knead the spawn bag to break the spawn apart, then open the top of your bagged log and place 1 to 1 and a half cups of spawn in the bag.
Then, close the bag and gently move the spawn around until the bottom and the top of the log are coated with a layer of spawn.
Step 5: Incubation
There are two stages to maitake log incubation.
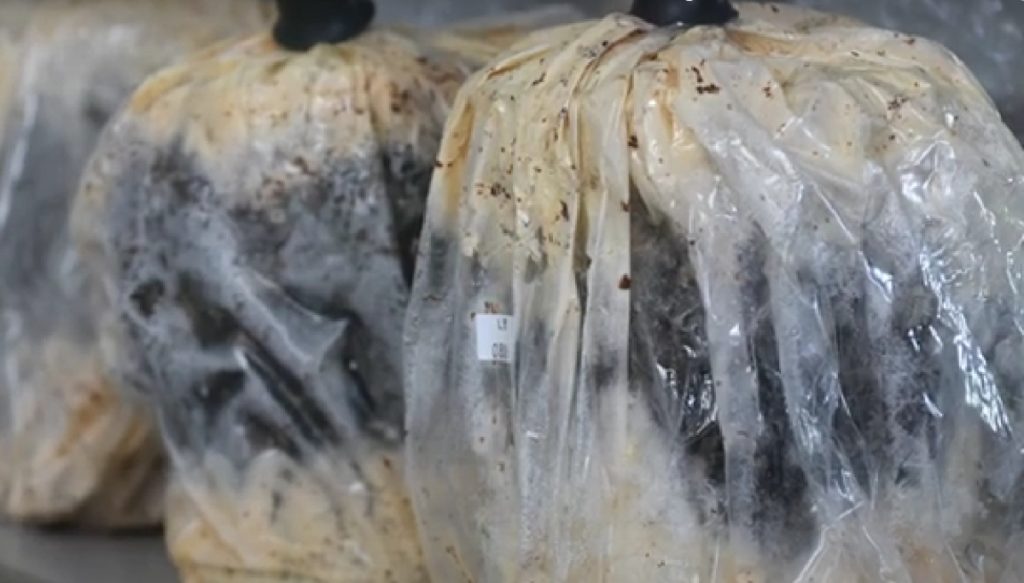
First, place your bagged logs in a draft-free spot with temperatures of 55 to 70°F (12 to 21C) for 2 to 3 months. During this time, the maitake mycelium will colonize the logs.
When the log is fully colonized and covered in white mycelium, it’s time to remove it from the bag and bury it outdoors in a shady spot.
Bury your log in a hole deep enough for it to stand upright, with 1 inch (2.5 cm) of soil covering the top.
Step 6: Fruiting
Remember to mark the location of your buried log, and keep an eye out in late summer to fall around a year after you bury them.
Your maitake mushrooms will fruit from the top of the colonized log and emerge through the layer of soil above the log.
The wonderful thing about growing maitake mushrooms on logs is that, in the right conditions, they can fruit for seven years or more.
Step 7: Harvesting
Harvest your maitake mushrooms when the caps are 1 to 2 inches ( 2.5 to 5 cm) long, and their edges are still turned under.
To harvest them, gently pull and twist the entire cluster off at the base.
Final Thoughts
Maitake mushrooms are sought-after culinary and medicinal mushrooms, but they take a while to grow.
Because they’re slow growing, it increases the chances of contamination, and as a result, they’re better suited to people with some mushroom growing experience.
We recommend beginner mushroom growers start with easy-to-grow species like oyster mushrooms or shiitake mushrooms.
To learn more about growing mushrooms, visit our Mushroom Growing Hub or try one of our mushroom cultivation courses.
