You may have come across these beautiful bracket fungi while walking in the woods. But did you know they have potent health benefits, and you can grow them at home?
Growing turkey tail mushrooms at home is not as difficult as you think. All you need is a few supplies and some patience.
Read on to learn the different ways you can grow turkey tail mushrooms at home, why you would want to cultivate them, how long they take to grow and how to grow turkey tail mushrooms step-by-step.
What Are Turkey Tail Mushrooms?
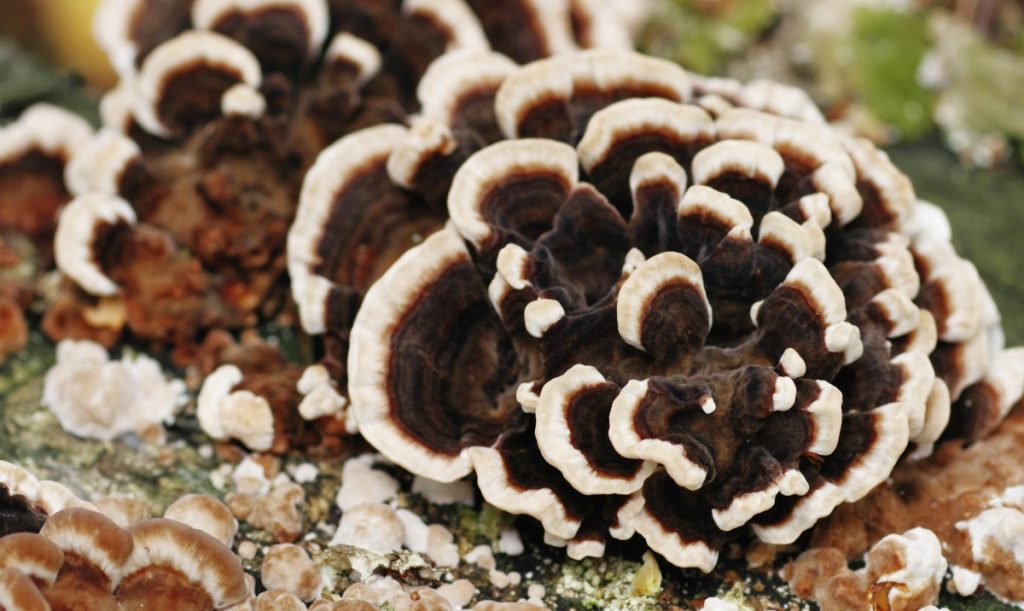
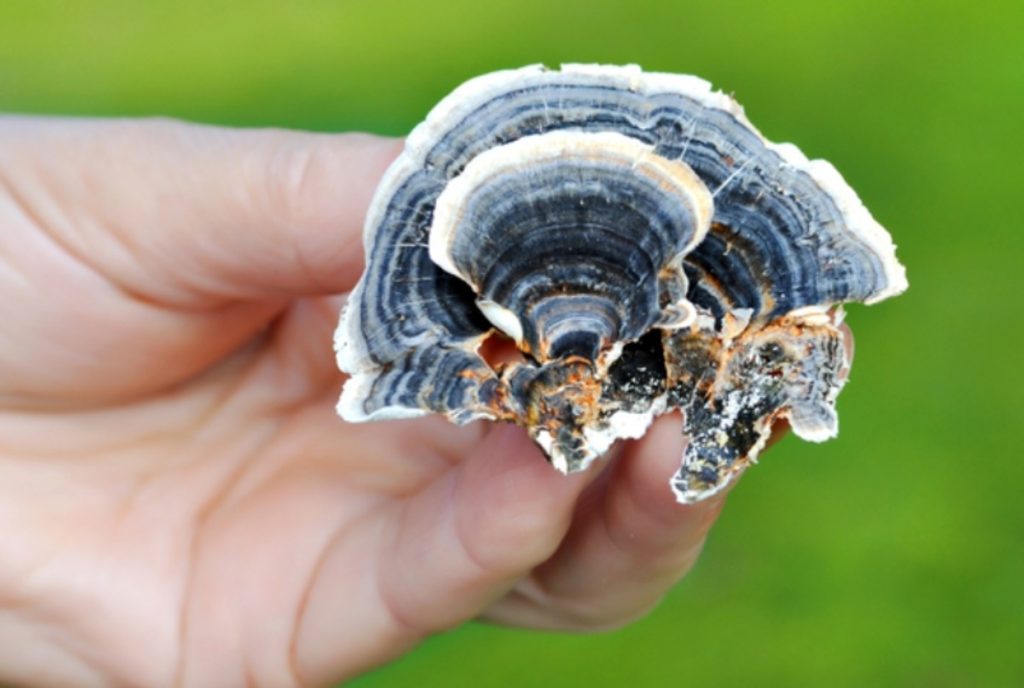
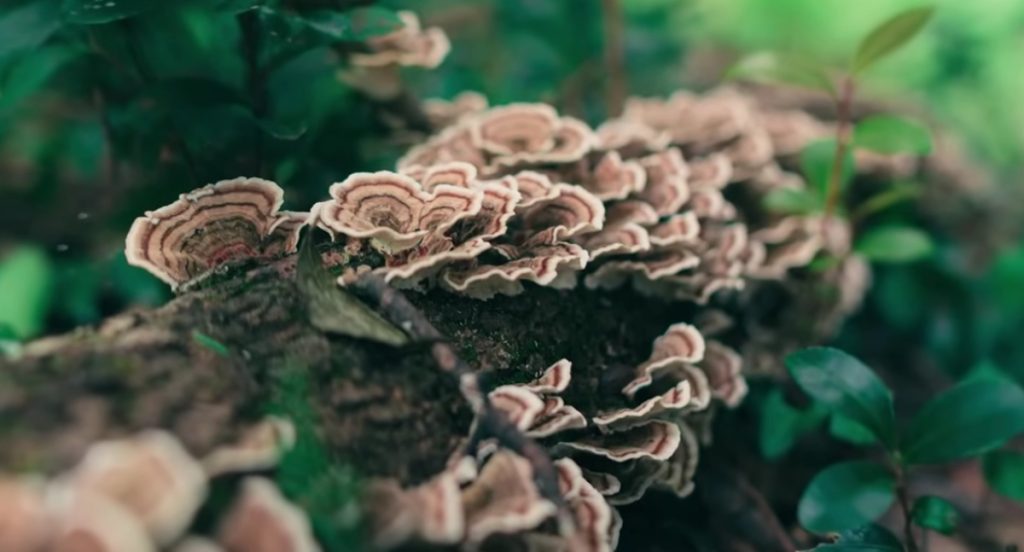
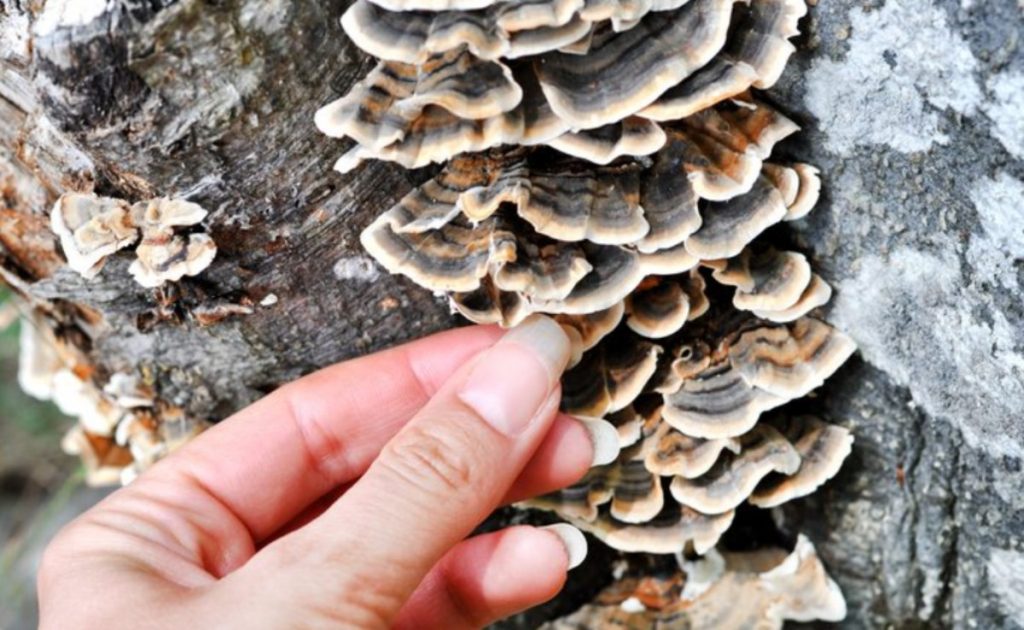
Turkey tails are striking polypore bracket fungi found in woodlands worldwide. They grow in clusters on dead stumps and fallen branches and are powerful decomposers.
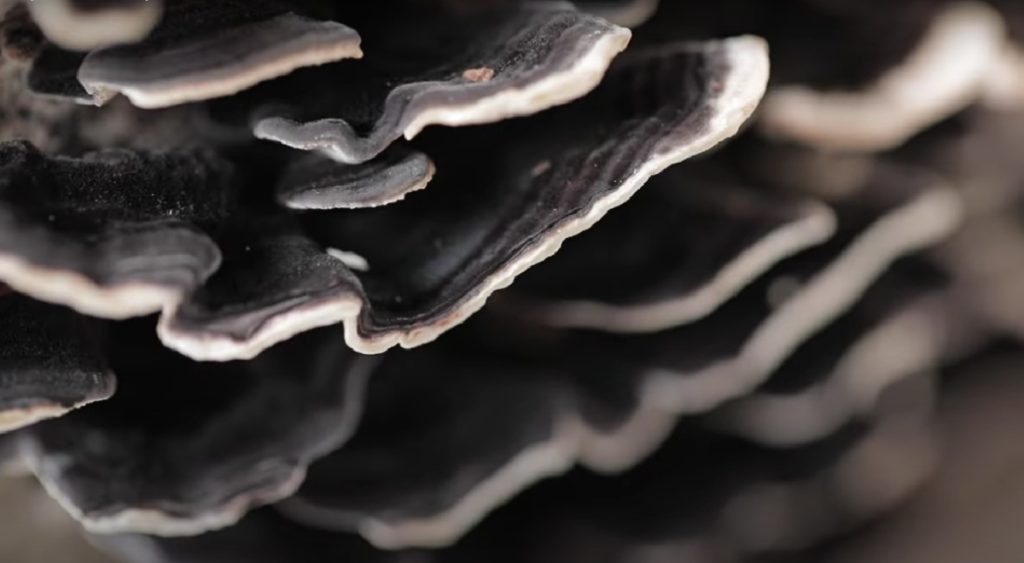
Their round or fan-shaped fruiting bodies are easily recognizable because of their concentric rings of different colors.
A cluster of these mushrooms with their rounded shape and concentric colored rings resemble the tail feathers of wild turkeys, giving them their name.
Our complete guide to turkey tail mushrooms has more information for you with tips on finding, cleaning and storing turkey tail mushrooms.
Why Grow Turkey Tail Mushrooms?
Turkey tail mushrooms are potent medicinal mushrooms that traditional Chinese healers have used for centuries to treat numerous ailments.
They contain loads of antioxidants and bioactive compounds and are known for their ability to boost the immune system, maintain a healthy gut and help fight some cancers.
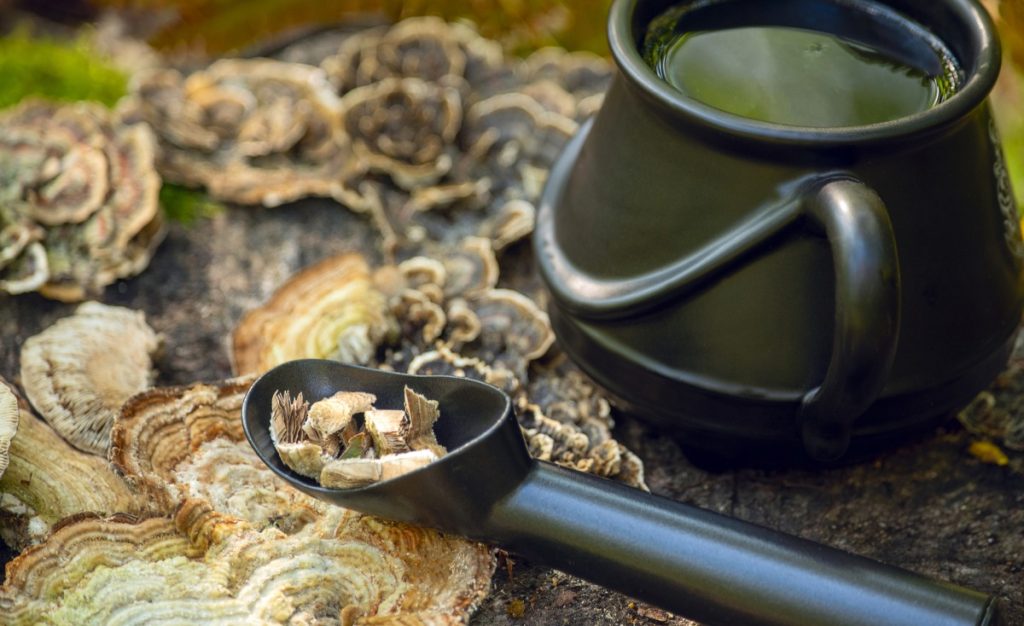
Although turkey tail mushrooms are edible, people don’t usually eat them fresh as they’re tough and woody.
They’re most commonly used fresh in soups and stews or to make medicinal teas, or dried and ground into a mushroom powder or used to make extracts.
Extracts are the best way to access turkey tails’ health benefits, and these are available in several forms, including extract powders, capsules and tinctures.
You can also make medicinal turkey tail tinctures at home using uncomplicated hot water and alcohol extraction techniques. You’ll just need a regular supply of turkey tail mushrooms.
Foraging for wild turkey tail mushrooms may be an option for you, but although they’re one of the most common bracket fungi found by foragers, correctly identifying them is not always easy, meaning you could end up with a less potent variety.
And, as many people live in urban areas without access to woodlands, one of the best ways to have an ongoing supply of these beneficial mushrooms is to grow them at home.
Different Ways to Grow Turkey Tail Mushrooms
There are several ways to grow turkey tail mushrooms, and people often wonder, “Can you grow turkey tail mushrooms indoors?”
The answer is yes, which means you can still grow turkey tail mushrooms indoors even if you live in an apartment.
Here are some of the different ways you can grow turkey tail mushrooms:
Using a Grow Kit
A turkey tail mushroom grow kit is the most beginner-friendly way to grow turkey tail mushrooms.
These kits are intended for use indoors but can also be fruited outdoors if weather conditions remain suitable for the entire fruiting phase.
Always buy grow kits from a reputable local supplier who provides clear, easy-to-follow instructions.
A turkey tail grow kit generally contains a bag of fully-colonized, ready-to-fruit hardwood substrate.
Once it arrives, you’ll need to place the grow kit in fruiting conditions and expose the colonized substrate to fresh air by opening the top of the bag or cutting a slit in the side of the bag.
After this, you must provide ideal humidity and temperatures for the turkey tails to fruit.
Fruiting chambers allow mushroom growers to control growing conditions, but a simple humidity tent also works well, and some turkey tail grow kits come with humidity tents.
In Grow Bags
If you’ve successfully grown turkey tail grow kits, you may want to try your hand at growing turkey tail mushrooms in bags.
If you go this route, the fruiting process will be the same as a grow kit, but you’ll also have to prepare, inoculate and incubate your mushroom substrate.
Mushroom cultivators commonly use mushroom growing bags to grow turkey tail mushrooms indoors.
In Buckets or Containers
You can also grow turkey tail mushrooms in plastic containers or buckets. Buckets are usually best when used for side-fruiting mushroom species.
Turkey tail mushrooms provide you with two options. They will grow out of holes drilled in the side of the bucket, or you can open the top of the bucket and let them fruit from the top.
One of the benefits of using buckets or containers to grow mushrooms, instead of bags, is that they are reusable and significantly reduce the amount of plastic waste you create.
However, sawdust substrates with small particles are not recommended for larger 5-gallon (20 liter) buckets as compaction can occur in the center, reducing fresh air exchange and preventing colonization.
Outdoors on Logs
In nature, turkey tail mushrooms grow on dead and decaying logs, and depending on your climate, you could inoculate hardwood logs to grow them outdoors in the same way.
When growing mushrooms on logs, colonization takes longer than bags or buckets, but you’ll get mushrooms from your logs for several years.
How Long Do Turkey Tail Mushrooms Take to Grow?
Turkey tail mushrooms are slow growing and take a long time to fruit. Their fruiting phase can take up to three months from the first signs of growth to harvesting.
How long does turkey tail take to colonize?
Colonization times vary depending on the substrate you’re using and the growing conditions. But at room temperature, turkey tail mycelium usually takes two to three weeks to colonize a bag of hardwood substrate.
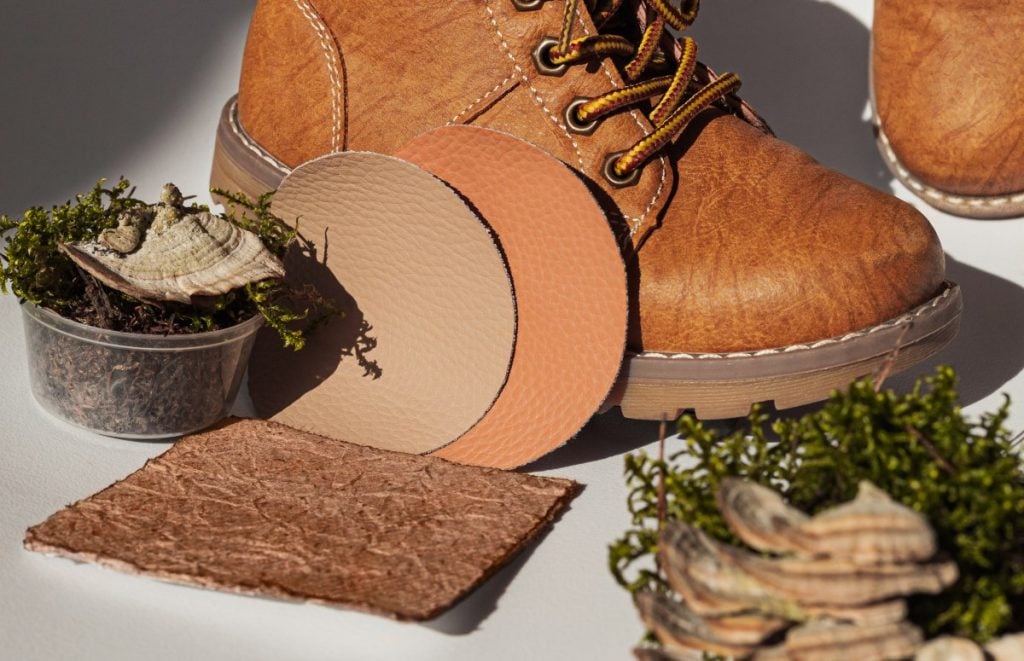
Here’s an interesting fact: Turkey tail mycelium is thick, dense and resilient and thus often used to produce eco-friendly, mycelium-based products like insulation, packaging and textiles.
What is the Best Substrate for Turkey Tail Mushrooms?
The best turkey tail mushroom substrate for bags is hardwood sawdust with less than 10% added supplements, as they prefer substrates with low or even no supplementation.
Turkey tail mushrooms will grow on many hardwoods, including oak, maple, beech, alder and birch.
How to Grow Turkey Tail Mushrooms Indoors in Bags
Turkey tail mushrooms can tolerate a wide range of environmental conditions, making them relatively easy to grow as long as you can consistently provide the high humidity levels they require.
Follow the steps below to make fruiting blocks and grow turkey tail mushrooms indoors:
Step 1: Gather Supplies
The first step is to gather all the materials and equipment that you’ll need, including:
- Turkey tail spawn – We recommended using high-quality turkey tail grain spawn as it has more nutrients than sawdust spawn and is easy to mix into the sawdust substrate.
- Hardwood substrate material like sawdust, hardwood pellets or wood chips.
- Autoclavable mushroom grow bags with filter patches.
- A bucket or tote to hydrate the substrate.
- A pressure cooker for sterilization.
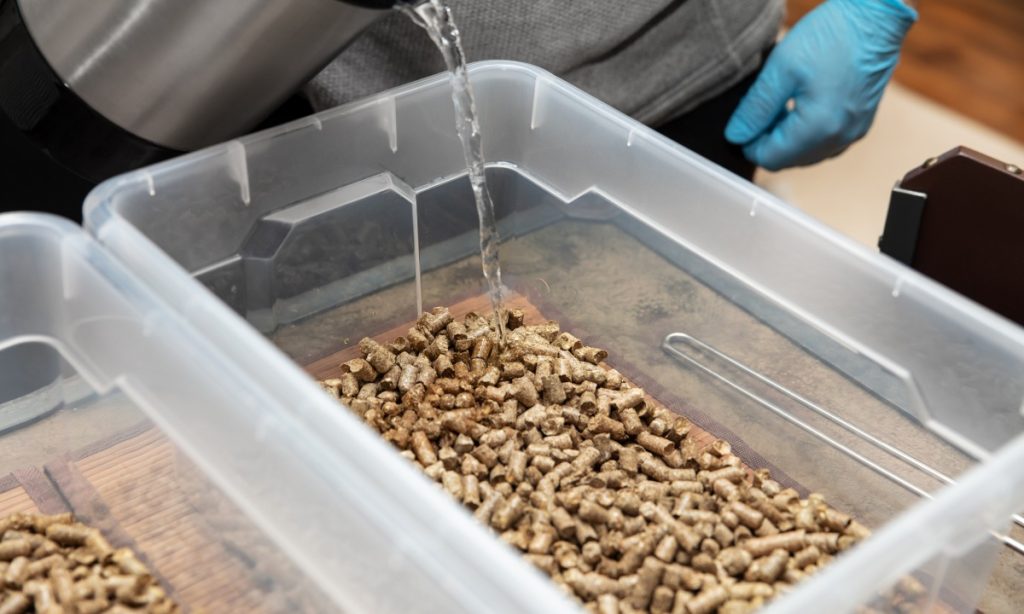
Step 2: Hydrate Your Substrate
The first step when preparing a substrate is to hydrate it evenly to around 60% water content or field capacity, as it’s known in mushroom growing terms.
It’s important to get your hydration correct, as incorrect moisture levels can slow colonization, increasing the chances of contamination.
The quantity of water needed may vary as fresh sawdust will not retain as much water as old, dry sawdust.
But generally, you’ll need around 1.5 liters of water to hydrate 1 kg of dry sawdust.
A squeeze test is the recommended way to check if your sawdust substrate is correctly hydrated. It involves squeezing a handful of wet sawdust as tightly as possible.
If no water comes out and the substrate does not clump together in your hand, it needs more water, but if more than one or two drops of water come out, the substrate is too wet.
Once you’re happy that your substrate has the correct moisture content, it’s time to load it into your bags for sterilization.
Step 3: Sterilize Your Substrate
It’s always best to sterilize sawdust substrates, especially if they have added supplements like wheat bran or soy hulls.
But, if you purchased hardwood pellets and plan on using them without additional supplements, they don’t need sterilization, as the production process already sterilized them.
A pressure cooker is ideal for small-scale mushroom growers to sterilize substrate jars or bags.
You’ll need to sterilize your substrate at 15 PSI for at least 2 hours to ensure you destroy any potential contaminants. Our guide to sterilizing mushroom substrates has more information and detailed step-by-step instructions.
Step 4: Inoculation
Introducing mushroom spawn to a nutritious substrate is called inoculation. One of many industry specific mushroom-growing terms you’ll come across when growing mushrooms.
Contaminants are often introduced into mushroom substrates during inoculation, so it’s best to inoculate your substrate in as sterile an environment as possible to help prevent contamination, for example, inside a still air box or in front of a laminar flow hood.
Grain spawn providers recommend an inoculation rate of 5 to 10% turkey tail grain spawn to moist substrate.
The higher the inoculation rate, the faster the mycelium will colonize the substrate, reducing the chances of contamination.
Although mushroom cultivators aim to use the least amount of spawn they can without drastically extending colonization times, we recommend beginners start with a higher rate to increase the chances of success.
There are several ways to add the spawn to the substrate. We like ‘through spawning’, which involves mixing the spawn into the substrate until evenly distributed, as this usually reduces colonization times.
Our article, “Mushroom Inoculation: Spawn, Substrate, Logs & Beds,” has more information on inoculation and distribution methods.
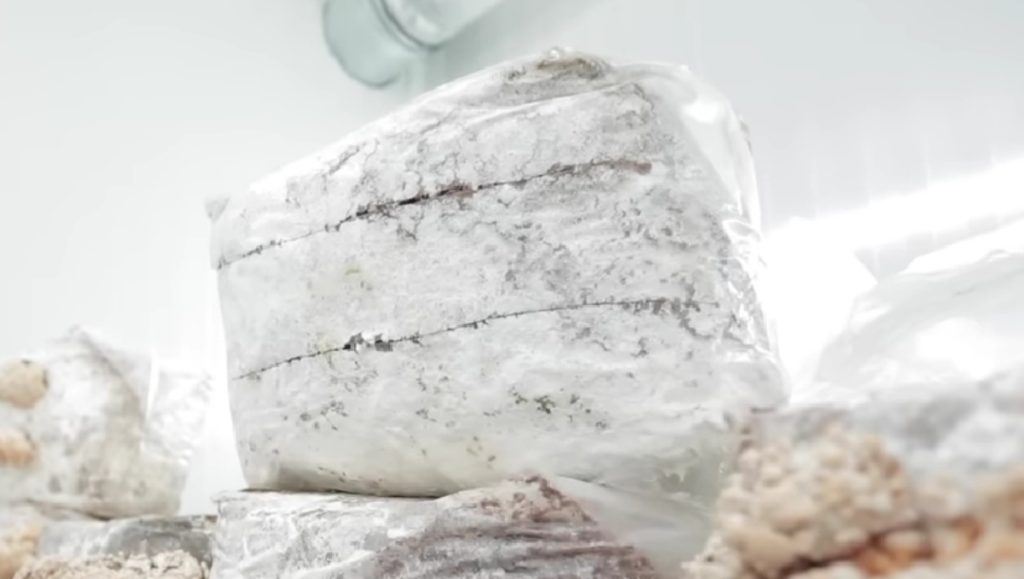
Step 5: Incubation
Once you have inoculated the sterilized substrate, the mycelium needs time to feed on the organic matter you provided and grow through the substrate in your bag.
This phase of the mushroom growing process is called incubation, and with turkey tail mushrooms, it takes anywhere from 14 to 21 days for the mycelium to completely colonize the substrate.
Keep your bag in a warm, dark spot with no drafts or direct sunlight during this time.
Ideal incubation temperatures for turkey tail mushrooms are room temperatures of around 75°F (24°C), but the mycelium will still grow with temperatures between 64 and 70°F (18 and 21°C), only a little slower.
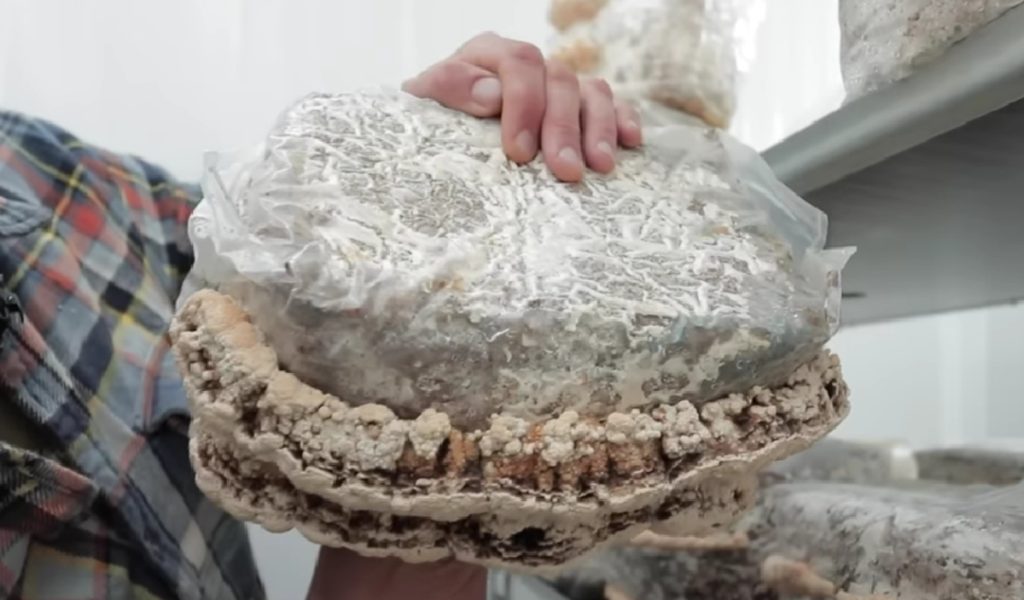
When dense, white mushroom mycelium has covered the entire substrate block, it’s ready for fruiting conditions.
Step 6: Fruiting
Fruiting is the fun stage of mushroom growth, where you finally see your mushrooms grow.
However, unlike oyster mushrooms, which are fast-growing and ready for harvest in less than two weeks, turkey tail mushrooms take two to three months to fruit.
You can grow some strains of turkey tail mushrooms in rosettes from the top of the bag, but we’ve found most strains fruit best in a shelf-like shape from slits cut into the side of the bag.
To initiate fruiting, you must increase humidity levels and expose the mycelium to fresh air.
The first step is to gently cut slits on the front and sides of the bag with a knife, being careful not to damage the mycelium.
Then squeeze as much air as possible out of the bag, fold the top part with the filter down the back and tuck it under the bag before placing it upright on a countertop or shelf.
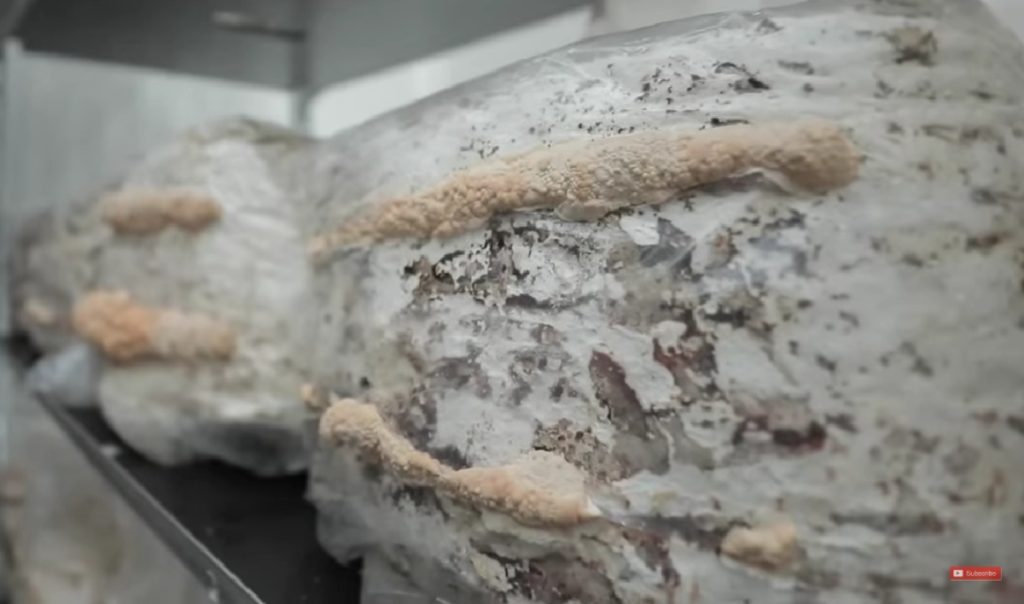
The fresh air exposure will encourage the mushrooms to begin pinning, and over the next two to three weeks, you should see the mycelium thickening and growing white blob-like bumps.
These blobs will then gradually flatten out, forming rings of velvety, brown mushrooms that have a creamy white porous underside.
During fruiting, turkey tails need temperatures between 61 and 70°F (18 and 21°C) and relative humidity of 95 to 100% during the first three weeks for pinning and 85 to 90% after this.
If you don’t have a fruiting chamber, you can use a clear plastic bag to create a humidity tent over your substrate bag. A humidity tent will help you maintain the humidity levels needed for healthy growth.
We have found that turkey tail mushrooms prefer to grow in a fruiting chamber without other mushroom varieties.
Step 7: Harvesting
It’s best to harvest turkey tail mushrooms while they are young, one to two months old, and still growing, as their medicinal properties are most potent during this stage.
Keep an eye on your turkey tails. When the white growing edge begins to get thinner, they’re getting to the stage where they will stop growing and produce spores.
Although you may want to let them get as large as possible, it’s best to harvest turkey tails before the white growing edge recedes or there are signs of discoloration on the underside of the caps.
How to Grow Turkey Tail Mushrooms Outdoors on Logs
If you have access to hardwood logs and a sheltered, shady spot in your garden, you can also grow turkey tail mushrooms outdoors using logs as a substrate.
People often inoculate their logs in spring, as it’s best to cut fresh logs in winter when they are dormant, but anywhere from early winter will work.
This time frame allows enough time for the turkey tail to colonize the log and produce a flush of mushrooms the following autumn.
Here are some steps to follow to grow turkey tail mushrooms on logs:
Step 1: Gather Supplies
The first step when growing mushrooms on logs is to gather all the supplies and equipment that you’ll need, including sourcing:
Healthy, Fresh Hardwood Logs
Source and cut hardwood logs from healthy living trees at the end of winter while they’re still dormant as they contain more nutrients at this time.
The ideal size for turkey tail logs is 4 to 6 inches (10 to 15 cm) in diameter and 36 to 40 inches (90 to 100 cm) long.
You’ll need to rest your logs for at least two weeks before use and ideally inoculate them four to five weeks after cutting them.
If you wait longer than this, they begin to lose moisture and the chances of contamination increase.
Turkey Tail Spawn
You can use sawdust spawn or spawn plugs to inoculate your logs. We think spawn plugs are a little easier as you need a specialized inoculating tool to insert sawdust spawn into holes in logs.
Remember to buy your turkey tail spawn from a reputable supplier, preferably nearby, reducing the travel time.
Wax
You’ll need wax to seal the holes in your logs after you have inserted the spawn plugs or sawdust spawn.
Sealing the holes helps prevent the turkey tail spawn from drying out and reduces the chances of contamination.
Growers commonly use cheese wax, but you can use any wax to seal your holes, including candle wax, beeswax and soy-based wax.
Equipment
Apart from the supplies above, you’ll also need some equipment to drill and seal the holes in your logs, including:
- Drill with an 8.6 or 12mm drill bit (depending if you’re using plug or sawdust spawn)
- Hammer for spawn plugs or spring-loaded Inoculation tool for sawdust spawn
- Pot
- Propane stove
- Wax dauber or small brush
Step 2: Drill Holes in the Logs
If you’re drilling holes for plug spawn, you’ll typically need a 5/16 inch (8.5mm) drill bit, but for sawdust spawn, people most often use a 7/16 inch (12mm) drill bit.
Start by drilling a row of 1-inch (2.5 cm) deep holes 6 inches (15 cm) apart along the length of your log.
You can buy a specially designed drill bit with a depth marker or wrap some tape around your drill bit 1 inch (2.5 cm) from the end so you know how deep to drill.
The idea is to create a diamond pattern with your holes.
So once the first row is complete, drill another row of holes 2.5 inches (6 cm) away from the first row, but stagger the holes so they create a triangle or checkerboard pattern with the first row of holes.
Continue like this until you have drilled holes around the entire log.
Step 3: Inoculation
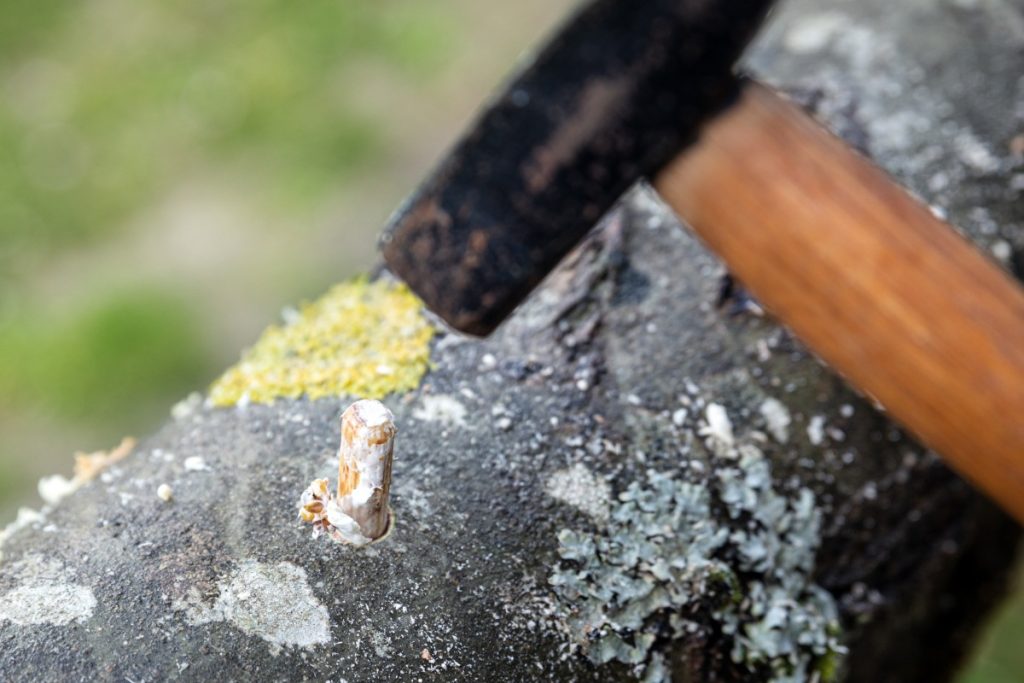
When you have finished drilling all the holes, it’s time to insert your plug or sawdust spawn.
For plug spawn, insert one plug per hole and tap them gently with a hammer until they’re below the surface of the bark and flush with the wood of the log.
For sawdust spawn, you’ll need to break the spawn apart and then insert it into the holes using an inoculation tool.
Now, it’s time to seal the holes with wax. First, melt the wax in an old deep fryer or pot, and once melted, apply it to your holes using a wax dauber or small brush.
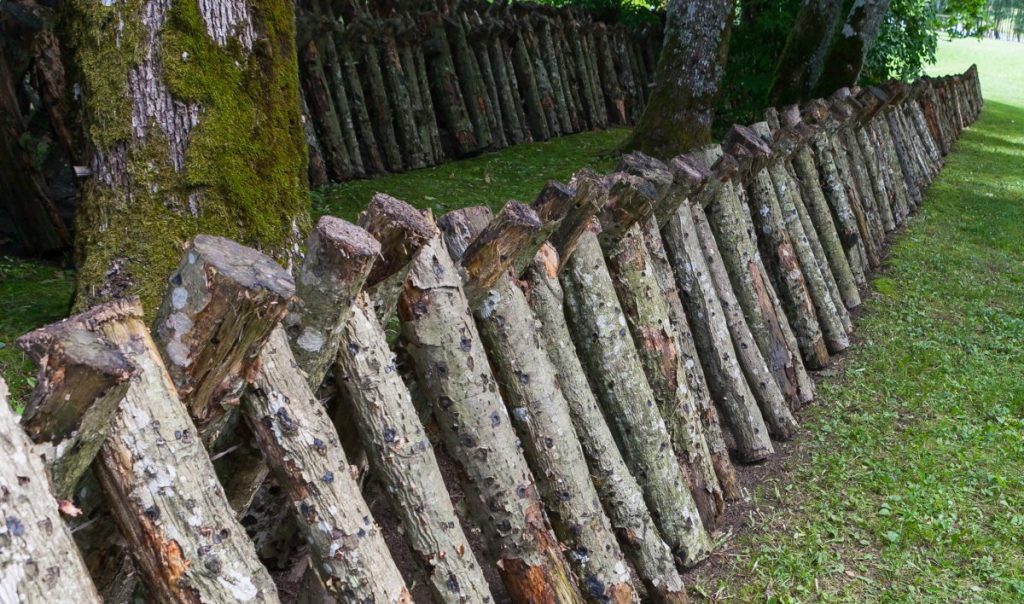
Step 4: Incubation
Once you have finished inoculating your logs, store them in a sheltered, shady spot where they’ll benefit from any natural rainfall.
Labeling your logs with the type of mushroom and inoculation date can be helpful if you plan on growing different types of mushrooms on logs.
Maintaining the moisture content of the logs during incubation is crucial. If your logs dry out, the turkey tail mycelium may die.
We recommend sprinkling your logs once or twice a week, depending on the amount of rain. Logs generally need at least 1 inch (25 mm) of rain a week to remain moist.
Step 5: Fruiting
Your turkey tail logs should produce mushrooms late summer to early autumn, a year after you inoculated them.
Exactly when they fruit will depend on the weather conditions in your area, as mushrooms only fruit when ideal fruiting conditions are present.
Fortunately, turkey tail mushrooms are less fussy than many other species and will tolerate a range of temperatures but need high humidity levels to initiate fruiting.
Step 6: Harvesting
The best way to harvest turkey tail mushrooms growing on logs is to grab the mushrooms, twist and pull to break them off at the base of the stem.
You can store fresh turkey tails in the fridge for up to two weeks, and they’re often dried or frozen for long-term storage.
Common Issues When Growing Turkey Tail Mushrooms + How to Troubleshoot Them
Like other mushroom species, turkey tail mushrooms need specific growing conditions to develop correctly, and many common mushroom growing mistakes are related to providing these conditions.
Here are some of the common issues you may encounter when growing turkey tail mushrooms:
Contamination
Several organisms, including mold and bacteria, enjoy the same growing conditions as mushrooms, and they can occur in every stage of mushroom growth.
Some contaminants appear during incubation, and these often devour substrate faster than mycelium. Others are problematic during fruiting and cause mushroom fruiting bodies to rot.
To help prevent mushroom contamination, take the time to sterilize your substrate correctly and use sterile techniques during inoculation.
Moisture Levels
If there is insufficient moisture, your turkey tail mushroom will not fruit. However, excessive humidity in a humidity tent or fruiting chamber can lead to condensation on the mushrooms, causing irregular growth and increasing the chances of contamination.
If you’re using a plastic bag as a humidity tent and see condensation forming, lift the bag and fan the mushrooms or make more holes in your bag to increase airflow.
Growers with fruiting chambers often install humidity systems that consist of a humidifier and hygrometer or humidity regulator to ensure constant humidity levels.
Fresh Air Exchange
Too much fresh air exchange may reduce the humidity levels around your mushrooms, causing them to dry out and stop growing, but insufficient air exchange is also a problem, causing long, finger-like growth.
If you’re using a humidity tent over your turkey tail mushrooms, you’ll need to lift it and mist the inside two to five times a day, depending on your climate.
Doing this allows fresh air exchange while you’re misting the inside of the tent with water to maintain humidity levels.
Fruiting chambers are less labor intensive and often have air holes or fans to provide adequate fresh air for healthy growth.
Final Thoughts
Growing turkey tails at home is an excellent idea if you want to enjoy their health benefits or produce medicinal extracts,
Although turkey tails take a long time to fruit, they’re some of the easiest medicinal mushrooms to grow and will tolerate a broader range of conditions than other species.
However, if you are new to mushroom growing, we recommend starting with growing oyster mushrooms.
They’re fast-growing and hardy, making them one of the easiest mushroom species to grow, and setting you up for success while you learn the nuances of mushroom growing.
For more information and free resources to help you get started, visit our Mushroom Growing Hub.


