Here are the bare essential tools and supplies you’ll need to start your microgreens business.
- A 2-bulb, 4 foot fluorescent light fixture. Along with basic T8 fluorescent bulbs like you’d find in any shop.
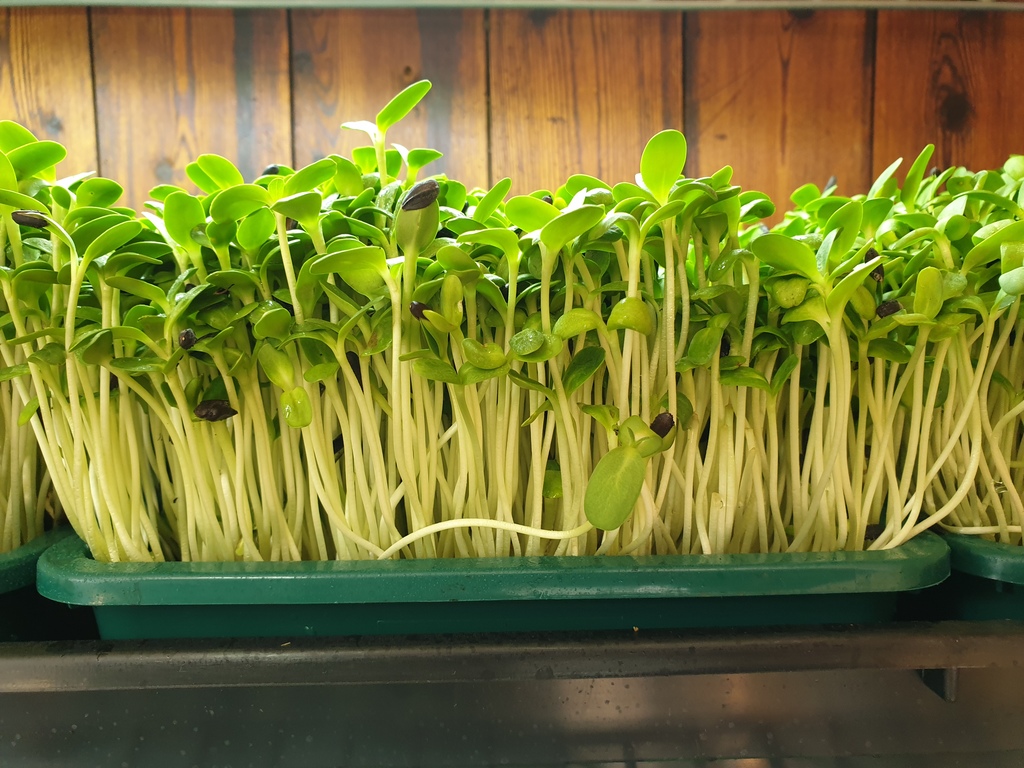
- 16 10″x20X trays with drain holes. On a 4 foot setup you’ll be able to grow 8 flats of microgreens per week. I’d recommend doubling up your flats to provide extra stability and strength.
- Paper towels. To put over seeds when you start them.
- A spray bottle. To keep your seeds from drying out during germination and to keep your microgreens moist as they grow.
- Seed. I’d start with radish seeds because they’re easiest and grow the fastest. It’s worth paying a bit extra to get organic seeds. That way you can market your microgreens as organic as well.
You can order your seeds online from any site. Just type in “buy radish microgreen seeds (your country”) and you should find a seller. It’s important to buy in bulk to cut down on your costs.
- A scale. To measure out your microgreens for packaging. A regular kitchen scale will do.
- A good pair of scissors or a large sharp knife. For harvesting your microgreens. It’s worth investing a few extra dollars here, as a dull blade will make harvesting a nightmare.
- Potting soil. Any high quality organic potting soil will do.
- A timer. To set your lights up to turn on and off at certain times.
- A small fan. To keep your crops well ventilated to prevent mold or other issues.
- A cheap watering can. Get one with a really fine spout. Once your microgreens get larger, you’ll want to start watering them instead of just misting them.
Altogether your supplies should only cost you a few hundred dollars. If you’re profiting $20 per flat you sell, you can expect to make about $150 per week with a 8 flat setup.
I’d recommend 8 flats as a good starting size. Don’t go crazy and try to grow 20 varieties at once when you’re just starting out. It’s better to start small and master one type of microgreen before moving on to the next.
For a larger microgreens business you’ll probably want to buy more like 100 trays and 8 sets of lights, plus a lot more seed. You’ll probably end up spending more like $1,000.
But of course, you can always reinvest profits from your business to expand as you start to sell your product.
Starting A Microgreens Business
Even if you can successfully grow microgreens, you don’t really have a business until you’ve got some customers willing to buy them from you.
So one of the most important things before starting your microgreens business is to do some research and see if your business has a chance of succeeding.
It’s far better to find out up front before you invest the money, time, and energy only to find out that nobody wants to buy your microgreens.
Is A Microgreens Business Right For You?

So first you need to find out if growing and selling microgreens is profitable in your area. And also if you’re the right kind of person to succeed at a microgreens business.
Creating a business isn’t for everyone. Maybe you’re not at a point in your life right now where you can devote the time and energy needed to get your microgreens company off the ground.
If you aren’t able to fully commit to your business, it might be better to wait for a better time before you start.
Step 1: Finding Customers & Getting To Know Them
The more you can network and find people who might be interested in your microgreens in advance, the less you’ll need to stress about selling your microgreens once they’ve grown.
There are a bunch of different sales channels that you can use. Most microgreen farmers use a combination of several different channels.
Chefs
When you’re selling to chefs, you want to produce an info sheet. This is a small card that presents your business information at a quick glance including products you have available, prices, and how to order from you.
For example, include details like what days your product is available, cost per 1 lb bag, etc.
Print out your fresh sheet on really thick paper so chefs are less likely to throw it away.
Try to get a standing order with chefs if they like your product. For example, you’ll deliver $50 worth of microgreens to them each week. That way you’ll have a consistent demand for your product.
Residential customers

You can deliver your microgreens direct to people’s doors. They can either place individual orders with you, or you can set up a CSA (Community Supported Agriculture).
A CSA is a group of members who receive a weekly share of your microgreens for a fee.
Providing microgreens recipe ideas for free with your deliveries will help inspire your customers with different ways to eat them and encourage regular orders.
Farmers markets

Selling at farmers markets can be a lucrative way to sell your microgreens, especially if nobody else at your local market is selling any yet.
Grocery stores
Believe it or not, you can contact your local grocery stores to sell your product for you.
Even if they’re part of a large chain, they may still be open to the idea. Especially with customers placing more emphasis on eating locally.
Wholesale
Selling your microgreens wholesale will earn you the least amount of money per tray, but it’s also the least work.
A wholesaler will likely buy as much surplus microgreens as you can produce if you’re having trouble selling through other channels.
Step 2: Find High Quality Information

When you’re starting out, I’d spend a lot of your spare time finding as much information about growing microgreens as you can.
Watch videos by successful growers on Youtube, buy books on Amazon, and even sign up for paid online courses.
Paying for online courses will cost you more up front, but will save you lots of time by presenting you with everything you need to know. Instead of trying to piece together all of the information by yourself.
Step 3: Testing New Varieties and Techniques
When you’re starting off, you want to spend a few weeks or months of trial and error to find what works best for you.
Try out different varieties, hours of light per day, temperatures, seed density, and other variables to see what helps or harms your grow operation.
Step 4: Keep Excellent Records

In any business, keeping good records is critical.
In a microgreens business, there are tons of variables that you’re going to want to keep track of. You need to optimize your business and find out what works and what doesn’t.
Maybe you can pack more seeds per tray to improve yields, or cut back on 1 hour of light per day to save on electricity costs if it doesn’t have a negative effect on your crops.
I’d recommend setting up a Google spreadsheet. It has an autosave feature, plus you can access it from anywhere, even on your phone. You can also share it if you decide to hire employees later on in the life of your business.
Keep a separate sheet for each variety of microgreen you grow. Include details like:
- Seed variety and company purchased from
- Date and time seeds were soaked
- Date and time trays were seeded
- Seed density per tray
- Seed technique notes (Did you use a paper towel or leave them uncovered? How many stacks of trays)
- Growing conditions (Light per tray, humidity, airflow, watering)
- Harvest date and time. (Including harvest technique and yield)
From a business sense, it’s important to keep track of your profit margin as well. How much does it cost you to grow a flat of each variety of microgreens, and what do they sell for?
You might start off selling a dozen different varieties, but discover that only two or three are making the majority of your money. Then you can discontinue the other varieties and focus on what’s working best.
Step 5: Selling Microgreens
You don’t have a microgreen business unless you’re selling them. Otherwise you’re just a gardener wasting money!
Really growing microgreens is the easy part. It’s establishing business relationships to be able to sell your product that’s hard. Ideally you want to sell 90% of what you grow if you really want to make money.
You can use split testing to determine what works best in terms of selling and marketing your product.
For example, you can try just stopping in at a restaurant randomly to see if a chef will buy your microgreens. Another time you can try calling ahead first and scheduling an appointment, and see which approach works best.
You should really keep a separate spreadsheet just to track your sales and selling. Track who you contacted, at which date and time, if they bought or not, what they ordered, etc.
Step 6: Keep It Simple

In the beginning, keep your microgreens business as simple as possible.
Start off with just one, two, or maybe three different varieties of microgreens maximum. Pick popular ones like radish, sunflower, etc.
Obscure varieties might command a higher price, but only if you’ve got people willing to buy them. Focus on the staples that will actually make you reliable income in the beginning.
Start out with just one or two lights and less than 20 trays per week maximum.
Once you start making some sales, you can always start expanding. You can also ask chefs and your other customers what kind of microgreens they’re looking for.
That way you can change your supply so that it meets their demand.
Read more of growing microgreens vs growing mushrooms and why are both great crops that you should consider growing.
How To Price Your Microgreens

My preferred method for pricing microgreens is to decide how much you want or need to make, and then work backward.
Some people might want to make $40 or $60 per hour of their time.
Other people are okay only making $20 per hour. Figure out how much you want to earn per hour, and then you can do the math to figure out what you need to be charging.
In this example, let’s say you want to make $30 per hour.
You spend 30 minutes per tray of microgreens including seeding, cleanup, and making the sale.
Your general overhead is $5 per tray for seeds, supplies, wasted product, taxes, electricity, insurance, and any other costs.
So you have to make $20 on average from the sale of each tray to cover $15 worth of labor plus $5 of general overhead and expenses.
It’s important to keep in mind that overhead and labor might both be different depending on the sales channel. So you’ll need to recalculate both labor and overhead for each sales channel to determine your pricing for that channel.
For example, if you’re selling at a farmer’s market there’s the extra waste, more time spent packaging, and a full day’s labor standing at the market to sell.
That’s probably going to be your highest labor and overhead cost. How do you know what people at the farmer’s market are willing to pay?
As a general rule, if you aren’t turning away about 2 out of every 10 customers, then your prices are too low.
For home delivery, there’s hardly any waste so your overhead is lower. But you’ll have to spend half a day delivering your microgreens, so your labor cost is higher.
At restaurants there’s low waste, decreased packaging and cost, and quick delivery time. Along with wholesale, restaurants will probably be some of your lowest labor and overhead so you can charge the lowest prices.
Start off by figuring out the minimum price that you can charge. If you don’t have many competitors in your area who are also selling microgreens, you can adjust your prices upward until the demand for your products starts decreasing.
In a very competitive market, you’ll want to simply keep prices as low as you can.
If you can’t meet your minimum labor cost, you need to adjust your sales channels. If high competition doesn’t allow you to charge what you need to make, you either need to make your growing system more efficient.
The alternative is that growing microgreens might just not be a viable business for you in your area.
Making sure you’re pricing properly up front is important, as improper pricing can be bad news down the road.
When in doubt, start your pricing too high and you can always bring it down. It’s harder to raise your prices on established customers.
My 4 Favorite Commercial Microgreens
Here are my top 4 picks when it comes to microgreens. If you’re just starting out your microgreen business, I’d recommend starting with one or two of these varieties.
1) Radishes

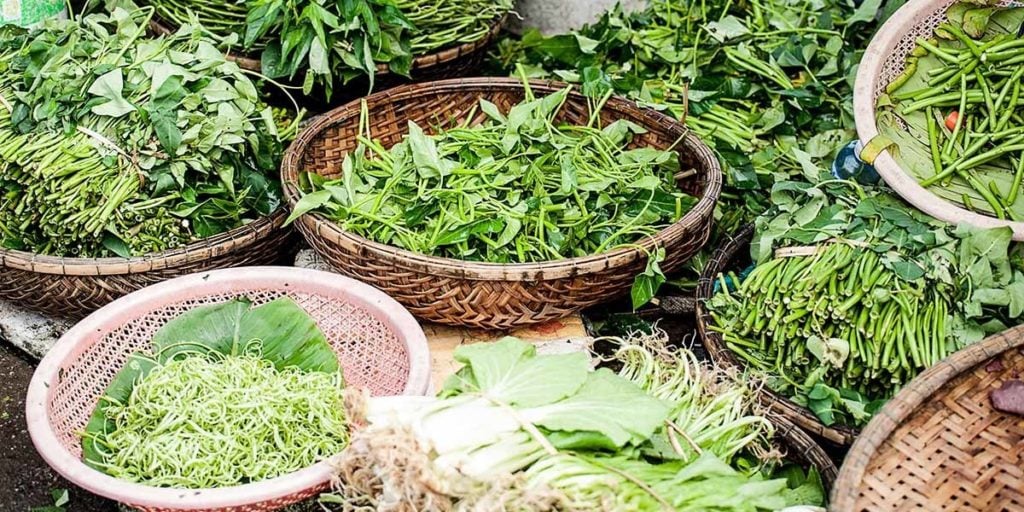
Radish microgreens are super easy to grow and have an awesome yield. Plus they have a very intense spicy flavor and good color that chefs will love. They’re also very high in nutrition.
2) Salad mixes aka mesclun

Salad microgreens have a less intense flavor than many other varieties, so they aren’t overpowering to people who prefer more bland food. They offer a diverse amount of nutrition in each bite.
Chefs really like the different appearance and texture of them as well. I’d look for a mix with many different varieties like arugula, kohlrabi, cabbage, mustard, and lettuce. Or even consider making your own custom blend.
3) Pea shoots

Peas microgreens offer a good yield. They look great in exotic dishes for chefs. Plus kids love them too, since they taste just like young snow peas. They last a really long time in the fridge if you can’t sell them right away.
You can throw them in a salad mix to bulk it up a bit. Plus they’ll regrow after you cut them, allowing multiple harvests per tray. I recommend speckled and green pea varieties.
4) Sunflower

Sunflower microgreens are what most people are familiar with, so there’s less hesitation to overcome when it comes to selling them straight to consumers. They have a nutty sweet flavor with a crunchy texture.
Sunflowers are heavy, meaning a higher yield per tray. They’re also bulky and durable. Like pea shoots, sunflower microgreens can last a long time in the fridge. They can also go in salad mixes as well.
Soil vs. Hydroponics For Your Microgreens Business

I’m quite biased when it comes to growing microgreens and much prefer growing them in a soil medium, instead of using hydroponics systems. There are just too many downsides to hydroponics and not very many upsides in my opinion.
The main pro of growing hydroponic microgreens is that it’s “cleaner” (if you think that dirt is dirty.)
The one area that I could see a benefit to this is if you’re bringing full trays into a restaurant kitchen as an example of your product. Most chefs wouldn’t want you to bring live soil into their kitchen.
Using hydroponics is also easier to dispose of if you live in an urban environment. You might not have room in your yard to compost.
However, the downsides of hydroponics are numerous.
It’s more expensive and there can be substantially lower yield. Sometimes only half the yield as growing in soil.
- Read about growing microgreens in more sustainable ways here.

Hydroponically grown microgreens are also more prone to disease problems. Especially mold and damping off. It’s really difficult to get the water level right and you’ll often end up flooding them in the beginning.
In my experience, hydroponically-grown microgreens just don’t taste as flavorful. Plus I find they have a shorter shelf life.
Finally, it simply doesn’t work for several common varieties of microgreens like sunflowers and beets.
Making A Walk-In Cooler To Extend The Life Of Your Greens
As your business expands, you’ll need a way to keep your product fresh until you can get it to customers.
Leaving your fresh microgreens at room temperature is a recipe for disaster, especially in the summer. They won’t last more than a day or so before they start to wilt.
Having a walk-in cooler is a huge benefit when it comes to extending the life of your crops. Luckily it’s not that hard to make one yourself.
If you have some basic carpentry knowledge, you should be able to put together a DIY walk-in cooler yourself.
You’ll need wooden 2x4s to frame your room. Then you’ll want to make a double wall of home insulation panels. You’ll need some kind of cooling unit as well.
Normally a window-mounted air conditioning unit is enough to keep an 8′ x 8′ room cold, which should be more than large enough to store all of your microgreens even as your business expands.
The hardest part of creating a DIY walk-in cooler is the door. It will need to fit snug to prevent cold air from escaping, or warm air from getting in.
Usually it’s best to buy a purpose-made door.
Once your business is to a point where you’re storing thousands of dollars worth of microgreens at a time, you probably want some backup systems in place.
For example, having a second air conditioning unit in case the first one dies. As well as perhaps some kind of DIY alarm system to notify you if the temperature inside your cooler gets too high.
Common Issues Faced By Beginner Microgreens Farmers (And How To Fix Them)
1) Rot And Mold

Normally caused by excessive temperatures or humidity.
The ideal temperature for most microgreens is about 67 F (19 C.) Although some like sunflowers might like it a little warmer, more like 70 F (21 C.) The ideal humidity for microgreens is 50%.
So in the summer you’ll need some way of reducing humidity if you live in a warm and wet area. Also make sure you’ve got good air circulation.
2) Poor germination
How new is your seed? Some varieties need a dormant period when first harvested before they will sprout.
How long are you soaking your seeds? Some varieties, especially broccoli, can drown if you soak them for more than a couple of hours.
Underwatering is more of an issue during germination than overwatering. Never let your seeds dry out, but don’t overwater them either. In terms of temperature, most seeds will germinate between 55 and 75 F, just be sure to avoid extreme hot or cold.
3) Uneven germination
Make sure you’re seeding evenly across your tray. Ensure you’re using a quality soil and it’s mixed well. The amount of light, air circulation, and water should be constant across your whole tray.
4) Spindly or tall microgreens
Your plants aren’t getting enough light. Microgreens grow tall and leggy to try and get closer to light sources. Make sure they’re getting a solid 4 to 8 hours of direct light each day.
Conclusion: The Main Takeaways From This Article
- A microgreen business has a very fast startup time. You can make your first sale within two or three weeks of getting started.
- Microgreens can be a value add to any existing business, whether an existing traditional farm or even a non-farm business. Or you can produce microgreens as a standalone business.
- There’s not much startup capital required. You can get your microgreens business up and running for well under $1,000.
- In the beginning of your microgreens business there will be a lot of trial and error. You need to keep very good records to find out what’s working and what isn’t.
- Establishing proper sales channels right away is critical to the success of your business. Start by selling at farmers markets and try to get standing orders with chefs to buy around $50 of microgreens from you each week so you have a steady customer base.
- If you’re not ready to grow microgreens as a business, try growing them on a small scale using paper towels!