You don’t need agar plates to grow mushrooms, and many mushroom farmers buy grain spawn or colonized fruiting blocks and focus on the fruiting phase of mushroom cultivation.
But if you’re a mushroom enthusiast who wants to experience the entire growing process or clone your favorite mushroom strains, learning to work with agar plates is beneficial.
Read on to learn more about agar, the benefits of agar plates, the different types of agar media and how to make agar plates step-by-step.
What is Agar?
Agar is a transparent, odorless and tasteless gelatinous substance derived from red seaweed.
It’s used as a gelling agent, thickener and stabilizer in food products and to create nutritious growing mediums for mushroom spores and mycelium.
Agar is solid at room temperature. Like gelatine, it’s used as a solidifier. The more agar you add to a mixture, the firmer the final growing medium.
How do you prepare agar for mushrooms?
To prepare agar for mushroom cultivation, combine it with a nutrient-rich substance and water and then sterilize the resulting mixture in a pressure cooker or autoclave.
Will Mycelium Grow on Just Agar?
Mushroom mycelium will not grow on plain agar as it contains little to no nutrients.
Mycologists add agar to a nutrient-rich liquid to create sterile mushroom agar plates suitable for growing mycelium.
Several different agar plate recipes provide the necessary nutrients for mycelial growth.
We’ll cover these in more detail below.
Why use Agar Plates?
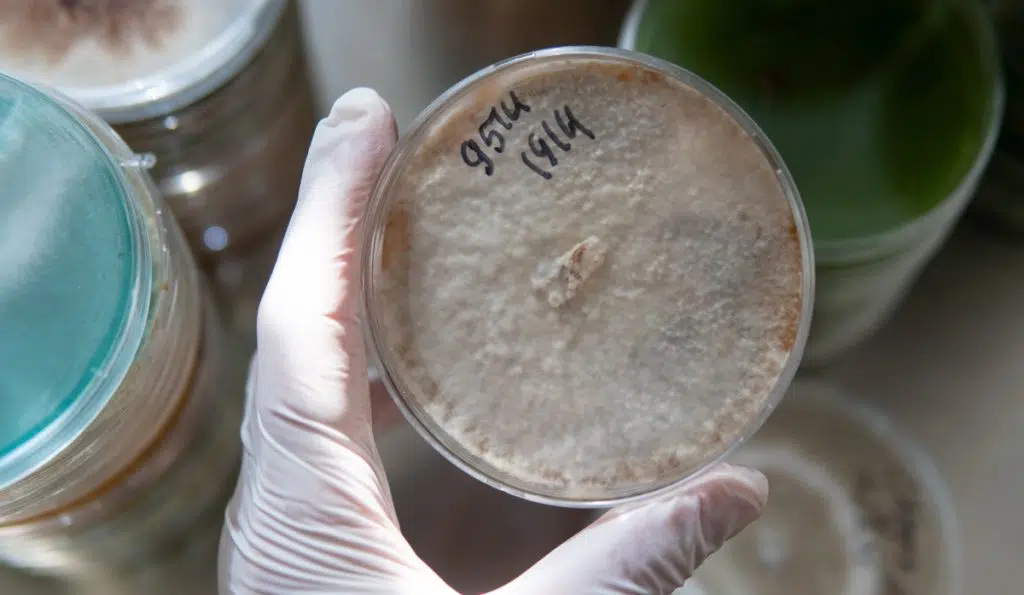
Agar plates are Petri dishes containing a sterile nutrient-rich agar solution that provides nutrients for mycelium to grow in the sterile environment inside the Petri dishes.
They allow you to clone mushrooms and germinate new strains from mushroom spore prints with less risk of contamination.
Agar is colorless, making it easy to spot and remove any mushroom contamination.
If you spot contamination growing in your mycelium, cut out a piece of healthy mycelium, transfer it to another petri dish with sterile nutrient-rich agar solution, and let it continue growing.
Remember to throw away the contaminated agar plate.
You may have to transfer healthy mycelium several times before getting a petri dish of clean, contaminant-free mushroom mycelium ready for the next growing stage.
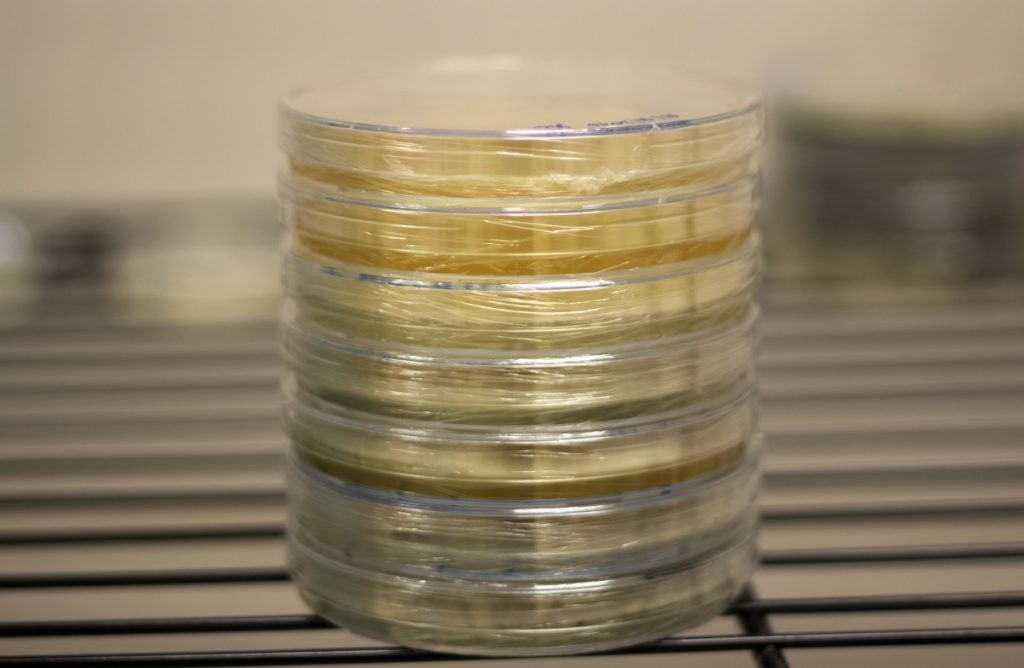
Agar plates also allow you to store mushroom mycelium for long periods.
Once a petri dish is fully colonized, store it in a sealed plastic bag in a refrigerator, and the mycelium can remain viable for up to 12 months.
Types of Agar Media
Although there are numerous mushroom agar recipes, none are ideally suited for all mushroom species as different mushrooms have different nutrient requirements.
Essentially, they’re all made by adding a food source to agar to create a nutrient-rich agar media for mushroom cultures.
When you first begin, it’s best not to use complicated agar recipes. A general-purpose agar media will allow you to germinate spores, isolate mushroom strains and grow mycelium.
Here are some popular, easy-to-make agar recipes for mushroom cultivation:
Light Malt Extract Agar (LMEA)
This is a popular mushroom agar recipe widely used by mushroom cultivators who enjoy its versatility.
Malt extract agar (MEA) is made with nutrient-rich malted barley, creating an agar plate with a similar mix of nutrients to the natural food source of many edible mushrooms.
It’s very effective for growing saprotrophic mushroom species that feed on decaying wood and other plant matter in the wild.
As malt extract agar contains many nutrients, it supports vigorous mycelial growth and is ideal for cloning mushrooms and creating mushroom cultures.
The ingredients are readily available and can be found at most grocery stores or brewers’ supply stores.
Ingredients:
- 500 ml water
- 10 g agar powder
- 10 g malt extract
Some growers add 1 g of yeast to this recipe to provide even more nutrients.
You can also add activated charcoal to make black agar plates.
Potato Dextrose Agar (PDA)
Potato Dextrose Agar (PDA) is another common agar medium that mushroom growers use.
In this recipe, potato starch and dextrose provide the nutrients that support a wide range of mushroom species.
Potato dextrose agar is extremely versatile and especially useful in spore germination and maintaining mother cultures.
Ingredients:
- 500 ml water
- 10 g agar powder
- 10 g dextrose
- 2 g potato infusion
Growers often add yeast to this basic recipe.
Oatmeal Agar
Oatmeal Agar is an economical type of agar media used for growing mycelium. It consists of regular oatmeal and agar-agar and is ideal for beginners.
To make oatmeal agar, soak 40 g of oatmeal in 500ml of boiling water for 10 minutes, stirring occasionally, then strain the mixture to remove large oatmeal particles before adding the agar.
Ingredients:
- 500 ml water
- 40 g oatmeal
- 10 g agar powder
Growers often add yeast to this recipe to provide more nutrients.
How to Make Agar Plates Step-by-Step
This article focuses on making light malt extract agar plates that support most edible mushroom species.
You’ll need the same equipment to make other recipes. The only difference will be what you use as a source of nutrients for the mushroom mycelium.
Follow the steps below to make agar plates using the light malt extract agar recipe:
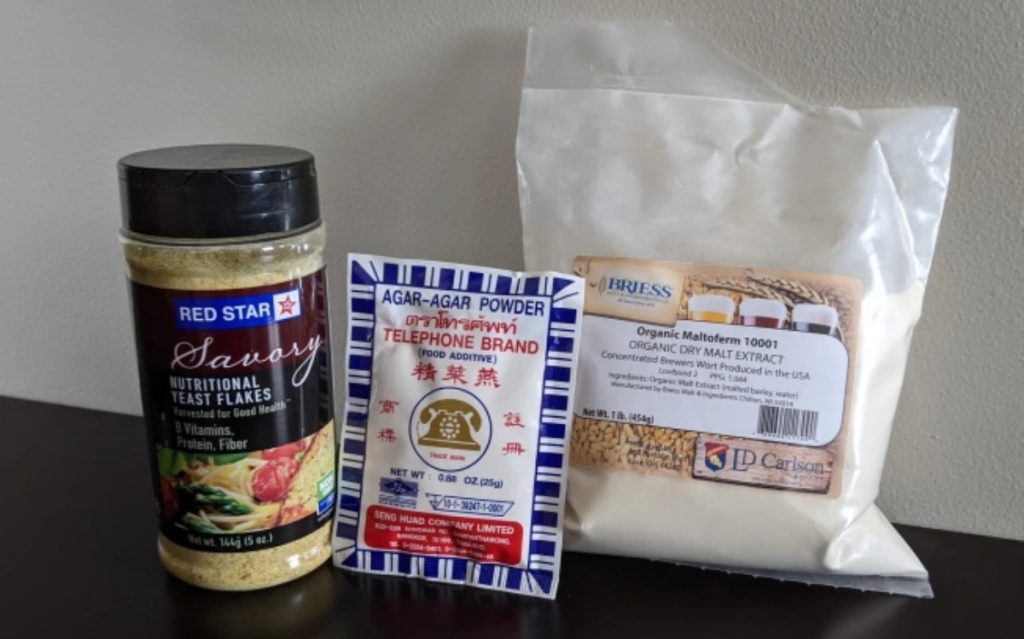
Step1: Gather Supplies
The first step is to gather all the supplies and equipment that you’ll need to make agar plates, including:
- Agar agar – Agar is not always easy to source locally, and you may need to order it online.
- Light malt extract – You’ll find malt extract at local brew stores or online.
- Nutritional yeast (optional) – You’ll often find nutritional yeast in health food and organic grocery stores.
- Water – Some growers suggest using distilled water, but tap water is also suitable.
- Petri dishes – You can order these online from laboratory supply companies. Disposable plastic Petri dishes supplied in a pre-sealed, sterilized pack work well.
- Wide mouth bottle or jar with a hole in the lid – Mason jars work well, and you can buy special lids or drill a hole in a standard lid yourself.
- Polyfill stuffing to use as a filter in the hole in the jar lid
- Tin foil to cover the lids of your jars during sterilization
- Digital scale to measure your dry ingredients
- Pressure cooker for sterilization
- Clean work station and still air box or Laminar flow hood to help prevent contamination
Step 2: Mix the Ingredients
Accurate measurements are crucial when making agar plates, as incorrect quantities may result in slower mycelium growth and increase the chances of contamination.
Use your digital scale to measure 10g of agar and 10g of light malt extract, and a glass measuring jug to measure the hot water.
Many growers use boiling water, but hot tap water will also work.
Remember, agar added to cold water will start solidifying immediately, making mixing challenging.
Add the dry ingredients to the hot water in your measuring jug and stir vigorously until the agar and malt extract are dissolved.
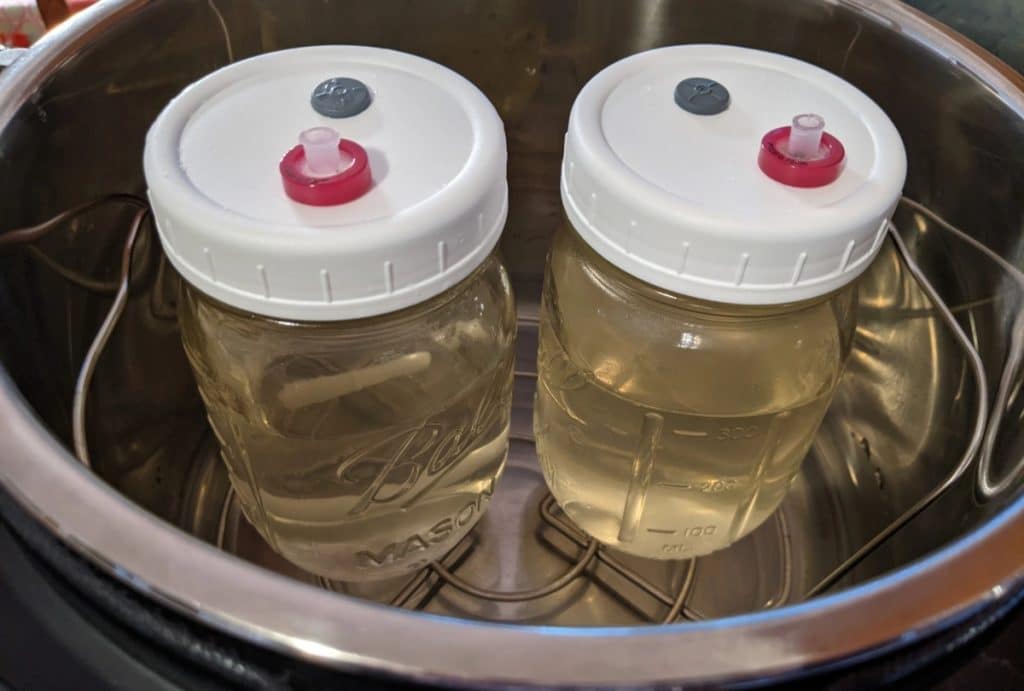
Step 3: Sterilize
Your solution is ready for sterilization once the dry ingredients are fully dissolved.
Pour the solution into your jars or bottles, filling them to approximately two-thirds to prevent them from boiling over during sterilization.
Close the jars with your modified lids that have holes filled with polyfill. These holes allow sterile gas exchange while the agar mixture cools after sterilization.
Next, cover the lids with tin foil to prevent water from getting into the jars during sterilization, and place the jars or bottles inside your pressure cooker.
Stand them upright on a rack so they do not touch the base of the pressure cooker.
You’ll also want to ensure they’re not touching each other or the sides of the pressure cooker.
Following the instructions for your pressure cooker, sterilize the agar mix for 30 minutes at 15 PSI. Remember to only start timing once the pressure cooker reaches 15 PSI.
When the time is up, turn off the pressure cooker and leave your agar mix to cool to around 115-125°F (46-52°C). It’s cool enough to handle but still warm enough to remain liquid at this temperature.
This usually takes a couple of hours, and you cannot rush the process. Pouring the plates while your mixture is too hot may warp or damage plastic Petri dishes.
Step 4: Pour the Agar
One of the most important factors for success at this stage is working in a clean, sterile environment to help prevent contamination.
Ideally, you should work in front of a laminar flow hood, but a still air box will also help reduce contamination.
Open the first petri dish and pour in a little agar mixture, adding enough to cover the bottom. Then, close it quickly and move on to the next dish.
Pour all your petri dishes one after the other in one session without touching the inside of the dish with your hands. Try to open the lid of each petri dish for as little time as possible.
Leave the Petri dishes stacked in front of your running laminar flow hood or inside the still-air box until they have cooled to room temperature.
Step 5: Seal the Agar Plates
You’ll have to wait around 30 minutes to 1 hour for the agar plates to cool down and solidify.
During cooling, some of the plates may get condensation on the inside of the lids. This initial condensation will dissipate and is usually not a problem.
If you do not plan on using all the agar plates immediately, you’ll need to seal them for storage.
Most growers agree that laboratory parafilm is the best material for sealing agar plates because parafilm is breathable, flexible and prevents contamination.
Cut a length of parafilm around 3 to 4 inches (7 to 10 cm) long, peel off the paper, and as most parafilm is 2 inches (5 cm) wide, you’ll need to fold it in half lengthways.
Now wrap the parafilm around the edge of the petri dish, stretching it until it sticks to the dish.
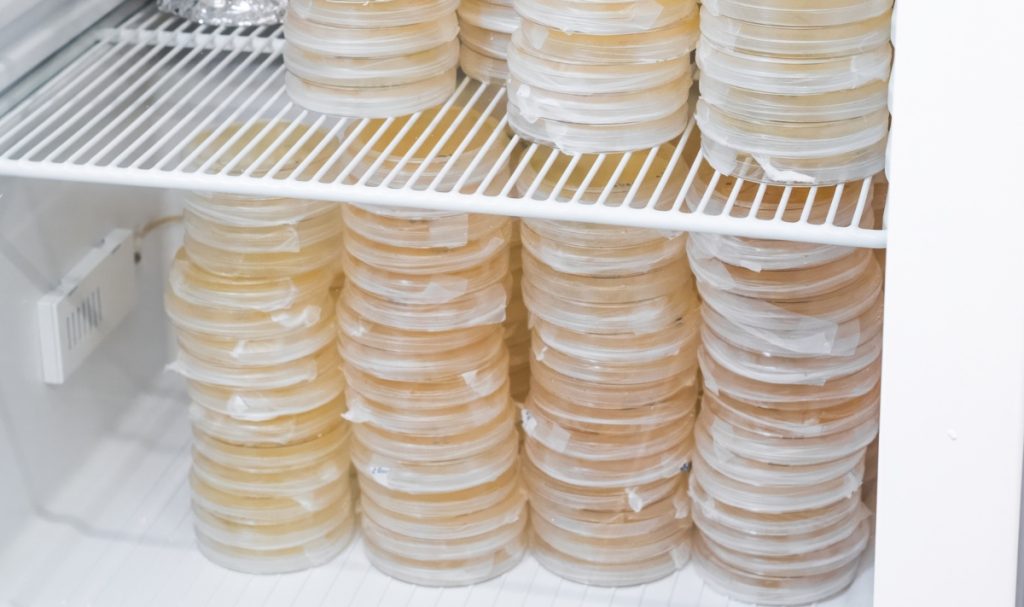
Step 6: Store the Agar Plates
Agar plates stored correctly have a longer lifespan, but for best results, use them within two to four weeks.
The best place to store agar plates is in a sealed container or plastic bag in the refrigerator at 35 to 40°F (2 to 4°C).
Before using your plates, check them carefully for any signs of contamination and then allow them to warm to room temperature before opening them for inoculation.
This helps to prevent condensation that may cause contamination.
Different Ways to Use Agar Plates
Agar plates are exceptionally versatile, and mycologists use them in several ways, including:
- To grow mycelium from spores – Adding spores to the nutrient-rich agar plate encourages them to germinate and form mycelium.
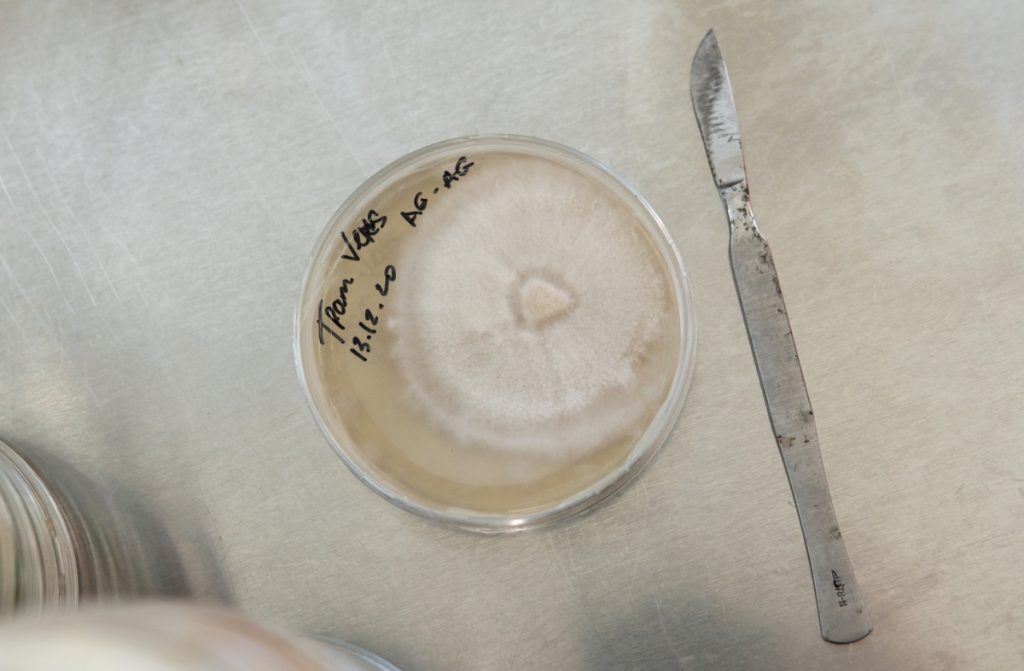
- To multiply a particular strain of mycelium – This involves transferring a piece of healthy mycelium from one agar plate to another to grow more mycelium.
- To test grain spawn – A sample of colonized grain can be transferred to an agar plate for isolation or testing.
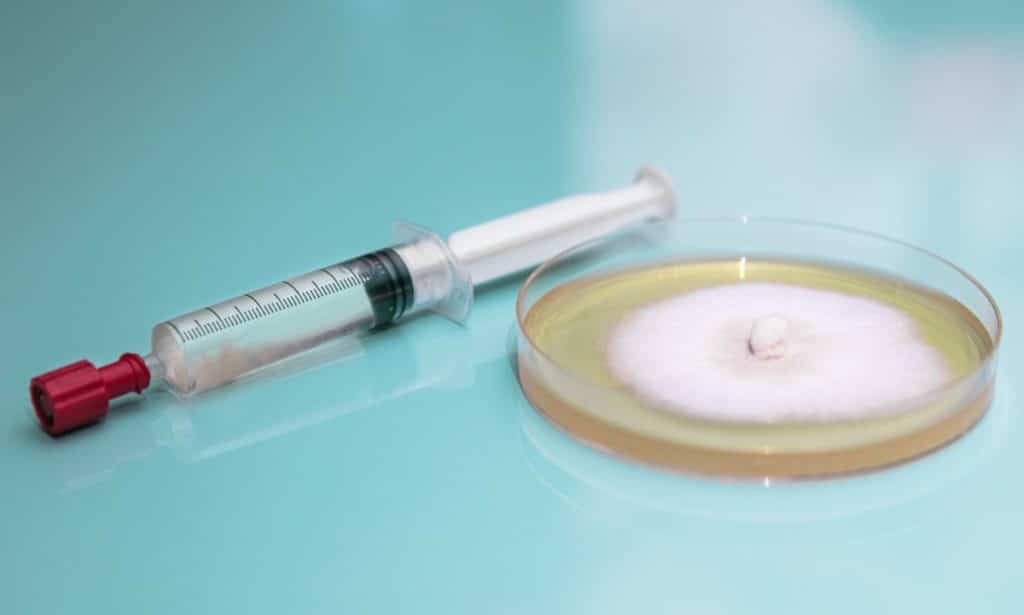
- To grow mycelium from liquid culture – You can inoculate an agar plate with liquid culture for mycelial growth.
- To inoculate substrates to create spawn – This involves transferring a piece of colonized agar to sterilized grain or sawdust to begin the spawn run.
- To make liquid mushroom culture – You can place a piece of colonized agar in sterile, nutrient-rich solutions to create liquid cultures.
- To store mycelium – For long-term storage, growers can transfer mycelium on agar to a culture slant.
Final Thoughts
Agar plates allow you to clone mushrooms, germinate new strains from spore prints and store mushroom mycelium with less risk of contamination.
If you enjoy experimenting and want to experience the entire mushroom-growing process, agar plates will make your life easier.
But, if you’re more interested in growing mushrooms for profit or starting a small mushroom farm, we recommend skipping the agar part and buying grain spawn to inoculate your bulk mushroom substrate.
To learn more about growing mushrooms the low-tech way, visit our Mushroom Growing Hub or try one of our mushroom cultivation courses.


