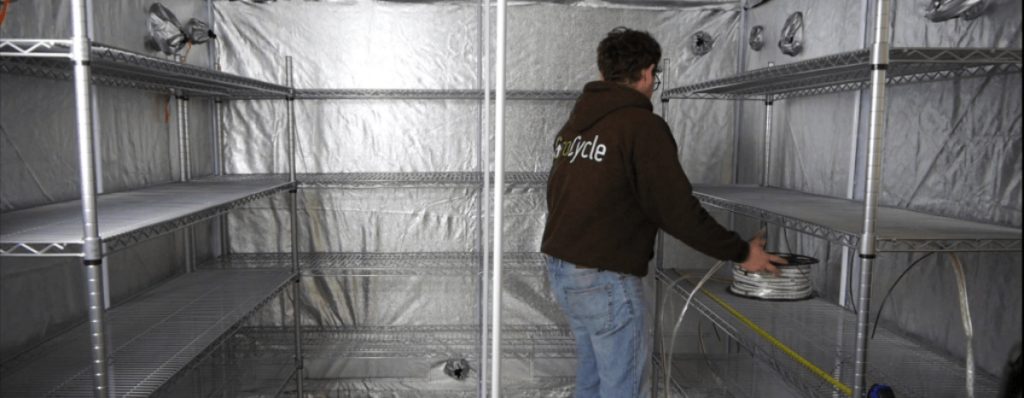
You can grow mushrooms at home without a grow tent, and there are several easy ways for beginner mushroom growers to get started.
But, after experiencing the wonder of harvesting homegrown gourmet mushrooms, many people want to learn more and grow larger quantities.
Setting up a mushroom grow tent allows you to grow fresh mushrooms year-round and provides more control over the fruiting conditions resulting in larger yields.
This article explores what a mushroom grow tent is, why you should build one and how to make and set up a mushroom grow tent.
What is a Mushroom Grow Tent?
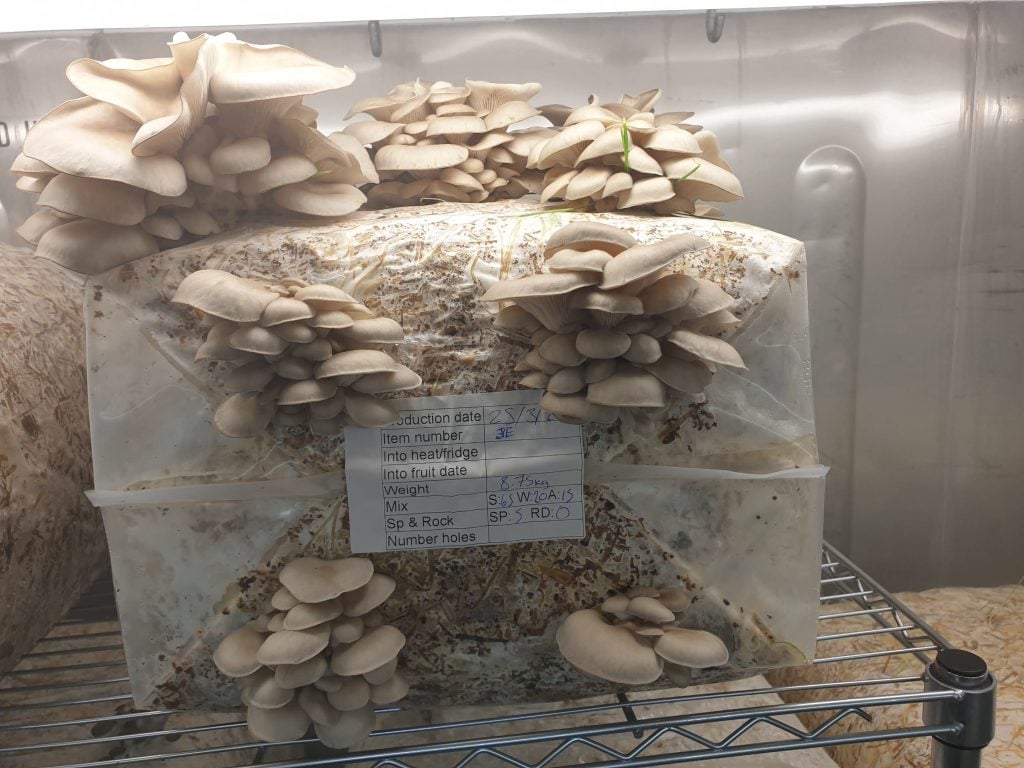
A mushroom grow tent is a portable, collapsible fruiting chamber that cultivators use indoors to maintain ideal fruiting conditions for mushrooms.
Mushroom grow tents come in all shapes and sizes and are essentially a frame covered in plastic, canvas or reflective sheeting.
They’re ideal for those who need something larger than a monotub or shotgun fruiting chamber but don’t want to build a permanent grow room.
Grow tents, like smaller fruiting chambers, give you control over the mushrooms’ fruiting conditions as you can control the light, temperature, humidity and airflow.
You can use wood and plastic sheeting to build a DIY mushroom grow tent from scratch.
But it’s quicker to set up inexpensive, ready-to-go hydroponic grow tents or mini-greenhouses for mushroom growing.
We recommend using one of these as they’re quick and easy and allow you to set up a fully automated mushroom grow tent within a day.
A Martha grow tent made from a 4-tier greenhouse is a popular and inexpensive option for small-scale mushroom cultivators, but has limited space.
Read our article on how to build a Martha grow tent step by step to learn more about this type of grow tent.
For mushroom cultivators looking for larger yields, or those who want to start a low-tech mushroom farm, a larger hydroponic grow tent is worth considering.
And, even though you are purchasing a ready-made grow tent, there are still some steps to take to turn it into a mushroom tent.
For this reason, some people like to buy mushroom grow tent kits with all the required equipment and connections to get started.
Why Build a Mushroom Grow tent?
Mushroom grow tents are ideal for those who want to produce larger quantities of mushrooms at home.
Here are 6 great reasons to build a mushroom grow tent:
- Inexpensive – Grow tents provide a cost effective way to create a spacious fruiting chamber for more mushrooms as you do not need to build a dedicated grow room.
- Quick to set up – You can easily set up most grow tents and have them fully functional in under a day.
- Available in different sizes – Grow tents come in various sizes, from small countertop models to large walk-in units allowing you to choose one that suits your space.
- Can be placed anywhere – Grow tents are portable and collapsible, allowing you to transport them into hard to get to spaces.
People often set up mushroom grow tents in spare rooms, basements or closets.
- Have ports for ducting and electrics – These convenient ports make installing equipment like humidifiers, fans and sensors easier.
- Often come with drip trays or liners – All of the moisture in the humid grow tent environment needs to go somewhere.
Condensed water drips onto the base of your grow tent, and these liners help to prevent it from leaking out onto the surrounding floor.
But, like other fruiting chambers, mushroom grow tents have a few cons.
Cons of Mushroom Grow Tents
Here are some of the cons of a mushroom grow tent:
- Not as durable as other options – Although generally manufactured from durable materials, hydroponic grow tents are still light, portable structures.
- Zips and seams can break with heavy use – Zips and seams are the weak points in a grow tent, and although spares may be available, it’s often not easy to repair them quickly.
This delay could create problems if you have a tent full of maturing mushrooms when the zip or seam breaks.
- May leak spores from around the zip and seams – Many hydroponic grow tents claim to be airtight, but zips and seams are difficult to seal and may leak spores into your home.
That said, if you harvest your mushrooms before they release their spores, you won’t need to worry about this.
How to Make a Mushroom Grow Tent
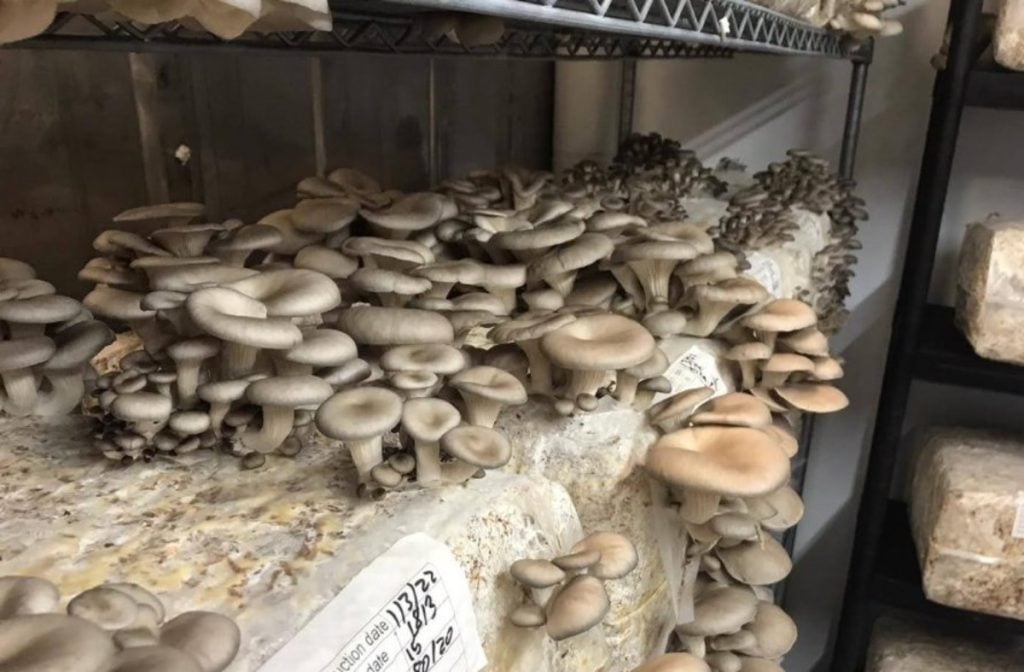
One of the great things about a mushroom grow tent is that you can make it as simple or complicated as you choose.
You can create fruiting conditions in a Martha grow tent the low-tech way, using trays of perlite for humidity and slits for ventilation.
Or, if you’re hoping to produce larger yields and reduce contamination, you could build an automated mushroom grow tent.
Automated grow tents often include a mushroom grow tent humidifier, fan for air circulation, temperature and light control and instruments to monitor humidity, CO2 and temperature levels.
Some even transmit information to computers and cell phones so that you can check the fruiting conditions even when you’re not home.
With this type of grow tent you can closely monitor and control the fruiting conditions for maximum yields.
What Do You Need to Build a Mushroom Grow Tent?
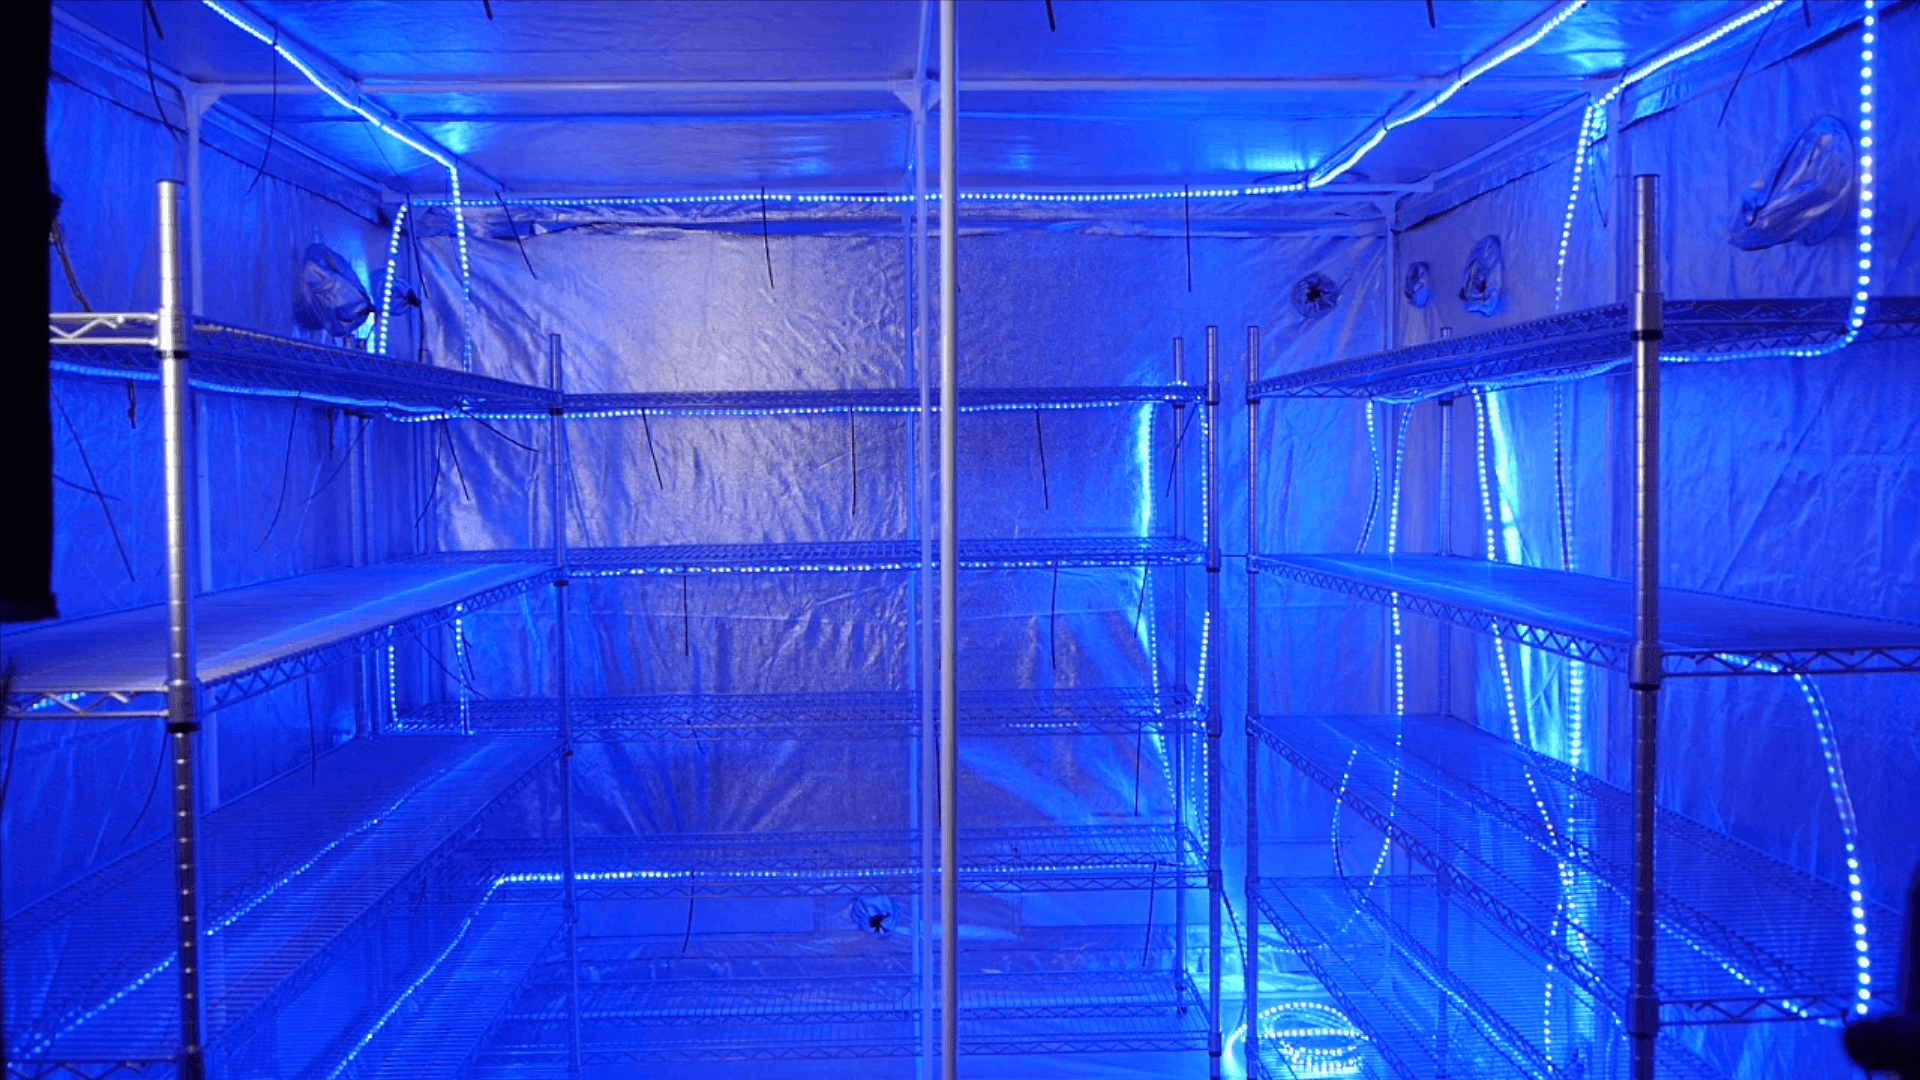
To build a spacious, automated mushroom grow tent, you need the following:
1. A Place For Your Grow Tent
There are a few factors to consider when choosing a location for your tent:
- Temperature – If possible, choose a location with a relatively stable temperature. Sudden changes in temperature make it more difficult for you to maintain the right conditions for mushrooms.
Choose a room that doesn’t get lots of foot traffic, so the door stays shut. Doing this will also help to prevent accidental damage to equipment.
- Clean Fresh Air – The fresh air coming into the tent needs to be clean to help prevent contamination.
Closed rooms make this easier, and, in some cases, if you have a HEPA filtered central HVAC system, you can use the air in the room without further filtration.
Alternatively, growers install fans with a HEPA filter to clean the air before it goes into the grow room.
- Exhaust – Mushroom spores can cause allergic reactions, so it’s important to ventilate to the outside of your home.
Pick a location for your grow tent in a room with a window or vent that you can use to exhaust air and spores outdoors.
- Noise – When your mushroom grow tent is operational, the fans and humidifier make a little noise. For most, this will not be a problem.
But, light sleepers may not enjoy being in the room next door.
- Electricity – You need access to electricity to run all the equipment.
While this is often as simple as running an extension cord, if you don’t like messy cables lying around, consider the location of the electrical outlet.
- Water – You need water to fill up your humidifier, so if possible, consider placing the tent near a water line or running a dedicated hose to your tent.
Access to nearby water is optional, as you can manually fill your humidifier when required.
But if you can run a hose to your tent’s location, you can add an auto-fill valve to the humidifier to completely automate the system.
2. A Hydroponics Tent
Most companies manufacture hydroponic grow tents for people wanting to grow plants, and as mushrooms don’t have the same requirements, you may not need all the features offered.
Things to consider when choosing a mushroom grow tent:
- Size – Grow tents come in various sizes. Consider how much space you have and how many mushrooms you want to grow when deciding what size to get.
- Durability – Manufacturers use different materials when producing grow tents. Choose a tent made from durable, easy to clean materials.
- Ports – Ports make it easy to add electrical and other components to your tent. The number of ports varies from model to model, so make sure the one you choose has enough ports to meet your requirements.
- Observation windows – As mushrooms don’t need lots of light to grow, you don’t need a tent with large windows. But if you choose an opaque tent, it’s nice to have well-situated observation windows so you can monitor the mushrooms’ growth without opening the grow tent.
3. Shelving
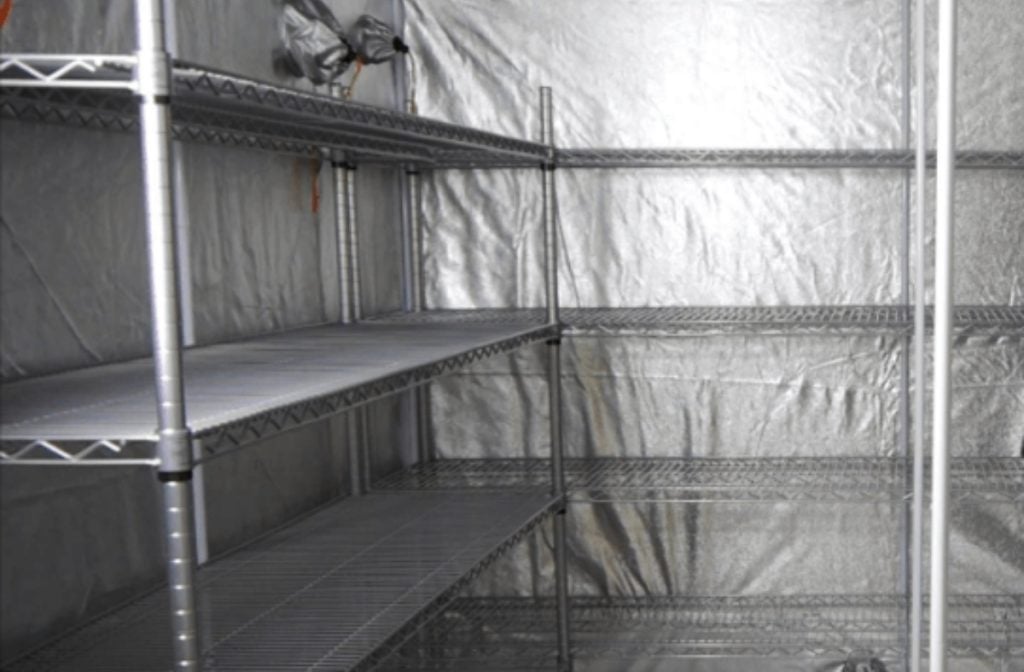
The amount of shelving needed will depend on the dimensions of your fruiting chamber and what you can get in your area.
Plastic or metal shelving is the most common type used in growing tents as wood tends to warp and rot in the humidity.
Plastic shelving is lighter, making it easier to move, and will not rust, but they’re not as strong as metal or wire shelving and will not hold as much weight.
Metal shelving is stronger and easier to clean, but depending on the material it’s made of may rust in the high humidity of the grow tent environment.
Metal shelves are heavier than plastic shelves, but you can find some with wheels making it easier to move them.
Metal shelving will support the weight of larger bags of substrate.
4. A humidifier
As with all the other components, when it comes to humidifiers, there are several options.
Generally, cool mist humidifiers are better than warm mist humidifiers for growing mushrooms as they use less energy.
Cool mist humidifiers use either evaporative wicking or ultrasonic vibrations to increase humidity.
You can use both systems for mushroom grow tents, but ultrasonic humidifiers are often better, especially for larger grow tents.
They use a vibrating disc to create cool mist and push the fine water drops into the air instead of relying on evaporation.
Ultrasonic humidifiers produce a steady, visible stream of vapor, allowing you to create higher humidity levels and increase the humidity levels faster than evaporative humidifiers.
DIY Humidifiers are another option for a mushroom grow tent, and an affordable way to produce lots of cool mist.
Several online videos are available with instructions on how to build a DIY humidifier using a pond fogger and a bucket or tote.
5. Lighting
Although mushrooms don’t need light to produce food like plants, they need indirect light to grow properly.
In nature, mushrooms grow towards the light, allowing them to get far enough out of the ground to distribute their spores.
But. they don’t need a lot of light, and if your grow tent lights are too harsh, they may dry the mushrooms or stunt their growth.
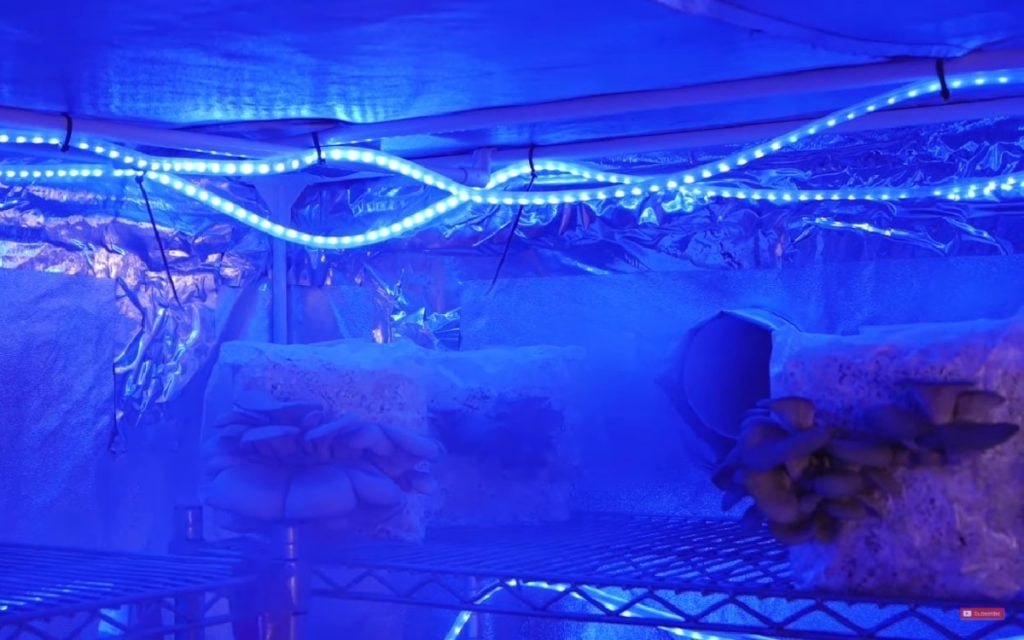
In our mushroom fruiting chambers, we aim to provide just enough light to allow us to read and write notes.
We found that LED rope lights work best. They provide enough light for our needs, are simple, easy to install and very energy efficient.
6. Fans For Ventilation
Fresh air exchange is important when growing mushrooms, as like humans, they use oxygen and produce carbon dioxide.
High levels of CO2 inside your grow tent may affect your mushrooms’ growth, and oyster mushrooms, in particular, are sensitive to excess CO2.
You can buy a meter to measure CO2 levels, and we recommend keeping the CO2 levels in your grow tent below 1000 ppm (parts per million).
You’ll need fans to blow stale air, excess moisture and mushroom spores out of the grow tent and bring in fresh air.
7. Equipment For Temperature Control
In many places the local room temperature is ideal for growing mushrooms.
But if you live in very hot or cold climates without indoor temperature control, you may need to take extra measures to maintain ideal fruiting temperatures.
Mushroom grow tent temperature requirements will vary between different species.
But, most mushrooms like temperatures in the 50°F to 70°F (10°C to 21°C) range, and keeping your grow tent between 60 and 65 F (15.5 C and 18 C) is a safe range.
If you’re placing your tent in a room warmer than this, consider adding a small air conditioning unit to the room.
If the room is colder than 50°F (10°C), you can place waterproof heating mats underneath your mushrooms.
They will help maintain temperatures approximately 10 – 20 F (5.5 -11 C) above the ambient air temperature of the room.
8. Automation Equipment
One of the great things about a mushroom grow tent is that you can automate most tasks.
We recommend installing a thermostat and CO2 and humidity controllers that automatically turn your fan and humidifier on and off.
It’s also a good idea to attach a timer to your LED lights to switch them on and off for the desired time each day.
How to Set Up a Mushroom Grow Tent
Follow the steps below to set up your mushroom grow tent:
Step 1: Decide on Your Design and Size
Before you can begin, you need to decide what size tent you want and have a basic idea of how you want your shelving laid out.
You also need to do some research and decide which equipment to buy.
If you’re thinking of starting a small-scale mushroom farm, take a look at our mushroom growing business plan.
This article will give you a good idea of what’s involved and how to start a mushroom business.
Our video below on designing a mushroom farm will also give you direction and help you get started.
Step 2: Buy Equipment and Prepare Your Room
Now that you have made some decisions, it’s time to buy your grow tent and equipment and assemble the tools required to build the tent.
Make sure the room where you’re erecting the grow tent is clean, and the floor is free of sharp objects that could tear the tent.
Step 3: Assemble your Hydroponic Tent
When the room is ready, assemble your hydroponic tent following the manufacturer’s instructions.
One person can easily assemble a smaller grow tent on their own, but with bigger tents, a second set of hands may be helpful.
Here are some tips for assembling your grow tent:
- Be careful when opening the box – Most manufacturers use durable materials for grow tents, but a sharp knife or box cutter will slash them if you’re careless when opening the box.
- Check you have all the pieces – Find the parts list and instructions and check the box’s contents to see that you have all the parts.
- Follow the instructions – First, read through the instructions to get an idea of how the tent fits together.
Then follow the instructions to assemble it as you often need to put the tent together in a specific order, and it’s easier to follow the steps than to construct it randomly.
- Take your time when assembling – Generally, hydroponic grow tents are easy to assemble, but rushing may lead to mistakes that will cause problems at a later stage.
Step 4: Install Shelving
Once you’ve erected the grow tent, install the shelving you have chosen, making sure all joints and connections are tight.
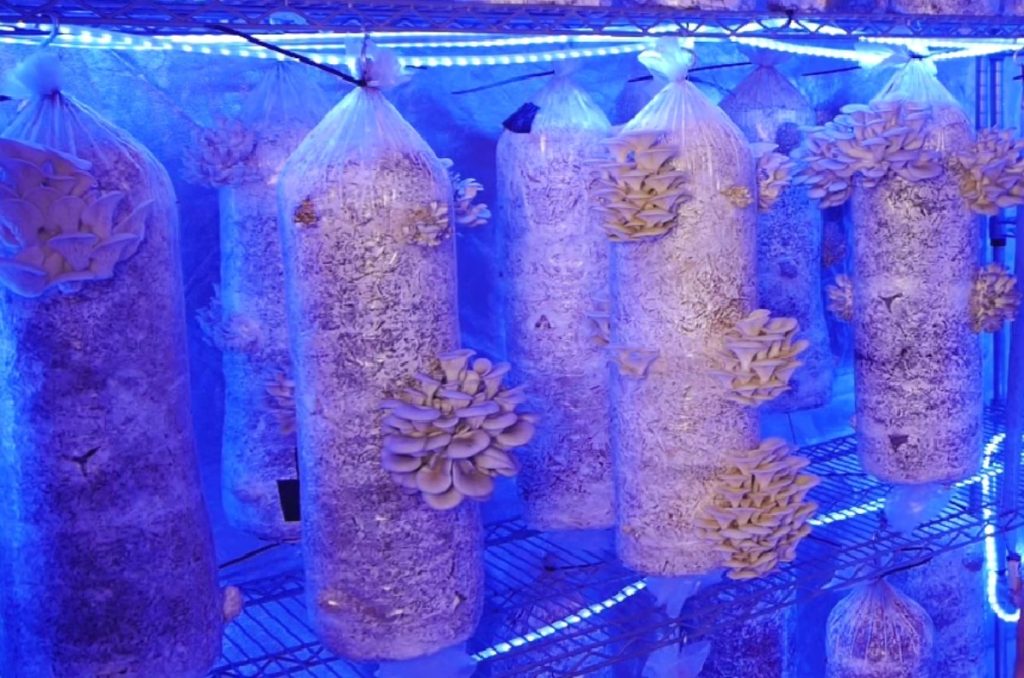
We like to use metal shelving as it’s strong enough to support hanging mushroom growing bags.
Step 5: Install Lighting
Waterproof LED strip lights provide enough light for mushrooms and are easy to install in a mushroom grow tent.
Use zip ties to secure the lights to the shelving, making sure that you start the strip so that when installed, the end with the plug exits the grow tent at the port closest to your power supply.
Step 6: Install a Humidifier
Humidity is one of the most important things to get right in your grow tent.
How much humidity for a mushroom grow tent? You want to maintain humidity levels of between 80% and 90%.
You can put the humidifier inside the grow tent or have it outside with piping or tubes to direct the moist air into the tent.
You won’t need to run the humidifier constantly as it will produce too much moisture.
You can either use a timer with an on-off switch to turn the humidifier on and off or install a humidity controller.
A humidity controller monitors humidity, and switches the humidifier on and off to keep the levels within the desired range.
Step 7: Install Your Fresh Air Intake Fans
When installing your fan, ensure it’s facing the right way with the arrow pointing in the direction you want the air to be passing through.
Grow rooms work best with positive pressure. You use your fan to push air into the room and then it exits out of either passive vents or you can also use a smaller exhaust fan to help pull the air out.
For species that require lots of fresh air exchange, like Oyster mushrooms, you want to aim to replace the volume of the air in the room at least 10 times per hour. This equates to a full room of fresh air once every 6 minutes.
To achieve this you can either leave your fan running constantly on a slower speed, or you can connect it to a timer or CO2 controller that switches it on and off to keep the CO2 within acceptable levels (for most species this would be less than 1000ppm CO2).
Step 8: Automate Your System
Once you’ve installed your humidifier, lights and fan, it’s time to connect your thermostat, CO2 and humidity controllers and lighting timer.
Without automation equipment, you’ll need to manually monitor and adjust the CO2 levels, humidity, temperature and lighting.
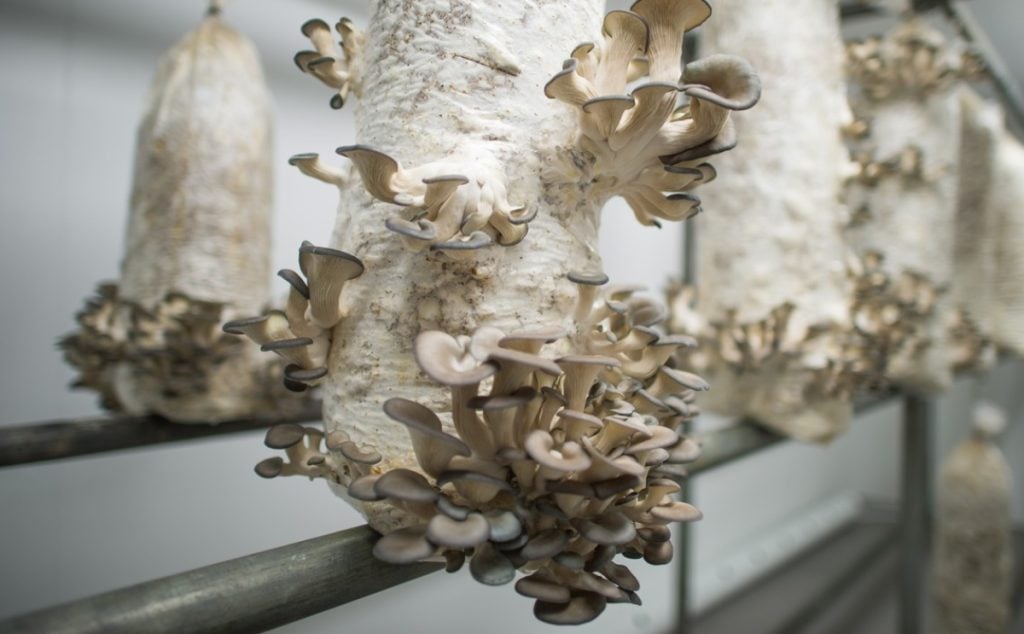
How to Grow Mushrooms in Mushroom Grow Tents
First, check that your grow tent is clean and that all your equipment is clean inside and out and working properly.
Before placing your bags of fully colonized substrate into the grow tent, switch on the humidifier and heating if required and wait until the temperature and humidity levels are correct.
Then place the colonized bags or containers in your grow tent and open the tops or cut slits in them depending on the type of mushrooms you are growing.
Now it’s just a matter of maintaining ideal fruiting conditions until your mushrooms are ready for harvest. How long your mushrooms take to grow varies depending on the mushroom species you’re growing.
How much monitoring and work this requires will depend on your mushroom grow tent setup and level of automation.
In the beginning, you may need to experiment a little to see which parameters produce the best results.
To learn more about the mushroom growing stages before fruiting, read our guide on how to grow mushrooms.
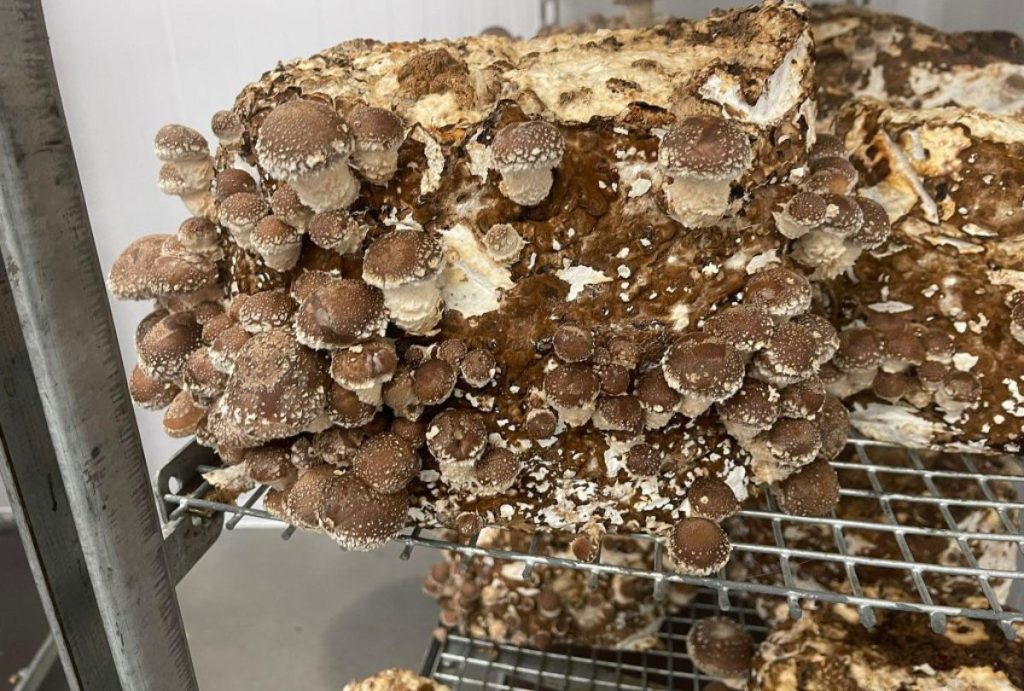
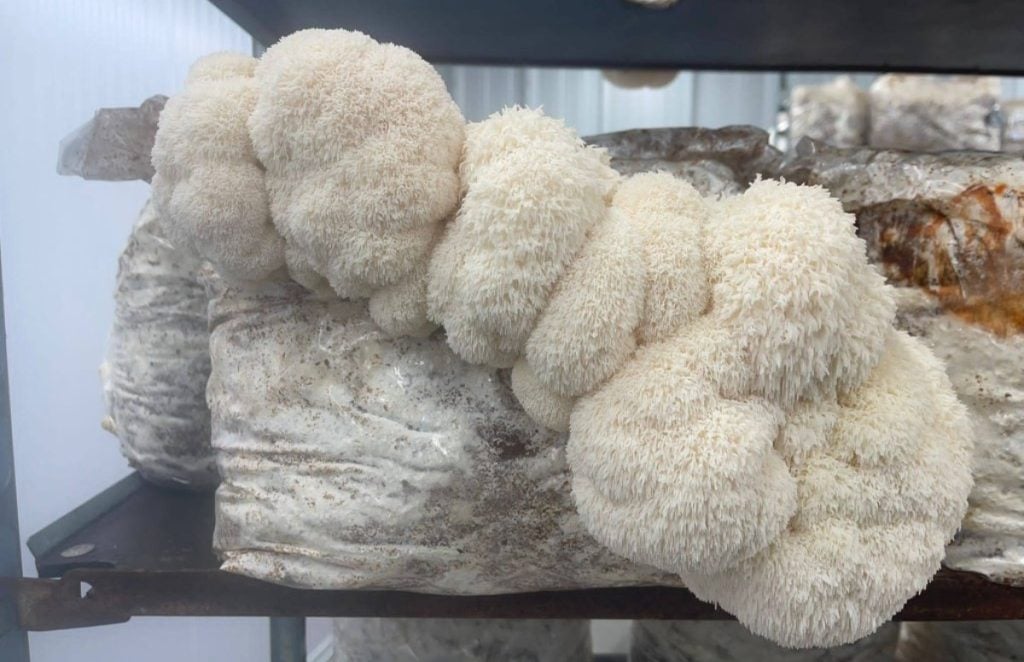
You can use a mushroom grow tent to grow several types of mushrooms, including oyster, reishi, shiitake, lion’s mane and chestnut mushrooms.
Common Issues With a Mushroom Grow Tent + How to Troubleshoot Them
Here are some common mushroom grow tent issues that you’ll want to watch out for:
Incorrect Humidity Levels
If your humidity levels are too low, your mushrooms may not grow at all, as mushrooms need high humidity during pinning.
Cracked or brown mushroom caps or mushrooms that pin, but then stop growing are other signs that the air may be too dry.
To prevent this, ensure your humidifier has a constant water supply and that you set your humidity controller to at least 80% relative humidity.
If the humidity levels are too high, you increase the chances of mold and contamination, and your mushrooms may develop fuzzy stems.
To address this, reduce the time the humidifier is running by adjusting your timer or humidity controller.
Not Enough Air Exchange
If you don’t have enough air exchange in your mushroom grow tent, the CO2 levels may get too high.
High CO2 levels affect the mushrooms’ growth during pinning and can cause mushrooms with thin stems.
Another possible result of insufficient air exchange is a build-up of large amounts of spores in the grow tent, increasing the likelihood of mold.
To increase air exchange, set your fan to run more frequently if on a timer, or use a CO2 controller to keep the CO2 levels where you want them.
Incorrect Temperatures
Mushrooms have a preferred mushroom fruiting temperature range. If temperatures are too hot or too cold, it can negatively impact their growth.
Most mushrooms grow well in temperatures between 50°F to 70°F (10°C to 21°C).
If you live in a hot climate, you may need to use a small air conditioning unit to reduce the temperature in the room.
In colder climates you can place waterproof heating mats underneath your mushrooms to increase the temperature.
Final Thoughts
Mushroom grow tents are ideal for mushroom cultivators who need something larger than a monotub or shotgun fruiting chamber but don’t have space for a permanent grow room.
A mushroom grow tent can be as simple or complicated as you choose, depending on your requirements.
An automated mushroom grow tent allows you to grow fresh mushrooms year-round, provides more control over the fruiting conditions and requires less monitoring.
These factors make it the choice of many small-scale urban mushroom farmers.
Want to learn more and take your mushroom growing to the next level? We suggest our Low Tech Mushroom Farming course.
In this course we walk you through how to plan, build and run a small-scale mushroom farm.
