
Knowing how to make a spore print from a mushroom is useful for both mushroom cultivators and foragers.
But, making mushroom spore prints is not only for mushroom growers or foragers.
It’s also a fun and educational activity for people of all ages and gives you a better understanding of the mushroom life cycle and how mushrooms reproduce.
An added bonus is that it’s easy to learn how to make a spore print of a mushroom, and you don’t need expensive equipment.
In this article, we look at what a mushroom spore print is, why you would make one, how to save and store your spore prints and how to make a mushroom spore print step by step.
What are Mushroom Spores?
Mushroom Spores are tiny reproductive cells that fungi use to reproduce and spread. Spores perform the same function for fungi that seeds do for plants.
Mushrooms each carry and release millions of spores that all contain the genetic material necessary to form new mushrooms.
Depending on the type of mushroom, the released spores get carried to new locations by wind, water, insects or animals.
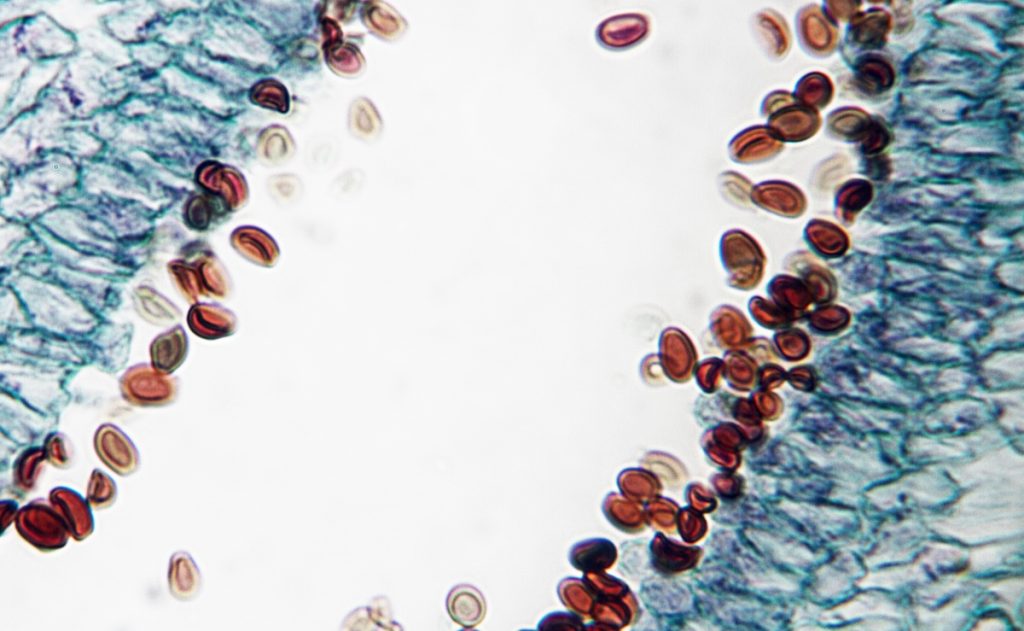
Spores come in different colors, shapes and sizes and are extremely small. You cannot see their shape and size with the human eye.
Without a microscope, humans can only see their color when thousands of spores are together.
Mushroom spores come in a wide range of colors, including shades of white, yellow, cream, green, brown, red, purple, rust and black.
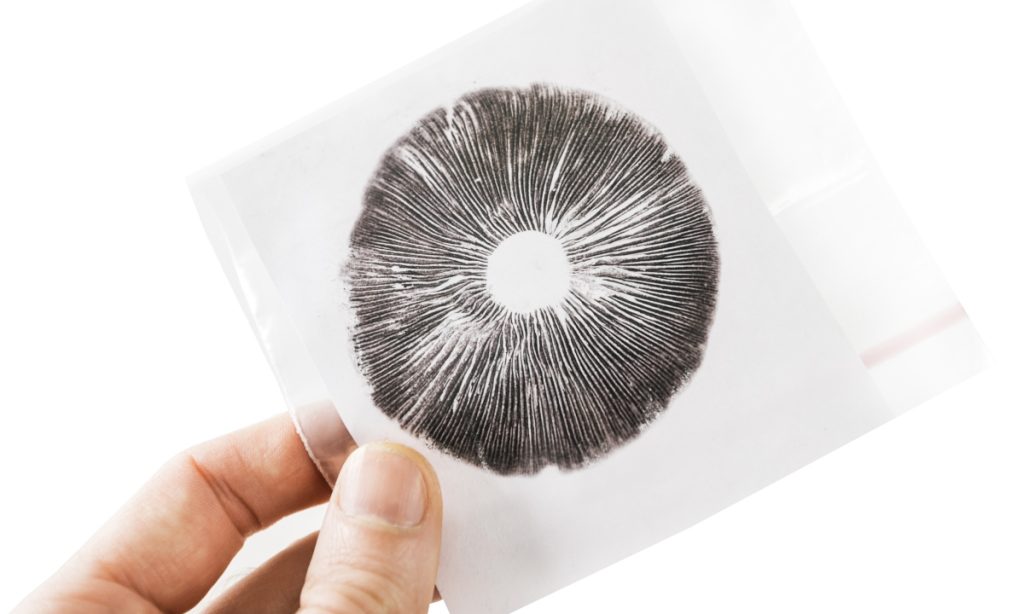
What is a Mushroom Spore Print?
A mushroom spore print is a pattern on paper, foil, glass or other flat surfaces consisting of thousands of spores dropped from a mushroom’s spore-bearing surface.
Different types of mushrooms don’t only have spores of different shapes, sizes and colors. They also release their spores in unique patterns.
These patterns match the mushrooms’ spore-bearing surfaces that are often on the underside of the mushroom’s cap.
They include structures such as gills, spines, tubes and pores that hold the spores before their release.
What Is The Purpose of a Mushroom Spore Print?
People and scientists make mushroom spore prints for three main purposes:
1. Mushroom Identification
One of the most common purposes of mushroom spore prints is to help identify a mushroom.
The spores’ color helps determine which mycological family a mushroom belongs to, and for species with dangerous look-alikes, it can be a key identification factor.
But, spore color shouldn’t be the only criteria used for mushroom identification, especially when identifying edible mushrooms.
Some color differences are subtle, and people may interpret colors differently.
And, if you’re using spore color to try and identify a mushroom, you should definitely not eat it without first consulting an expert.
If you come across a mushroom in the wild and have no idea what spore color to expect, take a few samples and make spore prints on white and black paper.
Here are some popular edible and medicinal mushrooms and their spore colors:
- Oyster mushrooms – white to lilac-gray
- Cremini mushrooms – brown
- Reishi mushrooms – dark brown
- Chanterelles – pale yellow to creamy white
- Morels – white to creamy yellow
- Maitake mushrooms – white
- Puffball mushrooms – brown
- Porcini mushrooms – yellow-brown or olive-brown
- Shiitake mushrooms – white
- Turkey tail mushrooms – white
- Hedgehog mushrooms – white
- Chestnut mushrooms – reddish brown
- Shaggy mane mushrooms– black
- Lion’s mane mushrooms – white
- Pioppino mushrooms – brown
And these are some common poisonous mushrooms and their spore colors:
- Jack o lantern mushrooms – white to pale yellow
- Fly agaric – white
- False parasol – green
As you can see from the list above, several mushrooms have similarly colored spores.
Because of this, researchers make spore prints on glass slides and then, using a microscope, examine the spores’ size and shape to confirm identification.
But, spore print color can be helpful when you’re trying to tell the difference between the shaggy manes and false parasols in your backyard.
They look very similar when young, but a shaggy mane has black spores and the false parasol green spores.
2. Mushroom Cultivation
You can use spore prints to grow mushrooms at home, and they’re a great way to add new mushroom strains to your low-tech mushroom farm.
But, bear in mind that growing mushrooms from spores is like growing plants from seeds. Every time two spores fuse and make mycelium, they create a new mushroom strain.
It’s impossible to predict characteristics of the new strain, like the speed of colonization, size and color of the fruiting body, etc.
For commercial purposes, it’s generally best to start with a proven strain created by cloning an existing popular mushroom strain.
But growing mushrooms from spores could be a fun exercise for those who like to experiment and enjoy surprises.
3. Mushroom Spore Print Art
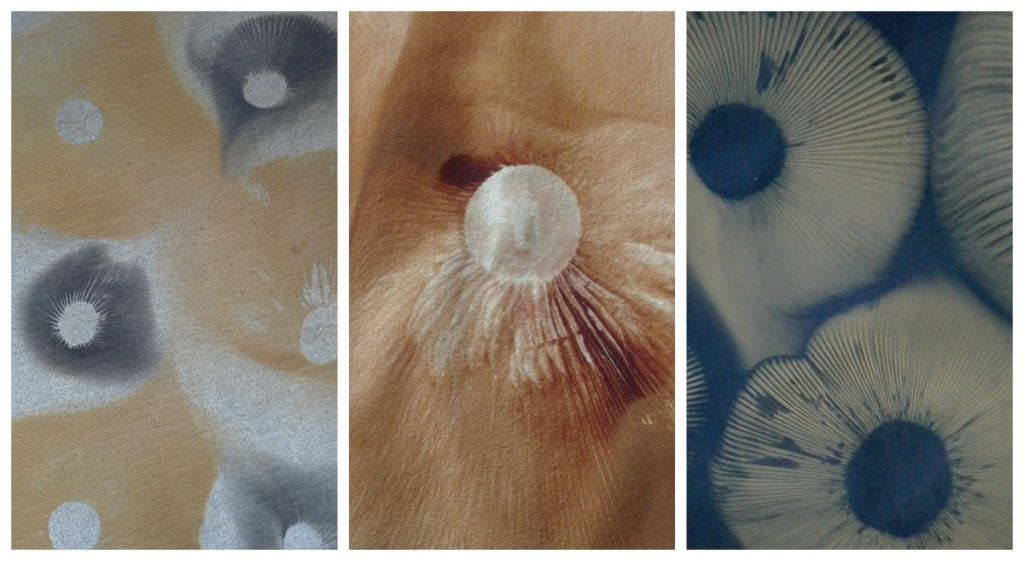
Each spore print is unique, and many are beautiful and intriguing to look at, so people use them to create artworks.
You can get creative when making a spore print artwork and combine different colors, shapes, patterns and sizes on one piece of paper.
Many spore print artists also experiment with using colored and textured paper as well as other surfaces for their artworks.
And for those who have mycophobia, mushroom spore print art may help you appreciate their beauty without looking at an actual mushroom.
Artist Thomas Keyes has some beautiful examples of spore print art, and Gustav Fischer from The Spore Print Collective uses original spore prints to create digital spore print art.
How Long Does it Take to Make a Mushroom Spore Print?
Depending on the age of the mushroom you have chosen, it can take as little as 2 hours to make a spore print, but usually, it takes 6 to 12 hours to get a distinctive spore print.
How Do You Make a Spore Print?
Making a mushroom spore print is easy and simply requires leaving a mature mushroom to drop its spores onto a piece of paper, tinfoil or glass.
Use the step-by-step instructions below to make your own mushroom spore prints.
How to Make a Mushroom Spore Print in 5 Steps
To make a mushroom spore print, you’ll need the following:
- A fresh mushroom fruiting body
- A paper, tinfoil or glass surface
- A drinking glass or bowl
- An airtight bag for storage
- Fixative or hairspray for creative prints (optional)
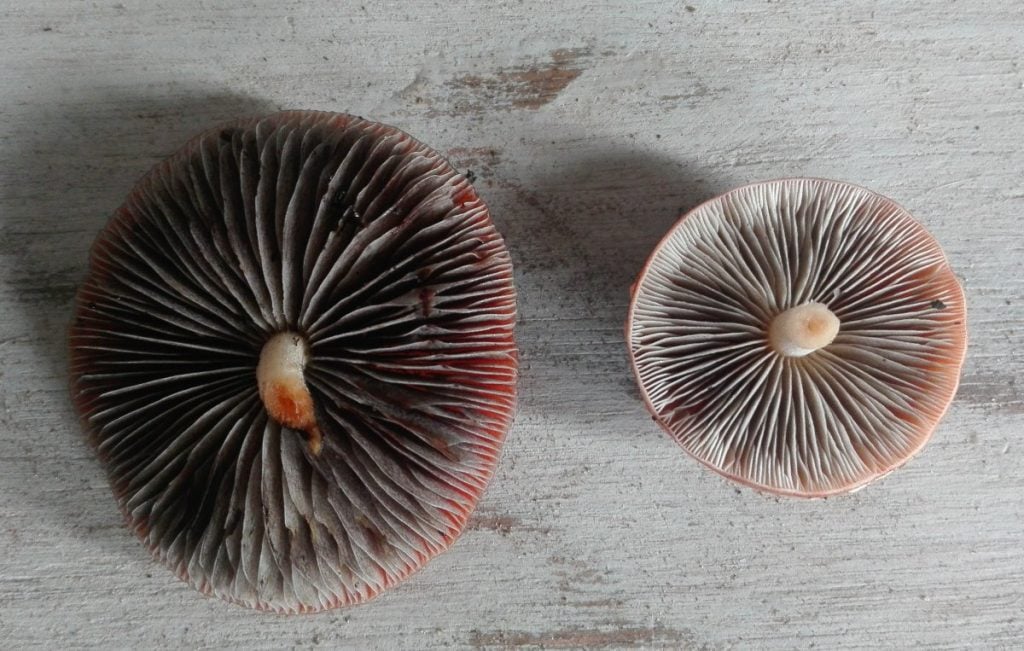
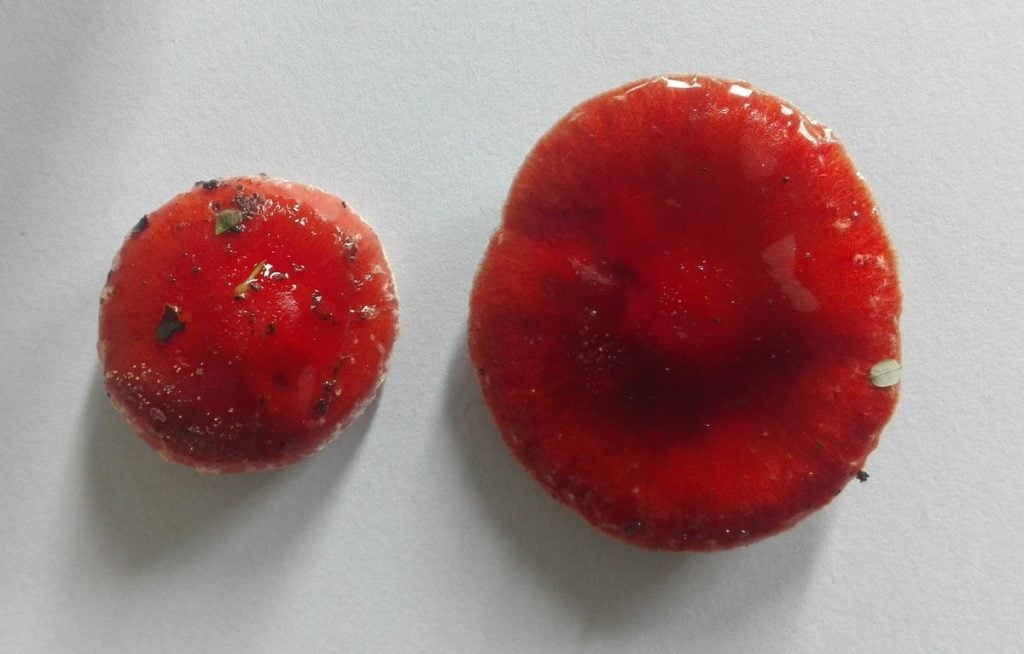
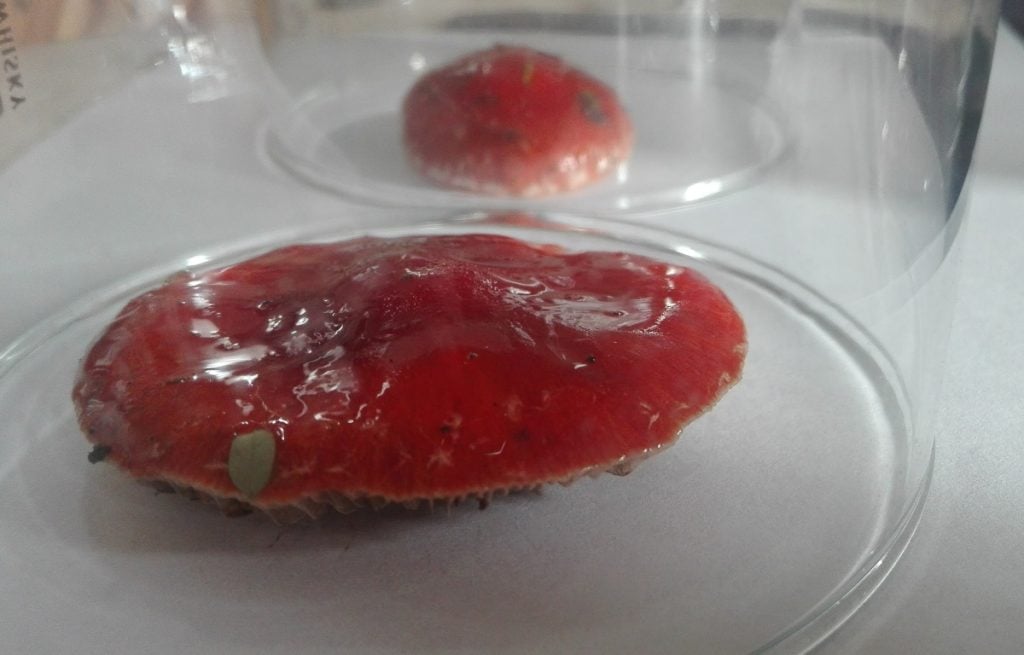
Step 1: Choose a Mushroom
Here are some things to consider when choosing a mushroom to make spore prints:
- Select a mature mushroom as it will have enough spores to make a print. Younger mushrooms often won’t have enough spores, and in some species, a partial veil covers the gills or pores.
- Flat mushrooms often create the best prints, but unusual shapes can be interesting for creative pieces.
- If parts of the mushroom cover the spore-bearing surface, the spore print may not work as well.
Look for these things when choosing a mushroom:
- A fully open cap with exposed gills, pores or spines
- Gills, pores or spines that are firm and healthy, not wet and mushy
- The mushroom should feel slightly moist. Dry or shriveled mushrooms won’t work
- A mushroom without any mold spots, bruising or insect damage
Step 2: Remove the Mushroom Stem
Once you have selected a mushroom, you’ll need to remove the stem from the cap if it’s the type of mushroom with a stem and cap.
Some stems snap off easily, but usually, it’s best to use a sharp knife or scalpel to cut the stem. Doing this will ensure you do not damage the spore-bearing surface on the underside of the cap.
If you are making a spore print of a shelf mushroom or trumpet-shaped mushroom, you can often use the whole fruiting body to make the spore print.
If you are making a spore print for cultivation purposes, it’s best to take steps to prevent contamination.
Make sure your workspace, glass or bowl and hands are clean, and use a sterilized scalpel to remove the stem.
Some growers recommend wiping down the top of the mushroom’s cap with isopropyl alcohol to reduce the chances of contamination.
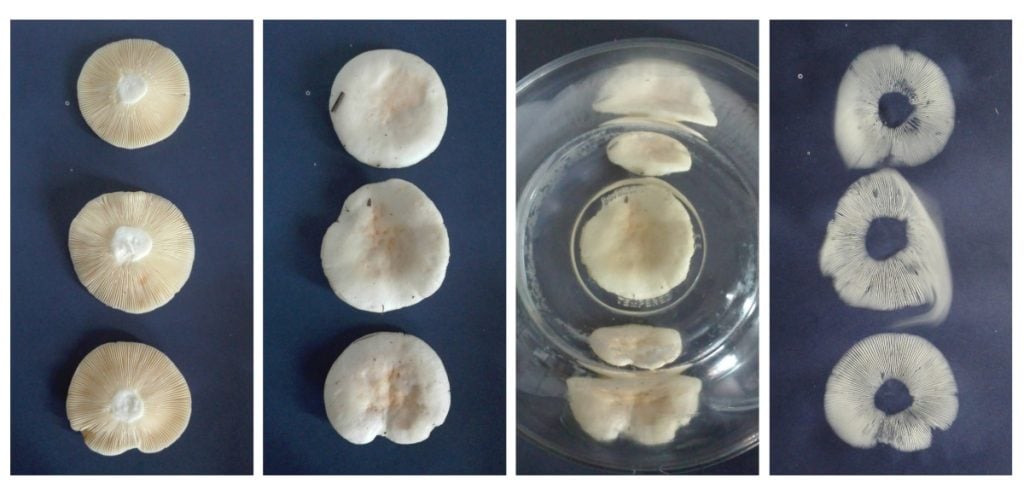
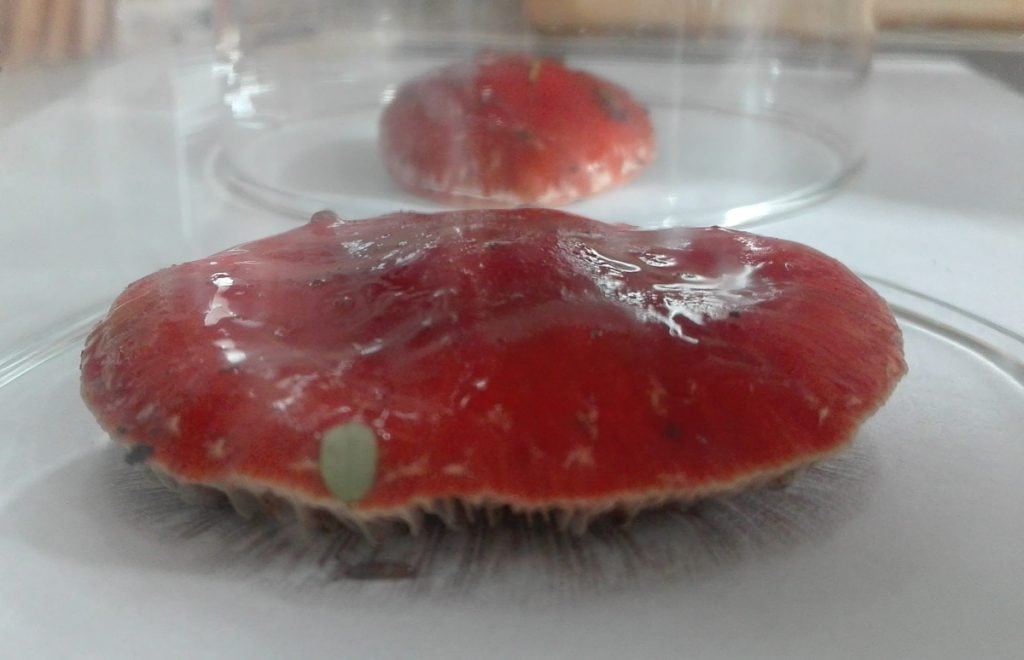
Step 3: Place the Mushroom Cap in Position
Find a space where you can leave your mushroom undisturbed for up to 24 hours to create the spore print.
Place the mushroom caps on your paper, tinfoil or glass surface with the gills, pores or spines facing down.
When using paper, it’s best to use dark colors for mushrooms with white spore prints and white for the others.
If you’re making a spore print for cultivation purposes, it’s better to use tin foil.
You can clean it with alcohol beforehand, helping to prevent contamination, and it’s also easier to transfer spores off the tinfoil into your growing medium.
Step 4: Cover and Wait
Ideally, you want the spores to fall straight down from the cap.
To achieve this, you need to cover the mushroom cap with a glass or bowl to prevent air currents from blowing the spores around as they fall.
The glass or bowl covering also helps prevent the mushroom from drying out, but smaller mushrooms may still dry out quickly.
A tip to help prevent this is to place a piece of wet tissue on top of the cap.
While any container will work, a clear glass covering allows you to monitor the progress and decide when the spore print is ready.
How Long to Make a Mushroom Spore Print
If the mushroom is freshly picked and mature, you may have a complete spore print within 2 hours.
But, people generally recommend leaving the sporulating mushroom cap for at least 6 to 12 hours, and some mushroom species can take up to a day to release their spores.
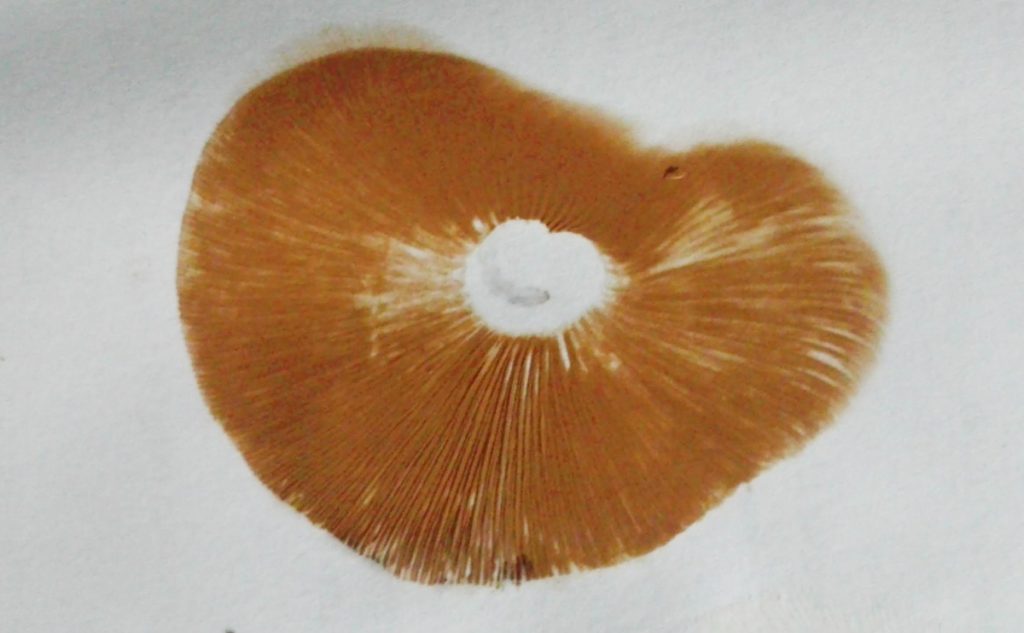
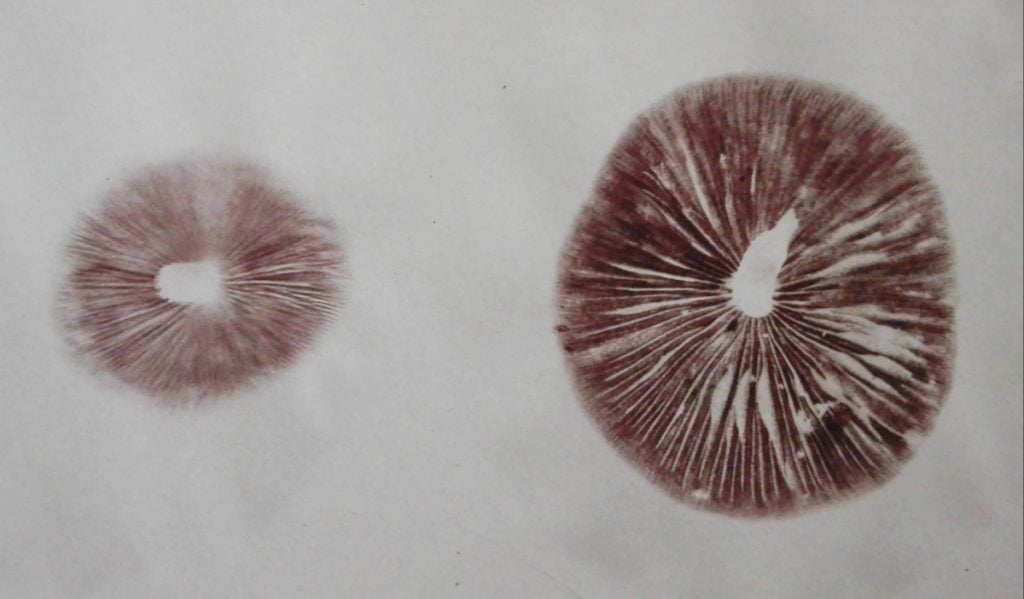
After 12 hours, carefully remove the covering and lift the mushroom cap. You should see a pattern on the surface that matches the mushroom’s gills, pores or spines.
If you do not see a pattern, the mushroom may be too dry or old or need more time.
Place the mushroom back on the surface and leave it for another 12 hours.
You can often create more than one spore print pattern with each mushroom cap. Move the cap to a different place on the same page or place it on a different color and repeat the process.
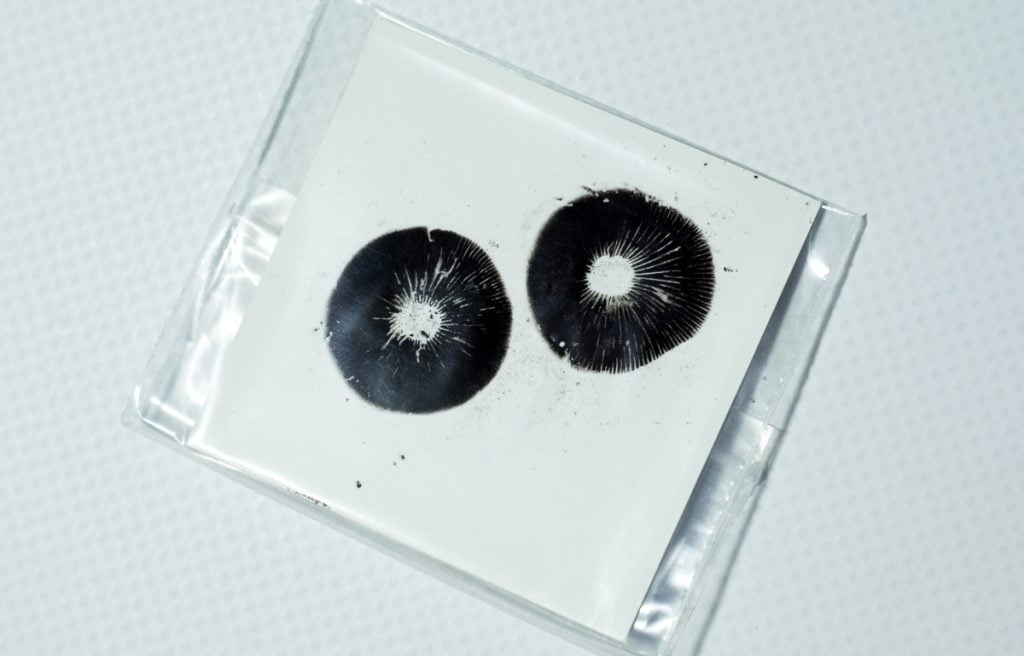
Step 5: Store or Save the Spore Print
If you are creating a spore print for cultivation purposes, you can fold over the paper or tin foil and put it in a zip-lock bag using clean tweezers.
You can now store these spore prints in a dark location at room temperature until you are ready to use them.
You don’t need to keep spore prints in the fridge, and they can last for decades and still be viable.
But, if you’re using the spore prints for identification purposes or artworks, you’ll want to preserve them.
Spore prints are fragile, so avoid touching or moving them before spraying them with fixative or hairspray.
Hold the spray can at least 12 to 15 inches (30 to 40cm) above the print to prevent the spray from disturbing the spores.
If you’re not careful, the pressure from the spray may smudge or change the spore print pattern, and it could even blow the spores right off the surface.
To be safe, use more than one coat of fixative to preserve the spore print.
The fact that mushrooms make beautiful spore prints is not the only thing that makes them unique. Watch our video below to discover 10 other amazing facts about mushrooms.
Final Thoughts
Making spore prints is an easy equipment-free exercise that’s useful for both mushroom foragers and cultivators.
Foragers find spore prints useful when trying to identify unusual mushroom species, and mushroom growers can grow new strains with diverse characteristics.
But growing mushrooms from a spore print is not the only way to grow mushrooms at home.
There are several options available and excellent mushroom growing books with lots of information.
And our introductory mushroom cultivation course is the perfect place for beginners to start.
We’ll teach you how to grow oyster mushrooms using simple methods and minimal equipment.


