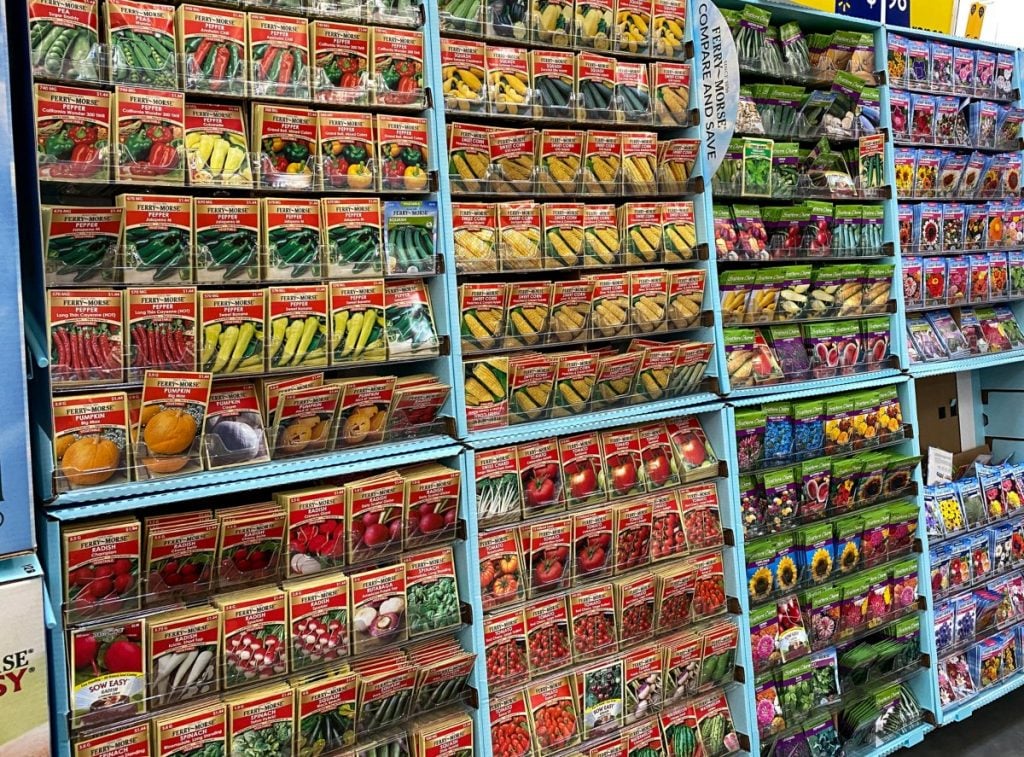
For thousands of years, farmers and gardeners have practiced seed saving to obtain flowers, herbs, vegetables and grains and maintain their farms or gardens.
Seed saving is often done on a large scale by seed suppliers, using advanced techniques and various machines.
However, this is not the only way to save seeds. Small-scale seed saving is an easy, fun skill to learn and valuable for homesteaders and permaculture gardeners.
In this article, we will look at what seed saving is and why it’s important.
You will also learn how to save seeds with a step-by-step guide and useful tips to help you save seeds from your favorite and most productive plants.
What Is Seed Saving?
Seed saving is a term used to describe the process of harvesting seeds from a crop and saving them for use at a later date.
Modern large-scale commercial farmers rarely practice seed saving. But, it’s popular with gardeners, homesteaders and permaculture farmers.
In many areas, people organize seed swapping gatherings and get together to exchange saved seeds.
Is Seed Saving Illegal?
Seed saving is not illegal unless you save seeds from a plant grown from patented hybrid or genetically modified seeds.
When farmers choose to purchase genetically modified seeds, they often have to sign a document stating they will use them solely for planting one commercial crop.
It would then be illegal to harvest and save seeds from this crop.
There are seed breeders currently working to give farmers more options by expanding the number of plant varieties that farmers can freely save and share.
Why Is Seed Saving Important?
If you enjoy homesteading and aim to be more self-sufficient, seed saving is an excellent skill to have.
It allows you to produce high-quality seeds and grow healthy plants without relying on outside sources.
But, even if you’re a home gardener with a small backyard garden, seed saving provides several benefits. By saving seeds, you can:
1. Save Money
Saving and sharing seeds not only increases the diversity in your garden but also saves you money.
Saving seeds is free, and seeds from seed libraries and seed exchanges cost substantially less than those offered by retail seed companies.
2. Grow and Improve Your Favorite Varieties
Seed saving allows you to grow your favorite vegetable and flower varieties year after year. And, if you only select seeds from the best plants, over time you will improve them.
The result is a strain of seeds well adapted to your specific garden zone and microclimate.
3. Preserve Heirloom Seeds for Future Generations
Heirloom crops wouldn’t exist if it weren’t for gardeners and farmers who carefully grew and saved seeds for thousands of years.
Saving seeds provides you with a unique opportunity to create your own heirloom crops and pass on a legacy of self-sufficiency to future generations in your family.

How Do You Save Seeds?
How you go about saving seeds will depend on the plant species in question.
Most plants grown for their flowers are dry seeded, but vegetable crops can be either dry seeded or wet seeded, and the techniques used to collect and save seeds from these differ.
- Wet seeded crops have seeds embedded in the flesh of fruits. There are two vegetable plant families with wet-seeded fruits, they are:
- The Solanaceae family – includes tomatoes, peppers and eggplants
- The Cucurbitaceae family – includes melons, squashes, and cucumbers.
- Dry seeded crops have seeds enclosed in pods or husks. Several vegetable plant families are dry-seeded and include:
- The Poaceae family – includes corn, rice and wheat.
- The Fabaceae family – includes beans, peas, and lentils.
- The Brassicaceae family – includes cabbage, mustard, and kale.
Saving vegetable seeds from dry-seeded crops can be relatively easy, while the process for wet-seeded crops takes longer and is a little more complicated.
The step-by-step seed saving guide below takes you through the seed saving process and provides more information on the various techniques.
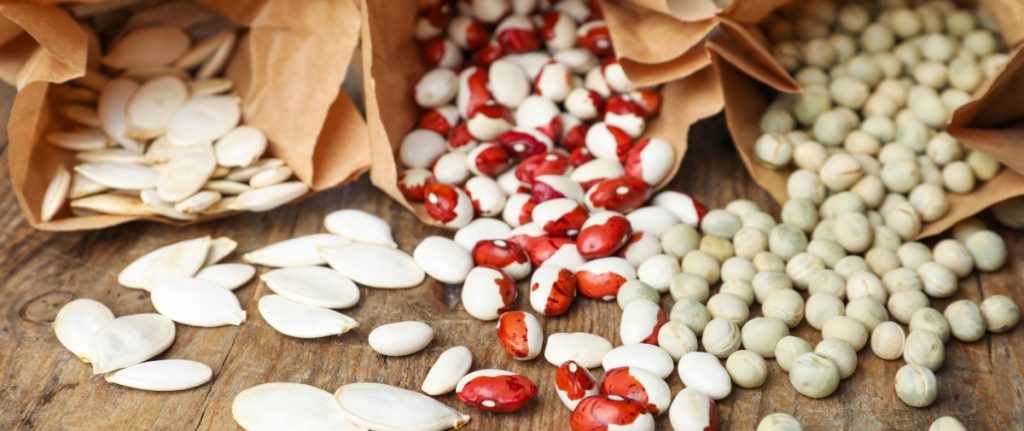
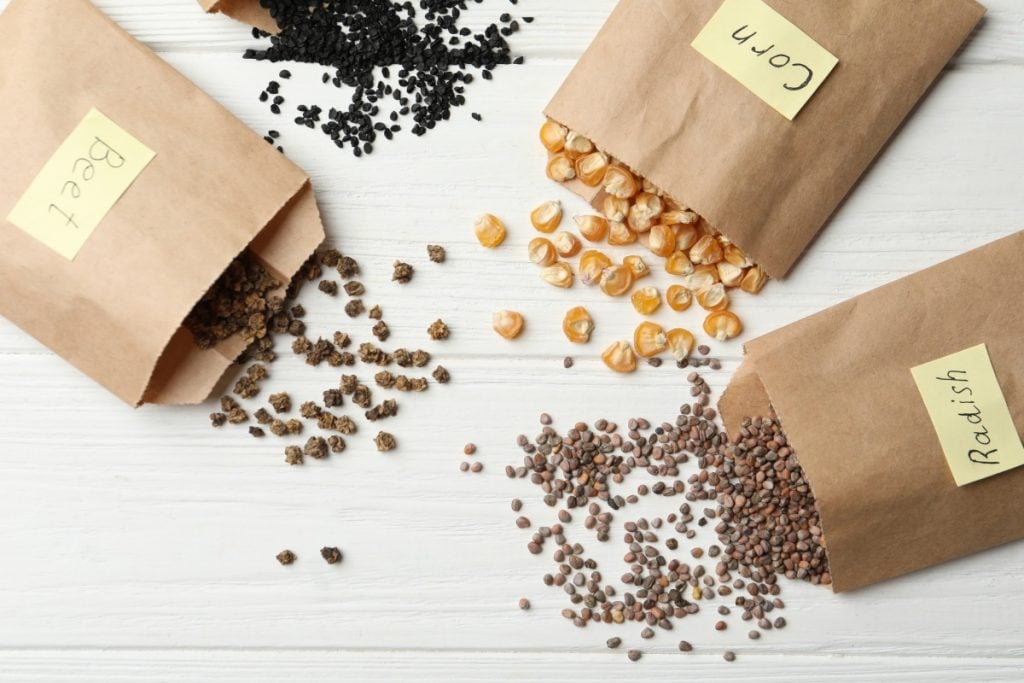
Step 1: Gather Seed Saving Supplies
Seed-saving supplies are household items that you can gather relatively easily. Nothing fancy is required.
It is a good idea to have a small seed-saving kit ready so that you can harvest seeds as soon as you notice they are mature.
Here are the things you will need:
- Pocket knife or small pair of scissors
- Pen or marker
- Paper envelopes or paper bags.
- Plastic or metal buckets or bowls
- Mason jars
Step 2: Wait For Seeds to Fully Mature
Harvesting seeds is easy and fun. The skill is knowing when the seeds are fully mature and ready for harvest.
It takes trial and error to learn and perfect this skill. So, don’t be afraid to experiment and try different things.
Dry Seeded Plants
Here are some things to look for that will indicate when dry seeds are mature and ready for harvest.
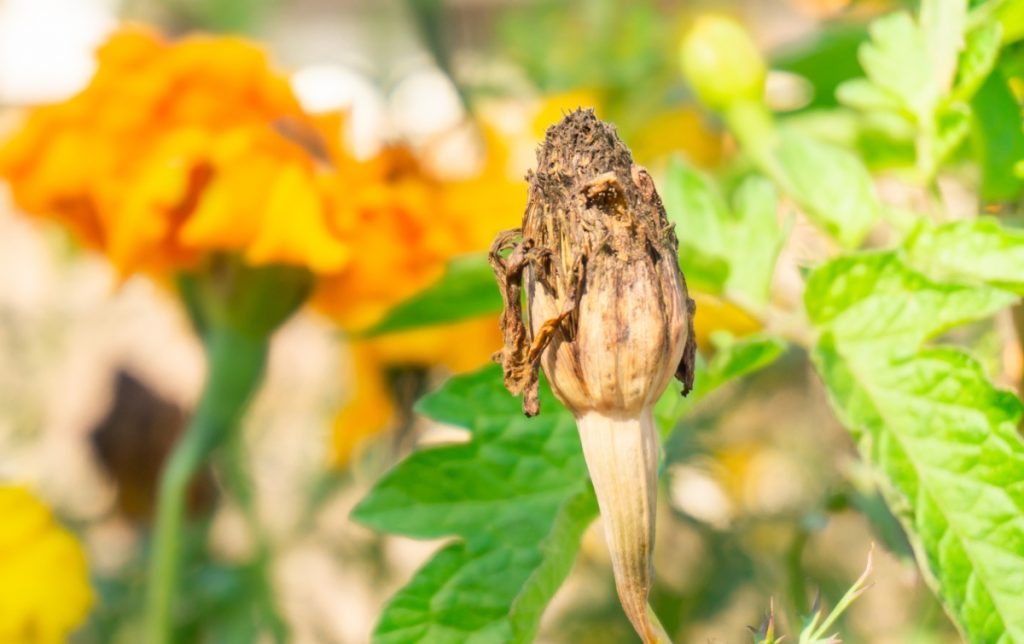
- Color of the seed or seed pod. Mature seeds and seed pods are no longer green and will change color to beige, brown, yellow or even black, depending on the plant.
Keep an eye on flowering plants when the flowers are fading. When the seed heads turn a brown color, they are ready to harvest.
- Dryness of the seed or seed pod. Seeds and seed pods are mature when they reach an adequate level of dryness.
You can test seed pods for dryness by rolling them between your fingers to see how easily they shatter.
Some seeds, such as onion or spinach seed, can be cut open to check dryness. If the inside is no longer milky and has become starchy, they are mature.
- Ease of detachment of seed or seed pod. How easily the seed or seed pod detaches can indicate maturity. Some crops, such as beet, cilantro, and swiss chard, can be checked by seeing if the seed comes off the stalk when you rub it vigorously.
If bad weather is threatening, you can pick some dry seeds before they are fully mature, and they will continue to mature off the plant. However, this is not always the case.
Wet Seeded Plants
Knowing when wet seeds are mature is a little more complicated and varies depending on the crop. It’s beneficial to do some research on how to save seeds from specific species.
However, in general, you need to let wet seeded fruit and vegetables mature on the plant as long as possible before harvesting.
Seeds will continue to increase in size and quality long after the fruit or vegetable becomes edible.
Cucumbers and brinjals, as an example, should not be picked for their seeds until they are overripe and beginning to shrivel up.
If you need to harvest fruit to protect against disease or damage before the seeds are fully mature, you should store the fruit whole and let the seeds ripen before extracting them.
Step 3: Harvest Seeds
When the seeds are mature, it’s time to harvest them. The type of seed you are saving will dictate how you harvest, but essentially you are just collecting seeds, seed pods or fiut.
- Shake small seeds from dry seed heads directly into paper envelopes for further drying and storage.
- Alternatively, snip off the entire seed head and put it into an envelope or paper bag. Once indoors, you can remove the dry seeds from the seed heads and put them into envelopes for storage.
- Seed pods can be snipped off the plant and collected in baskets, onion sacks, paper bags or cardboard boxes. Baskets and onion sacks both allow good air circulation for further drying.
- Collect overripe fruit and vegetables in plastic or metal containers, buckets or bowls to be cleaned and dried.
Step 4: Process The Seeds
Processing seeds involves drying and cleaning the seeds and is not as complicated as it sounds.
You clean the seeds of dry-seeded crops after they have completely dried, while wet-seeded crops are first cleaned and then dried.
There are three different ways to process seeds, and which method you use will depend on the type of seed you are saving.
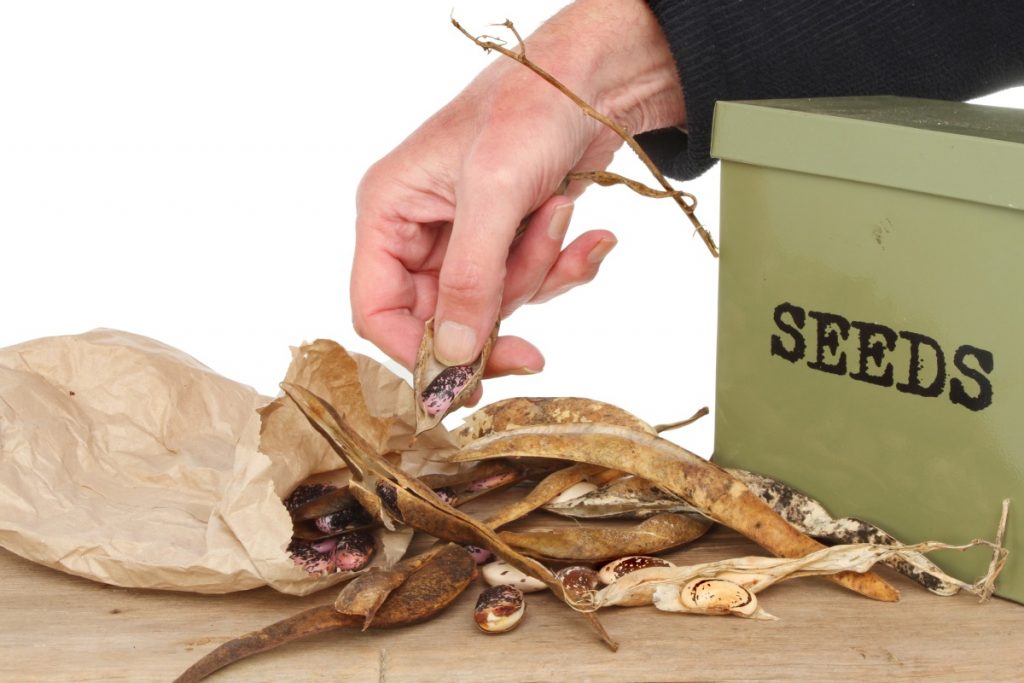
1. Dry Process
Use the dry process for plants that produce seeds in husks or pods. Such as peas, beans, leeks, rocket and radishes and has three steps.
Step 1: Drying
Allow the pods to dry completely. It is best if they dry while outdoors on the plant. If this is not possible, you can pull out the entire plant and hang it to dry.
The seeds will continue to mature, strengthen and dry as the plant dies.
Step 2: Threshing
Threshing is the process of loosening and releasing the seeds from the pods or any other plant material attached to them. There are several ways you can do this that include
- Rubbing by hand – You can rub seed pods between your gloved hands to break them open or by rubbing the seed pods or husks over a rough surface.
- Using a sack or pillowcase – For pods that shatter easily, you can put the seed pods in a fabric sack or pillowcase and shake them so that the pods crack open and release the seeds.
- Compressing between two boards – For smaller seeds, you can crack open the pods between two boards, but be careful not to rub too hard and damage the seeds.
- Using a machine – Larger-scale seed growers often use commercial threshing machines to release the seeds.
Step 3: Cleaning
If you are a small-scale seed saver and don’t mind a little chaff with your seeds, then you may wish to skip this step.
However, in most instances, seed growers will want to clean the seeds and separate them from any bits of pod, husks, leaves or stems.
Cleaning is generally accomplished in two ways, winnowing and screening.
- Winnowing uses an air current, natural or a fan, to separate the seed from non-seed material based on weight.
An easy way to do this is to stand on a tarp and pour seed from one container to another in the wind or in front of a fan.
Most chaff is lighter than the seeds and will blow away and land outside the container receiving the seeds.
- Screening is the same as sieving and uses trays or screens with holes to separate seeds from non-seed material based on size.
One basic screening technique uses two stacked screens. The top screen has holes slightly larger than the seeds, and the bottom screen has smaller holes.
Any larger material will remain on the top screen, and all smaller bits will fall through the bottom screen, leaving only seeds between the screens.
You can make the screens yourself or buy specifically designed screens for seed cleaning.
Most screens have round holes, but you also get screens with holes of different shapes for specific crops.
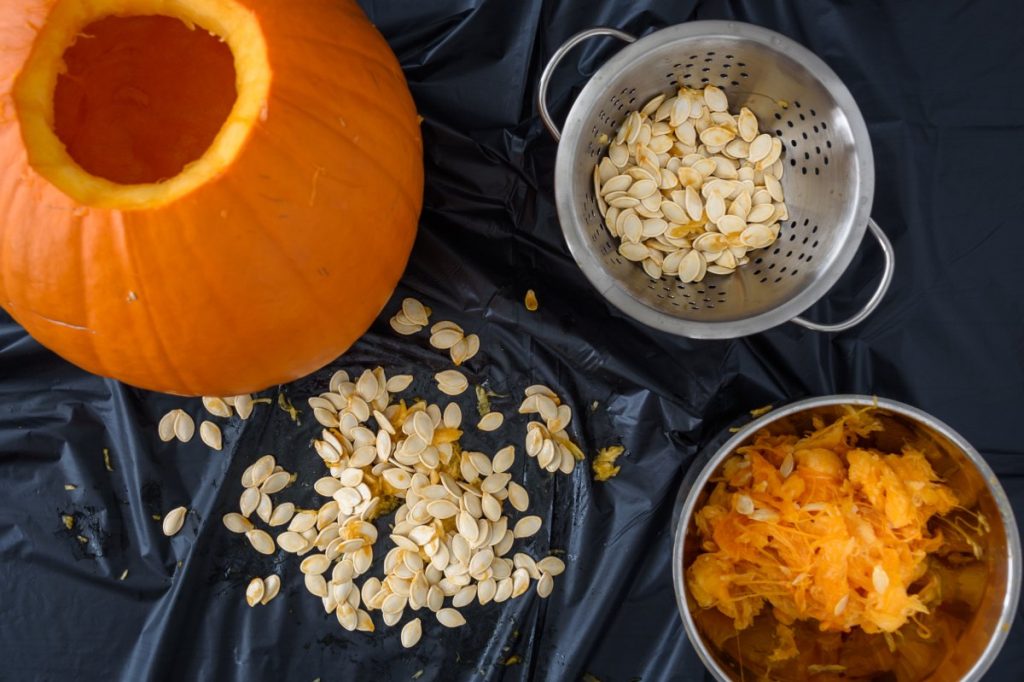
2. Wet Process
Use the wet process for seeds found in the flesh of fruits or vegetables, such as melons and squashes. This process also has three steps.
Step 1: Extracting
Carefully cut open the fruit or vegetable and extract the seeds and any pulp surrounding them.
Step 2: Cleaning
Cleaning separates the seeds from the fruit pulp surrounding them.
Cleaning is generally accomplished in three ways, soaking, rinsing and decanting.
A combination of rinsing and decanting is very effective and commonly used.
- Soaking can loosen the pulp clinging to the seed and makes it easier to clean them.
Soaking involves placing the seeds and pulp in a container full of water and allowing them to soak for up to 12 hours.
After this, you will need to use the other methods to clean them further before drying.
- Rinsing is the process of putting the seeds in a sieve or strainer and cleaning off the pulp by rubbing the seeds gently under running water.
If you rely solely on rinsing to clean your seeds, you will not remove any lightweight, potentially non-viable seeds. The decanting process does this.
However, if you have a small garden and plenty of seeds, this should not be a problem for you.
- Decanting separates pulp and lightweight, less viable seeds from the heavier healthy seeds.
When decanting, you place the seeds and pulp in a container and add water. We recommend a ratio of one part seeds and pulp to four parts water.
You then stir vigorously to loosen the seeds from the pulp.
Wait a few minutes for the heavy seeds to settle on the bottom and pour the top layer of pulp, debris, and lighter seeds off the top.
Repeat the process three to six times until the water is relatively clean, then pour the seeds into a strainer and rinse under running water.
Step 3: Drying
Spread the seeds thinly on a glass or ceramic dish or baking sheet in a well-ventilated place, and air dry the seeds.
Stir and turn them frequently. Doing this will help to aerate them and prevent mold.
3. Fermentation Process
The fermentation process is similar to the wet process, but it has four steps. Use this method for tomatoes and cucumbers.
Step 1: Extracting
Remove the seeds and pulp from the fruit, place them in a container and mix them with a little water.
Step 2: Fermenting
Allow the seeds to ferment for up to four days. When a layer of white or gray mold has formed on top of the water, the fermentation is complete.
During the fermentation process the mold breaks down the gel sacs around the seeds that can inhibit germination.
When fermentation is complete, add more water and swish it around. The heavy, healthy seeds should sink to the bottom, and you can pour off the mold, pulp and non-viable seeds.
Step 3: Rinsing
Rinse the seeds in a sieve under running water rubbing gently to remove any remaining pulp.
Step 4: Drying
Put the clean seeds on a plate or screen to air dry thoroughly in a well ventilated spot out of direct sunlight.
Step 5: Store Your Seeds
When your seeds are dry, they can be labeled and stored.
Label the seed envelopes with the date, plant variety, and any other details you want to remember.
It’s best to store your seeds in an airtight container in a dark, cool place.
Canning or mason jars work well as they are airtight, and you can store several envelopes together in a single sealed jar.
What Are the Easiest Seeds to Save?
Self-pollinating crops are the easiest crops to save and beans, peas, lettuce and tomatoes are great for beginners.
However, many people consider legumes the easiest.
Not only are they self-pollinating, but they’re also easy to grow and process, and you don’t need a lot of plants to save seeds reliably.
Here’s a brief look at how to save seeds from these crops.
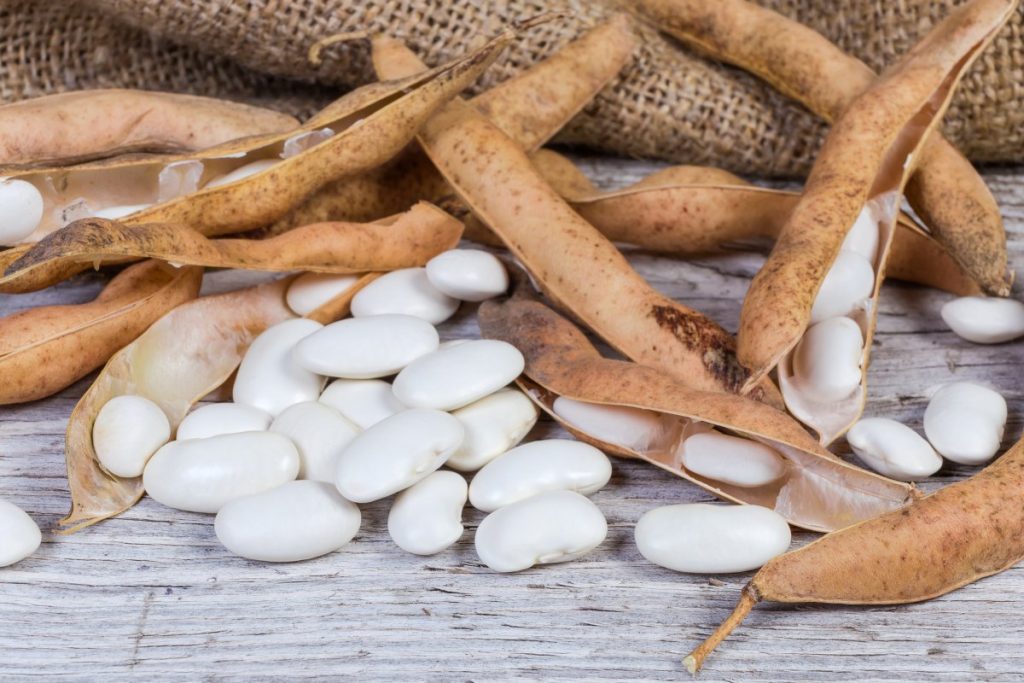
How to Save Bean and Pea Seeds
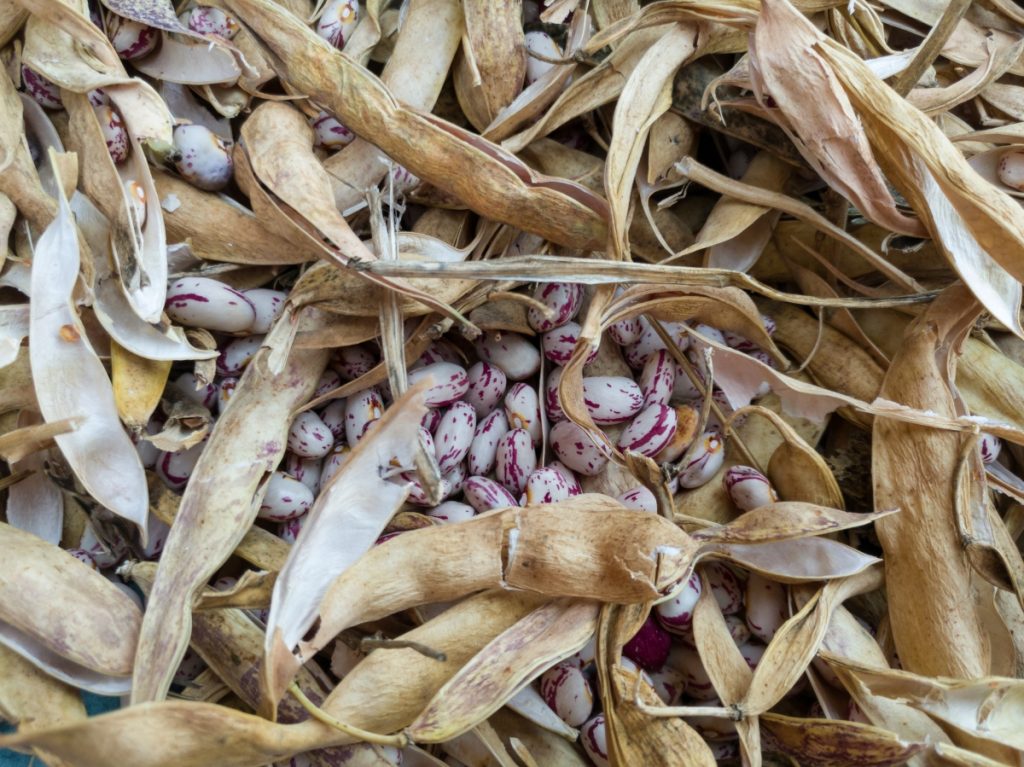
When saving bean and pea seeds, you use the dry process.
Let the seed pods ripen and dry out on the plant, then pop them open and remove the large bean or pea seeds.
Lay the seeds out to dry where there is good air circulation and indirect sunlight as too high a heat can damage the seeds.
When the seeds are thoroughly dry, they’re ready to store. See our tips and tricks below to help you know when they are dry enough.
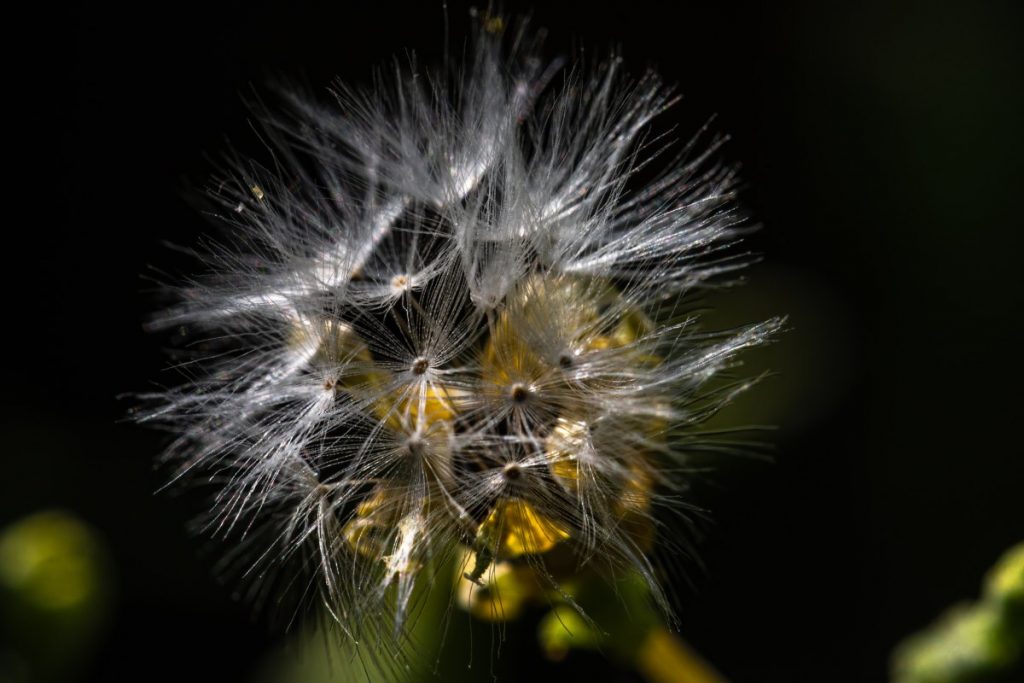
How to Save Lettuce Seeds
Lettuce seeds are easy to save using the dry process.
Allow the lettuce plant to flower, and wait for the flowers to die and go to seed.
At this point, the flower heads will turn white and fluffy, similar to dandelion flowers.
If you pull out the white fluffy bits, the seeds will be attached to the ends.
Gently remove the white fluff from the seeds, and put the clean seeds into envelopes for storage.
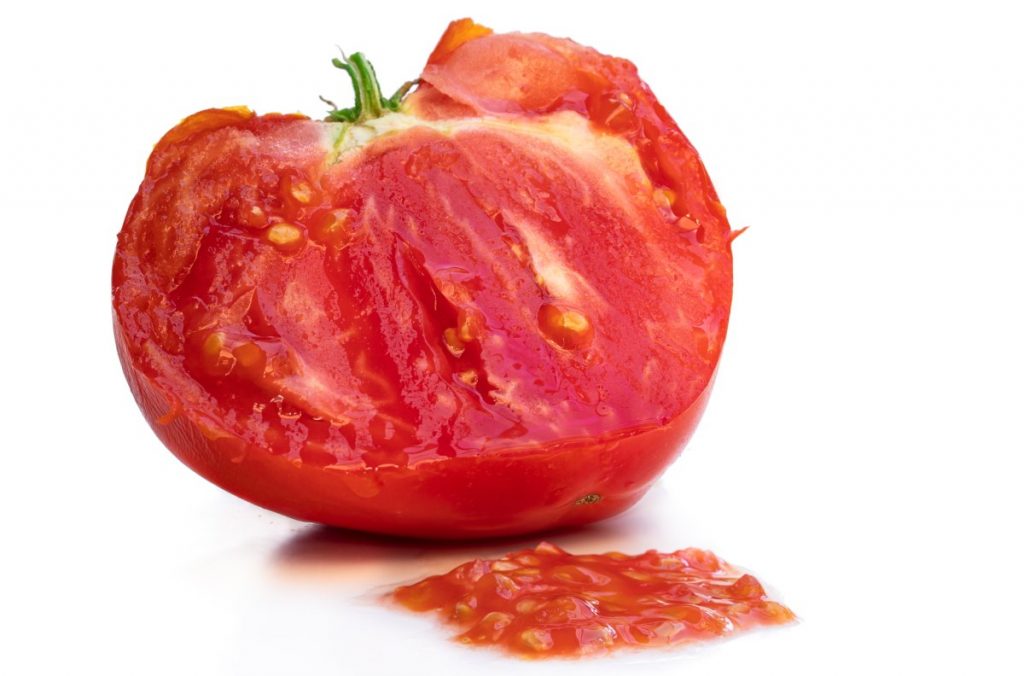
How to Save Tomato Seeds
It is best to use the fermentation process when saving tomato seeds. It increases the germination rate of the saved seeds.
First, remove the tomato seeds from the tomato and put them in a jar along with whatever pulp is attached to them.
Cover the seeds and pulp with water and place a coffee filter or cheesecloth on top to keep bugs out.
Leave the seed to ferment for three to four days until you have a moldy layer on top. Now your tomato seeds can be cleaned and dried.
Discard any seeds floating on the top of the water together with the mould, then clean the seeds in a fine mesh sieve under running water.
Gently rub the seeds against the sieve until all the pulp washes away and you have clean tomato seeds.
Lay the tomato seeds out to air dry, and when completely dry, you can store them.
Seed Saving Tips
Ready to become more self-sufficient and save some vegetable or flower seeds from your favorite plants? Here are some tips to help you get started.
1. Always Harvest From the Best and Healthiest Plants
When you save seeds, you become part of the process of natural selection.
If you only save seed from your healthiest, most productive and tastiest plants every year. You’ll eventually end up with seeds that consistently produce excellent plants.
2. Grow Plants Specifically for Seed Saving
In many instances, to let seeds mature fully, you need to allow fruit and vegetables to become overripe. Or leave leafy plants to go to seed, making them inedible.
Fortunately, you can usually get plenty of seeds from only a small amount of plants or fruit. Grow more plants than you need so you have enough to harvest and can use some to save seeds.
3. Start With Easy Crops
Saving seeds is fun and does not need to be complicated. Start with easy crops and add more as you master the art of saving seeds.
Have a look at the section on the easiest crops to grow for inspiration.
4. Know What Types of Seeds are Best for Seed Saving
There are several different types of seeds, and not all of them are suitable for seed saving. Here’s a quick look at the different types:
Open-Pollinated Seeds
Open-pollinated seeds are perfect for seed saving and come from plants pollinated by hand, wind or insects.
Open-pollinated seeds can be saved and replanted and, as long as there was no cross-pollination, will grow into the same type of plant.
Heirloom Seeds
Heirloom seeds are at least 50 years old and come from carefully selected open-pollinated plants handed down through generations.
Many heirloom seeds are hundreds and some even thousands of years old and have evolved to become unique, tasty, beautiful and nutritious plants.
Heirloom seeds are excellent for seed saving as not only will you have unique plants you will also play a role in preserving special seeds passed down through history.
Hybrid Seeds
Hybrid seeds are not good for seed saving. When you deliberately cross-pollinate two different plants to create a new type of plant, it is called a hybrid.
Why Are Hybrid Seeds Bad?
Hybrid seeds are bad for seed saving, because when you replant the saved seeds, you have no idea what will grow.
When you save seeds from a hybrid plant and replant them, the new plants that grow often won’t be the same as the original plant.
The seeds may revert back to either one of the parent plants used to create the hybrid or sometimes come out as a strange, unpalatable mix of the two.
GMO Seeds
Genetically modified or “GMO” seeds are created in a lab and not good for seed saving. It is usually illegal to save these seeds as they are patented.
Unless you are a large-scale commercial farmer, you are not likely to come across these seeds.
5. Check Seed Packets Carefully
When you purchase seeds, check the details on the seed packet.
If you see “F1” on the packet, the seeds are hybrids, and “OP” indicates open-pollinated seeds.
6. Understand How Plants Pollinate
If you understand plant pollination, it will help you prevent cross-pollination and choose easy plants for seed saving. Plants are either self-pollinated or cross-pollinated.
Self-Pollinating Plants
Self-pollinating plants fertilize themselves and don’t require cross-pollination, making them the easiest plants to save seeds from, even if you’re a beginner.
Seeds from self-pollinating plants will produce offspring that are the same as the plant you saved them from without any extra work on your part.
Self-pollinators include:
- Peas
- Beans
- Lettuce
- Tomatoes
- Peppers
Cross-Pollinating Plants
Cross-pollinating plants require pollen from other plants in the same species for fertilization.
They either have female and male flowers on the same plant that need to cross-pollinate, or each plant is either a male or a female, and the two need to cross-pollinate with each other.
Cross-pollinators can cross with different varieties of plants in the same species. If this happens, the resulting plants are a strange mix of the two parent plants, similar to the offspring from hybrid plants.
Cross-pollinators include:
- Squash
- Beets
- Spinach
- Carrots
- Cucumbers
- Kale
- Broccoli
- Cauliflower
- Zucchini
- Onions
Tips for Planning a Seed Saving Garden
If you are interested in saving seeds, planning can make it easier and ensure you get viable seeds that produce true-to-type plants.
7. Know What Species You Are Planting
Knowing what species of plant you are planting, in other words, the scientific name, will help you to understand which of your plants may cross-pollinate. You can then take steps to prevent this.
8. Know When Your Plants Will Seed
Annual plants flower, seed and die in one growing season but biennials, such as onions and carrots, don’t flower until their second growing season, after going through winter.
Long living perennials, such as asparagus and fruit trees, flower repeatedly for many years.
Knowing when to expect seeds helps when planning for seed saving.
9. Keep It Simple
If you’re a beginner, using self pollinators or planting only one variety per species is a simple way to ensure you don’t get cross-pollinated seeds.
10. Prevent Cross-Pollination
Many delicious vegetables are cross pollinators, and you may want to grow more than one plant variety from the same species.
Fortunately, there are a few precautions you can take to prevent cross-pollination.
- Space your plants correctly. Keep plants far enough away from each other to prevent them from cross-pollinating.
To produce seeds that are true to the parent plant, cross-pollinating plants need a minimum amount of space, called the isolation distance, between different varieties of the same species.
The isolation distance varies from species to species.
- Stagger planting times. Allow two or more weeks between planting different varieties so that flowering times do not overlap.
You must know how many days it takes for each variety to mature for this to work.
- Use a physical barrier. You can use a physical barrier, like a blossom bag or row cover, to cover one variety at a time.
Remember to expose each variety long enough for pollination amongst themselves.
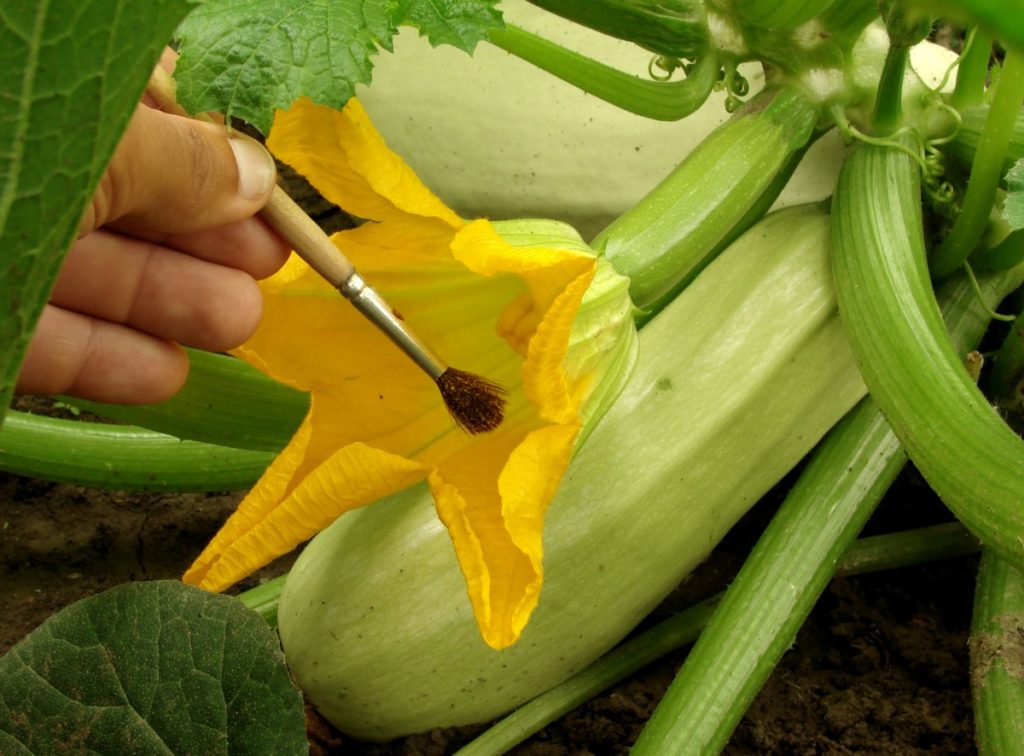
- Hand pollinate your plants. There are several hand pollinating techniques that help to ensure the plants won’t cross-pollinate on their own.
When hand-pollinating, you manually pollinate the female flowers by spreading pollen from the male flowers by hand.
Tips for Harvesting and Drying Seeds
Keep a seed saving kit handy and harvest seeds throughout the growing season. Here are some tips to help you.
11. Catch Seeds in Bags
You can catch seeds by placing small paper bags over the seed heads or seed pods when they look ready to burst.
12. Test to See if Seeds Are Dry Enough
If you’re not sure if your seeds are dry enough, push your fingernail into the side of the seed. If it makes a dent, they’re not dry enough yet. If there’s no dent, they’re ready to store.
13. Never Dry Seeds in an Oven
Although it can be tempting, especially in damp weather, never dry seeds in an oven, you can cause damage if the temperature of the seeds rises above 96°F (35.6°C).
14. Don’t Dry Seeds on or in Plastic.
Plastic does not breathe and could promote the growth of fungus or mold on your seeds. Paper bags or plates and shallow cardboard boxes are best for dry seeds.
15. Use Coffee Filters for Wet Seeds
Don’t use paper when working with wet-seeded crops, as the seeds may stick to the paper.
Coffee filters, however, are a great tool, and you can set clean wet seeds out to dry on a coffee filter.
Tips for Storing Seeds
Once your seeds are well dried, it is time to store them. If properly stored, well-dried seeds should remain viable for a few years, though some crops may keep for a lot longer.
16. Always Label Seed Envelopes
Labeling is vital as it allows for proper planning of future planting. Detailed labels also provide information for other growers if you want to become part of a seed exchange program.
Don’t forget to include the crop type, variety name, date of harvest, and other relevant notes.
17. You Can Store Seeds in a Freezer
Once properly dried, seeds can be sealed in airtight containers or ziplock bags and stored in the freezer for several years.
However, when you want to use your seeds, always allow the container of seeds to warm naturally to room temperature before opening.
If you suddenly expose frozen seeds to warmer air, it can destroy the viability of the seed.
Final Thoughts
Growing and saving heirloom seeds allows you to experience and enjoy unique, traditional plants and play a role in preserving them for future generations.
The best approach for beginner seed savers is to keep it simple and have fun. Seedalliance.org has a detailed seed saving guide that you can download for more information.
Seed saving is an effective way for homesteaders to be more self-sufficient and save the seeds of their favorite and most productive plants.
Learn how to start a homestead with our step-by-step beginners’ guide and begin your seed-saving journey.